

Bypass valve leaking
By
Thatoneguy, in Transmissions and transaxles
-
Similar Content
-
 By CHuls
*Estate Sale*
71-16KS02 1977 C Series Garden Tractor C-160 Automatic Kohler K341S-71223A 16hp Sundstrand Hydrostatic 90-1140
Comes with mower deck (not sure but, I'm told it's a 48") & 42" plow blade model/sn 42BC01 08580 7276
Been sitting for years, haven't been able to get it started. When I put a little gas in to try starting it this year, it leaked from the tank, probably cracked fuel hose
Not sure what it's all worth together but, make an offer.
-
 By mattd860
I have developed a kit that allows a Wheel Horse / Toro hydrostatic tractor to be operated by a pedal on the right side of the tractor. The original forward/reverse lever can be retained or removed. The kit includes everything needed to install the pedal kit and installation is simple with the help of a downloadable installation manual. Additionally, only one (1) 1/4" hole will need to be drilled which can be done by a hand drill. No other drilling or cutting will be necessary. Any tractor with this kit can be converted back to stock without any visible evidence that kit was installed. However, you'll never want to do that
The kit operates very simply and similar to modern tractors. When the pedal is pushed forwards the tractor will move forwards. When the reverse pedal is pressed downwards, the tractor will moved in reverse. If the operator takes his foot of the pedal at any time, the pedal will automatically center itself and the hydrostatic transmission will return to neutral (stop). This enables the operator to use both hands on the steering wheel or one hand on the wheel and the other operating an attachment like a snow blower, plow, etc.
The foot pedal is custom cast in Aluminum, uses brass bushings to minimize wear, and it closely matches the OEM Wheel Horse BRAKE pedal commonly found on 8-speed manual transmission tractors. Modifications were done to the pedal to add the reverse pedal and adapt the pedal to the rest of the kit. For the most part, the pedal looks like it was designed and manufactured by Wheel Horse / Toro. Additionally, a grease fitting has been adapted to the pedal to further minimize wear and tear and if the brass bushings ever wear out they are fully replaceable without having to buy a whole new pedal.
The pedal kit fits the following series tractors with Eaton hydrostatic transmissions: C-1X5, 300, 400, 500.
My kit can be adapted to older hydrostatic tractors with the Sundstrand transmission, however, you will need to find an updated hydro cam commonly found on ebay. Message me for more information.
Here is a link where you can download the installation manual: CLICK HERE
I am selling these kits for $330 shipped to anywhere in the United States. I offer multi order discounts as well. I will also sell to other countries for additional shipping charges to be determined.
If anyone has any questions please feel free to PM me or post your question here and I will be glad to help. Or you can email me at mattdarling02@hotmail.com.
Thanks!
Below are pictures of the complete kit and the pedal installed on the tractor. Some modifications have been made since these pictures were taken. For example, the reverse pedal is now cast in aluminum instead of the steel pedal shown below.
-
By olivertractor
I was pulling a roller and thatch rake the other day with my c120 hydro and noticed oil on the back of the fender. On looking closer I saw the plug thing on the back of the pump leaking oil. Any advice on how serious this will be to repair? Anything helps
-
 By RJ Hamner
I found this "field modification" (origin unknown). The dark square that has been wired to the rod is lead that weighs about a pound and a half.
the 876 doesen't have the friction parts of the later models so I am wondering if this was/is an attempt to dampen the movement of the forward/reverse lever?!?
Any ideas??
Bob
-
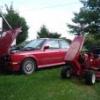
 By Maxwell-8
So yesterday I picked-up a C175. She was rusting away as she was stored outside. She had a new to her Kohler K341. @squonk The previous owner indeed better had"LET AN ELECTRICIAN CHECK his SHORTS!" as bad wiring shorted the battery out, and exploded/melted. She has a Sundstrand hydro pump with a Filter, is that normal? By the pump I believe it's a 1980. But you never now for sure as it's made in Oevel. Due to the bad wiring, the engine was in no running condition. But don't think the K341 has many hours on it. The hydro I don't know if it works. She was hard to push. So i lift up one wheel, so we could roll here one one wheel and the diff prevented the trans from locking up.
So first things to do:
1) get the engine running
2) replace the steering wheel, but don't think removing it will be very hard as it's already split in two.
3) replace the axleseals, the oil leak caused a lot of sandbuild up as she was mainly used on for leveling out a horse track.
4) clean all the acid and remove all the old wiring to do a full rewiring
5) replace the plastic seat pan with a metal.
6)...
I'm looking forward on my first C.
It's also my first hydro, I don't know a lot about them and prefer actual gears. Simpler and need less maintenance (parts-shortage).
But since I couldn't find another project WH and me hearing a lot of good things about hydro's on the forum.. I finally took the shot.
-