
Leaderboard


Popular Content
Showing content with the highest reputation on 03/07/2024 in all areas
-
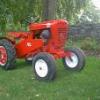
13 pointsOne Wheel is enough In addition to the Choremaster and Kinkade one wheel garden tractors dozens of others were offered to people who were tired of hoeing by hand or pushing human powered cultivators. Some were so outlandish that it is obvious they would not be successful yet others were the beginnings of successful garden tractor companies. There are so many I will present them in two instalments. Victor Tractor The largest and probably the least practical one wheeled tractor was the Victor Tractor built in 1919 with a Climax four cylinder engine. This may have been a prototype attempting to attract investors or perhaps it was just someone’s dream come true. No other information could be found on it. Spry Wheel Very little coverage could be found concerning the Spry Wheel walking tractor. I did find out it had no clutch and battery ignition. This review appeared in the June 22, 1922 The Florists, Review #23 A light power cultivator is made by H. C. Dodge, Inc., Boston, Mass., and is known as the Sprywheel. This one- wheel tractor is found to work well in cultivating plants set out in narrow rows. An eastern nurseryman finds it particularly useful for cultivating young evergreens and azaleas, which are bedded out, five rows to a bed, with ten inches between the rows, in a heavy clay soil that packs hard, but has no stones in it. In this soil the machine goes from two and one-half to three inches deep; in light soil it will cultivate five inches deep. This nursery- man says: "In previous years this work has always been done by hand hoeing, as the rows are too close together and the stock too valuable to permit the horse cultivator. The trouble with the machine is to find a man who will keep up with it all day. By paying a little extra, however, we are able to save more than the cost of the machine in one week, over the expense of hand work, as it will do more and better work than ten men with hoes. Bolins Handi-Ho The Handi-Ho came with an air cooled single cylinder one and a half or a two and three quarter horsepower model of single wheeled walk behind garden tractor. Attachments included cultivators, lawn mowers, sickle bar mowers snow plows and tillers. Gravely Model “D” Benjamin Franklin Gravely Dunbar, West Virginia, devised a hand-pushed plow fitted with an auxiliary Indian motorcycle engine and driven by belts in 1916. His goal was to build a tractor which would revolutionize gardening and lawn maintenance for the homeowner. This innovative approach to garden cultivation became the Model “D” all-gear single wheeled walk-behind units were powered by a single-cylinder four-stroke engine built from 1916 to 1952. Unitractor The Unitractor manufactured by R.D. Eaglesfield Manufacturing in Indianapolis, Indiana. It has Briggs Model N engine mounted inside the drive wheel and a sickle bar mower attachment. R. D. Eaglesfield of Indianapolis, Indiana, made the "Unitractor" which sold for $98.50 in 1939. The Unitractor weighed 105 pounds and was powered by a 1.5 horse Briggs and Stratton model NR-6. Colwood Motor Hoe The Colwood Motor Hoe was made by Dashwood Engineering of London who produced these machines from 1945 to 1949 The first cultivator was the Model A which first appeared in 1945 with a JAP 2A engine, later models were the model B with a JAP or Villiers power, also the model RA with a Villiers engine. Perhaps @ranger, @meadowfield or @Mickwhitt can tell us more about this one wheeled tractor Endless Tread Garden Tractor The story behind the inspiration for the Endless Tread Garden Tractor is priceless. Sam Beachy, the inweave gentleman who started building the Endless Tread in 1953 recalls that as a young boy his mother would hitch him to the front of a hand pushed cultivator and he would pull it through the family’s rather large garden. His first experimental powered cultivator was a single wheeled unit with a Maytag engine. The gearing was not proper and on the first test he could barely hang on. It was built while Beachy was employed at a machine shop. The first Endless Tread Garden Tractor was built in 1942 powered by a AU7R Continental engine. At some point in the 1950s the engine of choice was changed to Briggs and Stratton. Great Lakes Junior Chief walk behind cultivator The Junior Chief tractor was a single wheel walk behind built by the Great Lakes company in Rock Creek Ohio. It was powered by a 6R6 Briggs and Stratton Engine and was made between 1949 & 1961. Will-Burt Little Farmer The Will-Burt Little Farmer Power Cultivator came to market in 1949 along with several optional accessory implements. This self-propelled cultivator was powered by a Briggs & Stratton engine and sold via catalog for $89.95 George Garden Tractor The George Garden Tractor has a story unlike any you are likely to come acrost. Members the Church of Jesus Christ in Sullivan were conscientious objectors and had a difficult time finding work during World War II, they founded Community Industries to provide employment for church members. The George Division of Community Industries used the phrase “Let George Do It.” The company started out designing and manufacturing a two-wheel garden tractor, then progressed to a one-wheel model. The tractor division continued to thrive. An ad in Popular Mechanics in April 1951 advertised a George Tractor for $107.50: “All equipment for little cost.”
-
12 pointsWell after a couple of years of farting around, cleaning, building, rebuilding and gathering parts I finally finished my little JD horse and a half hit miss engine. It was in sad shape when I got it, but it had all it's pieces. Here's some pictures.
-
10 pointsThe 520 I used for mowing last summer then leaf grinding last fall was put away blown off but not properly cleaned. I moved it to the shop and tore it apart somewhat then took it out and washed it. Air filter was pretty clogged so I washed the pre-cleaner and hung it to dry then blew out the paper filter. Leaves got stuck in cooling fins only on the front cylinder so I pulled the sheet metal and cleaned it out. Deck got torn down and I replaced two upper spindle bearings that sounded a little rough. Belt tension idler replaced with a good used one I had on hand. I then installed a set of blades that I sharpened and balanced last year. A new deck wheel was installed because one was a little loose. I then took it outside and oiled it. Next up was the mule drive. The flat idler was loose and noisy so I installed a new 1630-2RS bearing that I added some grease to. The V idler I just added some grease to the bearing. Air cleaner was assembled with the pre-filter lightly oiled. Tire pressures set to 12 Deck and tractor greased. Oil was changed last fall so good there. Hydro oil level checked. Deck installed onto tractor and level checked. Ready for the grass to grow. Poor thing has a Cub tire LOL.
-
7 pointsLooks like you also mowed some grass Lane. The first mowing award goes to....
-
6 pointsWas this your inspiration ?
-
6 pointsI thought about tossing a tecky on it, just for the sake of putting one to good use!
-
5 pointsI added some more lighting, so @squonk could keep tabs on my messy work bench
-
5 pointsI’d say if you were to do it, maybe gap your rings for boost, build the engine to work well with the turbo, and time and fuel it right. Do some research to satisfy the needs of the engine. One thing to think of is oiling. You’ll need a tank and a pump since most single cylinders are splash lubricated.
-
5 pointsThere I fixed it.
-
5 pointsIt could be worse- I got one with a snapper seat! Your "worker" machines look as good as most everyone else's show tractors! Keep on doing what you do!
-
5 pointsOnly do this with a Techumseh.
-
5 pointsAmazing what get 50 post around here. Then again, as @ebinmaine would say, we are easily amused!
-
4 pointsMine also Joe. I still have plows and blowers on mine, But I will have to mow before Easter so the little egg hunters don't fall over the clumps.
-
4 pointsGiven enough use, the Tecky's do that all by themselves!!!!!
-
4 points
-
3 pointsNot quite ready to mow lawn here yet but almost ready to get the garden opened up and put some taters in the ground. I figured since it was a warm rainy day I would pull the snow blower off and put the new to me tiller on and check everything over before it really is time. Now I just have to wash all the barn dust off the 520 lol
-
3 points20240131_131823_1_1.mp4 Here's a video of it running for a few seconds. Not much bandwidth for video.
-
3 pointsGood thing my Mrs. Sylvan doesn't see your posts... She is great, and puts up with all my shenanigans, but I can hear it now: "So, why do your tractors look like they "do" and that @cleat guy's look, uhm, well... "perfect"???"
-
3 pointsNitrous Oxide???😂😂😂🤪
-
3 pointsWhat about jorts? Is that mandatory with the safety sandals?
-
3 pointsGreat suggestions, Pete. For simple little tractors, things can certainly get complicated. I'll be rewiring everything, in addition to the things mentioned. This one is going to be a worker, so not so focused on bodywork, mainly going for mechanical perfection. Hopefully, no issues with the internals, we'll see.
-
3 pointsIt wouldn’t You didn‘t see the floor in the Pict - right? Guess why Normally there‘s no place where parts can falling down.. 🤪 no - it must be the ceiling, otherwise the floor was tooo clean...😎 .... too much to clean...🤫😂 just for a Pict...🤐🤪🥳
-
3 pointsIt’s trick photography actually, the tractor is the right way up, everything else is upside down 😂
-
2 pointsMade it myself few years ago with a cheapo „Harbor freight“ Engine to see what can be achieved. One word before - cheap - depends on your own definition. 🤪 all together i wasted for that „idiot Bet“ about 1800$ for few Day‘s Fun and abou 2 months of Work to win this Bet. We used a cheap chinese Quadbike as „Testvehicle“ what had a cracked Engine. That was the reason this dang idiotic Bet was made by few Beers - if you think about such an item - no friends should be aside and the Beer must be faaaaar faaaar away... believe me, ask why i knew it.😎 I used a Smart Turbo therefore that must be reworked before you can use it. Reason is, the Smart Turbo has an fixed cast iron Exhaust manifold for a 3 cyl. engine on it. That is part of the Turbo. Grinded it down and welded a Pipe onto it, to be able to be adapted. or be aware to have access to a cnc Machine and build your own exhaust. If you can weld cast iron you got the half bet with the Cheap version. Additionally you need a little Temp stable Hydraulicpump. I raped a Haldex pump for that, what becomes an own Filter and distributor case cnc milled. Here first the pump intake pass a filter, out of the pump to the Cooling section of the Turbo, than rerouted thru a external Oil Cooler I used a Computer Watercoolung system heatchanger and back in the Pressure oil section. all this lines must be temp stable hydraulic up to 130 deg C and 8 bar pressure. The turbo oil drain section out of the Turbo goes into the separate Oiltank where the Haldex pump sucks it‘s oil via Filter. if you drive a turbo without an pressured Oil system it runns for about 5 min that you be done. it‘s bearings be shot and the Turbo is killed. It may spin but want be able to build pressure. that „System“ worked for about a Month if i remember right before the Engine blows at about 7500 rpm. i suggesting also wrap a rabbitfence arround the Engine to protect yourself against hot spit parts out from the Engine when it explodes. Carb passes thru the Turbo with a Silicone inlet pipe to decouple the Heat. Use at least 100 oktan fuel- if you can get Air Fuel - the better solution. Ignition at Start a little retarded or best movable or programmable between retard and advanced. exhaust depends on your „Soundambiente“ your neighbours are willing to accept. 😎 The Boos was Freaking Funny. The Values up to 22 HP be results of several Dyno Runs after lots of modifications. at this time i had a friend with a tunning shop, who had a own Dyno. But he is retired since about 20 years sadly. This Engines can be simpler „modified“ increase Static Middlepressure by reducing the Head Gasket thickness, improve all bearings if possibillity and if available enlarge the Intake and outlet valves +2 sizes up ( bore and grind) open up the Intake and exhaust paths on the Cylindre head and optimise the Airflow - perfectly is, if an airflow bench is available. remove the Piston and enlighten it, or better use high performance parts. Extremely important be much stiffer valve springs and maybe a reworked or aftermarket „hot Camshaft“ and a six horses Engine can bring up easy Up to 12HP but only if carb and exhaust are perfectly matched and set up. Depending on your time and Wallet..🤪😁👍😎 you also need better quality bearings on the crankshaft and stronger springs or the engine don‘t survive the first „throttle up“. turbo wasn‘t cheap if the system should last just a little bit. as allready mentioned , just to blew it up, use NOS. small pipe with 0,3- max 0,65 bar pressure for a dry system brings also dang lot of Fun but also not for long. Each tunning reduces the lifespan - the more power you squezzed out of that little aengines, the shorter the Enginelife, that simple. But yap, get this experiences give me a dang cool idiotic Times with my best Friend Peter since...👍😎
-
2 pointsMy grandfather had a pool table he used for a work bench. Covered it with a heavy drop cloth. Took one of those tables with the bags in the pockets built a tunnel down the middle and used downspouts from the pockets to the tunnel. I could be upstairs and hear the pool balls going down the tunnel. I could tell by the distinct sound of each hole which one the shot was made in .
-
2 pointsI like the cuckoo clock. I have one in my living room that my parents brought back from Germany many years ago. It still works perfectly.
-
2 pointsUntil the fatal moment when the connecting rod wants out and ventilates the block doing so. From there on in, lubrication don't mean squat!!
-
2 pointsmy stuff is still in cold storage But.....I got a retired neighbor that likes to wash his cars constantly and mow grass every three days, he cut the last week of February.
-
2 pointsSet of WH hubcaps. The pic of the separate 8" one is the "Worst of the Bunch" $75.00. SOLD!!
-
2 pointsI’ve seen one Onan P220 that had a Subaru turbocharger added. It was a messy job but it did run. As I recall, the fellow had shifted the camshaft by one gear tooth on the crank to get the spark timing to work. For my money, I think it would be easier to use an electric supercharger--less plumbing.
-
2 points
-
2 pointsI think the "market" does the end game talking here. Trying to force things with grants, government regulations, etc may be occasionally beneficial but it often does not "force" the desired result. Forcing electric cars and trucks has had limited success. There are those few in metro areas that buying a Tesla makes sense (if you have the $$), yet many of us needing truck power and distance simply can't use it...we need our dinosaur powered vehicles. Manufacturers and dealers are backing off from the "hype" as reality has shown the demand is not there yet. However, the "hybrid" concept has seen a great deal of success and seems to be a better "transition" technology. I have dabbled in the solar power arena and have discovered, as many others have, its expensive and has serious limitations for the average Joe. Yet, there are more and more applications where it makes sense for some folks. Lastly, consider the success of battery powered tools where the technology has developed to the point they are a great improvement, with responding market share. We will likely see riding mowers going electric as a result of this success. Almost every sector of "new technology" goes through growing pains....some fail, some succeed but ultimately it has to work for a critical mass of end users to be successful.
-
2 pointsI took pictures of my 520H and my 520HC. The 520H has a 10 and a 20 fuse with the 20A close to the engine and it has power at all times irregardless of ignition switch being on or off. The 10A fuse has power with the ignition switch on. The 520HC has a 10 and a 15 fuse with the 15A away from the engine and it has power at all times irregardless of ignition switch being on or off. The 10A fuse has power with the ignition switch on. What this tells me is that fuse position is irrelevent as the fuse holder can get clipped on in any way. Biggest thing is to check for power and also wire colour as the constant power fuse will have red wires and the switched fuse will have pink and/or green wires.
-
2 pointsThanks! I did look at The website. Hopefully today I can get the pump off and disassembled and match it up. I just want to get this one sparking, and cranking before I get too far. Might be rebuilding it depending on how it runs. If it does. It turns and has (some) compression. I just finished a K181 in my 856, my first one, and really enjoyed it.
-
2 pointsAnother cheap remedy here, cleaning and reinstalling the VCT / VVT solenoid. It just gets dirty with nasty oil over time and gets gunked up.
-
2 pointsAs mentioned in the thread about this issue alone, I did replace this caliper but it was a fun project to do. The parts alone were more than a reman caliper with bracket using my FIL’s work account discount at O’Reilly. He set it up mainly for us to get the discount!
-
2 pointsSundstrands that actually have a leak tend to do so at either the axle seal(s), or at the motion control lever. Axle seal leaks tend to travel to the lowest point before dripping, which makes it appear to leak at the gasket or towards the lowest part of the middle. Check fluid before and after each use, just to verify how much is lost. Never use the tranny if low in fluid. If the loss is minimal, just do as has been suggested and fix when you can.
-
2 pointsonly improvement would be replacing those chains with mono-filament. lets just pretend I didn't say that
-
2 pointsIf that were the case that bench would be empty!
-
2 pointsLane, I'd be willing to bet there's a little bit of gunk in the fuel bowl in the bottom. May want to pop that off sometime and just spray it out real quick.
-
2 pointsI decided to take out my 314-8 tractor today to mow some leaves. It started right up and I moved it around in the garage to put some gas in and check the oil. I noticed a small puddle in front of tractor as I was warming up the motor. It was gasoline coming from carb I assumed. So stopped the tractor and took off air cleaner, etc. I took a good look motor and carb it was pretty dirty and I do usually clean in good before putting away in the fall but not this last year. However, I noticed a drip coming from the fuel line between the fuel pump and carburetor. Turned out the fuel line hose was cracked at the top. I never had that happen before on a tractor. Even the older round hoods. This may have been the original fuel line as I never changed it before. The screws in the air cleaner plate were real tight so I think it may be the original fuel hose between the fuel pump and carb. I think this is a 1994 314 so thirty years of duty. I have only used non ethanol in this tractor but I am sure that is not the total history as I have only owned this tractor ten years. Anyway replaced the line mowed up the leaves out front as I started to do an hour earlier!
-
2 pointsCrushed it, and no trips to the Bumps and Bruises thread!
-
2 pointsThat's slick!
-
2 pointsGot time tonight to work on a 702 project I've been working on. It was in rough shape and needed one of everything but needed to be saved. Originally it was a 502 but its getting a 702 conversion. Anyway here's some small progress, drilled out the spot welds for the bottom if the rotted out dash and bent up a new peice out of 16ga.
-
2 pointsWell, it was nice today so little man got to drive. Definitely gonna have to make a bolt-on set of footrests. His feet barely reach the pedals, so he can't drive alone yet.... A little timid, but he enjoyed the test drive. ...and I thought I was almost finished with it!
-
2 pointsPretty much done! ...a few things to touch up, but the belt guard turned out sorta ok- got some dimples, but not terrible. The first pic below is what I started out to mimic. This machine actually started as a L157, so everything from the steering wheel back was made to look like 62-64 model as best I could. Anyway- this is the final look. Little rascal drives great. Low range with 8 inch wheels is like time stands still! Of course, before my son can drive it- it'll get safety switches in the pedals, or some form of bolt-on running boards. His legs are shorter than I thought, so he barely reaches the pedals anyway.
-
2 pointsThen you're in good conpany! I didn't paint the belt guard today. It was so pretty outside I just rode it around like it is. I'll paint later.
-
2 pointsMy stepson wanted to buy a four wheel drive truck because he would get his two wheel drive stuck when he went hunting. I told him the only thing that would change is the length of the cable the wrecker would need to pull him out! Got to be a tad bit smarter than the mud you are driving into, He ain't!
-
1 pointThe easiest engine swap would be to install another Briggs 11. Engine Post up a wanted ad in our classifieds, someone’s gotta have one.
-
1 pointBTW Dan may have to call this tractor Jake not Cubby or Casey ...


.thumb.JPG.1b2a1a39cdcedb1e001571713350b32c.JPG)


This leaderboard is set to New York/GMT-04:00