
Leaderboard


Popular Content
Showing content with the highest reputation on 01/27/2018 in all areas
-
12 pointsJust a look at what done so far, still a lot to do. Hub Caps Yes or No?
-
9 pointsWhen I this quote is from OILUJ52 "every tractor has a story", I thought that is a very profound statement. It seems to me, that when you put a lot of labor and love into fixing, repairing and restoring and modifying these tractors, they kind of become like a part of the family. Sort of like kids with their own personality. Most of the time you love them, but some times a good swift kick is needed also. That being said, here are my tractor stories (short version) 1983 C175 (Big Red) I bought this for $1500 when we moved into our current home in 1994. It came with mower, snow cab, blade, and snowblower. I have used this to plow snow since then. I did some cleaning and painting before this winter. Still my favorite tractor. Never have used the snow cab. 1974 B80 (Little Red) I bought this in 2005 for $700. It came with mower, blade, and snowblower. It has a gray engine, which I assume is a replacement. This was my backup plow tractor until recently. 1974 B80 (Little Red #2) I bought this in 2011 for my grandson, paid $100. It was a “restoration” in progress, and the kid selling it cut his price in half, I think just to make it go away. Last year I finished the “restoration” and sent it home to my grandson with a snow blade and tire chains 1972 Raider 14 I bought this in 2013 for $125, non running. Need an air cleaner, and a little TLC. I have a rototiller on it, and it gets very little use. I really like this tractor, especially the skinny rimmed steering wheel. 1988 414-8 I bought this in 2014 for $50, with a locked up motor. Other than that it is in real good shape. I was able to get the engine freed up, and started, and it smokes really bad. I replaced the motor with a 16hp B&S from a parted out GT1600. It now has a mower deck on it, and has been used regularly. 1978 C141 I bought this in 2014 for $250, with the intention of putting the motor in the 414-8. Decided it was too good of a tractor to part out. It currently has a snowblower on it, also I have a grader blade for it. Gets little use, but always starts and runs good. 1986 417A I bought this in 2016 for $100, non-running and a broken frame. Have fixed the frame, and got it running. It now has a blade and chains, and is the backup snow plow /trailer hauler 1977 C120 (Rusty) I bought this in 2017 for $150. The engine ran, but the frame was broken in the middle, front end all worn out, just a beat up and rusty tractor. I replaced the frame and seat pan and front end with parts from a parted out B60, which was equally rusty. Thanks for listening, you guys here on this forum are awesome
-
9 pointsMake Sure Your Paint Is Cured Before Applying Your Graphics Occasionally, a vinyl graphic is applied smoothly and bubble-free, but bubbles appear a day or so later as if by magic. If this happens, you probably have applied your graphic to a substrate that’s still out-gassing. Out-gassing is a process seen in solvent based materials wherein the solvents used in manufacturing slowly evaporate as the product ages. This process, also known as curing, generally takes a few days to a few weeks depending on the product or surface. If you apply a vinyl graphic to a substrate that’s still curing, those solvents will be trapped, causing bubbles under the vinyl. In addition to being an unsightly nuisance, the trapped solvents can interact chemically with the vinyl’s adhesive causing it to fail. To avoid this, never apply vinyl to a freshly painted surface.
-
8 pointsDon't get enough snow here in Oklahoma to play with this bad boy...but would love to have it if I lived up north...neighbors would hate me though lol
-
7 pointsI make most of my graphics using Arlon 4600lx Air Egress prepositional Eco Solvent printable wrap vinyl and laminate. You will notice the air channels in the adhesive of the decals that allows trapped air to escape in the event you should have a bubble after application. I am attaching a link to a you tube video that demonstrates removing post application bubbles. Air escape vinyl is very user friendly and a wet application is NOT recommended as the air channels can and will trap moisture under the decals. If you do use the wet method with this material just be patient, allow extra time for the solution to completely dry and then make sure to go over all edges to ensure a good seal. Use a soft cloth or cotton glove to prevent scratching the decal. This will prevent contaminates from lifting the edge and causing premature failure of your graphics. You can use Windex or mix a small amount of dish soap in a quart spray bottle for your wet application. . Also I highly recommend watching the video on the installation tips page at redoyourhorse.com Make sure all surfaces especially glass are super clean. Glass is porous and needs to be cleaned with isopropyl alcohol to remove residue trapped in the glass. This will help the edges remain sealed and prevent premature failure of your window decals. Installing air escape decals Installing air escape on glass
-
6 pointsWell, I started in on the project today. Took off the seat cover and foam. I'll need both if someone could direct me to a source? Removed the gas tank, lines, filter for cleaning/ replacement. Took off the shift plate and vacuumed all around in there. I got the engine side cover mostly off... but... how do you remove the fan shield? Tips or tricks? The phillips head screws are not wanting to move, I did spray them with Kroil. Took the cylinder head off so I can replace the gasket and resurface the head.... It looks good to me but more expertise is Always appreciated ! The shift plate is damaged at the ends due to the shifter being WAY out of adjustment for Many years. Hopefully I can adjust or fix the extra play.
-
6 pointsDo you guyz need a room
-
6 pointsmost of the tractors that I currently own have now become part of my family , a few of which I couldn’t part with as they have soo much sentiment to me , not nessesary the tractor itself is so important but it’s the history behind it that is more important to me , I currently have a little suburban (rare to Uk) but it was once owned by an ole RAF pilot from World War Two , he purchased new in 1961 & used it in his estate to do numerous tasks , the little tractor came with snow plough ,mower deck & rear furrow plough ,it was one of me best finds and I only paid £350 for it , I really wouldn’t part with it as it has too much history To Me .
-
5 pointsTomorrow. 520, not sure of the year or hours. Told it runs great, has some rust though. Does have the swept front not sure about the reduction steering I know some early ones didn't have it. Comes with a 48" deck and plow and cement weights. Pics tomorrow
-
5 pointsRetirement is when a lot of us were able to get serious about .
-
5 pointsEvery new generation we can get involved helps us in the long run - that was a very good gesture on your part @19richie66 . I feel the same way - any sort of gesture to help keep new generations involved is a good thing - especially teaching them to fix things versus throwing it away and replacing, that whole idea is not sustainable nor smart - it uses far more resources than necessary, I hate how we've become a disposable society . It's not the way I was raised or taught - we were brought up to be self-sufficient and fix what we could instead of "wasting money" on something new, losing that has driven us in a bad direction. It's great to see a young man of his age group to get excited about some used parts - he will not forget that and it's a great lesson - he obviously has a great teacher as well, kudos to Dad and Mom ! Can't wait for more updates - I love this stuff.... Sarge
-
5 pointsMy mount was not cracked, but I use this 312-8 for ground work. I saw some one brace there transmission mount and though it was a good idea.
-
4 pointsAs promised in my New Shop Thread over in Non-Tractor Related Discussion, here is a thread to document the progress of my very special to me C141. For those of you who don't know the background story on this particular tractor, my good friend Ray purchased this tractor brand new with a mower deck and tiller attachment. Ray is the guy who first introduced me to the Wheel Horse brand, as they are not very common around here, we see more John Deere machines than anything. Ray used this tractor around his farmhouse for several years, but traded it to another good friend of his shortly after retiring and moving to town. After seeing my love for these little red tractors and my collection growing, he was able to get ahold of the friend who had the tractor, and work out a deal for me to purchase it from him. The mower deck has been gone for several years now, but I was able to purchase the tractor and tiller. This tractor will be strictly a show/parade machine, so the tiller is soon to be mounted on my worker C125 before spring. This is how the tractor came to me, minus the rear fenders, which are currently on the C125 until I can find another set for it Muffler was in very sad shape, practically fell off in my hand when I grabbed ahold of it. Also was surprised that I didn't find all the engine tins completely packed with rat/mice nest, as this tractor has been sitting outside under a tree for the last 5 years. Here is after the engine was removed, I have got to invest in a better way of lifting things around my shop. I can remember the day when picking up a K-Series by hand was nothing...not anymore...my shoulder hurt for two days after this step Evidently at some point a battery has leaked all over this machine, the battery tray and parts of the hood stand are ate up with rust pretty bad in some places, will probably be looking for some of those parts off a parts tractor in the near future Going to be needing some pulleys as well, I think every pulley on this thing is bent in at least one spot. And it sat outside with next to nothing left of the rubber shift boot for so long that is has some transmission issues. I pulled the dipstick when I first got it home, no oil, no water, only caked on layers of rust and scale. It was locked up, hence the black marks all over my fresh white floor. I have since got it to where the wheels will turn and it will shift into 3rd and reverse, but will not go into 1st or 2nd or shift between hi/lo. I'm sure I'll have lots of questions there when the time comes to open her up Frame of the tractor seems to be in good solid shape, front axle pivot pin came out super easy and shows no signs of abnormal wear. Spindles are good where they go in the axle, not so much where the wheel slides on. This poor thing must have been ran for years with the front wheel bearings gone to cut that deep of a groove into the spindle. I will get better pics of that next time I'm over at the shop. Much to my surprise, the RH wheel hub slipped right off without the slightest bit of trouble, couldn't get that lucky with the LH one though, its been a week and still haven't gotten it off. And this is how she sets in my shop right now. Sorry for the long winded post, there are about two weeks of work in this first post, tried to post from my phone the other night but was having trouble with it. Bought a new computer today so its much easier to post and upload pics now. Will update everyone as I make more progress.
-
4 pointsMany members battle with those things, oil, wait, try to get it off, oil wait, try to get it off and repeat. I just do it the quick way and cut the shaft below the tower. Then either weld or use a 3/4 shaft coupler to put it back.
-
4 pointsProbably is. Without the tractor running, just grab hold of the auger and try to move it around. The bearing (Actually a bushing) is that part attached to the side with 4 bolts in which the auger shaft goes. If the shaft moves around in the bearing, they are worn and should be replaced. Here's the files for the blower. The TIPL will show the parts drawing.
-
4 pointsWell first let me just put a disclaimer here and say that due to the fact that I am a human male I change my mind A LOT. I have tractors that are here to Work, at least for now. My plan is to get it running and working and moving heavy stuff like the B80 and see where we go from there. I'll likely have one rig for towing and one for plowing dirt/stone/snow that will also have a modified plow for carrying dirt/stone from pile to pathway etc... Probably will put the big tires from the other rig on this one. Other than that ??? Wing it !!
-
4 pointsFrom my point of view a running 12 HP would be a great buy, the tiller is a bonus!
-
4 pointsThis forum has some great guys regardless of what @cpete1 says! (i know that you're joking buddy!) If you have been following the thread, you know that there are several key parts that we need to continue on assembling JackRabbit. I received a PM from @19richie66 and he said he thought he might have some of the parts that we needed. I've had the opportunity to speak with him over the phone on several occasions and have enjoyed getting to know him. He looked through his stash and had several of the afforementioned parts. I asked him what he wanted for them as I was happy to purchase each item. He told me that he thought it was great that Caleb and I were working on this project together and that Caleb was learning some valuable life skills. Therefore, he said that he would send them to us for free! I asked him to let me at least take care of shipping but nothing doing! It was amazing to me that someone located over 1000 miles away, whom I'd never met in person, would do something like that for Caleb. I felt the best way to thank him publicly (after verifying it was ok) was to video Caleb opening the box and share it here! He included something special that Caleb was really excited about and wouldn't remove it until mom said, "Not at the supper table son!" Now it is time to get out into the shop today and work on JackRabbit! We have no excuses now that the parts have arrived!!!!
-
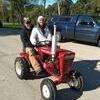
4 pointsFriend visited my new home, in the early 70's. Laughed when he saw my Craftsman (1st) tractor (). Left and returned later with my 1st Horse. A project! Made the front bumper, a 316 SS deck, picked up a snow plow and a bottom plow. Then needed a Parker sweeper and a trailer. I quickly sold the Craftsman (tractor (?)). Couldn't keep my sons off the Stallion! The son sitting on "his" Horse is now in his early 50's. My last Horse purchase, $200, my '90 520-8. Great Horse! Then, not looking, picked up an Allis B-10, a Pennsylvania Panzer and a Cub Cadet. Grandsons needed the wo.....wo......work!
-
4 pointsI Will Take Tons Of Pics For Here
-
4 pointsI've never really felt applying decals was that much of a challenge. Might just be all the experience I've acquired applying the old water slide decals during my scale model building days... that gives me the confidence? I typically only like to use factory originals whenever available...regardless of their age. To my eye, new vinyl, and the modern printing process just can't compare to the originals. I remember taking a chance on Ebay auction, obtaining an over 30 year old NOS factory original T-stripe for the hood of my AMX. Everyone told me there is no way it would ever work, don't waste your money...let me tell you, that thing turned out sooo nice.
-
3 pointsIm looking at a wheel horse tomorrow for a restoration project. I'm told it is a 1968 with a 12 hp kohler it only has a tiller attachment to go with it. im told it runs good. asking price is 375 i talked him down to 225 with out seeing it and im not committed to that price. it was listed in december so it has been around awhile so im guessing thats why he is willing to take less. my question is if all is running is 225 a good price. thanks
-
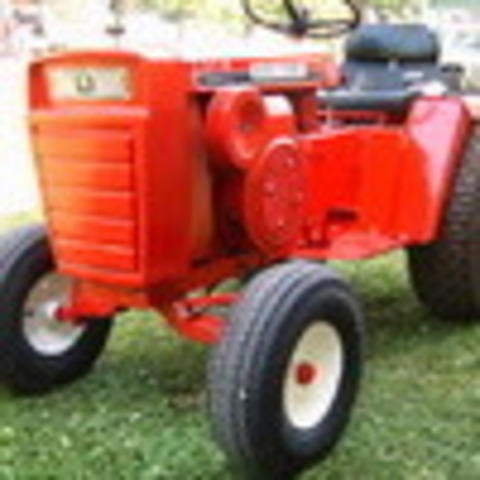
3 pointsCan any one tell me what this is, other than just a Wheel Horse? The identification badging is missing, unless I am missing where it may be. The engine is a 14 horse Kohler, it is a hydro (both drive and deck lift), but other than that I am not sure about year/ model/ type of hydro drive/ if the hydro drive is one I can tap into for other hydraulic attachments such as lifts (3 point), etc... Thank you in advance to all you WH guru's, Darren P.S.-Is there a good way to get the steering wheel off without breaking it as I have another good one on the machine next to it.
-
3 pointsWhat????? Huh???? Aldon Armageddon? Say it ain't so, Joe........ I'm deeply saddened to learn of this. Hope you give all us RS troopers a shot, if you're biting the bullet THAT hard. I really can't conceive of Aldon without a Wheel Horse, and Red Square without Aldon....... Say it ain't so, Joe!
-
3 pointsCut both shafts an inch or so below the wheel and get one of these. https://www.zoro.com/dayton-coupling-rigid-steel-6l012/i/G2314812/feature-product?gclid=CjwKCAiA47DTBRAUEiwA4luU2WNnBGIhGcDtTRCX__5KvSTvyI9M-zAkUD-VsUz_nvx26r3F
-
3 pointsOr my version. There are round and triangular versions.
-
3 pointsTook a drive to the river today. There is some flooding, but the road is still open.
-
3 pointsAnd here's what should sound/look like running...Jeff....BTW to and the cam-lock bearing VIDEO0001.mp4
-
3 pointsIt’s a C-145 Auto. I think the I’d tag is under the dash. Give us those numbers and we can narrow down the year.
-
3 pointsThanks Sarge! I agree with your above post and I desire my children to appreciate things and to take care of them (feels like a losing battle some days!) Got some more time with Caleb in the shop today. Since he is in basketball, they have a practice or a game nearly every night and that does limit our time together in the shop. I’ve promised him that I wouldn’t work on it without him. First up—try to remove the steering wheel so that we can replace the column... Gave Caleb a quick lesson on roll pins and spirol pins as well as punches. He was able to get the pin out but The steering wheel is stuck fast. I DON’T WANT TO DAMAGE THE WHEEL and so I’m looking for any input to crack it loose. In the process we noticed that the overall length of the one Richie sent was 6.5” and the one on the tractor was 4.5”. Did the C come with a shorter steering shaft and column than the other models? Here is JackRabbit. This is GhostRider (my 314-8). Richie’s column on top and JackRabbit’s on the bottom. I’m confused Then it was on to installing the fan. First up was teaching Caleb how to use a tap and die set to clean up the threads on the hydro... He used a little cutting oil and worked it like a natural. I can’t tell you how proud it makes me to see him not only doing this project but very much enjoying doing it! Even he was surprised at how much gunk was in the hole! Once it was clean, he dug out a new stainless bolt from my collection and installed the fan!!! Another project done, thanks to Richie!
-
3 pointsDang I forgot. That's for the reminder.
-
3 pointsMake sure there is space for the parachute button.
-
3 pointsI wired them in today. I still have to get some metric plumbing fittings to addapt the oil pressure sending unit to the block.
-
3 pointsYes that looks heavy! I think you might need to borrow @elcamino/wheelhorse's suspenders to help support that!
-
3 pointsGreat info Terry - I was wondering before when I did your vinyl what that odd pattern was on the back of them, never knew anything about the trapped air escaping that way - interesting. I've always done mine wet , never had an issue but I keep the soap down to a minimum and try to work quickly - then park it in the sun and allow it to set tightly and try not to squeegee the decal more than I have to . I have scratched a couple - there is no fixing that so it's important your scraper or rubber pad is absolutely clean - new is even better. Plastic applicators for bondo work ok, but they can seem to hurt the surface if press very hard so keep that in mind. I do need to find something better for laying them down - any ideas ? I love Terry's custom work - he's great at custom stuff and what he's done for us over the years - quite the asset around here. Sarge
-
3 pointsOk. you guys made me go out and take a pic of my truck window.
-
3 pointsGlad to help. I have been blessed with people giving me knowledge, parts and many other things over the years. Just giving back and passing on the blessing.It’s what we’re supposed to do. I’ll be here waiting on updates.
-
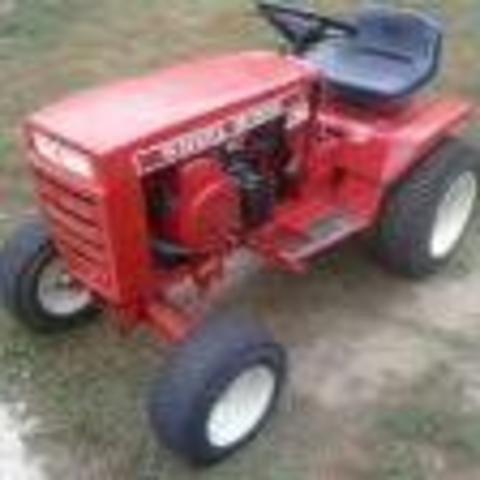
3 points@edgro, Great post Idea !! I'm really lookin forward to all the stories here.... Mine: as a brand and this forum... A couple years ago I had a 25 or 30 year old Murray 1238 with no deck (We push mow) that my honey and I were using to pull stuff around the acreage here. It ran really well and had a ton of power but didn't weight enough (275 lbs) to grab traction pulling the 1000lbs + that we often did. I asked my equipment repair guy what to get that would be Heavier and WH was his best recommendation having been a toro dealer worker for 20 + years. My tractors: 74 B80: I found this on CL as a pile of parts, literally. A young fella here in southern Maine had a few of these Horses and was narrowing down his collection some. This one, he had disassembled to paint and it had sat that way for a year or two and he hadn't gotten to it yet so he sold it to me. He was the 2nd or 3rd owner and it had been stored outside for most or all of it's life so the paint and body is very rough... It will be repainted at some point soon. Mechanically it's in excellent condition with NO wear showing in the cylinder bore and has plenty of power etc... Parts pile was $180 and I had the above mentioned shop put it back to running condition for me... then started doing my own work and mods (see my signature) and needed info... and found 74 C160: Well many people have a "most desirable" of tractors and since I've had the B80 and worked it and liked it... I've wanted an 8 speed (mine's a 4) and then there's the whole "more power".... I've wanted a C160 for at least a year and just got one here. I haven't even started to work on it yet... that's today!! It was originally purchased new by Granby Telephone Company which was one of only three towns in Massachusetts with it's own telephone service. Mower and plow for them for a few years then bought by the dad of the guy I got it from. He sold it to a neighbor who used it for a few years then sold it back to the son. His uncle had a turn in there somewhere to. Now it's MINE Hahahahaha !! I'll be starting a work thread on this rig today... I'd like to say thank you to all the folks here on the 'Square as well. Great advice, great people !!!
-
3 pointsToday I install a paire of Led light on my Horse hod mount
-
3 points@WV Hillbilly, That sure is a cool tractor. Looks like a good way to spend A LOT of money, I count about $4800 in IH suitcase weights alone. The best way to become a millionaire pulling tractors is to start with 3 million.
-
3 pointsOk so while you guys are showing off your rears here's my method. First I take a big swig off the bottle of Wild Turkey just to get up the gumption up for a eleven thumbed idiot like me to even attempt ruining a $40 decal. Nobody ever told me I was supposed to clean the SURFACE with alcohol. Then I take the decal and crumble it up and rip it in a couple of places. Hey it's gonna happen so I may as well just get it over with. Then I peel the backing off and just slap it on like I was wackin the wife's bottom. I get about the same results from the decal. After a couple more pulls off the turkey it looks fine. Did I mention I usually buy two sets & I am on Vinyl Guy's Christmas card list? When I sober up and see how it really looks I take the second set over to @Achto's place and let him put it on! Seriously Richard @953 nut your rear looks great, you get that one from Terry? Never mind found it! Gotta have one! Speaking of @Vinylguy get some popcorn there's a movie https://www.redoyourhorse.com/installation-tips/
-
2 pointsEric, try an "impact screwdriver", if you've ever been around dirt bikes (motorcycles period) you'll know what I mean those screws get galled up in the aluminum, that will help you get those engine tin screws out, Jeff.
-
2 pointsWhy thank you Terry but no need as I was just messing with the fellas. Your decals see me coming & pretty much jump on by themselves! They want no part of my ineptitude!
-
2 pointsFoot pedal assembly widened, mounting plate made and all tacked together. Mounting plate is sandwiched between foot rests and frame. Ran out of daylight. Will clean it up and weld it solid after getting it mounted and linkage hooked up. Mounting plate will be trimmed and opened up so as to not hold dirt and mud, not that it will see much of either. Maybe........
-
2 pointsI’d say it’s likely an 80 through 84 C-145. As far as the hydro, I believe the early black hoods used the sunstrand and the later models used the Eaton. A pic of where the transmission oil filter is mounted can clear up what one you have.
-
2 pointsAnother possibility which causes a loud knocking sound is if the impeller is not locked to the shaft, it will slip forward and hit the augers. Take one guess how I know this. Forgot to lock it down after changing the bearing.
-
2 pointsIronic that the video is 4:54 ! Pass the ear plugs!
-
2 pointsSO, what your saying is if you don't have a with a plow or blower, you need a V8 to compensate?
-
2 pointsAgreed. If it runs the engine by itself is almost worth that price.
-
2 pointsThank you for noticing!


This leaderboard is set to New York/GMT-04:00