
Leaderboard


Popular Content
Showing content with the highest reputation on 02/13/2017 in all areas
-
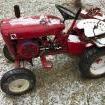
10 pointsHi folks been a while. I saved another wheel horse today. I couldn't believe my eyes a C195 headed for the shredder. Its ruff but probably 99% complete. I don't have the time right now so watch for it in the classifieds. But i couldn't see it go to the junk and be shredded.
-
10 pointsWell... cross another Series I KT17 off the list of survivors... I heard a scrunching noise when I started it to move some of the snow we just got. but it was running good and not spraying oil out a hole in the block, so i figured I'd give it a go. It seemed a little under powered (running on one cyl?), but maybe the snow was heavier... Almost done and "bang"... then nothing but a crank winding down the final revolutions of a lifetime of hard working... RIP fast forward, pulled my 12hp out (C175 repowered with a Magnum 12), swapped the plow for the blower, and back in business! I will say, there's nothing better than that hydraulic lift for a blower, the 12hp is an 8spd manual lift, have to figure out some lift springs. it doesn't steer as well even with the chains on the front with the lighter engine as it would happen, I had picked up a K341 for just this situation. I tore it down and was putting it back together, figured it would make a good winter project and I would have it ready when I needed it. looks like the schedule just got moved up a lot!!
-
9 pointsGetting ready to start my LR resto and thought it would be nice to have a way to lift the wheels off of the ground. After thinking about several ideas like lift tables, hoists, etc I decided to keep it simple (and cheap). I had an extra 2x6 from a job and a piece of black pipe. This is what I came up with.......raises either end up 4 inches with a push of the handle and works great.
-
7 pointsWhile watching the National News this evening, they were showing all the snow in the North-East. It was a quick shot, but I saw a Wheel Horse with a snow plow pushing snow! Maybe someone on Red Square just had their 15 (seconds) of fame!
-
6 pointsThis ones for you Lowell @wheelhorseman1000 For those who don't know it he now has complete kits to go thru these as well as individual bearings & seals. Since I put a plug in for ya don't tell how I screwed up on the first input shat seal! As it stands now First little snafu....barely tightened the lock nut and ting----easy to get back out tho. must just been a bad dog point?? Custom dual magnetic drain plugs ....anal @Aldon is gonna like this! No raising tractor front ends for this kid!
-
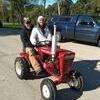
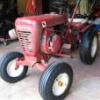
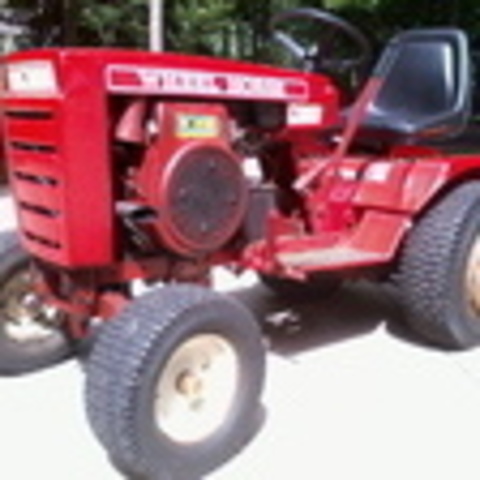
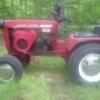
5 pointsJust picked this up this weekend. I have mostly wheel horse but Always wanted one of these.
-
5 pointsI saw it also and recorded it. I believe it was in Portland, Maine. ==> Wheel Horse at 00:24
-
5 pointsWell these may not be the best but they sure move some snow. On Friday with the no name I was plowing the street to keep it open with it because the city always plows side streets last. We have elderly people on this st. So I always try and keep it clear. What else am I going to do in a snow storm. We got over a foot on Friday. I hope you enjoy the vid.
-
4 points
-
4 pointsStarted this refresh a couple of months ago and have made a little progress but things are stating to shape up now so thought I would do a thread. 'Sides I need some help & advice! Little history first This is a 1967 1067 with the original K241 10hp. This tractor is somewhat special to me as I bought it as my first wheel horse in 1986. I had just started renting an old farm house which had quite a large lawn that I would be required to mow. I mentioned this to a buddy who told me of a riding lawn mower that he saw for sale. I went and looked at it and paid 350 which in the day was quite a bit of coin, for me at the time anyway as I was making only $5.50 an hour servicing dairy equipment! Wasn't the prettiest but it started right up and cut so I brought it home. Never would have guessed 31 years later I would have this WH monkey on my back! I new absolutely nothing about a Wheel Horse & keep in mid there was no such thing as the internet back then. After about a year I needed parts and someone told me they were no longer made. I contemplated scrapping it but then someone said to check Toro dealers for parts. All I needed was blades and some bearings. The first dealer I went to wasn't much help as they wanted me to cobble other parts on it and I didn't want to cobble any more on it than what had already been done. 2nd dealer I went to wasn't much help as they wanted to sell me a new 3,4 or 500 series! Must admit they did look nice on the showroom floor but given my tax bracket at the time wasn't likely to happen. The idea of scrapping came up again but I persisted and kept it running and mowing. Threw a rod in the 241 about 1994 but went thru the motor and fixed that. about 1997 another buddy had a Toro branded 246h for sale that took over mowing duties. So the old 1067 went into hibernation for 20 years. Every now and then I would throw a battery in it and it would ALWAYS fire right up. Fast forward to about two years ago and I decided I was gonna getting running again and use it. After searching the 'net for parts I stumbled on this thing called Red Square. Well after reading a here about RJ's, Suburbans, 953's, & 857's I quickly caught the bug! Eight or ten horses (OMG I lost count ) later I finally said this old girls time has come. @stevasaurus had mentioned this had a ten pinion 5060 LS transmission in it and might make a good plowing tractor. The axle seals were leaking bad, the hubs were walking on the axles & front end had homemade tie rods not to mention a myriad of other issues.....but thanks to RS, parts I had spied at the BS, and the knowledge of those here I knew this was savable. My intent is not a trailer queen nor a show tractor but a nice working tractor for some light field plowing, having fun at shows, moving boats & trailers around the ranch and perhaps some kids in a tub. I seriously doubt it will ever see mowing duty again. 'Nuff yaking and on to the before pics! After looking at these ..no where near as bad as some I have seen here! Tranny disassembly pics...not too bad 1533 were usable but since now they can be had. Note the water line!
-
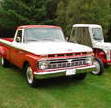
4 pointsWell here is my much anticipated bucket list tractor. Thanks to @whtractors24 for finding and giving me 1st opportunity to purchase this one, and to @CasualObserver and @smokin joe for the insight on this true original 754. Tractor is all original as far as I can tell. It has what I have never seen before, but Wheel Horse branded 6-12 ags on the back which are in rough shape, I'm hoping I can somehow save these, seat pan is completely rusted through also has hole in the tool box. This tractor sat in PO collection for about 10 years untouched, my plan is to get it running and driving and that is probably all. Enjoy as I am still trying to settle my excitement on this rare find that I though would never happen. Serial #48337 Kohler engine K161s spec#28626E
-
4 pointsKnowing SHYNON's luck.....He'll probably have three of those (754's) by Spring....
-
4 pointsIts close but they though it was usable. Still some good meat back in the keyway where the set screw is. I could bump out the hub to center the set over the woodruff but this would move out the hub. Here's the keyway. Bumped out a tad set screw center over the woody..
-
4 pointsSteering gear, should the fan gear shaft spin in the socket ball or the ball spin in the socket? this was pack full of 50 year old grease but does not show wear. Is ther a way to add a lube zerk here or not needed? Right now because of new paint the ball wants to spin in the socket but cause of the old grease I'm sure it didn't before. Fan & support was thinking of adding a zerk here but shows sign of little wear On the top side tho the socket that accepts the steering shat is quite worn. I guess what I am asking is what can I do now to try and tighten up the steering.? Stand by for some tie rod ordering Lowell. I think the MN boys got me straigtened out on this but is this hub usable? I did do another set screw.
-
4 points2/13/2017 8 AM 17 degrees
-
3 pointsOver the last few years I've added a couple more horses ('78 C-161 & '83 C-145) to the stable but they both were in need of new mufflers as well as a lot of TLC. A friend and fellow RS member was in the same situation with his little collection. After searching all the usual online sites and keeping a close eye on CL and here on RS for used mufflers, it seemed a losing battle. The new ones were just too expensive ($230-$300) and the used were almost non-existent, and if you did find one of them they were pretty pricey AND pretty used. We knew we wanted original equipment style. Something tucked under the hood and was not going to be so loud as to upset the neighbors or their dogs!!! With that in mind, we got together with a local custom exhaust manufacturer and showed him the factory mufflers and pipes from my '76 B-100 and my friend's '79 C-160 and asked him if he could duplicate that type system. He said he had never worked on anything that small but would give it a go. After three or four prototypes we finally got a final product that was well built and looked and sounded the way it should. The muffler is aluminized steel and has internal baffles. The exhaust pipe is made of 16 gauge aluminized steel also. The muffler has a tab welded on the lower side so it can be used on engines with or without the cradle mount. For us, it was well worth the time and effort to get the mufflers we wanted at an affordable price, and just a few bucks more than a used one!!! We now have O.E. Style mufflers that will work on my 10hp, 14hp and 16hp and also my friends 12hp and 16hp Kohler engines and a few extras on the shelf. I've included some pictures. Third pic is on my C-145, forth pic is on the C-161 and the last pic is of the plumbing.
-
3 pointsHad the day off so I drove down to Elkhart & bought another C-81. Even had time to stop & get the Mrs. flowers.
-
3 pointsYou sir have obviously have never see the good Dr's tractors.... ahhhh yah.... he's anal......
-
3 pointsNo problem. Thanks for the laughs.
-
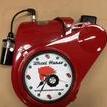
3 pointsThe tow valve is a simple tapered seat valve. Screw it in and the tapered point of the valve seats and seals a passageway in the pump. The pump will then create pressure and the tractor will operate. Open the valve (counter clockwise) and the valve unseats and hydro fluid can flow by it making it impossible for the pump to generate enough pressure to operate the tractor. If you can unscrew it a whole turn and the tractor still operates I am at a loss to explain what may be happening.
-
3 pointsJoe...Try setting it back like this. In the last 2 pictures, notice the other linkage in the top of the arm and in the 3rd hole in on the carb. The grooves you are talking about are a good way to adjust RPM range when you pull the throttle cable...less bumps equals pulling the throttle a little farther. Moving that mounting arm from 12:00 to like 11:00 will do the same thing.
-
3 pointsYes, solid steel bar. 1/16" over size for hole "A" seems a bit large to me and may quickly wear the bottoms of the 3/4 stud and the hole in the axle. A few thousandths should do it. Not saying 1/16 is wrong, just an observation and some thoughts about it. Maybe use 1 inch OD steel DOM tube with a wall thickness of .120 for "J". This will leave .005 gap for a 3/4" spindle. I'm no expert so hopefully somebody with more engineering or machining experience will chime in on this. Or, by the looks of that CAD drawing, you may already have that experience.
-
3 pointsI agree with Jeff and Dennis.... I have good results with the TSC Kevlar belts. They are reasonably priced, available locally, and are rated for the back bend idler use. When I was building the clutch for the low rider, I actually bought 3 different length belts and built the clutch around the one that fit the best with the pulleys I had available. Then returned the other two for a full refund.
-
3 pointsHoward, we better stop this nonsense before we get a citation. The mods are on call and watching. Sorry for using your post @sodaking27, but inhaling too many horse fumes is probably the reason we act this way.
-
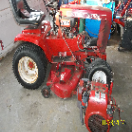
3 pointsWell I had to kick out the chief engineer this afternoon, think he has been sleeping for awhile now. Pulled the shroud and flywheel off and cleaned out the rest of his belongings. Rebuilt carburetor and fuel pump, pulled the head and cleaned up carbon. All in all I looked pretty good. Next up is to check the fuel tank and see if it will leak, thinking of rewiring it, new points and condenser.
-
2 pointspfrederi You really went all out THANK YOU ! I would not mind getting that part new as I chewed up the shoulder on mine. When I did turn this out and it was many moons ago and left as is because i just though this simple thing may not be so simple. One thing comes to mind but with barrier of fluid would not seem so steel seated against aluminum and the hole has been clog with corrosion deterioration, farer fetch ,or other junk. Maybe when I get a chance I should take out valve and use a vacuum and then blow some air after getting fluid level lowered,I don't know . Need brain stormers on this one. Now looking at the pic I took I may of taken all the way out and then put anti seize on it looks silvery in color. I don't remember fluid flowing out ,I would of remember that which may show the sign of a plugged up hole / venturi if that is what you call it.
-
2 pointsOk... that cements it. Im gonna find a clean Johnson cover for it. Fat Ass Evi he says... nope in my book I dont go boating without my "BIG JOHNSON!" Tony
-
2 pointssomebody else's fault about the seals.....it was ....she was at me about something new to me stupid and I wacked it wrong! I should have done it right away and still will Aldon... the zerk on the hitch pin. Also going to try o-rings under the hi/lo shift lever to try and keep water out during washings.
-
2 points😍 I like - and all I remember is that it was somebody else's fault about the seals
-
2 pointsWhen they remove the hydro lift they should use Hex head ORB #5 Plugs. They do not loop it back. Your Electro can be a great unit.. I have 2 electros and 2 chargers thy are great
-
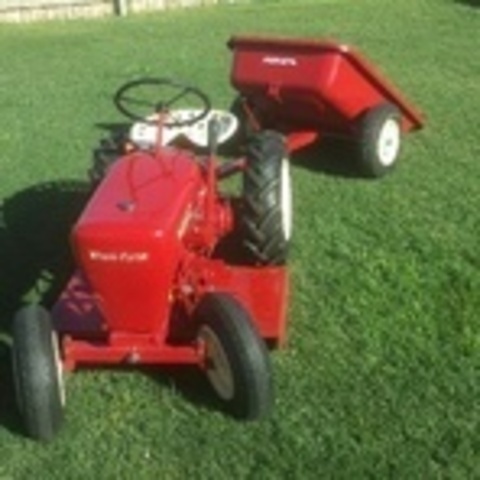
2 pointsIt wouldn't take much to graft that blower on to your horse!
-
2 pointsJosh, Might be just leaking around the bolts...........They are threaded through into the crankcase. If that is the case you could drain your oil and take them out one at a time, clean them and the holes with a suitable solvent, apply Locktite thread sealant and re-install them tightening them to spec. However, the gasket behind the bearing plate might be leaking in which case you might have to replace it. I would do the bolt thing first. What do you have to lose? Now, having stated all this, there is a seal around the crankshaft that is pressed into that bearing plate. If that is the case the clutch will have to be removed to access that seal but it can be replaced without pulling the engine...................Gary
-
2 points@1995 520H+96+97, be safe up there. That's getting a little scary. We had the 40MPH winds here last night and many lost power. I tried to go to the post office this morning and my road is closed due to a power pole with a transformer attached is laying across the road 300 yds from my house. And I still have power...go figger. At least we don't have the low temps and snow like you guys are getting. I am assuming you have back up power and heat. Best wishes and good luck.
-
2 points2/13/2017 12:00 pm 20 degrees.
-
2 pointsMower deck mule drives, snow blowers C series and newer
-
2 pointsThe attach-a-matic mule drives slip right off with the push of a rod, so no need to keep in on with the blade. Plus it inhibits some lift of the blade.
-
2 pointsThanks T-Mo. I knew somebody would have the experience. MUCH tighter than I imagined. Couple of questions. -Would this tight of a fit allow for grease? -How would you approach the tube size for the spindles? Since the spindles are .75 would you order .75 ID tube and/or enlarge the hole or lathe the spindle? (Assuming the spindles measure .75 and the tube ID tolerance is under .0036 ) -Does the RPM of the pieces change anything? Just curious about this stuff since I only have some backyard engineering experience.
-
2 pointsSounds like the PO had the cable set up right. You have to take into consideration that the Kohler manual does not cover every little variation of their engines. Not all K181's had the extra tab on the gov wheel. If you put the cable mounting arm back at 12 o'clock and attach the cable back to the little arm on the gov wheel you will have more control of the gov. All that little arm does is increase the cable travel. My K181 does not have that little arm on the gov wheel and it's a PITA to get the throttle set where I want, not much movement from idle to wide open. I'm actually thinking about welding a tab on the gov wheel on mine so that I have more cable travel. This will increase my ability to make minor adjustments on my engine speed.
-
2 pointsThere are standards for hole sizes versus cylindrical fits, i.e. close running to free running fits, plus interference fit. For a 3/4 shaft, here are fit sizes. Close running fit: clearance limits (min/max) .0008 to .0023 Medium running fit: Clearance limits (min/max) .0016 to .0036 Free running fit: Clearance limits (min/max) .0025 to .0057 For the application I wouldn't go above the medium running fit. These limits are based on, not only the hole size but the shaft size also. Measured the shaft size and add the clearance limit to it to size your hole. For further information, there are ANSI specs that govern cylindrical fits, buy they're basically the same for what I show you, except they're broken down into 4 classes, from class LC5, LC6, LC8 and LC9.
-
2 pointsI went to Rotary and an implement dealer in Nebraska that carries them - they fit the profile of the older HA belts used on my 1277 for the hydro , which has a pretty small engine drive pulley for the transmission . Previous use the of the TSC kevlar belts ate the sides off the pulley since their belts are a standard (new standard at that) A profile . I welded up the cast pulley and re-turned it in the lathe to the original angles . New belt from Rotary and haven't touched it since - works perfectly even when the parking brake is engaged . There is a physical difference in the HA rated belt profile and they are tough to find for the older models . I run mine hard enough pulling loads and pushing rock with loaded tires to break a belt in far too few hours of use - the Rotary has stood up quite well and has no sleeve or shroud on it - just rubber with cords in it for strength . Need to get a few spares for shelf stock and get 'em bagged tightly to preserve them - too many things are going away these days and finding original WH or Toro belts will someday follow suit . Sarge
-
2 pointsBetter get in that cab to warm up.
-
2 pointsWhatever those hole sizes are - just keep in mind they need to be fitted closely to a pin to prevent a lot of play in the steering - same goes with the wheel spindles . Sarge
-
2 pointsSeems that most Sundstrand transaxles can be attached to similar year frames, the motion control levers may need alteration and a bit of sheet metal could need massaging, but that is all part of any swap. I see no reason to doubt that it would be doable, just a matter of putting the two side by side and seeing what will fit and what needs alteration to fit.
-
2 points1995 520H+96+97 Man you got it working up there. Nice set up Hope you got the old F body tuck away. Bring on the snow with them tractors.
-
2 pointsA: 13/16" (I didnt take mine off the RJ to measure, but you're going to stuff 3/4" into that hole so I would drill it a 16th over that) B: 1" C: 1 15/16" D: 3/8" E: 2 15/16" (will work at 3") F: 1" o.d. & 3/4" i.d. G: 1 1/2" H: 3/4" I: 4 5/8" J: 3/4" K: 15 1/4" (hard to tell with welds covering the actual joint) Your K and L appear to be the same measurement, but I can tell you that the over all length is 17" and center to center is 15 7/8". Hope this helps.
-
2 pointsHere is a look at my '78 C-161. They must have made both types is '78. Left to Right...'76 B-100, 78 C-161 and 83 C=145 Black Hood!!! Jim
-
2 pointsCrackin eggs, Howard, yur crackin me up. FOR, FORE, FOUR, 4
-
2 pointsI use Gates Green Power Rated belts for almost all things, decks blowers and hydros...However for gear drives Toro Wheel Horse are best.
-
2 pointsHad a fun day getting out the 876. It's my first wheel horse I ever owned and I've had it since I was 8. I got out the plow and went to work. The kohler 181 was tough and had no problem what so ever. I can't wait to do it again!
-
2 pointsNice cab... Is that a heat collector on the right side? Is the belt guard vented? I just captured the heat behind the PTO and mine stays 30F warmer than outside temp.


This leaderboard is set to New York/GMT-04:00