
Leaderboard


Popular Content
Showing content with the highest reputation on 06/23/2016 in all areas
-
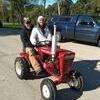
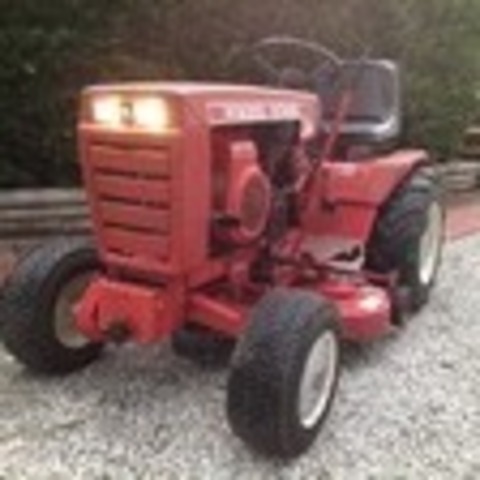
8 pointsPicked up the 1054 at the auction this afternoon along with the 54" dozer/snow blade. Other attachments they sold separately. Got so busy with guys congratulations on the tractor did not hear what other items went for.... Told the owner I will send him a few photos when I get done fixing her up. His Uncle bought it new in 1964. PS it drives like a dream!!
-
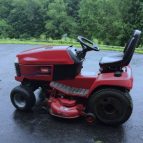
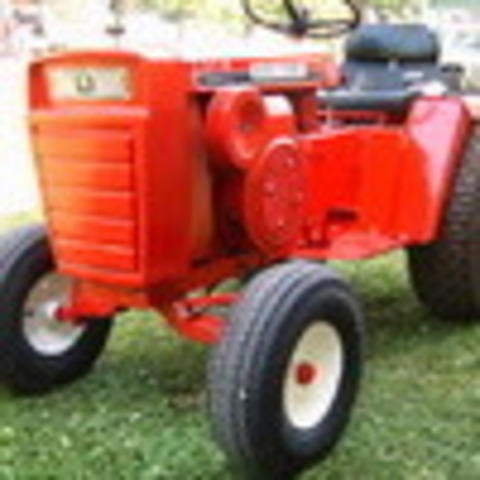
7 pointsHere is the $50 WH that was on ebay this past Saturday. Steve (wh500special) knew I was looking for one, so he grabbed it and then passed it on to me. I picked it up just now and it's sitting now in the garage with the 416-8 and some JDs. It's missing some engine pieces and the front wheels are bolted to hubs, incorrect rear wheels, and the deck is pretty shot, and I'm pretty sure the seat spring is backwards. But, it's safe and sound now.
-
4 pointsWaiting for the bus???
-
4 pointsI made the trip two years ago all the way from Great Britain and it was one of the best experiences so of my life , met so,e amazing people . Would love to do it again .
-
4 pointsLife has been crazy as always so I have not been here much. There has been a victory! As per my last updates #145 Ž, new belt is still going with no issues whatsoever. Last change in deck was to relocate idler to the outer hole in tension bar.Prior to that problem persisted. The only last thing I need to do to confirm solution is to actually use another brand belt to see what happens. If everything is OK with that one we can safely assume that the lack of proper tension was the problem. If problem reoccurs with that belt, then belt quality/type will be the problem.
-
3 pointsThe things you see after the show
-
3 pointsKinda looks to me that all three of them are liking what they're seeing in the lobby. I need to go out there.
-
3 pointsLooking good Richie. That would fit in very well with some of the cool customs at the show and there will be lots more tomorrow when the show officially opens. The super D that @gulftanebuilt is a site to behold and you ought to hear it. I'm batting almost 1000 on the stuff to bring back. Haven't got the hood from Lane yet but we talked about it. Just haven't picked it up yet. Nice afternoon, a great Mexican meal with the guys and wives, some rain this evening and it's supposed to be nice tomorrow.
-
3 pointsIif you only knew what the conversation was about!
-
3 pointsFender pan back to one piece. More hammering, grinding and still need to make the mounts.
-
3 pointsYou wouldn't beleive it Neil. Thursday looked like the main show day there are so many tractors here.
-
3 points
-
3 pointsDon't worry....We'll bungee you into a camp chair, put you in a tub and chauffer you around to drool on the horses...plus there will more n likely some bros will have a two seater ther.
-
3 pointsSix hours on the road almost there and the only horse I've seen is the one behind me.
-
3 pointsSUCCESS !!!! Replaced the black ignition ring with a new one (Gray) strong magnets, and the beast roared to life !!! Just to sum up the problems, the coil secondary was bad also, open winding. The ignition module may be still OK, I will check this out later on the bench to see if the circuit will operate with a makeshift tester. Now the H518 has a new capacitor, a new coil, a new ignition module (and heat shield spacer), and a new ignition ring. The former parts lasted 29 years, so if these new parts last that long I will be 102 years old and probably won't even be able to mount the horse any longer !!! LOL As a side note, after removing all the parts to get at the ignition module and ignition ring, as well as the coil, I can now do this blindfolded, sort of like field stripping my old M14 from Army days. Thank you to all who contributed some really GREAT information regarding this problem, may you all win the lottery !! Dick
-
2 pointsThis was my first time attending this event , If you Love wheel horses make the trip! you will not be disappointed. The amount of wheel horses gathered in one place almost unbelievable. Lots of great people there . Got some good ( great!) deals from the vendors too you know who you are :). Thanks to all !
-
2 pointsI took a tall chute assembly off a beat up blower and put it on a good short chute. Works great. I just took everything from the base to the top of the chute and transferred it over
-
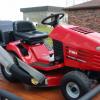
2 pointsThe 6.5hp Predator engine bolts right down in the existing frame holes, Down side is the air cleaner will only fit under the hood if you remove the top cover. The muffler does not fit under the hood either. I added a different air cleaner, down side made the brake hard to get to. Fixed that later by bolting a wrench on top of the brake peddle. Purchased an exhaust flange and bent 3/4" conduit to reach a muffler under the hood, no down side on that. After these alterations I had to drill the main jet out with a #67 drill bit.
-
2 pointsGo to the "Big Show" the raffle prize is a Tri-cycle Wheel Horse! I really don't know. I have seen several of them, but never was that interested because as a worker it may be too unstable.
-
2 points
-
2 points
-
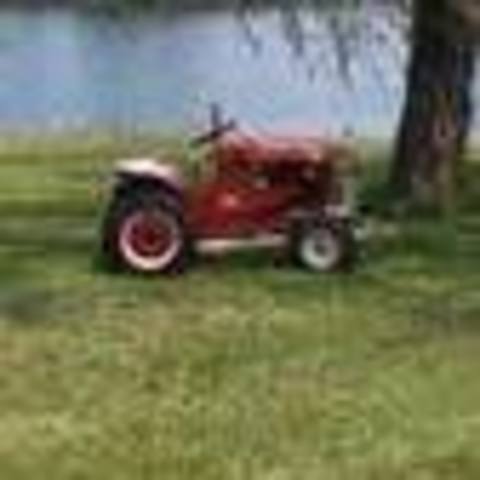
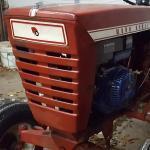
2 pointsAny pics of it in person? You made all this hype about this tractor now Let us see it too!
-
2 pointsEmory says "Let's go!"
-
2 pointsIf the tank was "goobered into the tank a threaded nipple" the standard grommet may not seal properly. All is not lost, a bulkhead fitting may do the trick. You would have to drill the tank hole larger and use a bulkhead fitting. Fish a string through the gas cap opening and out the new and de-burred hole. Put the inner part of the bulkhead fitting with its' gasket on the string letting it travel to your newly cut (hole sawed) hole. Wriggle the fitting threads through the hole and screw the bulkhead compression nut on. The fitting gasket must be inside the tank or product (gas) will seep around the fitting threads and drip, drip, drip. http://www.marinedepot.com/Double_Threaded_Bulkhead_Fitting_Double_Threaded_Bulkheads-Plumbing_Parts-FT1131-FIFTBHDT-vi.html Then a thread by barb fitting and a gas line valve and of course a fuel filter. Use Teflon tape on the barb's threads. https://www.grainger.com/product/THOGUS-Male-Adapter-WP121689/_/N-qvx?s_pp=false&picUrl=//static.grainger.com/rp/s/is/image/Grainger/3XVK8_AS01?$smthumb$ https://www.grainger.com/product/THOGUS-1-2-Nylon-Male-Adapter-1VRY8?functionCode=P2IDP2PCP
-
2 pointsI know there are several guys in motorized wheel chairs that are at every show. I'm hoping they may be able to assist you. But...if they can't, you know this bunch of guys will find a way to make it work.
-
1 pointMy 518 bought new in 1988 started having electrical problems when hot (typical coil/ignition module issues) so I replaced both. The coil was bad, secondary was open, but while I had the flywheel off I cleaned the engine, replaced the ignition module, but not the ignition ring as it looked fine. After the parts arrived, I installed the ignition module and made sure the ring (which had moved while removing the flywheel) had the key-way lined up with the new key on the crankshaft, and installed the new coil. Engine cranks over fine, carb is getting fuel, no spark to plugs. The test light lights when on the neg. terminal of the coil and dims when cranking (stays dim while cranking, I cannot see pulsing action. The test light on the positive side of the coil is lit and stays lit while cranking dimming slightly. I pulled one plug and checked for spark while cranking...nothing, no spark on a good plug. The new insulator "IS" on the back of the ignition module. Can the ignition ring be bad? If so, how, it looked fine, no cracks, no damage noticeable.
-
1 pointI have never understood the purpose. I grew up on a farm and never saw any job where having the front wheels like that would help. The opposite, in fact. If you are straddling a row with the rear wheels, it would put the front wheels square on the row
-
1 pointthis is the subframe attached to the tractor
-
1 pointGreat! You got it going, Mine is still running like a champ ! Cant believe that little plastic ring was such a headache ! I got my new Volt gauge today and installed and also changed oil & Filter while I was still on it . That was it my original SW gauge was defective . So at least now I can keep an eye on my charging system again . Have a great summer !
-
1 pointThanks!! Was raining this morning, I hope it still is auction time. Maybe scare away some bidders....
-
1 pointGood luck with the auction!
-
1 pointGood luck!!
-
1 pointNhaydt92 . With my experience with these fine little engines. Is I do it the hard way but it turns out the to be the right way in the end. I take the head off check out the cylinder bore. Then I Change out points and condenser. then last check out the timing. This thru the years has work for me. Then get a new carb or 2 there cheap enough. Put a new head gasket on. Keep the original when you get time do this one the right way. I hope this helps. If you need info feel free to ask.
-
1 pointRain this morning, clearing by 9:00 am, then okay until late with a chance of a thunder boomer in the evening.
-
1 pointI have seen that deck. You're gonna need a chainsaw to get it off the trailer. It has been there so long, it's taken root!
-
1 pointIs this what you need ?
-
1 pointSquonk , Does that mean you are hiding out at the Comfort Inn tomorrow?
-
1 pointI assure you that @formariz is quite capable and will get this figured out. With his abilities and the help from the others here I think I can say nobody else could do better.
-
1 point@rhnEUMANN That is only 1/2" extra on each side of the wheel!
-
1 pointWow what a great Score, I love the black hoods, Looks like it's a real deal. I would think not very many had the promo decals.
-
1 pointThursday is "setup" day and not an official day of the show. That way when the show "starts" for Friday morning, there are displays and people already there. Some people show up Friday to setup too. Your close enough to visit everyday!
-
1 pointYou got it Louis. The valve expands the rubber grommet to make the seal. They are available on line and at dealers. One trick ....start the grommet in the tank but do not push it in the entire way until you have the valve fitting started. Then push the entire assembly in together.
-
1 pointThey will be just fine, 16 is the outside diameter and 8 is the rim size. You probably won't even notice the extra inch of width.
-
1 pointWell, I didn't post anything because I wasn't sure....Until Now!
-
1 pointThursday 9am everything starts.
-
1 pointThat is the one and only Steveasaurs.
-
1 pointVanSickle makes a real good acrylic enamel that is reasonably priced. I have used it on multiple projects from farm & garden tractors restorations to trucks. If you prefer a oil base enamel they also make that. I use the acrylic because I the dry times are shorter and the gloss is better.
-
1 pointI plan on doing that on the blades for the 875. Will tell you a welding tip, I clamp the blade down on a piece of copper plate and then TIG weld the edge. Weld on the copper side turns out flat. . Those are the owner's Brush Hog blades!! lol
-
1 pointI cannot find "Save Old Iron: comments on Jess's page, where is it ?
-
1 pointSorry to be the bearer of bad news ,reckon I was lucky to have spent more $ first go around than tear into it 2-3 times, but lessons learned help out the next time or fella in need,Jeff. This is my original 1 i don't know of any way to test it but my Tech guy said if the module goes bad this isn't far behind save yourself some troubles and put it all in together so we did.


This leaderboard is set to New York/GMT-04:00