
Leaderboard


Popular Content
Showing content with the highest reputation on 09/03/2026 in all areas
-
11 pointsSpecial day for @Coulter Caleb last Saturday as he married the love of his life Faith Cowger. We had the privilege of staging a three generations of GTO owners For those of you that don’t know, I brought Caleb home from the hospital in my 1969 Goat following his birth. Grampie bought the 1967 as a project car two weeks after Caleb’s birth and we restored it over the next two years. Finally Caleb bought his 1970 on his 18th birthday and we have worked on it over the years. the groomsmen the lovely couple a fairytale departure from the church! getting the new bride settled in the Goat it was a great wedding day one more pano pic for good measure. GTO’s have been a passion of mine for most of my life and it was neat to have three of them take a small part in the wedding day of my first born.
-
10 pointsSeptember 3, 1777, The American flag is said to have flown in battle for the first time, during a Revolutionary War skirmish at Cooch’s Bridge, Delaware. Patriot General William Maxwell ordered the stars and stripes banner raised as a detachment of his infantry and cavalry met an advance guard of British and Hessian troops. The rebels were defeated and forced to retreat to General George Washington’s main force near Brandywine Creek in Pennsylvania.
-
10 pointsOf course, how silly of me!
-
5 pointsWe took a drive tonight. Mrs. P drove it like she parked it yesterday! Things it needs yet: Throttle adjustment. The hydroboost seems to be enough of a drag at idle, it’ll stall if you spike the brakes hard enough. Wiper motor, wipers I have another motor. I just need to swap it in. Windshield its a little cracked, all over. IMG_8503.jpeg
-
4 pointsFinally got a sunny day here today. It rained just under an inch last night though. I managed to get the bottom of the hoods and fenders painted that I had sanded and primed a few days ago. Hopefully I can get the top sides painted on Sunday as it is not supposed to rain that day.
-
4 pointsWelcome to Red Square. Why do you think you need a new wiring harness? Have never seen new ones available. They can be easily taken apart and cleaned or repaired if necessary. Post your tractor's model and serial numbers so we can link you to the correct wiring diagrams.
-
3 pointsHappy Birthday @dclarke, we are glad you were born.
-
3 pointsIf it weren't for marriage, men would go through life thinking they had no faults at all.
-
3 pointsThere are more than you'd think. Not as many as 20 years ago, but they are still around. I live about 30 miles NE of Charlotte. There used to be a few members around Fuquay and the Raleigh area. I haven't kept up but I know there are a few still in your area.
-
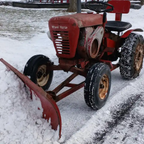
3 pointsI was rummaging through old posts and realized this thread deserved an update. Last series of posts here concerned attaching a muffler nipple to a K181 exhaust port that had no threads due to rust and exhaust erosion. I was successful with using an NPT tap to get some threading and then reinforced it with JB Weld Steel epoxy. Update... After about a year of use, the epoxy softened and the muffler stared to wobble. (as @WHX?? predicted just after I’d finished the repair ). Acetone and careful scraping removed the old epoxy. Then I went through most of the sequence again but this time using the white JB Weld High Temperature epoxy that @squonk suggested (also a bit after I’d finished the first repair 😉). I was concerned that this epoxy cures to a more brittle composition (somewhat akin to ceramics) but after more than three years the muffler is still solidly in place. The 854 is alive and well as my worker for mowing (36” gear deck), towing, and plowing (42”). I’ve posted about these implements elsewhere. Full repaint. F-plate reinforcement, 6-speed, one-piece gas tank, custom dash with volt and amp meters, front attach-a-matic, solenoid start, new rubber (Carlisle and Firestone), and a couple new decals!
-
3 points
-
2 pointsI've had a 414 - 8 for several years and have just begun giving it an overhaul. The things in pieces getting cleaned up and different parts are getting the attention they have need for some time. So I was considering a new wiring harness. I'm certainly not finding one in my internet searches, but I had a feeling that someone in this forum would be able to point me in the right direction or bring me into reality as to what I should expect. Do I just need to fabricate the connections? Am I wasting my time trying to find some used rat's nest off of somebody's old tractor? I'd appreciate any feedback. I'm hoping to get this thing put back together soon.
-
2 points
-
2 pointsWhat do farmers use to make crop circles? A Pro-tractor
-
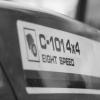
2 pointsThe likelihood of finding a new wiring harness for a nearly four decade old Wheel Horse is remote. There could be one out there but do you really need one? We can help you identify any problems and correct them. As far as I know the 414 model was made from 1987 to 1989. The 1987 (model # 31-14K802) wiring is not the same as the 1988 and 1989 (model # 31-14K803 or 31-14K804) because of the charging system being used. Though the wiring diagram may look like a multicolored bowl of spaghettis it can be understood if taken in small bytes (pun intended) and we have that resource available. Let us know the model number and the wiring difficulties you have experienced and we will help you overcome them.
-
2 points
-
2 pointsI usually make a new harness, if one is needed.
-
2 points
-
2 pointsThanks for the response. Looking at the videos of transmission rebuilds. When it gets a little cooler, I'll look at flushing the trans. I'm sure as long as it has been sitting, it will need going through. Compiling a list of stuff needed. Thanks, Dave
-
2 pointsdrive to front still to do - deciding whether to spoil a suburban 400 - or use my suburban 551 - and swap the trans for an 8 speed before I do the drive. Which will be chain from the back to front...
-
2 pointsYes it was built in 1959 and some of those later 59s came with that type of solid seat. They were all badged RJ-58 so if it still has the factory sticker it would read RJ-58
-
2 pointsI upgraded the wheels and tires, 30 x 10 -12 Interforce AGs on the rear and 4.00-12 tri-ribs on steel wheels and 4 bolt cast iron hubs on the front
-
1 pointNICE!!! Thanks for sharing Ed. You guys look like you're having a good time! There's definitely something special about that Chesapeake Bay sewage which makes those blue claws from down there the best. Man do I love those Baltimore crab cakes. It's been a long while since I've been down there.
-
1 pointIs there a port on this corner? If so, move the plug from it to the BYD and the hose to that port. None of your pics show it very well but I can see some lettering there like the ID for a port.
-
1 pointSome great pics there! Trina reminded me yesterday that the annual calendar is coming up soon.
-
1 point
-
1 pointGlad you found a good engine. I look forward to seeing pictures. Those lifts are real back savers.
-
1 pointHappy Birthday Denny!!! Hope its a good one!!
-
1 pointHappy Birthday 🎂 🥳 🎉
-
1 pointWell, I found one an hour from here in York, ME. Better than a 3 hour trip to CT. Less money too. Appears to have the 3 wire 13 amp stator and separate regulator that @Bill D mentioned in another thread. A lot of stuff to swap. Pics when I get it cleaned up. The medical lift works excellent.
-
1 pointSeptember 2, 1945: Representatives from Japan signed the formal Japanese Surrender aboard the battleship USS Missouri in Tokyo Bay, officially marking the end of World War II. This day is celebrated as V-J Day (Victory over Japan Day)
-
1 pointHappy Birthday Denny !!! Hope it's a great one.
-
1 pointExcellent update!!! But, Uhm... Pics???
-
1 pointThis is the exact type of damage I was referring to. The "mystery hole" looks like the spring broke some time ago, the owner at the time was unable to remove the broken section of spring, and and just made a new hole.
-
1 pointWhat is a scarecrow's favorite fruit? Straw-berries!
-
1 pointWife: “Do you think our kids are spoiled?” Husband: “No, I think most kids smell that way.” Wife: “Our new neighbor always kisses his wife when he leaves for work. Why don’t you do that?” Husband: “How can I? I don’t even know her.”
-
1 pointAnd you know this because????
-
1 pointNow driving and steering - a lot of trial and error!
-
1 pointGot the modified bracket mounted with mostly new bolts. New high powered alternator in. The belt even fits after the changeover! Next is to make and install the new alternator wiring harness.
-
1 pointWow!, Thanks. Those will come in handy. This little tractor is cool! Dug around in the container again today to see what's in there. A few better pictures: Can't find the gear on the end of the steering shaft, but it's in there somewhere. Front Tombstone Weight Dave
-
1 pointSince you've put fresh gear oil back in it, get it running and drive it around for a week or two. As Ed said, jack it up and check axle bearing before replacing seals, worn bearings will cause new seals to fail . If axle bearings appear good, you will have to drain it to replace seals, so I would do a diesel or kerosene flush at that time. Removing axle hubs is one of the rights of passage as a wheel horse owner!!!!!!!! When you remove the hubs, do not use a 3 jaw puller, you WILL break them. Here a thread with several designs of hub pullers. You can buy precut heavy round plate disc from several suppliers on EvilBay. These transmissions are not that complicated. I actually enjoy rebuilding them. If you decide to rebuild it, drain oil. fill with diesel or kerosene and drive it around a little to do a flush before disassembly. It sure helps get some of the smelly gear oil off everything. take plenty of pictures as you disassemble it to help you reassemble it. Post picture of parts after disassembly and we can help identify anything that needs replaced. FYI the hi/lo shift fork assembly and the main shift forks have small balls in them that can easily get lost on disassembly. You can get replacements in those parts drawers at you ACE or other hardware store (not Home Depo or Lowes) You can clean rusty gears & shafts up on a bench grinder with a wire wheel. Here's a video by out transmission guru, Stevasaurus. While the bearing arbors he now has look great, you can use sockets as arbors to remove and install bearings You can buy your bearings and seals from a any bearing supply house, or get the from one of our vendors https://wheelhorsepartsandmore.com/product-category/manual-transmissions/
-
1 pointFinished up on the C160 front end today replaced tie rods with some l had made a while back. Also added thrust bearings on the spindles. Good thing I had the homegrown tie rods ready, one of the old ones fell apart when I took it off . Steers way easier than before even with the wider wheels and 5 rib V61 tires.
-
1 pointAdded some liquid ballast and installed some new front wheel bearings on “Vince” the 1257. Installed some thrust bearings on front spindles also. Did improve ease of steering.
-
1 pointGot some VERY cool stuff today for the build. Two new crossmembers for the rear of the frame. Also one "restored" original that holds the center fuel tank. These are the correct 8 mm wires for an HEI distributor. Excellent brand. Red to match the distributor cap. They were on fleeeebay listed as a small block or big block Chevy V8 set. I knew immediately that was incorrect by counting the SIX wires and a coil wire GM never used. I also noticed that the wires were nearly half the length needed for a big block V8. Turns out that they measure out nicely for my own inline six. Likely they were for some sort of oddball aftermarket ignition setup with a separate coil. Price was great. The coil wire should fit a Wheelhorse too! This muffler is said to be USA 🇺🇸 made as well. Origin address was Elkhart IN. Stainless steel. Straight through design. Quality looks good. Inexpensive too. When I get the truck running I'll see what I think of the volume and tone. Might add another one right with it to deepen the tone. I'm particularly excited to have this carburetor. Holley model H4 - 4360. These were known as the Economaster. I'll include a Google description in the next post. These have a small intake capacity of 450 CFM. That's a little scant for a 427 or a 350 at higher RPM but it's excellent for a 300 cubic inch engine. They have mechanical secondaries. I like that quite a lot too. They do take a bit of getting used to in driving. Never just - floor it - unless you're already at a medium to high RPM. This carb is an NOS piece from the late 1970s. The parts are cast in Japan and assembled in the USA. This evening's bonus pic is our 7 year old chicken.
-
1 point1474 hours. Needs rewired, will not start with key and wires are burned. Fresh service when I received it. 60 inch deck, snowblower and tire chains. I do have all the books, sales receipts, complete history. Does run and mow excellent. Have all hubcaps and a box of belts, filters and misc pieces. Lost all interest Will be scrapped October 1st.
-
1 pointToday's fun was removing the air pump, several related hoses, alternator and their bracket. Air pump stays out. Alternator is being swapped from the Ford 2G to 3G setup. The early Ford alternators are well known to have wiring harness overheating issues. They're also relatively weak. 30 to 60 amps maybe?? The swap gives a HUGE increase in amperage! The new alternator is rated for 173 amps. This was a day of very slow beginnings and excellent results at the end. The slow, because of the 8 or 10 bolts 🔩 I removed, two of them fought me HARD. But I won...... eventually. Both pivot bolts were rusted in place. The cases of the air pump and alternator are both aluminum. Cast iron or cast steel brackets. Steel bolts. The rules of corrosion for dissimilar metals were really working overtime. The alternator case I had to smash and cut to get it out. You can still see a chunk of it in the bracket here. The shiny silver part. Old alternator. All I need from this is the drive pulley. Cleaned out a LOT of space removing things. Here's the bracket in my big vise. I had to heat the aluminum piece with a propane torch to get the bolt out. Then used a 51" breaker bar. New and old alternator, bracket, and the wiring harness for the change. The original bracket needs a notch to allow the new alternator room to swing down for mounting and adjustment. I'm not keeping the air pump so the top of the bracket can be cut off for a cleaner look. After some cutting on my portable bandsaw and grinding. Here's the modified bracket. The two (biggest) pieces here show what I removed.
-
1 pointToday I got the exhaust cut & removed from just downstream of the catalytic converters. Those will be removed later. The muffler had an interesting surprise. Upon tilting it to remove it from the truck.. I heard rattling rolling noises. There was at least a dozen and a half acorns in the part of the muffler furthest from the open end. I was unaware that was possible given that this is a stock closed type muffler. Maybe it's in the design. Maybe it's got internal holes it wasn't built with. Doesn't matter because I never intended to leave it on. I also got the unused canister vent and air intake pieces removed from under the hood. Also detached the fuel tank side of the unused vent hose. That'll be rerouted and filtered somehow when the bed is built. When the PO assembled the truck, this intake manifold port was hose attached directly to an upper vacuum port of the carburetor. One vacuum source attached by hose to another vacuum source. It was also thoroughly gunkified with the orange sealant you can see. I have no idea what purpose that would serve. In other news. This is Seamus. He VERY rarely makes appearances while human people are in his barn. Today I lucked out and got a pic.
-
1 pointor risk the Backyard hammer mechanic method which is NOT always the proper way. Just time saving and assuming you don't plan to go deep on that engine and just want to start and run it like it is. Stuff a small damp rag in there and lay the engine on it's side ( Like using a milk crate or something) so the exhaust port is facing down and use gravity. But gravity also works against us older folks for getting up off the floor so plan ahead! My philosophy being the chips and dust will fall, the rag keeps anything else from going deep and the exhaust blows out when it's started. At least that's how I've done it sawing exhaust nipples to get those out.
-
1 pointIf you’re afraid of getting metal in the engine, you could just pop the spark plug out and blow air into the hole as you tap…. Grease also helps when tapping cast to keep the chips from moving too far. @peter lena could tell you what spec, weight and color grease I’m sure
-
1 pointWell. Uhh. Yeah.










This leaderboard is set to New York/GMT-04:00