
Leaderboard

Popular Content
Showing content with the highest reputation on 04/21/2026 in all areas
-
15 pointsGone wrong.
-
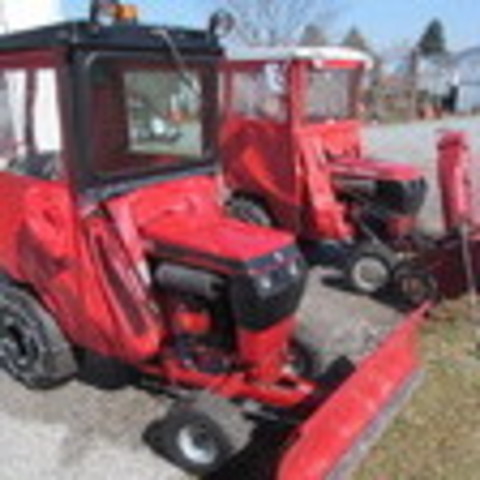
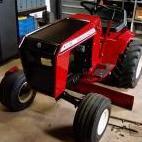
10 pointsI actually went to buy the tiller. Thinking I would have the only tractor with a tiller on the front and rear. But after talking a bit and learning he started working for Allis Chalmers in 1965, one year after I did, I knew I had to help a 77yo downsize. So I cleaned out his garage.
-
9 pointsApril 21, 1967, General Motors (GM) celebrates the manufacture of its 100 millionth American-made car. At the time, GM was the world’s largest automaker. General Motors was established in 1908 in Flint, Michigan, by horse-drawn carriage mogul William Durant. In 1904, Durant invested in the Buick Motor Company, which was started in 1903 by Scottish-born inventor David Dunbar Buick. Within a few years of forming his company, Buick lost control of it and sold his stock, which would later be worth hundreds of millions of dollars. Durant made Buick Motors the cornerstone of his new holding company, General Motors, then acquired Oldsmobile, Cadillac and Reliance Motor Company, among other auto and truck makers.
-
8 pointsYeah, I finally got a mower that is licensed to use state highways.
-
8 pointsYour engine is splash lubricated with relatively wide clearances when compared to a modern automotive pressure lubricated engine, I would go with 30 as stated in the engine manual.
-
7 pointsHey everyone! Just wanted to follow up with how things went, both to give closure and to maybe help anyone in the future. I was able to get that governor shaft in place and installed without any further disassembly of the crankcase. Took one strong magnet placed on the outside of the governor shaft hole, one extend-o pocket magnet to move the shaft around in the case, and about 10 minutes of my time. Turned the engine on its head, dropped the shaft down at the bottom, then maneuvered the shaft into position using the extend-o magnet. Once it was "in place"-ish, I moved it close enough to the magnet covering the shaft hole. The shaft attracted to the magnet and grabbed over. Then, I just pulled the magnet outward (with the shaft attached) and the shaft walked through the hole. Checked the alignment was correct, installed the shaft sleeve, torqued down the nut, and voila! - new governor shaft installed and ready to go. Reassembled everything (new oil, new oil pan gasket, new fuel pump installed, but not hooked-up to fuel lines (for closure - still using the electric fuel pump)), started her up, and bingo-bango - throttled up and governor-ed down as expected. Thanks again to everyone for the assistance and help here! It is GREATLY appreciated. Thank you!
-
7 pointsI have used Rotella T1 30w for years, summer and winter without any problems. IMHO it is the best oil for these older engines that is made. Bob
-
6 pointsVery noble... Just wait till you get to be his age!!!
-
6 pointsI can see what closed the deal, those license plat patches on the deck just couldn't be passed on gotta' have them.
-
6 pointsMcMaster-Carr is the adult version of "Acme". The mail order place where the Coyote got all is stuff to do in the Road Runner.!
-
5 pointsHello all. I am a proud owner of a early 312-8 and also 520 H. I wanted to introduce myself as a Wheel Horse enthusiast, and I also joined in order to keep up with all the maintenance procedures and tips that this forum provides.. Currently. I am focused on getting my 312-8 up & running. I have ordered a throttle to replace the old one and it will come in tomorrow, after that I should be ready to cut grass with it. I am located in SE Wisconsin. Respectfully. Tom
-
5 pointsTook hydro foot control off and replaced with steering column controls on the 520H. So much nicer I can actually relax now cruising up and down the happy hills of home. The more I operate this mochine the more I like it.
-
5 points
-
4 pointsSolution: Another tractor.
-
4 pointsIt's hard to not pass up a good deal isn't it?
-
4 points
-
4 pointsAnd their severe duty flat tappet ZDDP Zinc is 5% of what it was - due to the Zinc clogging catalytic converters. That is why modern car engines use roller lifters - no more flat tappets. Rotella still has a reasonable amount of zinc in it. Not recommended - using just modern multiweight motor oil alone. You CAN use it with a rather expensive zinc supplement added to it. Better off just to buy the conventional (not full synthetic) Rotella. TSC - $16 a gallon.....
-
4 pointsI'm about to find out. Never done it before, but I have a plan...
-
4 pointsI believe that the Rotella T1 was originally developed for use in diesel engines. It has a better extreme pressure additive package suitable for the higher bearing loads in compression ignition engines. When used in our antique Kohlers, and Onans, that same extreme pressure package helps protect our journal type crank and rod bearings and the non roller lifters and cam shaft. These surfaces have largely sliding type of friction. The current automotive engine oils are designed for tighter crank and rod bearings clearances - often with special coatings - and roller lifters running on the cam. All of these features are efforts to reduce friction and increase fuel efficiency, which, was not a concern when our antiques were designed and built.
-
4 pointsI was just talking about Warner Brothers cartoons a few days ago You're right: They all got their stuff from the Acme. Foghorn Leghorn for President
-
4 pointsBuying cable in bulk is a better idea but for no more often than I do it I just pick up a cheap throttle and cannibalize. I discovered I needed one for my Dino project so I got this at Rural King a couple days ago. I'll fit it to the original control and cut it to length as needed. The Z bend tool I have gets the job done OK.
-
3 pointsThat will fit! You will need the lift cable on the tractor, rear axle bracket, mid- mount pulleys and obviously the belt.
-
3 pointsWelcome aboard sir! When you get tired of learning about Wheel Horses, I have a feeling you'll enjoy some of what's in here... What Are You Listening To? - non tractor related discussion - RedSquare Wheel Horse Forum -------- Mods, can somebody merge his other Introduction threads into this one (especially the one with the photos), and maybe move it to the Introductions forum? Thanks!
-
3 pointsThirded...
-
3 pointsSeconded!!!
-
3 pointsHello Tom You've come to the right place. We have quite a few characters from Wisconsin and other nearby areas.
-
3 pointshttps://www.uscargocontrol.com/products/1-8-7x19-type-304-stainless-steel-wire-by-linear-foot?cq_src=google_ads&cq_cmp=191860260&cq_con=14410206540&cq_term=&cq_med=pla&cq_plac=&cq_net=g&cq_pos=&cq_plt=gp&utm_term=&utmcUQAvD_BwE regularly refer to stainless cabling , for corrosion free set ups , have it in various sizes , we regularly made up lift slings with it , in a winch set up its a no brainer , like chain / cable spray , ridiculous movement ease , snow plow chute , pete
-
3 pointsT-6 is not going to do anything better for you engine than T-1 (30w) or T-2 (40w). Full Syn and Blends in these old loose tolerance dirty port engines just burn off some of it after a couple of hours of use. Rotella T-6 is expensive overkill for these old flatheads.
-
3 pointsI bought one of those years ago. Very handy to have.
-
3 pointsIf you go that route... pay attention to the direction of the second end bends relative to the opposite end. For the smoothest action in use, you want the two ends to be within 10 degrees or so of the intended placement. If you end up 180 off, it puts a constant bind in the cable.....
-
3 pointsSounds a lot like me getting older!
-
3 pointsGot my donor wheels together for the rear. I don't have any more wide rears so I'm gonna have to make a set from two different pairs. The pair with the surface rust has a way wrong offset. They came from a Ford LGT. The tires on Ford pair would not break loose at the bead, even though they were clean. I had to use a 3 foot 2x6 and the weight of the Tundra to break them. Hopefully I can gain another skinny pair of wheels using these as well. We will see...
-
3 pointsOr, maybe he could just take the blower housing and wear it like a Flavor Flav clock to show off his Teccy allegiance!
-
3 pointsMan, this is a rough crowd………I love it 🤣🤣🤣
-
3 pointsLooking forward to hanging out again! Although 11:00 am is my limit due to the wife's birthday party. Can't wait to see the look on her face when I roll up with that truck project! LOL. I didn't tell her anything about it and don't plan to either! I'm just gonna blame @Sparky and how he needed me to take it so HIS wife doesn't know HE bought it! She likes Mike so that should soften the blow a little.
-
2 pointsI FINALLY got it going tonight! Washed it up and tested it, changed all the fluids! Now to put it to work! 20260421_194503.mp4
-
2 pointsThe bidding war was a frenzy, all the way up to $2,625 It closed, I bid myself up to $1,700, I’ll never see the Turd again…
-
2 points
-
2 pointsI’m not sure about anyone else here, but that hasn’t happened to me yet and I’ve been dealing with these tractors for over 40 years!!!
-
2 pointsNIce! I hope that works for you. I need to make a decision about my FEL, auto has to have a foot control or I move the loader onto a 8-speed without the L/S differential and electric clutch. I don't seem to have enough hands and arms to not have a foot control for direction. Kind of hate to do that since my 165 is the tilling machine but we'll see.
-
2 pointsSounds like we are going to get a How-to haha
-
2 pointsGit you some new stuff there Ed?
-
2 pointsNot a 520H, but my 1990 416H came with the hydro motion control mounted on the "floor". It is easy and convenient once I got everything adjusted. My right leg is not as mobile or strong as it once was, so I wouldn't be comfortable using a foot control in close spaces.
-
2 pointsBuy a couple of skateboard anti slip tap and your good to go. Anti slip tap prevents dirt and water for getting under it. unlike rubber mats that trap it underneath and cause rust.
-
2 pointsI have an old Hobart Beta Mig 200. It's a nice heavy duty industrial quality welder.
-
2 pointsGetting pulled out of Semi - Retirement again. In 2025 I worked from February to end of July on a massive 3 bathroom and complete removal of the 4'' cast iron soil stack and all related piping from the basement at foundation wall up through 3 floors into the attic and out the roof. This house is late 1800's /early 1900's and was not gutted out for removal of piping. I had to figure how the Old time Plumbers laid it out and then have a carpenter cut out walls and floors only where the new piping would go. This included all Cast Iron , galvanized threaded pipe and water piping. Also removed the original Lavatory basin sinks and Essex Claw foot tub and remove faucet etc. Really too much to keep typing. Turn the page to April 2026 and here I go again, this time a complete replacement of a heating system, basement only. The Material list cost is nothing short of Astonishing. This will be a Wall mounted boiler, indirect H/W Heater and all the included pipe and fittings. Again too much to type. Wish me luck. Cheers
-
2 pointsLots of nice work, maybe admin can consolidate into one thread? Nice for reference.
-
2 pointsActually tried that one for a while... Just didn't work as well when needing to stop and back up.
-
2 pointsThere... fixed it for ya... I don't watch or in any way support any sports on any media. Completely a marketing and gambling racket. My kids growing up, my nieces and nephews - absolutely. All day long. Until they get paid for it - college "scholarships", NIL deals etc...
-
2 pointsThat makes sense, thank you.













This leaderboard is set to New York/GMT-04:00