
Leaderboard


Popular Content
Showing content with the highest reputation on 02/14/2026 in all areas
-
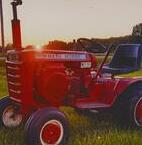
23 pointsThis is a long story so bear with; Dad was a Wheel Horse dealer. My moms uncle was also a Wheel Horse dealer from the 60's thru the 90's. My dad has only owned 3 Horses all these years: a 701 , a C141, and his only new Horse- a 416H. In 1978 moms uncle sold a new C141 to my grandparents neighbor. He stored it in my grandfathers barn but he died in 1980. My father sold our 701 and purchased the like new C141 for our own personal use. I had the majority of the seat time as mowing the grass was my job. We kept the C141 until 1993 when it was sold and dad took a new 416 for his own use. The C141 was sold somewhat locally and dad took a really ragged C120 on trade for it. Dad gave me the C120 which I totally restored and has been my everyday tractor since 1996. Fast forward to this week. I scroll the local Facebook marketplace listings several times a day and saw a C141 listed about an hour away and gave it no thought whatsoever because I am not looking for anything other than parts tractors. Looked at the listing another day or so later and for some reason looked closer: there were 2 things that gave it away : when we got it back in 1980 there were holes punched in the muffler ( God only knows why ) which Dad brazed shut, and there was a faded, worn decal on the left rear top of the hood. A few carefully asked questions and a rode trip was in order. It's had a rough life and multiple owners ,but our old C141 came home today after 33 years. Sold new by moms uncle, dads tractor for most of my life that was spent at home, and I own the tractor that was traded in on it. Needless to say it's going to get a full restoration and it's not going anywhere again.
-
12 pointsLeft cold snowy CT for much warmer Katy, TX to watch our granddaughter ride in her first rodeo with the Katy Cowgirls in the Katy Rodeo and parade.
-
10 pointsJust pull the two hairpin clips and the hoop will drop down. Then swing the hoop to the rear , Install the belt and reinstall the hoop .
-
8 pointsCheck out the manual for your tractor and/or snowblower. You’ll discover that the way to change the PTO belt is to remove pins holding the PTO bail at its upper and/or lower pivot and then slide the bail up or down to get clearance between the clevis and the stub in the PTO shell.
-
6 pointsToday we processed the lesser quality parts that were left from around 20 deer that we harvested this year. These bones are frozen until deer season is over then the bones are boiled and the meat is separated and ground for scrapple. The raw meat is ground for bologna. We made around 200lb each of scrapple and bologna. Scrapple boiling Dipped out and cooling Bologna Grinding Mixing spices Stuffing Then to the smoke house Then a lunch featuring a fish fry of perch, walleye, and striper
-
6 pointsWith all this snow this year and no 44'' 2 stage set up on the 520 - H I installed the 48'' Dozer blade. I really can't believe the oomph this thing has. I'm sure the extra weight of the twin cylinder helps. I only put the trac weights on and not the heavier steel weights along with a nice set of 2 link chains. I was pushing at least a foot and a half of crusty snow with it. Very impressed. This is my main mower but I may have to think about using another WH for mower duties ?
-
5 pointsA big shout out thank you to @Handy Don for helping me! I met him a few times at the Big Show, and you know when you talk to someone for a while and you can just tell they are smart? Well that’s Don!! My C-141 was not charging so after doing some basic testing I decided I needed help. I was going to post this here, but I kinda wanted some instant gratification. So I decided to call Don and pick his brain. After talking for a while we switched to FaceTime which enabled him to guide me step by step. His knowledge and ability to explain how things work is remarkable. Using my multi meter we were able to determine that the voltage regulator was not working properly. We probably chatted for an hour in total covering an array of topics! Afterwards I called Brian @76c12091520h at K+B Wheel Horse Parts and he informed me that he has one in stock and would send it to me. So I wanted to say thank you Don, Brian and everyone here at Red Square for helping keep my (our) hobby going strong! God Bless ❤️
-
5 pointsI've dropped nuts in my driveway, usually from lifting something REALLY heavy
-
5 pointsHappy Valentine's Day !! Being as such, it seemed like a good day to spray some red paint. The outside temp in the low 50's also made the shop easy to heat. A big THANK YOU to Jim for helping me wet sand this morning.
-
5 pointsNo. Just disconnect the pto trunnion the the pto plate will rotate enough to disengage the hoop from. The pto bell thrust bearing.
-
5 pointsRJ Suburban repop Showerhead muffler 3/4 formed steel not printed. $175 ea. shipped
-
5 pointsI for one would not slide the hubs out for clearance if needed. Two options - different rims with less rear offset, or wheel spacers. The grub screw position over the axle key is somewhat critical...
-
4 pointsI love my Bronco 14. That being said it tries my patience more than most of the others. It has alot of hydraulics mods and it has always had leaks to fix. But this latest was my fault. Or at least I thought so... I removed the balance gears last year and had no correct oil pan gasket. So I made one up, and as soon as I cranked it up it started leaking oil. So last week I changed out the oil pan gasket with a correct part. After driving it around, I see oil around the base of the engine again. Turns out the oil was coming from behind the fuel pump. It didn't contaminate my oil but it sure spit pretty bad. So today I made a steel plate cover for the fuel pump hole and added a low pressure (2-3psi) electric pump. This makes 3 tractors now using them and I've been very happy so far. When all back together she fired right up and ran like a champ. Absolutely zero oil leaking now and everything seems good. Even with the pump pulling on the rectifier it is still charging strong. It settles down to 12.6VDC after a few minutes.
-
4 pointsWow Brian! Excellent story I can’t wait to follow along with your restoration. The 1978-79 C-series are some of my favorite Wheel Horses made. Knowing you and the quality of your work, it will come out beautiful.
-
4 pointsGot some work done today welded and ground down on the frame for the front axle pin it was oblong. Got the tierods welded And primed those and the rear hubs.
-
4 pointsGreat story We love watching your restorations
-
4 points
-
4 pointsThe hood gas tank and carburetor are on coming together little at a time
-
4 pointsI had a Crown Vic Police Inerceptor. It was a great vehicle. Got over 300k miles outta it. It got respect on the road while delivering over 20mpg. Tons of power- I towed my boat, snowmobiles, & camper with it. I've owned over 100 vehicles & gotta say it was probably one of my favorites.
-
3 pointsWhat the hell it's tradition now! I didn't do a damn thing. Looks like them hood hangers worked purty good. Thank you for the P clamps ... ended all my misery. I got nice ... well decent ... throttle range without having to add that little tab.
-
3 pointsSoaking with Kroil for a while and as @76c12091520h says roll pin punch with patience should do it.
-
3 pointsGoodyear Custom extra track 16x 6.50 x 8 Pair on the C-160-8 I picked up recently.
-
3 pointsWin, win! This 10 speed is awesome!
-
3 pointsTake the hoop off the tractor so you can lay it on it's side where one good slam from a hammer should start it moving. Got to ask - why do you want the pin out?
-
3 pointsIf you are referring to the roll pin in the picture, yes , they can be difficult. Will need driven out using a special roll pin punch that won't mushroom the ends of it . Likely rusted fast after nearly 50 years
-
3 pointsNope. Slides right out. ..... unless it's rust welded in.
-
2 pointsLooking good Jim, but please don’t ram the piles with my future 418-A 😂😂
-
2 pointsWonderful!!
-
2 pointsI'm not sure if my 312H is stock or if the trunnion was put on top to get better rod alignment, but the muffler prevents the disconnection on mine. Requiring me to pull the lower pin in the PTO hoop to let it lower enough to allow the U bracket to clear the stub shaft.
-
2 pointsGreat way to spend a day
-
2 pointsMike, you do need to lower the hoop so the U bracket clears the stub shaft.
-
2 pointsWith bigger pin out just rotate the arm to the rear. No need to unhook anything else.
-
2 pointsThe Briggs is a 14FB (5.25 hp?) and ai also grabbed this cool index. Unfortunately, no collets for it.
-
2 pointsSo today, I got out my homemade vise and wire brushed the wheels, wiped em down with mineral spirits, let em dry and applied 4 coats of filling gray primer. " on scamazon you can get 2 brand new 16x6.50x8 tires. 2 new 8 inch rims. and here is the best part. the tires are already mounted on the rims. under $100 for everything". Money is at a premium now & I like DYI. Next, I installed the head. Never-seize was applied to the head bolts. Torqued 10 ft lbs, then 20 ft lbs then 30 ft lbs and finally 40 ft lbs. I have rechecked the torque 3 times as suggested. No change. Now I'm gettin' quality time (?) on the keyboard searchin' for the sizes of hardware I need. Got a great hardware store nearby. If they don't have it, you don't need it.
-
2 pointsThat swap should work. Probably won't need to move the hubs, as the 1" section width difference will end up being an additional 1/2" or so per side.
-
2 pointsI initially was going to do a 'need it, need it, built it, got, it' on your picture of future projects, but, they are all in the 'need it' catagory. Closest thing I've built in that selection was a stick & tissue peanut scale PT17 a couple decades ago. I do like the 'silent Sam' Indy cars. Those cars are from an era that seemed to encourage interesting and sometimes unique engineering and design at Indy - unlike the current rules that force the cars towards a single solution.
-
2 pointsMore experimentation and organizing tools and supplies. This metal Pete is getting more parts added. Cheap kit with some challenges... I like the look of the metal bodies but greatly prefer working with/on styrene. I'm not trying for any super details on this one but I'd like to have certain things right. Engine color for instance. None of the normal model paints match the needed tone. Stopped at the local hardware store the other day and found actual Catarpiller Yellow. Nice. This is after one of four or five very light coats.
-
2 pointsToo bad we didn't have a few extra days these places are not too far off our beaten path to the BS.
-
2 pointsSame here and where I moved from in Florida. Land is farmed and handed down through generations. Today it’s easier to make a lot of money at one time selling it off than farming it. All the orange groves I grew up around in central Florida are gone. Loved the smell of orange blossoms when they were in full bloom. Houses and apartment buildings don’t have the same aroma.
-
2 pointsCD It is like I always say by the school of hard knocks . Take your time with this it will pay you back in the end,
-
2 pointsI use PJ1 foam filter oil, its sticky so no drip off like motor oil, I can get 100+ hours of mowing out of a paper element and have barely any dirt on it..Just the finest of fines...but the foam sleeve will be packed every 8-10 hours. Its worth doing, the less dirt that hits the paper, the better
-
2 pointsI'm thankful the Amish have deep pockets i my area. Ed, that was actually a quote from @Beap52, not me, but I agree with him.
-
2 pointsIt's actually a Castle Nut used with a cotter pin to secure. What , that is the question.
-
2 pointsThere fixed that ...
-
2 pointsHere she is: P.S. And yes that is my 87' Chevy and 656 in the background
-
1 pointI don't know Unit ... @Sparky s neck of the woods there are many old stone fences ... many dating back to colonial days. Plunge's code required here on a new build. Floor no tho. Things really sound messed up there ... as much as I would enjoy living in the woods of Maine I would be mowing a lot in the dark & The @Pullstart would be on speed dial. ..
-
1 pointIt was originally a Fla detective unit. Had 60k mi when I got it. However, I drove it daily for 7yrs all year round to just over 300k. I wash my vehicles very often. It was also treated with Fluid Film underneath & in doors etc. I did have another set of 4 same wheels with winter tires.
-
1 pointStupid auto correct. Lol
-
1 pointHere is a picture of the chute crank support panel I made when I had the short chute blower on the 520. The crank was inserted thru the hole and the slit in the canvas and connected to the extension sleeve. The panel also served to mount the switches for the cab lights which I still use.
-
1 pointHonestly after all the 'dust settled' and the funeral was done, I found myself really needing to do something with my hands. I had just sold off a lot of my collection that previous fall, and I found I really needed to get back into restoring tractors and rebuilding engines. I really found it therapeutic to just get my mind into something else. I also knew my boy was looking over my shoulder the whole time, and still is! That's just something that worked for me.. All the best to you and your family!


This leaderboard is set to New York/GMT-04:00