
Leaderboard


Popular Content
Showing content with the highest reputation on 01/20/2026 in all areas
-
10 points
-
8 pointsIs hard to say good bye.
-
8 pointsMy experience with rubber and steel chains on turf tires. SURFACE RUBBER STEEL TURFS w/o any chains bare pavement best poor good ice poor best poor mud good best poor snow on grass good best poor snow on gravel good best poor snow on dirt good best poor
-
7 pointsJanuary 20, 1981 Ronald Reagan inaugurated as the 40th President of the United States of America
-
7 pointsThis would be a good opportunity to go with an electric pump.
-
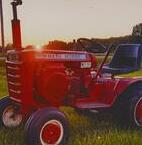
6 points120… I like what ya did there.. Beautiful machine!
-
6 pointsrecently? I feel for ya. I dread it mine is getting up there in age and has slowed a way down last couple years.
-
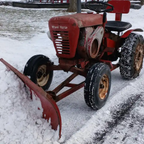
5 pointsTechnically it's not one, but since it's decaled as one.
-
5 pointsTrina got herself a new loveseat for the living room. This is half the old couch. Our not spoiled beast in her favorite location. Front of the woodstove.
-
5 pointsWhat do you tell @WHX?? with 2 black eyes? Nothin, she already done told him twice!
-
5 pointsRear receiver hitch ready to install. I made this up a few years ago at a previous work place. It is really just two pieces of 2" angle iron welded to a piece of 2" square tubing and the receiver is 2-1/2" square tubing. Rear receiver hitch sat in place held up by jack stand. Rear receiver hitch attaching hardware installed and loosely bolted up allowing a little free play to adjust hitch. Rear receiver hitch centered side to side. Rear receiver hitch bolts evenly snugged keeping hitch gently pulled rearward. Rear receiver hitch bolts torqued to 28 ft/lb. Rear receiver hitch installed.
-
4 pointsHope she went peacefully and glad you got be there.....
-
4 pointsThanks for the complements. I am pressed for space right now in that I have my truck, the wifes explorer, and my plow tractor all taking up space in my shop right now. My plan is to get another two car garage built next summer so my shop can actually just be a shop and not storage so at that point I may well buy or build a lift table that will likely do double duty of tractor maintenance and also a better way to clean the mower deck after each use where now I crawl under each time.
-
4 pointsI saw 1/8 metal sheet laying around in my garage so I'm going fab one. I suppose I need gasket too? but I cut it off kevlar gasket sheet
-
4 pointsCleat, it looks like if anyone would benefit from a lift table it would be you! I have a bad back, so I bought one years ago and it is a definite game changer. Being able to work on tractors without bending over is a joy. If I don’t feel like standing I just sit on my shop stool and work. No more kneeling or laying on the concrete. I actually have two tables, one that I built out of wood that is on casters and fits under the workbench when not in use and one that is an actual lift table. The wood one is mostly used for projects that I know will be on there for a while, like a restoration and the lift table for everything else. I think I paid around $5-600 dollars for the lift table from Harbor Freight and then made a wider top out of two layers of plywood. I’m thinking about putting better casters on it because once a tractor is on it, it’s difficult to move. My wooden table has good casters so I wheel it over next to my toolbox and workbench when I want to work on the tractor and then push it out of the way when I’m done. Also as I’ve said here before, you restorations are second to none! Keep up the good work, we always like to follow along 👍🏻
-
4 pointsI told her not to park her car under my steering wheel collection ...
-
4 pointsIf you have a fuel leak there the pump diaphragm is shot. Drain your engine oil and check for presence of gas. With a plastic pump your best off just replacing it. They are readily available and cheap but sometimes quality questionable. Plastic pumps are not worth rebuilding. There are many threads on them here. One of many offerings here.
-
3 pointsRefresh and a magnum.
-
3 pointsI’ll join in. Heres mine bit rough and needs some work though. But definitely not as nice as @76c12091520h!
-
3 pointsWe have ordered soooo many things from WallyWorld that are not stocked at the store when we place grocery orders for pick-up. As long as the total order is over $ 35.00 the items are shipped free.
-
3 pointsYeah. BBT. You try that......
-
3 pointsYou can tighten them up by moving th connecting link from the yellow line position to the white line link. Also you will probably want chain tensioners as i have on mine. They can be rubber or springs...
-
3 pointsThere, I added a plain turf tire. 22.5 would be perfect on a 22" tire. Best to go bigger so the cross chains wrap down over the side walls. No sloppy chains, the side chain length is adjusted to tighten the cross chains.
-
3 pointsAnd he had a great sense of humor!
-
3 points1985 312-8 my original post : I live in Poland so i have to order parts in advance from US or I found some minor parts here ( ignition switch, spark plug etc) or (like that CarBolo) on Chinese website (fastest route). Lots of planning with manuals but in short time I will know every part and every part number
-
3 pointsYeah, sometimes we just have to put them in their place don't we.
-
3 pointsHere in this corner of Pa., all structures have to have a permit. Temporary structures can not be anchored to the ground. So, I get a temporary structure and fill it with tractors, A man can not be to safe!
-
3 pointsMy pole barn building permit required a seepage pit with three inspections for the rain water Never used it for that as I midnight piped the rain water to my blackberry plants and used the pit as a french drain for a sink, urinal, and a floor drain. Midnight concrete floor, lectric, and water, but the guvment still got me. The taxes I paid for 25 years are more than the pole barn cost. The taxes I paid on the house for 55 years are over three times what I paid for the house. I did put 3/8" foam insulation under the metal roof to prevent indoor condensation rain. No heat or wall insulation so I only live there in the warmer months. BTW, my barn was built to house a 24' WAC boat that was 28' long and 9' high when on the trailer. So I built the barn 24' wide X 32' long X 10' high under the roof trusses with a 10 X18 foot door. Made it easy to back the boat in and still had room for the truck. This was before it turned into storage for tractors and buckets of parts.
-
3 pointsBuying...anything. In my opinion folks are selling biz for a variety of reasons. 1. cant fix it. 2. have no use for it 3. need money for life or to fund something that works 4. significant will murder me etc etc. due diligence of course. I would not buy something that is obviously neglected and stored outside. Me specifically. Not my skill level. Also as previously stated... Toro Im out! Wrenched on enough of them in college to know. Me thing not a ya'all thing. That said if you want a project and you significant wont smother you go for it. heart wants what the heart wants yeah?
-
3 pointsGot some snow between yesterday and today. Decided to do one pass last night on our driveway. Then did final pass and did my plow account about 20 minutes ago. 415BB428-68EE-4462-B3FC-C93255AE4408.mov
-
2 pointsYa it's a tough one to lose one. Asked Mrs. Pullstart once why they didn't have a dog my nieces loving them and living out in the country and all. She said it's just too hard to lose one. Sorry to hear of your loss @Achto ... sure was a daddy's girl ....
-
2 pointsI tried the 4 link and they worked ok but man the 2 link sure are a lot smoother ride
-
2 points73 12hp-8 figured it was close enough for Guberment work . BTW great looking tractors @76c12091520h and @AlexR, what are those wheel weights @AlexR.
-
2 points2:35pm today. She was all good this morning. Wife texted me to come home early from work. Got to spend her last 1.5hrs with her.
-
2 pointsSnowthrower 38in 1989 W0238 Ber-Vac 2-stage IPL SN.pdf - Snow Blowers - RedSquare Wheel Horse Forum If it fits the 3,4,amd 500 series, it should fit a C-160
-
2 pointsI miss Ronnie!
-
2 pointsI miss those days...
-
2 pointsI'm running this pump on a couple of my tractors. One of which is my pulling tractor. Have had good luck with them. https://www.amazon.com/Electric-Universal-Pressure-Transfer-Carburetor/dp/B08PY7V2MM/ref=sr_1_1_sspa The jungle site has the CarBole at a lower price than the link you posted. https://www.amazon.com/CarBole-Universal-2-3-5P-S-I-Operating-Self-Priming/dp/B01IR6BNKY/ref=sr_1_6_sspa
-
2 pointsI would think a block off plate would be better but have seen them both ways. I belive you can even get a factory block off plate but IDK what the cost would be.
-
2 pointsMost guys are gonna say block it off. Ther is a cover made to do it or fab one. If you need a gasket I have a ton of them.
-
2 points3 bucks out back this morning so the pictures were out a window and they were @ 75 yards off. 2 were sparing and the other one was always out of frame. I tried to crop the pictures so they are what they are
-
2 pointsDefinitely check for fuel in gas. I always thought the tractors with the fuel tank under seat were great candidates for electric fuel pumps and would go that route before trying one of the cheap plastic pumps. IDK what the name brand mechainicals go for but remember thinking there was not much difference $$$ wise in converting to electric or maybe even cheaper.
-
2 pointsSo its more just a "I paid good money for these why are they already going to s***" and not a usability factor?
-
2 pointsWhat's the big deal with dry rot on a tractor tire? I've seen some people on here replacing their tires because of dry rot but in my mind since these aren't going 60 mph like a car. I would think dry rot isn't going to be a big problem and as long as none of the cords or anything are damaged, if it leaks a little bit of air you could just put tubes in them and keep running them
-
2 pointsOk i am going to give you guys a good suggestion about the snowplow skids for Wheel Horse early snowplows. i have used a plow with the bowl cup shoes for fifty years. These will wear on the bottom over time depending on your setting of the snowplow. My dad was a blacksmith and we remade ours. Last time we made a pair together with my brother it took about two and a half hours. 45 minutes to make them and the rest to figure the math for metal volume . We made the sidewalls of the skid bowl 1/4 thick as opposed to original 1/8 inch. You can see wear holes on the original 1/8 inch wall bowl below! Last year I had two sets made for $30 by a blacksmith shop. 1/4 thick again. But my next sets will have a solid bowl with a 3/4 hole for the six inch long 3/4 rod. So support your local blacksmith shop. They need the work and this helps them make something they never made before! The skill to do is valuable and you are preserving some originality! Here is a link to FIND YOUR LOCAL BLACKSMITH FROM THE ABANA -ARTIST BLACKSMITH'S ASSOCIATION OF NORTH AMERICA.: https://abana.org/community/directory/#!directory/map
-
2 pointsAll back together and steering like new
-
2 pointsNow that the foot rests are on I can set the foot pedal height. I initially screwed the heim joint in all the way on the foot pedal control rod so the pedal is too far forward as shown. Here I am holding the pedal in full reverse and you can see the large gap between the reverse pedal and the foot rest. To adjust the pedal, unbolt the heim joint from the foot pedal and unscrew it a few turns on the rod then bolt it back to the pedal. Then push the pedal to full reverse again. When you have it set right the pedal will almost touch the foot rest but there should be a small gap. This will ensure you have full reverse speed. Once the heim is set in the right place the jamb nut can be tightened on the control rod to lock the heim joint in place. Here is the foot pedal in full reverse showing the slight gap to the foot rest. Here is how the foot pedal sits in neutral now. Tractor overview as of today.
-
2 pointsThrough ice and sleet and snow. They made it here.
-
2 pointsTodays adventure - rebuild the steering system. To start off I turned a portion of 5/8" stock down to 9/16" and threaded it to 12 pitch. Next drill a hole in it and tap the inside of it to 3/8-24. Then use a parting tool to cut it to length. OK, what am I building here ?? Remember the fan gear that the PO messed up by welding the drag link to it? The hole in it was too large for a heal-a-coil. So I tapped the hole in it to 9/16-12. What I made was an insert to repair the require 3/8-24 hole in the fan gear. Inserted with Loctite plus I peened the edges to ensure that it does not move. Next - take a peace of 5/8" x 4.5" stock, turn a 15/16" length of each end down to 7/16" and thread it to a 20 pitch. One new drag link. Now for the tie rod that was butchered up. First off, position the front axle and spindles so that everything is held strait. Then cut a 1" x 5/16" flat bar to length. Use a transfer punch to mark the outer holes. Drill the 1/2" holes in each end and the 3/8" hole for the drag link and test bolt things together. Looking good, now it was time to turn the two 1/2' bolts into part #3949 clevis pins. Cut to length and then drill an 1/8" hole 1" deep into the end of the bolt. Drill & tap the end to 1/4-28 to a depth of 3/8" for a grease zerk. Drill an 1/8" cross hole to meet up with the 1/8" length wise hole so that grease can get to the pivot point. Front end repaired & almost ready for some paint.
-
1 pointThe shift looks like it bolts in, but can't remember if you can pull it out with out taking side plate off. Might be able to slide down, maybe just loosen some bolts up front Here's so pic's


This leaderboard is set to New York/GMT-04:00