
Leaderboard


Popular Content
Showing content with the highest reputation on 01/19/2026 in all areas
-
10 pointsJanuary 19, 1883 The first electric lighting system employing overhead wires, built by Thomas Edison, begins service at Roselle, New Jersey.
-
7 pointsWell it’s not what I did today, but this past week. Myself and another guy dug the hole for a foundation of a new house. Mostly I push material to the guy in the excavator who bales it out of the hole. Then I finish grade the bottom of the hole with the dozer +/- 2” for the masons. The hole is almost but not finished in the picture, I just snapped it after lunch one day. This is in one of the most expensive zip codes in the country. 1.9 acre lot- 7 million dollars. Spec house that will probably list for around 23 million! This whole area used to be nothing but farmland mostly potatoes and corn. From this point you used to look across approximately a mile of fields and see the ocean. Now it’s mostly houses with some occasional fields. It’s sad really.
-
6 pointsGot some snow between yesterday and today. Decided to do one pass last night on our driveway. Then did final pass and did my plow account about 20 minutes ago. 415BB428-68EE-4462-B3FC-C93255AE4408.mov
-
6 pointsFor me this would depend on my plans for usage. If you plan to finish the inside then I would go with a stick built, just easier to do an inside finish. If there is no future plans to finish the inside then a pole building might be a better option. You mentioned that this would be on lake property. Is there a lake association or township that would have a say in what kind of building that you can out up? If there are a lot of trees around, then I would do a steel roof no matter what the building choice is. Shade from trees as well the leaves or pine needles that tend to build up on a shingled roof keep it from drying out. This greatly shortens the life span of the shingles. One other thought. Not sure how Michigan tax laws are but in Wisconsin a pole building with a gravel floor is not considered a permanent structure, thus the property taxes are much lower.
-
6 pointsSame technique for mine... 3rd season and going great!
-
5 pointsI decided to add shallow grooves on the steering shaft to retain grease under the welded-on gear. The coiled pin in the steering wheel did not want to budge, so I had to leave the upper end assembled. I had to do some creative fixturing but added five equally spaced shallow (.030 deep) grooves inline with the root of every other tooth of the gear using a ball endmill.
-
5 pointsDummy me didn't realize I needed to remove the flywheel screen for it to come off Got the new steering tower in place and started reassembling everything
-
5 pointsWell I finished the steering wheel mods today. Tomorrow will be reassembly- at least some of it. I raised the steering wheel about 2.5 inches. Might be too much but that's easily fixed if needed. So I decided to support the upper shaft with not one but two bearings. I welded a couple inches of 1 inch steel pipe on both sides of the factory bushing holder. I also placed a needle bearing in the bottom and a regular wheel bearing on top. The bearings are about 4 inches apart, which stiffens the whole column quite a bit. Not sure why the paint buggered up, but it looks good enough. Also added a grease fitting to keep those bearings slicked up. I cut the upper steering shaft and drilled it to accept an extension that was from a Toro Groundsmaster. Then I added the other half of the shaft with about 1.5 inches of separation. That raised the steering wheel the full 2.5 inches above what it was previously. Of course I needed to have a sleeve of some type to make the steering wheel and upper console match up. Luckily I had some aluminum stock left over so I turned a couple down on my lathe and added a setscrew to each. Not perfect, but looks decent. I also replaced the roll pin with a bolt with spacers. I bleeping hate roll pins! The steering is much tighter than it was before with almost no play. What little there is comes from the reduction unit, and it's as snug as I can get it without it binding. Huge improvement!
-
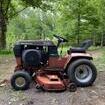
4 pointsits not mine. (But could be!). I know of the guy with the FEL and he want to sell it. It needs a seat. Ok, what’s it worth? A 93 314H, I didn’t see it run, it was out of gas. But, let’s assume it runs. It’s a Kiki way loader and it’s got non leaking lines. I think the lines are original. The muffler is whole! I mean, lets assume its got oil to be changed, fuel lines and an air filter to be changed. Shoot me all the questions and I’ll try to answer them! I mean, I’ll make sure the loader works!
-
4 pointsOk i am going to give you guys a good suggestion about the snowplow skids for Wheel Horse early snowplows. i have used a plow with the bowl cup shoes for fifty years. These will wear on the bottom over time depending on your setting of the snowplow. My dad was a blacksmith and we remade ours. Last time we made a pair together with my brother it took about two and a half hours. 45 minutes to make them and the rest to figure the math for metal volume . We made the sidewalls of the skid bowl 1/4 thick as opposed to original 1/8 inch. You can see wear holes on the original 1/8 inch wall bowl below! Last year I had two sets made for $30 by a blacksmith shop. 1/4 thick again. But my next sets will have a solid bowl with a 3/4 hole for the six inch long 3/4 rod. So support your local blacksmith shop. They need the work and this helps them make something they never made before! The skill to do is valuable and you are preserving some originality! Here is a link to FIND YOUR LOCAL BLACKSMITH FROM THE ABANA -ARTIST BLACKSMITH'S ASSOCIATION OF NORTH AMERICA.: https://abana.org/community/directory/#!directory/map
-
4 pointsThe bear proof bird feeder.
-
4 pointsIf just a cold storage warehouse then pole frame. Stick you need concrete. Gravel is fine for a warehouse. Nice thing about gravel is you can drop the mule's oil right on it, rake it around and walla ... blacktop.
-
4 pointsSo, what do you guys think? $2000-2500?? Im gonna try to get it for less than that.
-
4 pointsDid you try pulling harder?
-
4 pointsThe grease goes out the bottom anyway - there is a blow-out from the OE machining process. I figure the packed shallow grooves help to smear the grease.
-
4 pointsThey are limited to what they can do but come in handy for many tasks. Not a big deal to install and remove.
-
4 pointsI put a winch on the dedicated snow machine. I hurt for 2 days anymore using the manual lift. I do about 3/8 mile of drives.
-
3 pointsAll back together and steering like new
-
3 pointsFinished the fuel system today for testing purposes. New pump lines filter. Starts and runs well at full throttle still a little pop at idle but it is too cold out to spend much time fine tuning,. Ran in all gears Hi/Lo. up and down the drive way (see snow on tires, there are no pics of the test run. Ass't camera person doesn't come out when it is this cold ). Really wondering about the one rear axle it sticks out just over an inch from the hub. The hub is up against the tranny housing just like the other side. Wonder if some PO replaced the axle with a longer one from a 6 spd and if so why???
-
3 pointsI wasn't thinking I have seen those, mostly on heavy equipment, and could see them on 520s with a cab on. Or a 953 steering box.
-
3 pointsAnd the bills were mailed out the following month!!
-
3 pointsNow that the foot rests are on I can set the foot pedal height. I initially screwed the heim joint in all the way on the foot pedal control rod so the pedal is too far forward as shown. Here I am holding the pedal in full reverse and you can see the large gap between the reverse pedal and the foot rest. To adjust the pedal, unbolt the heim joint from the foot pedal and unscrew it a few turns on the rod then bolt it back to the pedal. Then push the pedal to full reverse again. When you have it set right the pedal will almost touch the foot rest but there should be a small gap. This will ensure you have full reverse speed. Once the heim is set in the right place the jamb nut can be tightened on the control rod to lock the heim joint in place. Here is the foot pedal in full reverse showing the slight gap to the foot rest. Here is how the foot pedal sits in neutral now. Tractor overview as of today.
-
3 pointsFoot rest rubber bumpers ready to install. These are just what I happen to have here, not really the ones that were used originally. Foot rest rubber bumpers silicone used as adhesive since the holes in the foot rests are just slightly too big for the bumpers to firmly snap onto. Foot rests ready for rubber bumpers to be installed. I cleaned the footrest and rubber bumper where the silicone is to be applied with contact cleaner so it will bond better. Foot rest rubber bumpers installed. I used a small screwdriver to apply just a thin layer of silicone to the rubber bumper before installing them to the foot rests.
-
3 pointsMight be from when it fell off the overhead and hit the missus car ...
-
3 pointsOk I fixed it. I got it running better than it ever has since I’ve owned it. I can now run it with no choke on, and idle it way down without it surging. I’m not sure any one thing I did fixed it. I think it was a combination of things. First I took apart the original carb and cleaned it. I was able to reuse the original gasket that goes between the halves. Although the next time I take it apart I should probably buy the rebuild kit with a new gasket. Next I cranked it over with the fuel hose still disconnected from the carb. It seemed to not flow very well. Less than the gravity flow through a 1/4” like for sure. So I swapped out the new aftermarket fuel pump back to the original. Then tested it again. It seemed to flow quite a bit better with the original pump. At first when I put it all back together the carb bowl wouldn’t fill. So I popped the top off the carb again and shot some more carb cleaner through the needle valve on the float. I cranked it over and saw fuel filling the bowl so I put it back together. She fired right up and runs good. Now I can focus on my rear wheel spacers and getting chains on it. I guess my lesson here is beware of aftermarket parts. They’re not all the same spec as Onan. Most likely if I had just cleaned the carb and resealed the intake I would have been golden
-
3 pointsPlastic scraper, flat blade screwdriver (being careful to not take the paint off), rags and elbow grease. No cleaning chemicals or even water. This spring I’ll remove the fender and guards and all and it’s get a proper pressure washing.
-
2 pointshappy Birthday @JC 1965, we are glad you were born.
-
2 pointsWhen I ordered my 4 tires they had two different shipping dates, but they all arrived on the same day. My bottom line, I received everything that I ordered and the price ultimately wasn't out of line, but I won't order from them again, I'll get them from somewhere that shows the price up front.
-
2 pointsI did more than that. I stopped playing nice.
-
2 pointsProbably the original got chewed up at the bearing and the PO replaced with the wrong part. There are a bunch of different ones that can (obviously) be made to work. PO may have checked the Toro price and just used what he had instead- once he woke up and got up off the floor...
-
2 pointsyep, a little different then the typical versions. This one i have done in the past, uses a grease-able shoulder bolt for the pivot. I like leaving the hand lever hooked up. I have a fused right ankle and sometimes it is cumbersome to use the foot control. this time I might have to work around stuff then usual.
-
2 pointsI had a special lift arm made for my 953. It broke at the weld. I took it to my welder friend ( Who made it) and he said it looked like the metal chrystalized from the heat. He redid it by TIG welding it and added reinforcement
-
2 pointsOur township mandated septic inspection every few years and septic tanks were to have a manhole installed if there was none. To install a manhole they required it to be designed by an engineer which would have cost plenty. Before the deadline I had a guy doing some excavation work and stump removal, he agreed to place a tree stump next to the manhole site while he quickly did the installation.
-
2 pointsOne should get an estimate of taxes before deciding on type of construction. Figure how many years you will be paying those taxes and how old you will get before the building will no longer be of good use for you. My pole building had no concrete floor and no electricity till after I got the occupancy permit, then those things magically appeared.
-
2 pointsNot too far but I add a zerk to the bottom bearing hole. Really not needed must be the Greasy Pete in me. Out of the 50 tractors @ebinmaine has I've never seen one wallowed out. Not sure if adding it is worth weakening that area.
-
2 pointsIs the lose of bearing surface greater than the advantage of the grease groove? Taken the joint is serviced timely.
-
2 pointsI am pretty much done with the building my own thing, to arthritic and short on time. My last build was a prefab. It was so nice just getting the pad level, wrote a check and viola....I have a building, here are the keys. After looking around found this place in Ohio. Super high quality. They do large custom structures. I got the tongue and groove treated flooring, and it solid. https://alpinestructures.net/index.html
-
2 pointsGravel drive? PVC pipe. Protects the grass too!
-
2 pointsThe steering on my GT-14 FEL I got from @fast88pu a few years ago at the Big Show was skipping teeth and unpredictable I investigated and found the housing support for the steering shaft was broken. I have a parts GT-14 that had a good support on it so I "borrowed" it Top one in picture is broken. Bottom one is the good one. It came off the donor easily but it's a tight fit getting it on the FEL tractor. I found the starter shield on the shroud is in the way. I started to remove it for better access and it won't come off I removed all the bolts I found that held it on and it wiggles but won't pull off
-
2 pointsWell, after a weekend of up and down with a friend's son's truck doing exhaust work I think I can safely say the lift is fixed. And the shop needs insulated.
-
2 pointsThrough ice and sleet and snow. They made it here.
-
2 pointsAgreed. Follow the @SylvanLakeWH rule!!
-
2 pointsActually @JCM I’m not talking about the Kwik-Way, my bad ! Mine is a Wheel Horse loader which I believe is actually made by Ark. I think I only took it off once before realizing it was easier to leave it on and just get more tractors for different attachments!!
-
2 pointsThe only problem I see is the grease has a way to go out, not stay in. I think a radial groove would be better. Maybe with a couple short cuts in the shaft that don't go to the end. My
-
2 pointsThe first few years I had just one tractor to do everything, I could install or remove the loader under a half hour. The front axle and spindles should be upgraded to handle the load, the 520H tractors have what is needed. Also. gear reduction steering will help a lot, the weight really makes it difficult to steer.
-
2 pointsOK thanks that the part number I have also just wasn't sure about it. its like about 5/8 wide I seen on a post someone was using a 1/2 wide belt . id rather not used aftermarket.
-
2 pointsAs promised more pictures. You guys are making me feel bad for wanting parts from this tractor Hope the pictures give a better idea of its condition. Been painted a couple times with a brush. Needs all tires and front wheels. The wiring is not great. Hydro pulley is bent and fan blades broken off. Seat latch is gone. The list goes on. All that being said, I'm still not 100% sold on robbing parts from it. I had limited time while both girls were down for naps so I quickly threw a jump pack on it. It would crank over 1 revolution and stop every time I tried. So I helped it along spinning the pulley by hand. It'll crank now but slowly. That's where I stopped as the + post on the s/g started smoking after only cranking a couple times. As mentioned the wiring is sketchy. I found 2 loose connections in the 10min I played with it. When I get some time to sneak away to the barn again I'll go over the wiring and start there. I definitely think it'll be a runner
-
2 points28 degrees? the heat is in the tools! my shop is 50/60.....that is why not as much gets done!
-
2 pointsFlywheel screen ready to install. Flywheel screen bolts and screws ready to install. Flywheel ready for screen to be installed. Flywheel screen loosely bolted on with the four center bolts. Note the upper right hand center bolt is in line with an outer screen hole. It is critical to line this up right or the outer screw holes will not line up. Flywheel screen loosely bolted on with the four center bolts and the six outer screws. Flywheel screen bolts torqued to 180 in/lb and screws torqued to 22.5 in/lb. Flywheel screen installed.
-
2 pointsSo you basically removed all that paint protector! LOL Amazing how deep that stuff was. And BTW you missed a spot!


This leaderboard is set to New York/GMT-04:00