
Leaderboard


Popular Content
Showing content with the highest reputation on 10/01/2025 in all areas
-
8 pointsBought my loving wife a new 2025 Explorer. We will also be using it for road trips and since it has a hitch it may do some horse hauling some day. It came with 21" wheels and big brakes so it handles and stops well. Her car has the upgraded interior. Lots of cargo room. Third row seats are up in this pic but will likely spend most of their time folded down flat.
-
7 pointsNational Raccoon Day takes place on October 1 every year. It is not limited to just raccoons, it extends to all misunderstood animals classified as pests, such as coyotes, spiders, and snakes. This day encourages people to look more closely at raccoons, not as a nuisance but as an important factor in the ecosystem. Many are even kept as pets, however, these are by sanctuaries and rescuers with profound knowledge about the creatures. They’re not to be kept like other domesticated animals. Read on to find out more about these interesting critters and their history.
-
7 pointsPiece by piece, I'm gradually getting the paint sorted on my GT18. Here are the steps in fixing up one of the foot rests: A fair amount of rust had developed under the rubber mat: I slathered on a thick coat of CitriStrip, wrapped it in a polyethylene sheet, and let it sit for a few hours. About 98% of the paint came right off without any scrubbing or scraping: Here's how it looked after washing off the CitriStrip and removing a few bits of remaining paint: Next, I let the foot rest sit in a phosphoric acid bath for a while, which took care of most of the rust, and then hit any stubborn remaining pockets with my spot blaster. (Note: I don't use phosphoric acid on high-strength or hardened steel, since I want to avoid hydrogen embrittlement.) I applied the initial coat of self-etching primer, which contains zinc phosphate: Then I filled the pits with 3M High-Bond filler and sanded it flat: Here it is after more primer coats: And after a few coats of paint: Now on to the next one.
-
6 pointsModern metal meets man of steel (Wheel Horse).
-
5 pointsNuther good start crabbing yesterday. never know what may come up in a crab trap. The beach crowd thinned out so we decided to walk the 80 miles to Ocean City. 79 mile to go. 20-40 MPH winds today so time to relax. Few more crabbers just rolled in.
-
5 pointsFOUND IT!!
-
4 pointsThey’re not the only erratic things to be found in Maine. 🤪
-
4 pointsI can see BBT hitching up to you, Fred and Barney laughing all the way to the Bedrock Bank!
-
4 pointsThat large space between holes added to the problem, you only need enough space to prevent binding when the terrain causes a great angle between the tractor and the toad.
-
4 pointsM-12 will bolt on but will require re wiring to work on C-100
-
4 pointsUsually do okay on the cheap carbs. Got one of those HIPA carbs and the body / machine work was exceptional. Plastic float was a no go. It was a crap shoot on if it was going to turn off. So I did my turn and returned it. For all the hassle I just should have replaced it like you did with a brass one. I don't throw any carbs away I figure there was a good float floating around.
-
4 pointsI miss Norm's car show photos and rally videos, and his kind words when I needed to hear them a few years ago. Rest in Peace, Norm, we do miss you here.
-
4 points
-
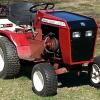
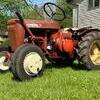
3 pointsThis is a new one on me, neither the tractor or trailer had any problems at all. I didn't even think it was a very heavy load. I was just moving stones. Modern metal maybe?
-
3 pointsDo they taste like chicken? Creamed-Possum-FI.webp
-
3 pointsare still open season if they come round my chickens…
-
3 pointsMaking progress, one stick at a time!
-
3 pointsDitto here on shop pics. Instead of cleaning up my shop for photo ops, I usually just take close-ups or crop out most of the junk in my shop that I haven't had the time (or energy) to 'organize.'
-
3 pointsThis pic kind of makes you feel like your sky diving into a wheel horse plant. (or falling off a ladder) Shop looks good Don, mine always looks way better in pics then in person......I think
-
3 pointsTeach the children correctly. Caution and care. Not fear.
-
3 pointsSince you are replacing all the bearings and seals, you can clean the case and gears with whatever you desire. I used Dawn degreaser and Power wash on the 2 3 spds I did. Then brake cleaner on all the gears to get all the grit out of the teeth. Then a light coat of oil or assembly lube to keep from rusting until the parts arrive. As far as bearing depth, Before disassembly I used a depth gauge on the bearing caps to the outer edge on both transmissions and they were recessed about 1/16th of an inch
-
3 pointsAfter all it has a Wheel Horse sticker on it, that has to be worth a $ 1,000. Everybody knows we are all crazy.
-
3 pointsnORM's picture hangs proudly next to the clock that would annoy him when we were on SKYPE.
-
2 pointsAnyone going? Last big show around here before we all end up hibernating I’ll be there as well as @wallfish, @Docwheelhorse, @Retired Wrencher https://www.zagrayforum.com/app.php/portal?sid=f973adeee5ef25d69d35f8f900f83e9f
-
2 pointsDid the bottom of the hitch pin hit a rock (or something that didn’t want to move) and cause it to bend? It is a long pin and will hang low to snag on stuff. I see that much more likely than just a loaded trailer.
-
2 pointslast two i did were set flush on inside I figured the inside is machined to a tolerance ?? before pic
-
2 pointsThe K 301s on 312's may have a different charging system. I know my 1985 312-8 has a 3 amp. charging system with AC lights. What I see in 1986 electric wiring diagrams the 1986 is the same.
-
2 points
-
2 pointsInstalling a component flush is fairly straightforward. Installing to a depth beyond flush or shy of flush would best be done with a stepped driver...
-
2 pointsUn-molested bearing on my 857 trans.As I know it has never been apart. The bearing edge is about a 1/16" in from the case edge. Same as the 2 transmissions I worked on. Al little closer to the edge is probably better than too far in.
-
2 pointsAs @lynnmor mentioned, a narrower gap in the tongue would have put less bending load on the pin, but you probably already know that. Did the stones happen to slide and hit the back gate of the trailer and cause a sudden jerk on the pin? Here are some hefty ******s that we dug out when we excavated for the new garage foundation (spray can for scale). These, and several other stones of comparable size that we dug out are glacial 'erratics' that were resting on the bedrock (aka, ledge) that we poured the foundation on. Very common here in Maine. BTW, no Wheel Horse was abused in the process of making this pile.
-
2 pointsWell, it looks like a depth of new cap bearings discussion is in order. So be it. To be fair to @TonyToro Jr. , I suggest we start a new topic and not ruin his thread. The cap bearing issue is common to all of the Wheel Horse manual and auto transmissions, and since there seems to be no resourse from Wheel Horse clearifying the issue, it will be up to us and our common since and experience to determine the correct depth of placement of the "Cap Bearing". Gentlemen, let's have the discussion we can all be proud of that effects all of us who have re-built one of these excellent transmissions. Link is here.
-
2 pointsOpsums... which I heard tell feast on ticks.
-
2 points
-
2 pointsIf you remove the two frame support bars outlined in red below there is no need to pull the pump.
-
2 pointsIt's the Engineer Thing - once you get it , the world is your Statistical Playground....
-
2 pointsas mentioned above both should fit any C, 3, 4 or 500 series wh tractor. i prefer the tall chutes for several reasons. 1... more precise at placing the discharged snow where you want it. 2...throws snow further 3...the tall chute rotates via a gear at the bottom of the chute. the short chute rotates via a cable system. the cable can ice up when slushy and slip or simply freeze up. not so with the gear system. i've used both so i know. regards mike
-
2 pointsThat fitment guide was probably written by the same guy that wrote the parts catalog that listed ball joints for a 1997 Bronco II.
-
2 pointsYep I didn’t I just used a rag, and the air hose and a nylon brush for and got it the best I could All new bearings ordered from WH parts and more so now we are at a standstill for now Once we get it running and driving I am going to run it for a hour or so and drain it again.
-
2 pointsTHAT PART'S TRUE!!!
-
2 pointsR.I.P. Norm. God Bless!
-
2 pointsExcellent point. Perhaps the carb is actually “Mama Bear” sized--somewhere between the two specs? Some research yields: Kohler K91: Kohler #16 carburetor, throttle bore 0.810 inches, venturi 0.542 inches Kohler K181: Kohler #26 carburetor, throttle bore 1.07 inches, venturi 0.812 inches Comparing; throttle bores: π*.405^2=0.515 vs. π*.5035^2=0.796 ==> 55% larger -- a big difference venturi: π*.271^2=0.231 vs. π*.406^2=0.518 ==> 124% larger -- wow!
-
2 pointsFor what it's worth - you are always better off to rebuild an OE carb, IF it is indeed not worn out beyond repair.
-
1 pointlooking for a complete 3pt for my GT14. im located in northern Illinois but can cover shipping if need be.
-
1 pointWell, it looks like a depth of new cap bearings discussion is in order. So be it. To be fair to @TonyToro Jr. , I suggest we start a new topic and not ruin his thread. The cap bearing issue is common to all of the Wheel Horse manual and auto transmissions, and since there seems to be no resourse from Wheel Horse clearifying the issue, it will be up to us and our common since and experience to determine the correct depth of placement of the "Cap Bearing". Gentlemen, let's have the discussion we can all be proud of that effects all of us who have re-built one of these excellent transmissions. Link to original thread.
-
1 pointcan’t get much these days for $400. if it runs good you did well.
-
1 pointAll right, I'll start. I believe the cap bearing should be tapped or pressed into the hole in the casting from the outside to a point where the bearing is flush with the outside of the casting. Here is a couple of pictures...Burrly1's #5007 transmissions. The 1st thing to admit...this is a nice look.
-
1 point0642st04 comes up as toro 42” 1985. Pretty sure it will fit anything with a front attach o matic from the early 70’s to the early 00’s. 79350 comes up as 3 series toro 42” 1998. Pretty sure it will work with the same models as the other. hopefully this is correct and helps
-
1 pointLook closely at the choke lever. Half of the imports have the choke lever reversed.
-
1 pointRolled into crab camp at 3PM and moved in for the week. And the relaxing begins.


This leaderboard is set to New York/GMT-04:00