
Leaderboard


Popular Content
Showing content with the highest reputation on 11/26/2024 in all areas
-
8 pointsDear Lord, your servant Jay Paxton will undergo surgery tomorrow. Please guide the surgeon's hands to be steady and effective to do the task at hand, and not create any further damage We pray against any infection or complications. Calm the heart of his family. Lord please allow this temporary trial to bring an end to Jay’s battel with cancer. When he is coming out of surgery, let the side effects be minimal. Work a miracle in this whole situation and bless it from beginning to end. Thank you Lord, we praise you as we know we are in good hands- the very hands of God. In Jesus name, we thank you for each day. Amen.
-
6 pointsShift knob restore. Still Waiting on more odds and ends for my C121 resto. In the meantime I noticed the shift knobs were wrecked no matter how much I scrubbed wire brush chemicals etc they still wouldn’t get clean. I’m too cheap to buy new. Used med grit sandpaper finished with 2500 . Now they are almost like new just need decals . I have too much time on my hands I guess or maybe just need help Shiny new balls !!
-
6 pointsThanks everyone for the kind and much appreciated birthday wishes. My wonderful wife, Krista had these cookies made for my birthday. These are made by her cousin who has a specialty cookie business. I ate one of the big ones (Although I hated to destroy one) and they taste as good as they look.
-
6 pointsI expected it to clean them up a little, but was pleasantly surprised myself. I forgot to mention that the microfiber “sock” that fits over the pad makes a big difference, plus they are machine washable. Long story short, this is the same thing I used on a scratched up tractor hood. It works very well!
-
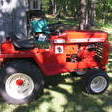
5 pointsOverall view as of today. I can't get too far ahead of myself or I will be done way too fast.
-
4 pointsI think you're in perfect health
-
3 pointsDon’t store your babies next to your buckets! Also, my turkey is all dirty. A good soak in the bath tub will help.
-
3 pointsI’ve been absent again but I’m still picking away. My repowered 12 automatic (18hp Briggs and Stratton vanguard v twin) was running like garbage so I cleaned the carb and fixed a ground kill wire leading to the front coil that I saw the mice had chewed. Took it out to do a load of firewood and it sounded off and had no power. Come to find out I had no spark on the back cylinder. I replaced both wires and then had no spark whatsoever. Confused I dug into the repair manual and surfed the internet. Turns out there are diodes in the coil ground kill wires. Reached out to a friend who has a repair shop and he had a junk engine that had the wire on it. Plugged it in and it’s back up and running on both cylinders. I decided it’s going to be my firewood/ back up plow tractor for the winter. Just need to install a plow on it if one of @WheelHorse_Kid‘s tractors or his brothers 856 fail on us but I don’t see that happening. Also got my fiancé’s little guy and my dog who I’m trying to get more comfortable in the garage out there with me.
-
3 points........ and WE'RE the crowd to know!
-
3 pointsAlright i finally made it back been super busy with work I finally had a moment to do some stuff... so I took all the cables off cleaned everything minor corrosion on those nothing bad made it up to the rectifier the bottom was so corroded to the mounting plate and the center bolt it took me prying it off with 2 screw drivers but with that being said everything is clean now and back together I hit the key and she's now purring like a kitten at a milk pail. Thanks for all the assistance
-
3 pointsHydraulic lift assembly ready to install. Lift arm greased at bushing and never seized at bellcrank mounting area. Right side lift arm bushing installed. Hydraulic lift assembly installed. Hydraulic lift cylinder installed.
-
3 pointsPut the shifter in what feels like neutral. Pull the shifter out and look in the hole. The top of the forks should form a square. If the square looks like 2 offset pieces use a large screw driver or pry bar and move the pieces so the form a square. You may have to rock the tractor back and forth a little to help them move. Report back how it works out.
-
3 pointsI've folded a couple folks clothes for em. Had mine folded tight enough to fit in a single overnight bag too. 1 out of 5 stars, do not recommend.
-
3 pointsOr maybe this one..
-
2 pointsDidn't think they were going to all come down before the snow started to fly this year.The 420 was pulled into the mix this year. It took 10 outings with 3 tractors and 2 broken rakes to get them under control. The 418-A with 42'' SD did the mulching and blowing them into the woods as well. Glad it's over..The raking does keep the upper body strength in check.
-
2 pointsAir horn. 100% needs to become for an air horn.
-
2 pointsI had my left hip replaced 3 weeks ago this last Monday and today I went to walmart shopping for food with no walker, cane or anything. I feel better than I have in years!!! Still taking a few pain meds but way down from two weeks ago. Hang in there, I have had both knees replaced and this was a cake walk!!! You'll be greasing something before you know it!!!! Randy
-
2 pointsThe Cyclone Rake has to be in the top 3 of my yard accessories!! But - theres that "but" - you do need a good sized yard to benefit from it. I'm like clueless, down here in NW La the leaf problem is much less, its the pine straw! I have some 125 pines in my 2+ acres of upkeep and until I got the largest Cyclone it was misery trying to get all that straw, and a good many leaves, up was a nightmare. Like wet leaves, the Cyclone doesnt like wet straw, but dry it will get 90-95% of the straw. Straw of course is needle like and the updraft/vacuum has to be strong. One year I decided to keep track of how many loads I hauled and ended with 22 loads of that finely mulched stuffs huge bag filled!! As mentioned, its a bit pricy, but WOW! what a tool, and, it is an extremely well made piece of machinery, with an extremely nice staff when you have the occasional problem. I'm now on my 22nd year with mine and have had to replace the blower fan (picked up a too biga stick) and the canvas bag finally wore out 3 yrs ago. Down here the leaves dont completely get off till the 1st or 2nd week of January and I go ahead and wait til then to start clean up.
-
2 pointsDipstick and tube ready to install. Dipstick tube installed. Dipstick installed.
-
2 points1. Contact K&B Horse Parts from our vendor section. 2. CALL Lincoln at A to Z Tractor in PA. Also from our vendor section. As our tractors age you'll find that part number resources are no longer as helpful on a regular basis. Another disadvantage to trying to find a particular part number is that it may be designed for a specific year or a specific color when there is a broad availability of other things that could potentially work.
-
2 pointsFender support bracket and fuel tank supports ready to assemble. Fender support bracket and fuel tank supports assembled. Fender support bracket and fuel tank supports installed using liquid teflon on bolt threads.
-
2 points@Greentored That definitely is a keeper. You do not find those every day. Enjoy it and enjoy the ride.
-
2 pointsI would pull that wheel and make sure you don’t have a groove worn into the underside of the spindle. It can be welded up and ground back round.
-
2 pointsWe got the 6 point all processed up, and in the freezer. It’s all seasoned and ready to pull out for a cookout!
-
2 pointsThanks may man, going to have to get me a couple. Enjoy your Thanksgiving, I'm smoking a Turkey and a Big Boston Butt and frying a Turkey. I told my kids and the rest of the group last year I'm getting to old for this its time for you young folk to take over. Obviously they didn't listen, told the wife yesterday we are going to New Orleans next year, they can work it out, she just looked at me with that 47 years married look and said yea right.
-
2 pointsThanks. I went back out and took a picture of the one I have on the right front and it looks larger in diameter then the one shown above.
-
2 pointsThanks! I like this pic better..
-
2 pointsVery nice score !!! A 1045 is still on my bucket list.
-
2 pointsBushings came in. Here they are cleaned and ready to be installed. I used a bit of this to ensure bushings do not move once installed. Bushings pressed in. Ready to be drilled. Bushings drilled. Blocks tapped to 1/4-28 for grease fittings.
-
2 pointsGood thing he wasn’t nosing around Hiram.
-
1 pointAnd they store nicely!
-
1 pointC-161 came with Kohler and Briggs engines, here is the wiring diagram for the Briggs equipped C-161. The kill relay for the magneto ignition is the major difference in the wiring and has NOTHING to do with the start5 function, it just grounds the ignition if the key is turned off or the PTO is on without someone in the seat. This may be what you have been calling a rectifier. Take another picture of the area where the solenoid is located with better lighting so we can make out what you are looking at. Just for your information the voltage regulator on a Briggs is under the engine cover and looks like this.
-
1 pointHappy Birthday, have a great day.
-
1 pointHappy Birthday @cleat!!!
-
1 pointHAPPPPY BIRTHDAY
-
1 point
-
1 pointWith the ignition switch plug disconnected use a volt meter to check for voltage starting at the battery working toward the ignition switch. Check both ends of the large cable from the battery to solenoid. Check for voltage to the fuse holder from the solenoid. Check for voltage coming from the fuse holder to the amp meter. Check for voltage from the amp meter to the start terminal of the ignition switch plug. Let us know what you find.
-
1 pointI’d imagine you’d have to make a hole in the hood to make it fit, even on a Classic series. Those overhead valves make them very tall.
-
1 point
-
1 point3m makes a kit specifically for headlight lens “de-clouding”. A series of finer and finer buffing materials plus paste. Similar mess and similar results in about the same time. I DO recommend some 2” wide painting tape and sturdy paper to mask off everything nearby AND be sure to use eye protection!
-
1 pointDo you wire in a toggle switch or are you saying they are constantly on?
-
1 pointI commend you for using that machine. Even with a LSE, a working tractor is a happy tractor!
-
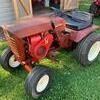
1 pointDay 19 All over the weekend got ALOT done! Getting to the final steps now. Over the week me and @TonyToro mounted fuel tank, ran fuel line and fuel filter, new gas cap, got all four tires mounted onto the tractor and the rear wheel spacers installed. Filled the tractor with oil, painted all the pto rods. Installed the pto mounting bracket by the battery. Got this metallic chrome color spray can from rust oleum at katz ace. That’s what we painted the pto rods with. Also did the air filter cover that too. Added some shims to the steering so it didn’t skip teeth anymore. Put on the rear hitch and ran a new belt on it and I also painted the hydraulic lift valve handle. AndI think that was everything. Trying to get it started for the first time this week!
-
1 pointHow I measure for custom belts.
-
1 pointLooks like the big driven pulley is replaced and do not know the diameter. https://www.partstree.com/models/105-1503-toro-adapter-kit/crank-support-and-pulley-assembly-0/
-
1 pointI've wondered the same thing. I've run it by friends that are technicians. I can't speak for the specific Sciences behind it. Hopefully somebody with a better understanding than me will pipe up. I've had discussions in both directions of yes it's always necessary or no you never need to do it. My thought process is, too many to similar materials for my comfort level are in play so I'm always going to retorque a cylinder head. In the case of a big block Kohler. The block is cast. The head bolts are steel. The cylinder head of course is aluminum. Some serious differences in the rates of expansion and contraction there. I've had the cylinder head off of maybe a dozen engines? I was probably two or three deep into that when I learned that they needed to be rechecked. When I go back and tighten up 10 bolts, one to three of them will move.
-
1 pointYes, do have the battery tested. I would still check and clean all the ground points. Especially the strap between the engine block and the frame and the body of the R-R. And yes, the R-R is behind the battery. Please let us know what you find with the battery test.
-
1 pointLeaf blower I put together
-
1 point
-
1 pointPhew, been a hectic few weeks away from the build bench. Garden projects and holidays took far too much of my hobby time lol. Why is the rum gone? Why is the rum always gone? Lol And my favourite, courtesy of young Frankenstein..... WHAT KNOCKERS! Anyway, back to the build... I've done some primer spraying on the chassis dear readers, but that's about as interesting as watching it dry. So today I started to Nankle (technical term in Yorkshire) with the brake and clutch pedals. The original pre-production models had cast bronze pedal heads. But as it was just after the Second World War II, bronze was in short supply so they changed them to steel. I am copying a pre-production variant so brass it has to be.... The studs cast into the face were a puzzle for me to replicate. So I drilled holes 1mm diameter and soldered brass pins in, which I then filed and polished. This is a pic of the original pedal box...


This leaderboard is set to New York/GMT-04:00