
Leaderboard

Popular Content
Showing content with the highest reputation on 09/04/2024 in all areas
-
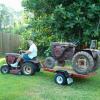
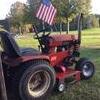
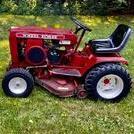
11 pointsSome I have had and some I Owen.
-
9 pointsI have ground down this flat on trannys that did not have it and modified the old style rails to match the new style.
-
6 pointsI've never tried to take those out of an automatic so take this with a grain of salt. Neat little trick that I learned from Lincoln at A to Z Tractor in PA. I have used a 3/4 diameter bolt or threaded rod with a washer sized so that it fits just barely through the center hole. Must be a hair under 1 1/8? If you put a nut, the washer, and another nut. Tighten it all up. You now have a flange on a stick, so to speak. You can get that washer stuck in behind the bearing and use it as a driving point. Works slick.
-
5 pointsAfter a year of unmotivation Break, i found again some motivation to finish my Transit Van. so i started again up in sheet Metal shaping. Built the First part... time to hammer it out in the real shape i adapted and formed it closer to the Form i need. Hammer and Dolly and several tries turns out that Way. i mag solder it in spot by spot Than a first adaption to the final shape And allway’s a checking the gaps... But it occurs that the Frontgrill is uneven. Better i use a lineal to line up the gap... Ok on the lineal it appears even but than.... Aarrrggghhhh what the Heck... it line up with the lineal but when i mount the grill - ooops look at the uneven gap but it was definitiv in the Front Grill, i checked it up with a lineal again - so let‘s see if i can it egalize as close as... better. But there when i line it up more, the right outline become a angle more than it should... ok let‘s see if i can egalize it little more... Close but not perfect but because the most part of it is hidden with the Front Bumper i let it as it is. Lots of more to work on...
-
5 pointsTook a lot of pictures at the show of decals and dash panels. It payed off. Worked on the C series dash plates and got these checked off the list. I did have a little “wood imperfection” on the top one but at least the design works. Next is the 953/1054/Gt14 style plates. These will be used for keyracks / magnets, etc.
-
4 pointsMost guys will discuss the pros and cons of the Onan engines till the cows come home. But to keep these happy, four simple things need to be done. The most important is making sure your rubber grommet around the oil filter that seals it to the cooling tin work is in place. Most every Onan I see is missing this on garden tractors. A very simple $6 part, but HIGHLY important to keeping that rear/right side cylinder cool. Without this little rubber part, you loose 30% of your cooling airflow on that side. And that figure is from Onan themselves and does not take into account the belt guard helping restrict cooling air flow on our Horses. Second thing is to do your valve lash adjustment sooner than the book says. In Onan factory schooling they taught us every 250ish hours vs the 600 in the book was the best practice. Valves being held slightly open is one the huge reasons we see popped valve seats on engines. Add in the missing grommet on the oil filter and we have a perfect storm to overheat the engine and superheat the valve seat=popped seat or thrown rods. Three...keep it clean, when you change the oil, clean up your mess, wipe it all down in there, shine a flashlight in there and look, is the seal under the flywheel seeping, or is the jug oil/grime free and dry? Pulling the left/front side cylinder head tin every spring or every oil change is good practice to check for the same along with rodent nests. And finally, run them at full throttle at all times after starting and till just prior to shutting them down. Onans do not tolerate overheating from extended RPM use like a Kohler can. Just nature of the beast and the design of the engine coming from the generator world. Once she is running, throttle up before driving off, drop back to 1/2 to 3/4 to engage PTO, then right back to full power 3600rpm + or - 50rpm with the PTO engaged. Nothing in the small engine world can match the snarl and power of an Onan B or P series, they just take a bit more upkeep to keep them happy. Mike
-
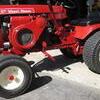
4 pointsThe BBT got her first restoration Pony out for a ride tonight. Swapped batteries from another tractor. Added some oil and gas. Replaced a bolt holding the solenoid we'd added years ago. Then went for a short cruise before we loaded up for Jim's.
-
4 pointsShould make one an air tank for a set of horns 😎
-
4 pointsThis is a common problem on the older transmissions. It's caused by the shift rails allowing it to find two gears the same time. Basically the rails ride in blind holes and suction causes them to lag behind. Careful shifting as mentioned will minimize the issue. Wheel Horse knew of the problem and initially issued a service bulletin stating to switch to 40w oil. This was in hopes the thinner oil would minimize the suction. Very so-so results. In 1965 they came up with a solution. Shift rails with a deeper center (neutral) detent groove along with a longer (3/4" vs 11/16") stop pin. This would not allow the rails to move into a gear unless the other one was in neutral. The left rails are the newer type. Keep in mind that there are two types on the newer style. One as pictured with the grooves machined all the way around and the type with just the center groove ground deeper. Both work the same and since the rails don't rotate it doesn't matter. Note the installation exceptions. In order for this to be effective both rails must be replaced and a 3/4" stop pin installed. The detent balls and springs are the same. At this point they changed their specs back to the heavier gear oil but the 40w had made it's way into some owners manuals and didn't get changed making some people thing that's what should be used. In reality, it really doesn't matter. 40w will work fine but I prefer the 80w90 stuff.
-
4 pointsWelcome to Red Square. Something you can try. Suspect it happens when shifting from 1st or Reverse (one shift rail) to 2nd or 3rd (the other shift rail) or just the opposite. When you come out of one gear pause in Neutral for a count of 5 before shifting to the next gear. The shift pattern is like a sideways H. Say you go from 3rd to Neutral hold it there. Don't let go of the rear shift rail. Pause. Then let go of the rear rail and slide through neutral to pickup the front shift rail R & 1st. Not necessary when shifting R to 1st, 1st to R or 2nd to 3rd, 3rd to 2nd. Let us know what you find and will explain what is happening.
-
3 pointsDid some more work over the start of this week. Monday I got the engine out of the donor tractor. Took some sheet metal off of a spare engine that I’m using for parts for this engine since it didn’t have some of the covers. Sprayed down the engine in degreaser and washed it clean. Sanded down and painted the shroud covers. And hopefully by the end of this week the engine will be in and painted. Also put in the dash board with 2 new used throttle and choke cables since Mr.Kelly had to use these for one of his other tractors and this one didn’t have them hooked up with the predator.
-
3 pointsI believe you are asking for double trouble. The new paint was put on for a reason. Once you go to the trouble of carefully removing the top layer, you will find that you should have gone ahead and removed it all. Paint remover (expensive) or sand blasting is your best method of removing it all.
-
3 pointsI don't think the bearings are the same OD as the ones in a manual transmission. If I recall correctly they are slightly larger. But between a 700-series and 1100, the gearbox (transaxle per the manual) is identical. This rule is broken only on a 520-HC that has a slightly larger input gear on the pump. All others an adapter plate is used to mount the smaller 700 pump, and the return hydraulic lines are plugged.
-
3 pointsI would check all ground connections, with particular attention being paid to the cable from battery to the frame.
-
3 pointsBoth tractors have the tall spindle and I have reinforced both sets.
-
3 pointsSpent some time going through the recently purchased c-101 8 . Drained trans, and a half gallon of water drained out before the gear oil. Went over the k241 and got it running ,needs some maint items one being shaker plate mounts but runs great 👍 Is that the dreaded green paint of a JD I see
-
3 pointsThe Ugly Bruce got a good scrubbin today in preparation for being shown at @JCM Jim's Meet n Greet this weekend.
-
3 pointsBath time!!
-
3 pointsAdded a new seat, grab handles and headlight bezels onto the 418-8.
-
2 pointsyesterday afternoon I went to get a tractor I guess you could call it off Facebook market, and I got there and went to take a look at it and it was a lot smaller than I thought, it is a 1965 toro professional 58 in cut reel mower, it has 2 bat wing reels in the front, it runs ok, carb leaks and needs rebuild and tank has crap in it, but pretty simple, I had it running for a good 2 minutes playing with the choke. its neat looking and I got pictures of the manual because he had the toro dealer book, he only had one horse a suburban that he would not let go of and a few springfeild type toros, he had over 100 tractors in a barn down the road I have not seen them yet but I want to buy a reel mower a push one he has also. but enough of that I'll get a few pics of it and it has a big crack in the hood. its plastic so we can plastic weld it. and the back wheel folds in for a storage mode I guess, I will add pics after I get home I just have 3 now.
-
2 pointsJust grind the ones you have if the forks are good. The grinding does not have to be perfect.
-
2 pointsHad that problem on my 418-c, solved it by buying a fender support from a 520.
-
2 pointsLast few trips to the shop I have been working on the fuel tanks. I have more work to do on them before I can weld up the unwanted holes.
-
2 points
-
2 pointsI like it. I have been waiting to get a wall to display mine. I have pretty much every grille throughout the years to hang up. Just need a good wall for the gt14 and 1054 grilles.
-
2 pointsIt has been a long time coming but we have red. I lost serious interest in this project after a huge paint failure which required total stripping of everything and starting over which after putting a lot of time into body work isn’t fun along with other things put it on the back burner. So now aside on waiting on some miscellaneous parts from toro the only paint work left is the nose of the hood and the hood stand. There is some used parts I need to find like a good rear rim but it’s not a high priority as I have a good set of rims off a 416 that I can use for the time being.
-
2 pointsI had a 400 hour 518-H Eaton 700 hydro tractor where the pump/motor had died from PO abuse. I merged the engine and many other bits of it with a more recent 520-H chassis and the rest has been parted to other uses. The last big piece was the transaxle minus the pump/motor. I’ve torn that down to retrieve the hubs, 8-pinion differential, and axles as potential spares. The diff and axle bearings are all in fine shape--does it make sense to try to extract any of them? How? I’ve also got the gears and brake shaft which look nearly pristine--the brake drum is badly rusted.
-
2 pointsI have two 312-8 tractors with the tall front spindles with 8" wheels and triribs.. The one with the 23 x 10.50 x12 rear tires there isn't any trouble attaching a deck. The other has been raised in the rear with 25 x 900 x 12 putting a deck on it I have to block up the deck to get the deck attached. The deck will need to be releveled on both. Here is a picture of the 312-8 with the 42" deck and 10.50 rear tires. Yes it got a little dry early this year. The other tractor I used for ground work, but I can put a deck on it If it need it.
-
2 pointsThe praying mantis will eat a lot of insects, they are great to have in the garden.
-
2 pointsI was obviously going for the dead leaf on the left but you didn't see that.
-
2 pointsWasn't quite sure what object you wanted us to identify here.
-
2 pointsOlder Fords are like that too. The driver's side of the frame will be super clean/rust free, and the passenger side will rust out. After a bit of research I have determined that it's because the power steering doesn't leak all over the passenger side.
-
2 pointsNOT ME!!! It isn't even close to spring yet.
-
2 pointsIts about time you took a bath.........................................OH...............the Wheel Horses, not you..........................
-
2 pointsThanks Peter I got a few more pics and a few of it in “storage mode” and the mower ID and the engine ID
-
2 pointsI have the axle and spindles here with me. Also was able to compare the ‘96 spindle with a ‘79 spindle that I have and it looks like the only difference is ride height by 1/2 inch. By putting the ‘96 axle and spindles on the ‘78 and using the ‘78 wheels and tires, the front on the tractor will sit 1/2 inch lower. The only other difference I see is the newer spindle uses a cotter pin and the older spindle uses an E-clip to hold the wheel on the spindle. So I think the problem is solved.
-
2 pointsObviously the PO used it as a mixing pan for concrete. This should be a good test for my new needle gun.
-
2 pointsJust one question: Is that 2 hours on the autobahn or 2 hours on a
-
2 pointsThat's easy Cleat. It's the routine maintenance....blade sharpening.
-
2 pointsI put our grass collection system on the 416h and while mowing, the blades kept slowing down for some strange, odd, unknown reason. I contemplated stopping and investigating the cause, but the grass wasn't too high and was mostly weeds so it was very slow, but bearable as my lawn is about 1/2 acre. I mean, I KNOW I didn't over grease the pto FOR SURE this time. I'm positive 😌. I've cleaned and regreased many times! Right? ....hmm. well, on 2nd thought, I HAVE been wrong once or twice before... 🥸
-
2 pointsA much a fan of WH as I am, asking one machine to do everything perfectly is a daunting challenge. As I read your post, and living myself not too far from Middletown, it seems the single most frequent use will be mowing. How complicated is the mown area regarding edges, obstacles, and boundaries? You don’t mention any trees but if you (or your close neighbors) have them, then fall leaf cleanup might be the second most frequent. You don’t mention either, if you prefer to cut-and-leave, bag, mulch, or sweep. These are important factors. Individual snowfalls in this neck of the woods have exceeded 10 inches only a couple of times in the past decade. Last year there was only one significant dump plus a few that were under three inches. Snowfall is trending toward fewer inches of wetter and denser precipitation. A two-stage blower might do better than a single in the right snow, but you don’t mention the amount of area that needs clearing, its accessibility, the surface (paved or not), where to put moved snow, and slope. Very important factors for deciding between blade and blower. My 2¢? A 314-H or 416-H (or an older C-160 with hydro) with a 42” or 48” mower that you like and a dozer blade could do you well and, bonus, can tow stuff around like a trailer. Fill in some of the other info and I’ll be happy to refine my thinking!
-
2 pointsI am officially declaring this rebuild: DONE !!! At least... To the point of full functionality. Known things to do: Add a couple spacers behind front wheels. Paint a few small things. We're going to add a steel reinforcement plate below the seat pan to stiffen it up some. Today I did the fabrication on the air cleaner and also made up a couple lower hood hinge adapter plates. We needed the plates because the hood was about 3/4" too far back... Bent, wrong, who knows? Here's a few pics. On the left is a piece of scrap I started with for both projects. On the right is the top brace seen in the following pics. In this pic you see the above brace, a lower one I made from an old tool box lock bar, and the extension pipe between the carb and air cleaner. That pipe is a piece of 1-1/2" id to od exhaust adapter cut to 5" length. How it sets with hood closed. And here's a shot of the lower hood hinge adapters. I cut the ends of the piece of scrap and drilled out the elongated holes to a round 1/2". Then drilled the holes for the other end with the existing tractor hinge pins to 3/8". Also drilled the hood holes from .46/.48 oblong to round .5 inches. After a fair pile of grinding and fitting they went in... Nice and snug. End result is it moved the hood forward 3/4" and up 1/2" for better engine clearance. I can't thank you all enough for the help you've given us.
-
1 pointHappy Birthday @Mike in NC, we are glad you were born.
-
1 pointFound this nice 1972 cart on Marketplace yesterday. Picked it up this morning. Not that I need another cart, but I couldn't pass it up for $40.00. Even the back end is in decent shape.
-
1 point
-
1 pointAccording to Waze by car. @Tractorhead lives in a rural farming area, though, so licensed tractors on the road are not at all unusual! Only part of the trip is on an autobahn and only parts of those are “open” speed. Waze assumes 120 kph (~75mph?) for the Bahn’s “open” parts and the posted limits on the rest. There are signs along the open sections suggesting “130 ist genug” (130kph is enough). During my invulnerable age, I averaged about 135 from Wien to München with a brief spurt up to 180.
-
1 pointSwitch to solid.
-
1 pointBoy... it sure is a good thing the corporate folk understand what works and what doesn't. 🙄
-
1 pointI'm afraid its a little too late for that, that what my dad does for a living, he works on cars, he owns a automotive shop. so I'm Shure I will be but I will still love my garden tractors.
-
1 point









This leaderboard is set to New York/GMT-04:00