
Leaderboard


Popular Content
Showing content with the highest reputation on 06/03/2024 in all areas
-
10 pointsBush Hog Garden Tractors In 1951, a new device designed to clear pasture and crop residue was being demonstrated to a group of farmers near Selma, Alabama. Witnessing the ease at which the tractor-pulled implement devoured heavy brush, an elderly gentleman wearing worn overalls stepped forward and observed, “That thing eats bushes like a hog!” And the Bush Hog brand was born. When Bush Hog decided to branch out into the lawn and garden tractor field, they had the good fortune to find an excellent manufacturing facility with a trained and highly motivated workforce. Stanley Shaw operated the company until 1962, when, at age 81, he sold the business to Bush Hog. One of the more unusual conditions in the sales agreement was that garden tractor production must remain in Galesburg. Some potential buyers may have seen this as a detriment but Bush Hog realized the value of continuing operations in Galesburg. Shaw industries had been the economic mainstay of Galesburg, KS, since 1905 and employed over half the community’s population. Some mention is made of a Mr. Pond who helped establish Bush Hog production when the sale from Shaw took place. Since Harold Pond had sold the Speedex Company in 1957 and returned to Galesburg it is likely that it was Harold Pond, he would have been about 57 years old at the time, but I couldn’t find any conformation of this. The Model T-63 Bush Hog Garden Tractor was designed, engineered, and produced in short order due to the talented workforce that Shaw had assembled. In keeping with Bush Hogs reputation for rugged quality implements their garden tractor was an all-gear drive unit with an automotive type clutch and ring and pinion rear gearing. Electric start Wisconsin engines were used coupled to a Peerless transmission. The tractor carried a hefty price tag for 1963 at $ 675, you could add a 32” mower deck for $ 90 and optional headlights for $ 20. This 1963 $ 785 package would be about $ 8,000 in 2024 money. Less expensive belt driven variable speed riding tractors were also built utilizing Tecumseh engines and a Peerless variable speed transaxle. Bush Hog garden tractor production ceased in 1972 and no other information could be found on them.
-
10 pointsSitting in my garage with two of my favorites. One is 2 months old….the other “side shot rig” is 36 years old. The one in spectacles is just OLD!
-
9 points69 GT 14 not the best pic but here it is.
-
8 pointsYesterday I came home to find that my son in law had power washed a few of my tractors and put them on display! He brought his C-141 automatic over for a service and decided it needed to be cleaned up, so while he had the power washer out he cleaned up a few more. I have to say not knowing this was going to happen and coming home to see it did put a smile on my face! Since I know you guys like pictures as much as me, here you go.
-
8 pointsSome do not realize the simplicity of K-Series model numbers K91 - Approximately 9 cubic inch displacement 1 cylinder K241 - Approximately 24 cubic inch displacement 1 cylinder K301 - Approximately 30 cubic inch displacement 1 cylinder K321 - Approximately 32 cubic inch displacement 1 cylinder K341 - Approximately 34 cubic inch displacement 1 cylinder K361 - Approximately 36 cubic inch displacement 1 cylinder K482 - Approximately 48 cubic inch displacement 2 cylinders K532 - Approximately 53 cubic inch displacement 2 cylinders K582 - Approximately 58 cubic inch displacement 2 cylinders
-
6 pointsWow, Old Sparky and a New Sparkler...two look a likes. Even the same hair do.
-
6 pointsFinally got her a little dirty today. All my machines earn their keep. Been practicing in the driveway, and there most definitely is a science to this stuff. At least that's true when you want a "finished" result.
-
5 pointsPicked this up super cheap over the weekend. Went through the fuel and cleaned out the ethanol oysters, changed fuel lines and filter. I'm chasing electrical gremlins though. I can't get power to the solenoid to start it. I have to jump the solenoid to start it. The wiring is all cobbled together. Looks like it sat and the mice got in it and then someone tried to rig it up. I'm thinking it might be a bad pto interlock switch. I'll have to keep chasing the gremlins.
-
5 pointsYeah, but according to my wife I'm stuck in 1980 when it comes to pricing.
-
5 pointsSounds like a pretty inflated asking price, to me.
-
5 pointsHigh backs are $80.00 Low backs are $75.00
-
5 pointsThank you all. I may have gotten lucky and ordered the last one available from a-ztractor.com I've got the case split. The Differential is out. The oil was nice and brown, and I've definitely got some cleaning up to do to remove some rust. I've been spending some time this morning watching some rebuild videos on YouTube and reading through the Transmission Manual. I'm glad I did. I had no idea that the shifting forks were held in by ball bearings. I'll make a point to take some photos when I get home and back to work on it to post here.
-
4 pointsYou need to get to the garage and get your lugnuts torqued!
-
4 pointsAmazing what a few Grandkids can do. Cherish every moment, they grow up too fast. Brings back some of my best days about 20 years ago.
-
4 pointsI've been slowly putzing around with this in between more kid's activities that I can keep straight, but finally feel like I'm making some headway. As of this weekend, I am done with all of the sloppy/greasy stuff and I'm only left rusty stuff. I like the rusty stuff, its much easier to fiddle with for an hour or so in the evening without getting all slopped up. Plus, now that I'm done with the greasy parts, I could clean out my parts washer and refill with clean solution. The E-tank has been bubbling away a few parts at a time. I do have some flash rust on a few pieces I pulled out and let sit, but nothing that 3-4mins with a wire brush won't fix before a quick wipe down and primer. I'm hoping to set a day aside here soon and do just that. First off.....I'm assuming this is some homemade bracket and NOT a WH part? I don't see it on any parts diagrams and it looks rather cobbled together. I have no idea where it came from off the tractor. I picked up a blind hole bearing puller set from Amazon and had mixed results. Some came out easy, some did not. The one above was the worst offender. I tried everything I could, but it wouldn't budge. I finally gave up and drilled a hole through the plate on the back side and punched it out. It had a lot of rust on the back side that was holding it tight. I'll just back the hole with some copper and fill it with the MIG welder before I start reassembly. Overall, the side plates cleaned up pretty nice. It bugs me that those bearings seat tight against the side plates. You can see the wear from the inner races spinning against the plate. On reassembly, and if I have the clearance, I may put some thrust washers in there or maybe just relieve some metal with a die grinder to give the replacement bearing inner races come clearance. Slowly collecting some more derusted parts. I still have some work to do on that slot hitch. I fear the pin is frozen solid in the tube. I haven't decided yet, but I may just cut it off with the band saw and weld a new tube on it. The main housing cleaned up nice as well. There is one threaded tab that appears to have broken off, but already has a reasonable repair done to it. Going to leave that alone and move on I did see this wear on the inside of the housing. I guess this is what happens when all of your bearings and bushings wear out and you wait too long to fix it. Everything gets so sloppy, that the main diff gear starts eating into the case. I believe that explains the damage I saw in the rest of the transmission. I'm sure it added a ton of drag and accelerated the wear on the other parts. As you can see, it was easy finding the "thin" spot on the brass bushings. 3/4 of them were worn all the way through to the steel housing Cleaned up some more nuts/bolts/washers since my parts washer is no longer a disgusting mess. I'm not sure where those long bolts belong. They may be part of the mounting linkage for the RM 3261 32" deck that was on the tractor. I have the parts diagram for it, but haven't got that far. Same with this guy. I don't see it on the parts diagram for the tractor, but it looks like a factory made part. I'm assuming its part of the deck, but would gladly listen if anyone recognizes what it is I should be getting a care package in the mail today from Jake that includes all the replacement parts I need, along with new bearings, bushings, gaskets, and seals. It would have been cheaper to buy an already rebuilt transmission, but then I would still have this one sitting on the shelf and I know I would end up rebuilding it at some point anyway. So that's all for now. I have more parts in the E-tank that I can pull out anytime. I'll probably get to that tomorrow, go through the parts that Jake sent me, and then maybe consider some primer and reassembly soon. Then I can move on to the frame and body work.
-
4 pointsNice... A 6 speed swap is a bit easier than an 8 speed swap. @Handy Don did a 6 speed swap on his 854, I did an 8 speed swap on mine. Six speed has the same size input shaft & pulley as a 4 speed the 69" drive belt stays the same; the brake drum & band are the same - no need to fabricate linkage. An 8 speed changes all that. You need to holesaw an opening for the Hi-Lo lever in the sheetmetal.... Bushings - I did several on the last 502.Flanged bushings for the clutch shaft, added a bushing in the upper portion of the lower block, added a bushing to the lower shaft - I do have a machine shop on site here... I undercut a shallow slot into the frame bushings to hold grease... added grease grooves in the steering shaft. Front axle bushings - done those too...
-
3 pointsHi all. Just listening mens 20 Twenty cricket live from New York! It's the world cup so quite a big deal. Apparently USA v Canada was a cracking game to open the tournament. With USA winning a game they should have lost. Anyone considering popping along to any games? Apparently it will challenge one of your national games, erm, rounders is it? Lol
-
3 pointsAgree. I've got some like those pictured and a set with the rotating sockets. Of course, if they are meant for a different use, I will have learned something new. Just had a thought - an orthdonist tool for adjusting braces?
-
3 pointsSquirrel Vasectomy tool?
-
3 pointsI would do as ED Dog said as well as 8ntruck said Cas. I'm betting on the mule and or deck pullies. Take the deck right off. Check the mule pullies and take off the deck belt and check all the spindles and idler. Make sure the idler slides good too.
-
3 pointsI've managed to get most of the Tranny apart. Does anyone have any suggestions on how to remove the plug holding the ball bearings/spring in place? I'm attaching photos (as promised) of where I'm at and the interns who are helping me out on the project.
-
3 pointsWire spring type hose clamp pliers. The notches in the jaws keep the spring clamps from going 'BOING' into some deep dark corner of the vehicle or shop being worked in, never to be seen again.
-
3 pointsHere are my videos if you have not seen them. The 1st is an 8 speed with the 8 pinion differential. The 2nd is an 8 speed with the 10 pinion differential. The hi/low mechanism is the same in both transmissions.
-
3 points@19richie66 Don't forge the bolts , Mr. LUGNUT will complain. Surprised that he doesn't want them mounted.
-
3 pointsOh yeah.....one other thing. Before buying replacement axles, I decided to try and drill these so I could flip and reuse them. If anyone ever had reservations about it, just go ahead and do it. It was very easy. The shafts are not hardened, and it took longer to fixture up the drill press than it did to drill the new holes. Line it up, shoot a little cutting fluid on it, and the bit went right through the axle. If you look at the earlier pics of the axles, I first had to grind off the sloppy welds on the end of the axles. I'm assuming a previous owner attempted to weld the end of the axles to the hubs, but did a pretty crappy job of it. I hit the shafts with some emery cloth and they cleaned up nicely. I really need to get a small metal lathe at some point. It would make all of this stuff a lot easier.
-
3 pointsAnd you still have to rely on that one poor brake friction band to stop - unless your drag you feet, but then you have to say "Yabba-dabba-doo"...
-
3 pointsThe 6-speed’s 10-pinion differential may not handle high speed as well as the 4-pinion in the 3-speed. The 10 pinions “float” within the diff housing where the 4 pinions (and 8-pinions in 8-speeds) are shaft mounted. When traveling fast and dead straight, there probably won’t be any issue, but on curves I’d expect greater internal wear--especially if you have a 5060 with aluminum endplates on the differential. I am intrigued by the idea that with the pulley swapping the low range becomes more like the high range and the high range becomes “rocket."
-
3 pointsLooks like a great time! I couldn't believe how much my father in law changed once my wife and I had kids. The man went from being grumpy and serious about everything to behavior I had never witnessed from a full grown man. Enjoy it!
-
3 pointsNice buy, looks like it will be a winner. I hate those crimp butt connectors but I have seen much worse. 25 amp fuse or fuse holder, Amp meter, Clutch switch or its wiring?
-
3 points
-
2 pointsHa! Ha! Me too!!!!
-
2 pointsI would day offer $500 and go from there.
-
2 pointsMeter is junk. They aren't the best quality to begin with.
-
2 pointsGood Morning! I recently acquired a 310-8 Wheel Horse tractor with a tiller attachment to till some fields in the back yard. This setup was working great until last weekend when the Tractor shifted itself into High gear and wouldn't shift out. I generally do a lot of reading and research before posting anything in forums. I've managed to remove the Unidrive 8 speed Transmission and I've discovered the usual culprit High/low fork is completely broken. I'm not completely sure where I could pickup a replacement. The Serial number (ID Number) listed under the Seat is 2110K806 35097 I'm hoping some of you guru's can help to point me in the right direction. I am having issues removing the input shaft and would also like some advice for that process, as all the videos I've found online for this seem to jump past the process of removing this and I won't want to damage anything. Thank you all in advance, Erik
-
2 pointsEric is correct...drill just enough to get through it. It is a 1/4" hole, try a 1/8" drill 1st. When you finish the trans, plug it with a bit of silicone grease will work also. That sits up against the trans mounting plate, it does not leak if you do not plug it.
-
2 points5 years ago we got a dozen Buff Orpington chicks. Some went to neighbors. We still have 8 hens. Still getting eggs too. Live shot of the backyahd. Silicone will work just fine to reseal. When disassembling... BE VERY AWARE of where those balls go. They are considered mythical in the ability to disappear under the absolute heaviest bench.
-
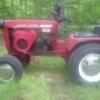
2 pointsThose pics aint' much but any tractor that runs ok, has a deck that works and you can mow with it is worth $700 all day long. IMHO
-
2 pointsApparently your governor isn't adjusted properly, the RPM should not drop very much under load. Check your engine manual for setting up the governor.
-
2 pointsHi temp paint is drying!
-
2 pointsIf it moves, continuity is not the problem. These are suppressed-zero indicators, should go to left peg when off. If it has a rubber plug in the back it may be adjustable, but more likely not. And it's probably swaged together, not really intended to be repaired.
-
2 pointsSeller often have wide vs narrow mixed up. Just order the $16 kit with all the stuff and you will have spare gaskets. BTW you have the green one shown above on your C-160.
-
2 pointsJust don't get any spark and the compression is terrible.
-
2 pointsSpeaking of the RM 3261 deck. I'm still not sure what I want to do with it. At this point, I haven't touched it other than to confirm that all once moving parts on it no longer move. It appears to all be there and in salvageable shape, but even if I cleaned it up and rebuilt it, I would never use it. I don't even think I would ever put it back on the tractor. It might just have to get listed as trade bait for the big show and try offset the purchase of Wally and his tranny rebuild I'm open to thoughts or opinions on what you think I should do with it
-
2 pointsPTO side either a Napa 8796 or 7440 depending on spec # Flywheel side Napa 8677
-
2 pointsGetting ready to sell
-
2 pointsMorning, Countdown to show is on!! Yesterday I got a FB message for an ad of mine that had been up for a year. Gentleman inquired about a 42" plow, weights and chains and would I pull it off the tractor in ad. He made a good $$$ offer and I said sure... Then he shows up and is looking around and asked about a 10 cu ft cart I had and would I sell it. Again we came up with a fair price to both of us and off it went---except that he was going to tow it home behind his Subaru. I asked where he lived and hes less than 2 miles away. I told him Id throw it in my pickup and drop it off. Got to his house and its a nice little ranch he just bought and has a nice rough sawn lumber workshop out back. He then invites me in and shows me the Charger 10 hes working on. Says he owned it then sold it when he moved away then found it wrecked / bought it back when he returned. Long story longer it got a Predator 13 conversion as original motor was too tired / burning lots of oil. I got him some good used parts for the original snow blow and 36" gear drive mow deck. Plus now hes interested in my C120 auto as a pure mowing machine and leaving his Charger as a snow plow, snow blow, yard tow rig. His name is Don and he's in his mid 60s... ex machine shop guy. I told him about here and the show. Plus about redoyourhorse--he wants decals Hopefully he joins... just a super nice guy.
-
2 pointsA hydro for mowing is a great option. No clutch to push and release for direction changes, and you have infinitely adjustable speed. So you can speed up in thin grass and slow down in heavy spots. The Chargers came with Sundstrand hydros. The three I've owned all had the earliest "hydrogear" version, as does my Bronco in the second pic below. So long as they were properly maintained (or possibly left alone), they are excellent. They came from the factory with ATF fluid, and later Wheel Horse released a bulletin allowing the use of 30W motor oil. Personally, I prefer ATF for it's wear and rust preventive qualities. The Chargers did not have hydraulic lift, though it can be added if the valve parts can be found. There should be a dipstick under the rear fender. You may need a wrench to loosen it. It should be clean, with no rust or garbage on it. If the fluid has a red tint, it's ATF. Motor oil will be brown. Either should be clear and clean. If the tractor runs, drive it around for a few minutes. It takes 5-10 minutes to warm up in summer weather. If you have a hill or good incline around, take it up and see if it maintains power throughout the climb. It might whine a little, but should power through to the point of spinning the wheels. It should also have limited slip, so it won't spin much like an 8-pinion. If it weakens climbing (after warming up) it's a worn out hydro. These can be rebuilt, but parts aren't easy to come by. Good luck! I hope it's a great find for you. I love my Bronco and the Charger that I gave my FIL (first pic). They are great machines.
-
2 pointsHelping, giving, sharing and caring etc etc is what makes OUR hobby the best.
-
2 pointsCorrect. 1967, 68, and 69. All 6 speeds had Limited Slip Differential. Post some pics from a couple different angles. I'd bet someone on here can ID that cool piece. Excellent catch on that tractor!!
-
2 pointsGood news, bad news........the graphite rods appear to be working excellent as far as removing rust and crud. The bad news, they are almost completely gone in less than 24hrs. Looks like I'll be going back to lawn mower blades and/or scrap steel. The rods were not "expensive", but I won't be buying more. If you have a cheap supply of graphite, I would say this is the way to go, but I'm not about to drop a bunch of cash on something labeled as sacrificial. I'm going to milk it as long as I can, and then I'll take some pics as I tear it apart to go back to steel.


This leaderboard is set to New York/GMT-04:00