
Leaderboard


Popular Content
Showing content with the highest reputation on 11/17/2023 in all areas
-
10 pointsFitting, cause most of the stuff that ends up in there is crap anyway.
-
7 points@ebinmaine always says, "Use what you have".
-
7 pointsOver the course of the last month or so, I’ve refurbished this old wagon. Made brackets to make the stake sides removable. Next week it goes to its new home with three of my grandchildren. Thanks to @Vinylguy at Redo Your Horse for working with me on the custom vinyl lettering, it came out perfectly.
-
7 pointsGrease fittings installed into brake and clutch pedals.
-
6 pointsUpper steering shaft ready to install. Upper steering shaft inserted into steering block with spacer washers for upper bearing slid onto it. Dash panel ready to install. Back side of dash panel showing upper bearing and low oil pressure warning light (bottom right). Closeup of bearing for upper steering shaft. This is simply a wheel bearing installed after opening up hole so it would fit. Dash panel installed. Washers slid up shaft and cotter pin installed to hold upper steering shaft tight into bearing. Gear lash set at steering block and locked into place with a cotter pin. Completed assembly of upper steering shaft and dash panel.
-
5 pointsWire harness getting ready for install. This is a simple harness modeled after the 520HC with only a low oil pressure light. Also the voltage regulator on the engine is wired directly to the start solenoid again as per 520HC 9 Pin is a somewhat sealed unit that I have on all of my 520's Fuse holders are sealed as well. The purple wire is for the clutch switch. I will finish that once everything is installed to get the proper length and take-off point. This is the 520HC wire diagram that this machine will more or less have. HC wire diagram.pdf
-
5 pointsIf it were turned over so it opened from the top and a flag were added, it would be approved.
-
5 pointsClutch pedal ready to install with retainer, wave washer, pedal itself, shim washer. Clutch rod ready to install. Pedal end of rod with Nylon washer, thin stainless washer and cotter pin. Clutch rod with trunnion, washer, and hairpin clip Clutch pedal and rod installed. Clutch rod and trunnion installed. Clutch spring installed. Clutch pedal, rod, trunnion, and spring overview.
-
5 points....... And I would take that as a compliment.....
-
4 pointsI know, this probaqbly doesn't belong on this forum, but I have to share this simple solution to a common problem. How to get a 5-gallon plastic buck unstuck from a stack of them.... air pressure is the answer: BUCKET STUCK .AVI
-
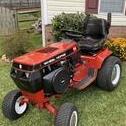
4 pointsWell it’s Front End Friday and I put the C-121 automatic and C-161 8-Speed in my basement for the winter, so I figured I’d snap a few pics.The C-161 automatic to the right has been in hibernation for two years now, she’s all original and in her work clothes!
-
4 pointsThank you all for your friendship. As most of you know I had to give up my tractors and the love of working on them because of my health. I can't do much of anything these days but I still come by to read posts from time to time. I will still be a member here as long as I can read. GOD BLESS all my friends here on red square.
-
4 pointsThis is the way. CALL them using the voice phone of old fashioned days. They'll tell you exactly what you need to do for the proper replacement.
-
4 pointsSo was mine! Funniest thing I ever saw? My dad chasing that gokart when he was "working on it", and it fired up unexpectedly on the 5th pull of the starter, and the governor was set backwards. I swear it ran for 2-3 minutes before flipping over, and he was still mid sentence on the cussing tirade. My uncle built racers for my cousins. My gokart was a dime store special, and it would smoke them all at the racetrack. But because mine had no safety gear, I couldn't race officially. Still funny.
-
4 pointsAlso a big fan of dry storage. Pulled out the snowblower today (it is NY). Check oil, fill tank, open valve, count to 5 (to let the gas fill the bowl), choke on, one pull and it’s running. Tecumseh HH60.
-
4 pointsDidnt watch his video...but I have about 12 generators in storage (its florida), and all but one i setup for longterm. I put seafoam in the tank, not alot of gas..let it run out, as its dying, keep hitting the choke until its dry. Pull the plug and hit it with deep creep about 2 seconds, pull it over a couple times. Drain the oil hot, add fresh. Then let it sit all day in the sun to dry the tank. Takes about 15 minutes to do once it starts running out of fuel. One i put gas in early spring and use it if we get any outages, its on a towable dolly with 15gallons of fuel...and put it away dry over winter.
-
3 pointsI have recently purchased a couple of C165 Wheel Horse tractors. They will be working tractors for a small (just under an acre) vineyard, so will be doing a lot of grass cutting the alleys and also towing a sprayer. Aside from being shown the very basics to get the tractors moving, I don't know anything about them - so hoping to learn a lot from this forum! Both tractors are already in pretty good condition and currently don't have any plans to do any 'renovation', my main interest will be in keeping them well maintained and looked after so that they are reliable for working and last as long as possible. One of the tractors comes with a rotovator/tiller (not sure how much use I will get out of this) and the other comes with a 42" cutting deck. I think one was made in Europe and the other in the US based on the labels. The both look pretty identical aside from the have different back sections (I'm sure there is a technical term for it), one seems to be a bulkier, plastic section. From what I can work out with the model numbers they were manufactured in 1980/81.
-
3 pointsI think you already nailed it. I have some tires with air and fluid both with tubes and no tubes the same. It’s a matter of preference. My nice tires with no tubes and good wheels I am 100% confident in. Something 20+ years old? I’m not so confident they won’t need a tube.
-
3 pointsThen and now folks will get you the correct parts if you call.
-
3 pointsI also am a fan of using tubes..... Easier to seat the bead AND you can fluid fill them without rusting the rims... Do yourself a favor. IF you are buying them from a land afar, inflate them to 5 PSI and let them sit for 3 days. Not all will stay inflated.... BT,DT. Easier to return them that way.
-
3 pointsI would tube them. I’ve never had a puncture that needed a plug in my 24 years of messing with WH’s. I’ve had leaky valves and leaky beads, but never a puncture.
-
3 pointsWhen I got my parts from now and then for my fuel pump I took it apart so I knew exactly what the parts look like that I was ordering.
-
3 pointsPreliminary GT14 gas tank model!
-
3 points
-
3 pointsBelt fits this a way!
-
3 points
-
3 pointsMaybe not USPS approved, but VERY fitting for junk mail!!!!
-
3 pointsMy wife would say "cause he is so cheap!" lol (i am just frugal)
-
3 pointsfirst off i agree with JoeM that us wheelhorse guys know how to get parts as cheap as possible. now two different angles to consider: 1---- recently i have offered a couple guys looking for parts a package deal for smallish money. they could easily take what they want from the package and sell the rest, recouping their costs AND geting the parts they wanted. one guy said "I don't want crap laying around". we all know you pay more piece by piece. 2--- the dollar is worth so little these days. would any of us pay $1000-$1200 for a new big box store riding lawnmower. NOPE!!! but, plenty of folks do because that is cheap money today. and if you think it is bad now wait till the dollar is no longer the world standard for currency.
-
3 pointsAgreed. Personally I think this was the only good thing about them.
-
3 pointsWell deserved trophy Howie! It’s awesome to see you still bringing home the “hardware” for the fine work put into your GTO. The more that I see pictures of your car the more that the color combination grows on me. Maybe one day I will be able to see yours in person…🤔😎 I had the privilege to do a couple of shows this past summer with our three generations of GTO’s (Dad’s, mine, and Caleb’s)…
-
3 pointsI guess this puts a cap on the show season for me!
-
3 pointsI wish bowl drains were a thing still like the old tecs had
-
3 pointsGot some horses down to winterize .
-
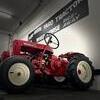
3 pointsFinished up a long overdue in depth servicing / upgrade on my 76 C120. Beyond the basic oil change, gear oil change , I added the heavy duty front spindle kit along with the matching rear wheels ( same as a 520 ) , new front and rear tires ( rears filled ) , new tie rods , replaced rear wheel bolts with studs and nuts , new axle seals , new set screws on the hubs, repainted the front section of the hood ( discolored from the heat ) and added heat reflective material to the inside , removed and sandblasted the original muffler ( usually about every 10 years ) and refinished with high temp paint , went thru the carb and rebuilt the fuel pump that was getting weak , changed out the fuel lines and added a filter , installed some non-corrosive hardware on the battery ( stainless and plastic ) , fixed / welded the all too common C-series steering tower crack at the lift arm , replaced the mule drive pulleys with the desirable early cast iron versions that have the replaceable bearings , replaced the 30 year old drive belt ( old one was still good but did it while I was in there , new clutch disc , replaced the bearings in the PTO , tightened , adjusted , shimmed, and bushed all the linkages and steering , and added LED bulbs up front . This tractor was my first Wheel Horse ( and will be the last one to go when that time comes ) and we restored it back in 1992- 93 . It has plowed snow / dirt with chains on it , hauled everything I needed it to , and has been my everyday grass cutter the whole time. Other than basic service this should get me another 30 years......I wish I had taken pictures of it before it was restored because it was really bad - blown engine, sat outside for years, surface rust on everything , original deck was rotted to pieces, but the price was right....FREE!
-
2 pointsNew to me
-
2 pointsto the Ian. @Sparky is the correct member to help you analyze sparks.
-
2 pointsYou have to disassemble the differential to repair /replace the pawl
-
2 points@Horse Newbie the lengths a dude will go to for some tail once a year… *edit* it kind of reminds me of Thursday morning of the Big Show, rushing to get in before the gates open!
-
2 pointsYou the man.. @steelman. Two great bucks. Congrats, that one looks like a real hog.
-
2 pointsI dunno. My 1975 snowblower and the ’68 Lawn Ranger have been pretty darned faithful start/runners. Granting that I don’t have the same ruggedness or “long heavy duty service” expectations that I would for a K or M, but “horses for courses” right?
-
2 pointsCongratulations on the new tractor. The 310-8 is a great machine!
-
2 pointsThey're all over Ebay. You just have to know what you're looking for. Searching "Kohler screen" returned 3 on the first page. This one is only 15 bucks: Flywheel screen for big block
-
2 pointsAs most of you know, I produce and sell brake linings. When I first started selling them on eBay, First class postage for 6 ounces was around $2.00. Now it's anywhere from $3.99 to $5.00. And what's worse, eBay charges sellers a fee based on the total of the product plus the postage. That's not fair since I have no profit in my postage. But that is a result of sellers trying to beat the system when eBay didn't factor postage into their fee calculations. For example, a seller with a $100 item with $5.00 postage, would charge $1.00 for the item and $104.00 for postage to avoid the fee. Didn't take long for eBay to figure that out. I think that the greed of eBay in their fee structure is the biggest problem causing the increase in parts prices.
-
2 pointsi'm with daveoman. i also paint my spindle housings with POR15. very durable!
-
2 points@ebinmaine one year in early October, I realized that I had a bunch of vacation to use up. I scheduled every other weekend with Friday and Monday off for the rest of the year. Funny thing is that nobody realized I had plenty of 4 day weekends that year.
-
2 pointsIt seems this would effect all spindle housing, verses just the right outer one.
-
2 pointsToday on my way home from work I stopped at the beach by my house at 4:30 and caught this sunset.
-
2 pointsAKA the Quadra-bog....
-
2 pointsI thought it was caused by @squonk eggs.


.thumb.jpg.a8a42e1755628a96c1510467c7dcc521.jpg)


This leaderboard is set to New York/GMT-04:00