
Leaderboard


Popular Content
Showing content with the highest reputation on 07/15/2022 in all areas
-
9 pointsDid my best to make these cast iron weights wheelhorse approved. Who said you couldn't turn a Ford into a wheelhorse? Thanks to vinyl guy!
-
7 pointsWear all the safety equipment; glasses gloves shoes long pants long sleeve shirt Or, follow @Pullstarts lead and keep a first aid kit handy.
-
6 points@The Freightliner Guy Pullstart would advise you to have a large first aid kit , very greasy short pants , and flip flops . A hammer to hit at least 2 fingers , 3/8 drill bit to drill a hole in your body at least once and his daughter to actually do the work..
-
6 pointsI changed the fluids and rubbed Project Hitch down with WD-40
-
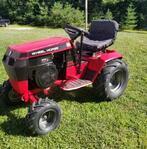
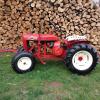
5 pointsMy 701 I had at the show in June.
-
5 pointsI’m here at the Portage, WI show watching it rain… but during last night’s parade ride I spotted a Briggs ZZ engine in the swap meet. I bailed out of line and scored a deal! It has no compression, but I have hopes it just has a stuck valve. I’ll filler’up with oil when we get home, and let it sit a while. That, or maybe even pull the head for inspections. Happy to have an original Lever Steer engine though!
-
4 pointsC-120 lookin at ya !!!!!!
-
4 points
-
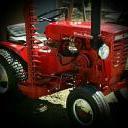
4 pointsThe other lazy 418-A takin in some shade
-
4 pointsAs stated, if the bearing is bad, the seal is the victim, not the problem. At least with the leak, the hub to axle joint got juiced up - makes foe easier hub removal. One setscrew over the key, or two?? If only one, I add a second one at 90 degrees to lock the hub - drill & tap 3/8-16 UNC and use the 5/16" tap drill to "dimple" the shaft for the second one - gives it a place to bite and not raise a burr to allow for removal in the future... Bill
-
4 pointsSo the "stack" you can see in this photo is actually a air snorkel I built. This tractor runs a down and under type exhaust. I'll try and get some photos of that.
-
4 pointsFew Wheel Horse's took a ride up to AW for supper
-
4 pointsA little info on straps, a few years back a group of guys going to a tractor show drove the Pennsylvania Turnpike towing an "open deck" trailer filled with their tractors. Well it turns out the Pennsylvania State Police did not like them using just straps to secure their tractors and made them unhook their trailer on the turnpike and go get chains to secure the tractors! My trailer is a 2004 16 foot bed landscaper's model with a few additions. i found an old boat trailer front post and mounted a winch on it , some pick truck side steps and a mounted swivel crane. I have eyelets mounted on all 4 corners and 6 "D" rings on the bed (mounted to the frame underneath the wood) for hooking chains and straps. Lights are also at each corner so the bed can be lighted. A 500 lbs tractor coming off the trailer and going down the road makes for 1 really bad day. Wild Bill in Richmond VA
-
3 points
-
3 pointsWe’ll after many hours & sourcing many replacement parts . The horse is back running off the OEM umbilical cord as it’s supposed to .I had to solder extensions to all the cut harness wires & reconnect them with solder & heat sink tubing . I reconnected the front & rear lights which were also cut & non-functional. Put in a new control panel with the correct new PTO switch & new key switch. Sanded , primed & painted it with 4 coats . Went with a new round dial hour meter , since the existing rectangular one was broken 😡 I sourced a heavy rubber hole plug for the hole someone sloppily drilled next to the throttle . I even went through the trouble of drilling a hole in the seat mount bracket & installed the reverse key switch & seat safety switch which was missing of course . Replaced the solenoid with a OEM toro one . What a hack job the prior owner did . I learned a valuable lesson from all this , check & recheck everything well when buying used , not all sellers are honest !
-
3 pointsI see no oil anywhere, squirt some everywhere there is moving parts. It ain't like a Mopar where it should be junked at the first sign of trouble.
-
3 pointsHard workin 418-A
-
3 points
-
3 points
-
3 points@kpinnc never had an issue with the satin black gas grille paint on my mufflers , no peeling or paint breaks , maybe a touch up but no peeling , pete
-
3 pointsA little Friday tree trimming.
-
3 pointsLooks like it was slipping for a while. That's basically brake dust from what I can see. If the clutch still engages (audible click when powered on), it may have enough adjustment to get you through the mowing season. Most electric clutches can be tightened or loosened as needed. Just remember that a tiny adjustment goes a long way. Check your manual and see if it has a procedure. Otherwise you may have to dig around online to find a procedure. Most clutches have 3 adjustment bolts on the outside of the bell. I don't see that on yours, so I'm not sure how to adjust that type. One thing to keep in mind- those Command engines can't take the axial load of a manual PTO, which is why they used electric clutches. You have to add a bearing and plate to them to use a manual clutch.
-
3 pointsI replaced those screws with Allen head screws, because it's much easier to get an Allen wrench in there as compared to a screw driver. The ears on those two tabs can be bent to hold the cam in place. The tension on your model is adjusted with the spring on the pivot arm. Early models didn't have than spring, and relied on the tabs for tension.
-
3 pointsIt looks like your nylon slide is not seated in the groove. You should be able to remove it w/o much disassembly.
-
3 pointsNice!! I’m glad I had an extra in my trailer for you!!
-
3 pointsYou need to use the tappets from the ACR cam as well. Different lengths. Also you may need a different cam shim for the endplay.
-
3 pointsto the I don't have a C-125, but my 312 and 417 are 36" wide. Your C-125 should be the same. A mower deck or wheel weights could be wider.
-
3 pointsThank you for those who the took the time to respond. I tried at first to compress the rivet with plyers. It didn't help. I ended up putting the throttle side in the vise and it worked well.
-
3 pointsNow that the wheels are cleaned up, I gotta put another set of tires in it.
-
3 pointsReplaced the stirrups on the 1257HEAVY for a set of running boards. Like having a few more places to set my feet.
-
3 pointsProbably will, I think I'm just gonna get it good mechanically. FYI you were on that thread about the fuel valve, I put one and I think it'll work fine!
-
3 pointsThanks johnnymag3. Here are two photos of the C160 in my neighbor's shed and one after my rehab in 2011. As a note of curiosity, in 2014 when I had a fellow advise me on rebuilding the K341 I told him about my neighbor wanting to landfill the C160 he said anyone who would throw away a Wheel Horse is an idiot! I have mentioned that to my neighbor many times for a good laugh. The other day my neighbor asked me how much money I had in it now and I jokingly said abut $6,000 and worth every penny.
-
3 pointsWhoa, good thing my glasses were on! LoL
-
2 pointsSelling my 520-H. It runs great and everything works as it should. It has 409 hours. Comes with a 48" Deck which cuts quietly.
-
2 pointsI have used this Rust-Oleum High Heat paint for years with good success. Note that it is for temperatures of up to 1200 degrees, they make one for even higher temperatures if you need it. The Rust-Oleum engine paint is only good for 500 or 600 degrees depending on the type.
-
2 pointsHey all thank you everybody for helping me out. it ended up being the blue wire shorted out needed to replace thank you everybody for your Help… up and running Yahoo!!
-
2 pointsmost likely the hub is moving on one or both of the axle's. you need to check and tighten them, but first remove them and replace axle seals. Check to make sure axle bearings are good by checking for up down and front to back play in axles with wheels off the ground.
-
2 pointsThis is what you need, Dave... for exhaust paint... https://www.autozone.com/paint-and-body/high-heat-paint/p/design-engineering-hi-temp-silicone-coating-aerosol-spray-12oz/720885_0_0?cmpid=LIA%3AUS%3AEN%3AAD%3ANL%3A1000000%3AGEN%3A396252405&msclkid=9240114fe2d71e7e0d65739e79d772fb&gclsrc=ds As far as: Me personally... I would screw the salvage muffler idea... and custom make everything.... but that's just nutty me. I would go buy some flanges, and some 1 inch header pipe... run the headers together... buy a reducer like this: Then buy the automotive style muffler of your choice. That's just 1 idea of many... Don
-
2 pointsI found the beginning of your build, but it looks Ike it became part of “what did you do to your Wheelhorse today?” Threads. https://www.wheelhorseforum.com/search/?&q=1257HEAVY&page=1&search_and_or=or&sortby=relevancy
-
2 pointsI'd do truck bed if possible.
-
2 pointsThey actually just emailed me back. Thank you again
-
2 pointsIf you plan to use the tractor with a PTO driven implement then I wouldn't change a thing. If it is going to be a trailer queen you should be able to find a non-functional electric clutch to put on there for show. Lots of us have electric clutches on the shelf that don't work.
-
2 pointsOkay. Thanks for that info Mike. I have the tappets and I have extra shims. As soon as I get the block back from the machine shop, I will play around with it. More to follow...
-
2 pointsFitted better more appropriate wheels. Started fitting chest’s well with tools . Next will build the remaining sliding saw and tool tills.
-
2 pointsFrom Lowell @wheelhorseman! Thank you for hooking me up with the lift cable! I got it put on!
-
2 pointsThis particular one has made a "few" miles of moldings.
-
2 pointsI mean, it gives it character, but I don’t want to “bump” around while riding around
-
2 pointsThose narrow front treads will steer easer then the wide ones. You'll like them better. as we all know you don't like hard work.
-
2 pointsBegin by checking the condition of the terminals in the Nine Pin Connector, the power to your ignition switch and all electrical loads comes through it. Clean and tighten all electrical connections including grounds.
-
2 pointsYou're going to need a tape measure to build anything anyway so take one out to your tractor and estimate how long YOU want them. The pics above give a good idea where to measure to and from. You can make them long out the rear past the trans for supporting a weight box. You can measure the width by measuring at the trans on the flats of the axles where you want to mount it. The more you are familiar with the mounting points on your tractor the better you can build it. You'll be much better off trying to figure some of this stuff out on your own instead of relying on others to provide all of the answers. Your tractor is there and you may see something we don't plus you will learn more on how to figure out what works best for you and best for your tractor. There are so many variables to consider for members to be able to provide correct answers like your skill level, ability, tools you have, tools you don't have, tools you need. We don't know these things except you can't weld. A good idea is to mock one up out of wood so you can see what it looks like on the tractor and hone in on the measurements you want before committing to the steel. Wood is much easier and cheaper to work with and adjust and faster. Then when it's what you want, measure your wood frame parts and make the steel frame. I'm not trying to discourage you from asking questions. That's how we all learn. But by trying to figure out stuff on your own you will learn more and strengthen your abilities. You will find that you'll learn much much more from mistakes than if you're given all the answers and breeze through it perfectly. This applies to most things in life as well. Don't be afraid to make mistakes!!!!!!!!! You can bolt pieces of angle to the top of the frame to make those trans mounts.


This leaderboard is set to New York/GMT-04:00