
Leaderboard

Popular Content
Showing content with the highest reputation on 02/22/2022 in all areas
-
10 pointsI have a Miller AC/DC Thunderbolt ($35 at auction didn't work well...was wired for 440 fixed that works fine). Bought a Miller 140 MIG welder. But I am not good at welding and welding thin sheet metal has not gone well at all. Picked up a massive Miller 33 Spot welder at auction for $15 (came with a Dayton 1HP electric motor that worked. The auction went 10 hours and these were at the end. I used Proxy Bid) Been sitting for a few months the power cord on the welder looked positively dangerous, so I never tried it. Found a manual on line and it became apparent that it had been modified. Originally it had a timer (dial in the rear) so you could replicate your weld more accurately than counting to yourself. it was missing couldn't find a replacement part...Not surprising since it used 4 Vacuum Tubes (anyone remember pulling them out of TVs and testing them on a big tester some where??) Guess this is old machine.... The timer was gone and there was big mercury solenoid installed. Worked on it for a bit and got the wiring replaced. Had it apart on the bench plugged it in and it tried to weld instantly. I had the solenoid lying down, turns out that when you tip a mercury solenoid beyond a certain point it triggers. Not a great idea for tool you might use at an angle. Picked up a 30amp solenoid for $10 probably won't last as long but I don't weld much and for $10... repair by replacement ...better that having it trigger unexpectedly . Got it together this afternoon did a couple test welds on sheet metal. (in one of the pics) Not bad. Have to get used to timing how long you depress the button. (Now I can work on the GT14 hood) The thing weighs a ton note the length of the straight welding arms that came with it....
-
7 pointsNot sure where I got this chart but thought it will be helpful to members.
-
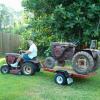
7 points@Docwheelhorse Yesterday we took a ride to get a tractor from Doc! And we took a visit to his wheel horse museum! And we got the tractor to steal the hubs and tires off of it to put on my gokart build.
-
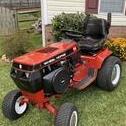
6 points1974 B-80 4-speed. Strong runner. New battery, seat, ignition parts, and tune-up. Stack muffler with rain flapper cap. Has 36' rear-discharge mower deck for extra $$
-
6 pointsThat screen is a good pre-filter and should be replaced with a new one once the tank is thoroughly cleaned. The only way they will block fuel flow is if the tank has accumulated a bunch of crap and removing the screen will allow that junk to get into the fuel system, Nothing wrong with adding a good fuel filter, I have them on mine too. Lowell @wheelhorseman has replacement shut offs with the screen and the grommet to seal them in place. https://wheelhorsepartsandmore.com/product-category/fuel/
-
6 pointsI just fortified my steering column a couple of days ago. It's now part of the frame and well worth the effort
-
5 pointsCouple years ago I bought an antique Lincoln tombstone welder. Here's the thread: It's been a great learning experience. If you want to learn to weld simply to get metal to stay together get a modern machine. If you really want to immerse yourself in the craft, get a vintage stick welder and go to it. There's dozens (hundreds??) of welding videos on YT. I've saved a few I go back and reference. After a year or so of occasional practice I was able to make a bead I'm satisfied with. It's a fascinating skill set to have.
-
5 pointsHad a visit with Lee1977 this evening. We welded up a mod to make a clevis hitch work with the tranny 'bolt on style' reciever hitch. He moved the lift arm to the outside, so it clears the receiver. ...and he let me use his new welder. I haven't stick welded for a while, but it works great! I'm out of practice, but some paint will help make it look better.
-
4 pointsI did a little sanding and put some paint on mine and Kelvin's work.
-
4 pointsBlazing Trousers…
-
4 pointsA little progress report. The crank shaft is out to the machinist to get turned down to .010" under size on the crank pin. I have just about every thing that will fit in the blast cabinet done. With all these nice clean parts I just had to spray a little paint. The starter/gen was pretty noisy so that got opened up for a rebuild. The bearing on the rear of the gen was stuck on the shaft. I don't have a fancy bearing puller so I cut a 3/4" slot in a chunk of iron and tapped a coupled of holes to make my own puller. The commutator was in pretty good shape so it only required a quick clean up with Scotchbrite. Cleaned the grooves out & polished up the shafts. Rotor ready to go. Put it all back together, hooked up some power & gave a test spin. Test turned out good, time to shoot a little paint. This part is done.
-
4 pointsI'm around the age of youngish dirt. And I'm cheap. 😂
-
4 points80 lb. Wheel Weights Rear Wench Lift
-
3 pointsA bear full of beans, you wouldn't want to be in a mile of that area.
-
3 pointsI like beans.
-
3 pointsIDK, I just prefer them black. Beaks things up a little bit. Figure that it was good enough for Delco Remy, it's good enough for me.
-
3 pointsThat's a solid description for many of us!
-
3 pointsThe halogen bulbs won't care DC or AC. The lighting stator puts out around 12 volts more a full throttle less at idle. If you use LED bulbs you will have to look at the specs. Many are DC only...
-
3 pointsYes sir. 100% correct. I learned what I know about engines from old engine guys, I learned welding from some old guys, and... as a side note... not trying to date him... but I wouldn't have found good/affordable tires if not for @ebinmaine... so... no replacement for the older guys or the Wheel Horse family. Don
-
3 pointsBecause we listen to the tips and tricks from the old(er) guy's. RS members or family. Lot of great input from various people. It really helps.
-
3 pointsThe things we young-guns are capable of! You and I are rocking out on Redsquare @Maxwell-8... Don
-
3 pointsChange one thing which leads to another and before you know it you've worked on every square centimeter, or inch if you're so inclined
-
3 pointsActually... nobody should ever like any meat in their can but... that's a whole nother topic entirely.
-
3 pointsSince the steering wheel moved back due to the dash lift, I moved the seat back. moved the seat support under the frame back an drilled new holes in the fender. I will have to gap weld the original holes in the seat pan. It is much more comfortable with my long legs, since the pedals are now further from me.
-
3 pointsCorrecto on the looks empty. The only time you will see those filters full is on a gravity feed system. Soo. It's running good? Ain't Broke. DONT fix it😁
-
3 pointsCondolences Randy.... Hey 'Fish stole my Squonky dig! Mines booked... Looks like @Achto's is too!
-
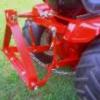
3 pointsThe welder is a "Prime Weld CT520D" Inverter welder, will work on either 120 or 220. Wish I had had it 40 years ago when I could still see to weld. That's a clevis hitch from Lowell at Wheelhorse Parts and More. Lowell or who ever welded that lift bar on did a good job, I spent about two hours getting it off in one piece.
-
3 pointsTwo heads… missing.
-
3 points
-
3 pointsToday, I had time to turn out a new axle pivot pin, with a heavier mounting tab that I pressed and welded on to it. The two 3/4" holes for locating the axle pin, that are in the cross member and the front hitch plate weren't worn hardly at all, very pleased about that. I had to clearance notch the triangle shaped 520 pitman arm in order to be able to install/remove the new pivot pin. Pretty excited to test fit the NOS 520 swept front axle beam Thanks again Bill
-
3 pointsat last......The energy crisis is over. We have a fuel free internal combustion engine.
-
3 pointsWas a nice day today. After my doctor's appointment I decided it was a good day to wake up the 1075. It hasn't been startered and driven all winter. Poured some gas in it, primed the fuel pump, choked it, turned the key and it fired right up. Had to put a little air in the front tires, I will look to replace them this spring. Really like this tractor. Short Frame, Big Block, Tall Stack, Custom Decals, Baby Moons, Wheel-A-Matic !!!
-
2 pointsIf ya can't clamp them, clamps not big enough, etc... you can nut and bolt every other hole with some 8 or 10 hardware, even self drilling sheet metal screws work, then weld the open holes, remove the hardware and then weld those holes. Done this myself a few times and it worked pretty good. I used less than 8mm holes though, as I recall, 1/8"
-
2 pointsJust don't count them
-
2 pointsIn RS speak that means bean counters....scourge of the earth...
-
2 pointsWhat is it with you and black S/Gs ..... starting to rub off...... and why is it your at pumpkin farmers .. your garage impassable or just warmer over ther????
-
2 points@Mustang67ford when you pullout that bolt for an engine to frame ground point , use a serrated washer for secure metal bite , dielectric grease , bolt this on top to have a go to on ignition and headlight , ground wire https://www.amazon.com/Gardner-Bender-GTA-2N-Aluminum-Mechanical/dp/B000MVOX9G/ref=sr_1_8?keywords=Electrical+Lugs&qid=1645576436&sr=8-8 . electrical section in h/w stores have the bolt size lug you want . ground cable from battery ground bolt point , bolted to this corner engine mount area , is easy and really insures your grounding is solid . used 4 ga cable , on first lead , then , 10- 12 ga wire from engine corner to rectifier base bolts , from there to headlight grounding . solid operation on my 3 horses , this set up works , pete
-
2 pointsNo, but I’d love to!
-
2 pointsALL bolts have a torque rating. 3/8 course bolt Grade 5 should be around 30, 35 ft lb.
-
2 pointsDon't know what it weighs i'm guessing somewhere in the neighbourhood of 15-20kg (35-45 lbs) And yes it is completely made of steel.
-
2 pointsWhat haven't I touched. haha Just remembered I will have to lengthen the shiftersticks and brakerod because I moved the tranny back as well.
-
2 pointsMake sure you pack plenty of tools this time!
-
2 pointsThis model should have a 2-wire regulator
-
2 points
-
2 points
-
2 pointsI have it on good authority an Onan will not run on fumes. If it's running fine it's getting copious quantities of gas. Accept the fact that you've fixed it and it's running fine. Take the win and celebrate.
-
2 pointsHere’s a special one to me. My Dad’s 78 C-161 after it sat in his basement for 8 years. And then a few days later after spit and polish, a battery, tune up, fluids, painted wheels, etc. And how it looks today:
-
2 pointsCouple of hats, couple of 65 Wheel- A - Matics, a 500 Special and an 857
-
2 pointsWrong day, but back on track
-
2 pointsWell update time ,new battery fitted an new fuel ,and to my surprise soon as the fuel got to the carb ,it started first time and l never had to clean the points etc ,not bad after 6 years of sitting . wes






.thumb.jpeg.8bdd6995142db7fbcf4df2d7b452df33.jpeg)
(800x673).jpg.cc3aefcd170c6bab1f22408014a1eb53.thumb.jpg.37c62115dec7a1fc65b8e86afd6af643.jpg)
This leaderboard is set to New York/GMT-04:00