Leaderboard
-
in all areas
- All areas
- Markers
- Marker Comments
- Marker Reviews
- Articles
- Article Comments
- Article Reviews
- Classfieds
- Classified Comments
- Classified Reviews
- Wiki's
- Wiki Comments
- Wiki Reviews
- Blog Entries
- Blog Comments
- Images
- Image Comments
- Image Reviews
- Albums
- Album Comments
- Album Reviews
- Files
- File Comments
- File Reviews
- Posts
-
Custom Date
-
All time
November 28 2011 - November 29 2025
-
Year
November 29 2024 - November 29 2025
-
Month
October 29 2025 - November 29 2025
-
Week
November 22 2025 - November 29 2025
-
Today
November 29 2025
-
Custom Date
05/25/2021 - 05/25/2021
-
All time
Popular Content
Showing content with the highest reputation on 05/25/2021 in all areas
-
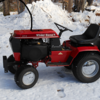
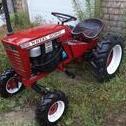
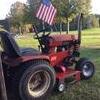
10 pointsFinally got the 89 310-8 with 42'' SD deck out for its first mowing today. Impressed by its mowing ability. Some before and after pictures. Hood and rear fender were swapped out that were acquired here on RS and some painting here and there. Installed an 1 1/8'' rear end and refurb to make it a little more presentable working WH tractor.
-
10 pointsMy son decided to take on his own project. He said he wants to get it running all by himself. I’m amazed at what he has done so far by himself. He might have learned a thing or two. He was out there talking to himself saying...WheelHorse makes it Kohler shakes it! 😂
-
8 points
-
8 pointsOh, and if anyone is sceptical about my calculations, they were checked by my very loyal friend... she's an expert with tangents...
-
7 pointsJust a Kodak moment here. But every once in awhile my phone freaks out and does this.... Really freaky thing is most often with B' hoods.... Silvia we have a problem... I lost count of how many B'hoods I have.....
-
7 points
-
7 points@WHX24 @Achto Here are pics of the side walls The larger lug opening goes inward. I also took the liberty of labeling them so you guys would know who gets what tire!
-
7 pointsSpent the morning with @squonk today and we did a little " Horse Trading" He came by my house and fixed a leaky carburetor and installed a new muffler on my 1075. In return for his labor I got him some NOS 6x12 tires. @Squonk is a great guy, was really nice of him to help me out. I am really pleased with the results. Thanks again Mike. The 1075 now has a new look. Big Block, Short Frame, Tall Stack !! After you left Mike I remembered I had some high heat muffler paint left over from my 416-8 project so I went and painted the muffler.
-
6 pointsFollowing on from my recent 518H power steering and swept front axle conversion (see earlier thread), I noticed that the front tyres were leaving very bad marks in the lawn on turns. Looking at the wheels during a turn showed that one was turning in too much and was effectively being pushed sideways...... and was scarring the lawn as a result. When I looked closer at the steering geometry, I found the there was no appreciable Akermann angle in the steering arm. Apologies if you understand Akermann's patent, but if not, here's a quick description: Clearly, when turning, the outer front wheel has to describe a larger circle than the inner wheel or one or both will skid (thus marking the lawn). See wikipedia for the full details: https://en.wikipedia.org/wiki/Ackermann_steering_geometry I have cloned the next two images from the above article (hope that's ok): and you can see how the system works, This arrangement is made possible by positioning the track rod ends such that lines drawn through the kingpin and track rod end on each side, intersect on the centre of the rear axle when driving straight, like this: To my surprise, the steering arms on my swept axle are near parallel and so were presumably the cause of the problem. When I look at my C175, I think it is similar (ie also 'wrong') but I haven't done any accurate measurements so the jury is still out on the earlier WH models. I did a quick geometry check to prove my point.The red wire in the picture crosses the centre of the rear axle and should intersect with the kingpin and the track rod end...and it clearly doesn't. I have to say that I am very surprised that Wheel Horse did not apparently incorporate this. Here's the geometry: 630mm being the distance between the kingpins and 1220mm being the wheel base (sorry for metric units). These are approximate measurements done with an uncalibrated tape measure waved in the general region of interest.....14.5 degrees being the required kingpin to track rod end angle. I didn't want to cut my steering arms and reweld, so designed a triangular bracket (one for each side) to achieve the same effect. 26mm being the required reduction in the track control rod length on both sides. Note the 12mm holes are to fit my power steering modified tractor. If you want to do the same mod, drill smaller holes as they are not as big on the original machime! My brackets ended up being a slightly different shape to better align with the sloping sides of the steering arms, but the positioning of the holes didn't change: I have only cut the lawn once since the modification but the difference appears to be dramatic, with almost no scarring (still occurs if I use full lock at speed, but that is hardly fair!). Has anyone else experienced this?
-
6 pointsOh boy oh boy. I now have front wheel weights/dual wheel adapters and an extra set of wheels for Hiram.
-
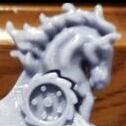
6 pointsOK, so the rust finish tuned out waayyy beyond my expectations. I'm so happy with it that I'm going to make you scroll down to see the picture, just for dramatic effect. I plan on using a matte clear over this hood ornament yet to preserve the finish. I will post a picture of that tomorrow. If any one is interested in this type of finish and would like to know what I used, here is the product. If you are using it on plastic they recommend using a primer designed to be used on plastic first. This is the primer that I used before I started applying their product. FYI - This same company makes kits to achieve a copper patina (green) and a bronze patina (blue). I think that either of these colors would look awesome on one of 3D's wall mount creations.
-
5 pointsThe Blackhood Police are on it… confiscation of that phone camera is first… blasphemous colorization … I feel a haiku coming on… @WHX24 has a bad phone It turns ‘s green the horror Haiku on it
-
5 pointsI can't even get my BBT on the one single hydro I have so I probably don't need two... That little woman is a gear jammer right straight down to the core.
-
5 pointsUncle Jim. We got NO black hoods out here at all so you could send us a 125-8 or a 165-8 if it would make you feel better.
-
5 pointsDone with the experimental pvc wear bar. Used old very worn metal bar as sandwich brace with plow blade… Will run some tests and see how she wears before the snow flies…
-
5 pointsAlong with the arrival of spring, we also get the arrival of swallows. It's nice to see them as they fly about, soaring and diving as they catch insects on their wings. Something else they are doing, is looking for somewhere to build their nests. Which is fine by me, but NOT in my workshop. The last few days if the doors were open, they've been flying in and out. Now I don't want swallow nests, or any bird nests in the workshop. One is the mess they make and the other is when the doors are shut, they can't get in or out. SWMBO had some net curtain material that was surplus to her requirements. She's kindly donated it for a good cause. An anti swallow deterrent across the door way.
-
5 pointsI’m down south. We left yesterday morning, made it to Tifton, GA. Ran to Okeechobee, FL and grabbed our camper that was destined to be a rental, but our toy hauler was delayed until August or more. In the driveway at my house on Friday, Norman’s PLASTIC clutch pedal broke. I borrowed Grandpa’s ‘13 Duramax. It’s been deleted and gets pretty awesome mileage and top that off with a bed transfer tank for another 20 gallons... we made great time. After picking the camper up, we ran up the road to Yee Haw Junction (an actual place!) and did a grease job in the 90 degree sun in the back of the Pilot fuel stop. The hubs came apart and I packed the bearings manually (slap, slap). The left front wheel was about 1/8” slop instead of a quarter turn slop. I’m glad I checked them! An hour down the road, I saw rubber flying. We had our first camper blowout. We found a shop a couple miles away that had a set of replacement tires and rather than opting to replace just the blown one, we went with four new and put the spare back. We’re back in Tifton for the night and are heading to our eye doctor in Hendersonville, TN tomorrow then home! Look out @The Tuul Crib, I hear tell town’s open and they might not be ready for this show!
-
4 pointsCouple a calendar shots there Plunge Some lube advice for Max @peter lena ? My gut hurts Sylvia...
-
4 points
-
4 pointsHere is one that came with my !977 C-120. I bought the C-120 new in April 1977.
-
4 pointsGot me a sticker pack of the flebay as I don't know if @Vinylguy ships to belgium? Anyway, It was cheap. Now that they arrived they look old. Would this be something WH made?
-
4 points
-
3 pointsWhat you are missing is that your yellow tie rod is actually two pieces connected to the triangle in the center. As the triangle turns the effective length of the two tie rods changes. I did a quick check on a 520H and found that the inner tire turns 43 degrees while the outer turns only 31 degrees. I didn't do the math, but Ackermann is alive and well.
-
3 pointsYou want to balance the tractor. Too much weight on the front will take away from rear traction.To stay with in a weight class, front weights can be moved further out in front of the tractor. Too much weight on the rear will cause the front end to come up. Yes this transfers the weight to the rear tires but, when the front end goes up the hitch goes down causing a lose of up pull on the front of the stone boat. This creates a disadvantage. If you can get your tractor balanced so that the front wheels are just tickling the ground most of the time, this would be a perfect set up. It will take some experimenting, don't expect to get it perfect the first time.
-
3 points
-
3 pointsMods clean up in aisle 3 Sorry Don @Snoopy11 No links to off site ads. Forum rules. We don't want to turn RS into a free for all selling site like CL. Posts or links to other sales are prohibited - site suggestions, updates, issues - RedSquare Wheel Horse Forum You can however off said ad!
-
3 pointsYears ago I moved into a house where the PO had left behind a metal lathe in the basement. At the time (and for many years after) I had zero interest in metalworking, so I gave it to a friend. No regrets, but there are days I've thought it'd be neat to have a lathe now!
-
3 pointsSpent the afternoon stripping cleaning and refitting the carb on my new Honda wheeled strimmer. Still not running right but I'm sure its just a carb issue. The gasket placement is pretty critical and very fiddly. I will make some headless studs to make it a bit easier. Its the same engine as on my mower which runs fine so I can compare the two set ups to make sure the PO hadnt fitted things wrong. Mick
-
3 points
-
3 pointsI was just curious Terry. I wasn't even 100% certain I got the bottom two from you but you're my only decal resource.
-
3 points
-
3 points@pullstart What an adventure! Makes my past weekend look like a trip to the mailbox! Attached pic for reference...even if Denali and I went all Calvin and Hobbes .....not much goin on there!
-
3 points
-
3 pointsUHMW plastic (Ultra High Molecular Weight polyethylene) might work fairly well ? Snowmobile ski skins / skis are made of the stuff and wear well
-
3 pointsThat's cool and all but nowadays some houses even have electricity to power lights and such.
-
3 pointsGood day for the horses, in between running hvac calls, (I was on call this weekend) I spread some fresh millings around the horse stable. Even had time to take the kids for a spin! Great weekend!!
-
2 points
-
2 pointsNo problem big guy ... I just think it's best if we all just help out and police ourselves.
-
2 pointsThis is odd....I have never seen a mule drive vibrate loose, but it must be happening. If the belt were continually stretching, the mule drive screw would quickly be out of tightening range. Take the screw assembly apart and add a lock nut to the screw.
-
2 pointsAnd the ID of the adaptor fit around the raised center of the WH hub. And you could even scribe the bolt circle onto the adaptor while it was on the lathe. Right tools and good thinking. Nice. And thanks!
-
2 pointsThe only reason to run it at 1/4 or less throttle is to let it cool down after using it awhile on a hot day for 10 or 20 seconds before you shut it off. So the slight random miss is kind of a moot point.
-
2 points
-
2 pointsThat means drilling holes in 60 year old sheet metal ......
-
2 points@Dennis C., you never mentioned trying a cleaning agent like SEAFOAM , similar problems solved with the nozzle extension into a running engine , backed up with a hand covering carb under speed , forcefully sucking and cleaning its way thru , has done it for me . also agree with others on the carb rebuild , not knowing its past . add , STA-BIL gas treatment with your gas , never an issue , pete
-
2 pointsWow! Take two people to operate but that should do a super fine job! Try as I may, nothing I have will do what that will do no matter how many passes I make.
-
2 pointsI run Rotella Straight 30 all year long in 6 tractors. And Mobil 1 10/40 in my C-160 Hydro
-
2 points@squonk I hope you are talking $100.00 and no some fool's name for neter regions.
-
2 points
-
2 pointsRylee and I completed our 6k this morning. Most children in third world countries travel on average 6 kilometers just for dirty water. Many don’t survive past 5 years old, due to parasites and disease in the water source. For each person who crossed a World Vision finish line today, one less child needs to search for that dirty water. My legs, my knees, my feet... the pain will be short lived. The little kids on our backs, I’m sure they appreciate the effort!
-
2 pointsI hate to be the bearer of bad news, but you got green stuff growing in your garage...


