
Leaderboard


Popular Content
Showing content with the highest reputation on 02/26/2019 in all areas
-
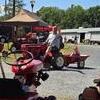
6 pointsMore Flywheelers pics from my better camera the Nikon!
-
5 pointsJust want to say thanks to Tony @Docwheelhorse ...Tony is my next door neighbor as some of you know...and he got my generator dragged outa my basement and hooked and running for my wife (and two cats ) while Im away on a business trip. I haven’t used my generator in over a year and sure enough I fly to Virginia and the power goes out for like 20 plus hours the day I leave.
-
5 pointsNot my video but a good summary of the show. Enjoy.👍
-
5 pointsI know this is a little different Eric but this is the setup on Claudia’s Case 224... this is a M16 motor on a rubber mounted plate. The bracket has a piece of flat steel welded to the bottom side and the bracket welded to that. The bottom of the bracket has a hole drilled through it with a 1/4” bolt, nut, and star washer. That is connected to the plate that the engine is solid mounted to. We installed it that way in 2003 and it is still going strong. Dad’s 875 has had a stack on it without brace since 1979 and it is still solid. (About the time of the install!) Anything mechanical can fail at any time. However, I think what you have will work just fine.
-
4 pointsnew to me. I have asked questions just never posted pics. Picked this up in Macugie Pa from it's original owner. It came with a 42 rear discharge deck, 48" plow and chains. This is how it came very clean. Alway's kept in heated garage at a car wash. Think I got a deal, paid $750. It was 400 hundred m,iles from home, but well worth the trip.
-
4 pointsSome pictures..... just don’t ever get old.
-
4 pointsMeasure yours and then take a look here, should work well. https://www.buyersproducts.com/product/easy-grip-rubber-hood-catch-870
-
4 pointsThe online parts lists can be confusing because some of them are shared between tractor models but fail to state what models use what. 103990 is for battery ignition with the ignition terminal identified with an I 103991 is for magneto ignition with the ignition terminal identified with an M Click on the picture Garry
-
4 pointsArrived home in Greencastle, Indiana at 9:00 pm. End of a 2500 mile trip to Florida Flywheelers.
-
4 pointsAfter taking a look at the ammeter, it happened to be a loose wire! Connected it and she fired right up! Replaced the fuses on the 310 and it fired up as well. All is good in kody-bobs wheel horse world. Also added my grandfather's 1951 Ford 8n that he bought new in 1952 to the heard.
-
3 pointsThe C160 I have didn't come with the 2 piece seat so I purchased one from Northern tool. It does look good and is comfortable BUT I wanted an original looking seat. So after making the seats for the lawn ranger and 1054/953 I've decided to give it a try. I did buy a seat that I could make patterns from and I can get very close to original. But with the c160 seat there's a big problem trying to duplicate them , they have designs in the back and the seat. Lines in the seat and the back and the back also has the wheelhorse emblem. I've been working on it since October 2018 and as the weather get better I can get in my garage to make a heated frame to make the designs in the seat and back. I had a die made for the Wheelhorse emblem. But this is the biggest problem I've run into. The back has a 1/6" steel plate that it's glued to and the seat has a 1/32 galvanized plate that it's glued to. I can't make these because it's not cost effective to try to reproduce it. So I can't charge what it would cost me to make a complete set. There for I may make the replacement seat and back that can be installed by the owner if they have the old steel back and seat. Maybe I'll make a video on how to install the new seat and back. Here is a few pictures to show some of the progress I've made. It will still be some time before I get a set completed and ready to install.but I hope to have them at the Big Show this year. Hopefully they'll look like the last picture when I'm done . Ps the last picture was borrowed and it's not mine. Yet
-
3 pointsYes Sarge after our talk I didn't think I wanted to take on this project. And I'm still in the process of figuring out how to make a frame to put on my heat press. This project will be a lot more work and I will have to weld a frame for the lines. I will keep everyone up to date as I make progress.
-
3 pointsHere's the way I figure it. This is what it comes right down to. I've basically got two possibilities here. 1, it will stay where it is and be perfectly fine. 2, it will break. I'll slap the stuff on there as tight as I can and keep an eye on it.
-
3 pointsToro's feeble attempt to get into the riding mower market. I saw one last year, and it definitely could NOT be called a 'garden tractor'. Probably part of the reason Toro realized they needed to buy Wheel Horse. Jim
-
3 pointsStopped at NorthGeorgia Tire and Alignment to deliver Clay Brooks s mower deck! I had not been to his families business in ten years! Looks the same! It was very good to visit with my friend Clay for a few minutes!
-
2 pointsthis Toro came up for sale near by. what is it? "Vintage Toro riding mower everything seems to be there except for the deck motor still turns over "
-
2 pointsA friend cut one out for me!
-
2 pointsYou won't get them at Napa
-
2 pointsConfirm first, that your bronze axle bearings aren't worn excessively...otherwise you'll just be throwing your money away installing them new axle seals.
-
2 pointsWelcome to Red Square. The seals are available from TORO...#83-2840 . Grab a chair, they are about $23 apiece...but worth it for that horse.
-
2 points
-
2 pointsLived in my house since 88 The power at my house had been off for a grand total of about 7 hrs during that time. 1 hr. was when I put in a new service and 5 was when a drunk knocked down a pole. When Sandy went through my lights blinked once. I have a Genny for a horse that I have to keep dusting cause Hey you never know!
-
2 pointsI don't have a problem with a bit of custom work on a 953, heck I've got one with a seat like that Simplicity seat (mine came from Tractor Supply) and it is very comfortable. I bet Terry @Vinylguy has a sticker big enough to cover that up.
-
2 points@Docwheelhorse Tony, well done sir.
-
2 pointsthe one i have was and it looks just like that one
-
2 pointsYou realize you can replace the terminals inside the plastic connector? Click on the picture. Garry
-
2 pointsI'll be laser cutting some. Just let me know what size everyone wants. Can make them any size
-
2 pointsJim, if you aren't planning on using Ag. tires you could use Light Truck mud and snow tires. One of my 953s has a pair of LT 235/75-15 tires. They fill the wheel well but don't scrub it.
-
2 pointsToo bad you did not have the serial number. The welded battery tray was part of the tractor frame in 1963 so they may have used up their 1963 frame inventory before going to the 1964 frames with bolt-on tray. They even used what was left of the 1962-63 A-xxxxx attachment serial numbers for the tractor serial numbers. Garry
-
2 pointsRAYP, recently did a similar switch swap and harness, as gwest has shown , one switch is for , points ignition, one switch is for mag ignition, that simplifies it . I also added a new wire harness with specific 5 point plug in https://www.amazon.com/HD-Switch-Replacement-Starter-Ignition/dp/B07DGQYDKR/ref=sr_1_7?hvadid=318642588944&hvdev=c&hvlocphy=9003291&hvnetw=g&hvpos=1o1&hvqmt=b&hvrand=12328943754702431369&hvtargid=kwd-29079129044&keywords=wheel+horse+ignition+switch&qid=1551186449&s=gateway&sr=8-7&tag=googhydr-20. for the cost involved about 22 $ , you can replace the problem and upgrade at the same time. good luck with it, pete
-
2 pointsSome of us used that glow on snowblowers to see!
-
2 pointsOld thread, but I’m glad to have read it! Just another fine specimen from Denny!
-
2 pointsGlad you made it home safely.
-
2 pointsGot it all swapped over finally! Used a motorcycle battery (not cheap by the way) and she runs pretty good! 20190225_182922.mp4
-
2 pointsJim's in his jammies!
-
2 pointsThat does look like a Model L to me, though it could be a Montgomery Ward Chor Trac as well. Simplicitys were painted orange and MW were red. It looks like it has been repainted so tough to tell unless there is a spot with the original paint. The plow doesn't look like a Simplicity plow. Here is the Model L that I bought from Ed with a red MW blade. I actually used it for the first time this year for moving snow, although I changed the engine to a Predator to make it easier to use. The area that i now clear is a lot less than what I used to do. The 30" blade is great for the walkway.
-
2 pointsWe'll I'll go for that as long as they reproduce there own vinyl and foam and they don't come out black and white or yellow and green.
-
2 pointsBelieved to be a '60?
-
2 points@953 nut I forgot to mention the smile, glad you did, the man never stops, he just recently sold his Honda Gold Wing but still owns at least 4 other bikes.I look forward to every ride I get to go on with him.
-
2 pointsAnother big advantage we have is that used conventional bearings, seals and other hardware. So many manufacturers used "propitiatory" hardware that could only be obtained from their dealers.
-
2 pointsThis has been hashed and rehashed here over and over. Toro DID know what they were getting when they bought Wheel Horse, that's why they bought them. But, to build one today would cost a lot which would make a new one priced so high, they would be competing, price wise, with the higher end market that is occupied by Deere, Simplicity, Kubota, etc. As most probably don't know, Eastman Industries bought Ingersoll and pretty much kept the design of the old Case/Ingersoll tractors intact, but prices are very, very high. So much so, that even die hard Case/Ingersoll owners wouldn't/couldn't afford a new one. I would say, the same thing would be happening if Wheel Horse was still being made today using the old classic design/build that most here want. What would happen, though you would be thrilled that they were still being made, you wouldn't buy one due to the high price compared to an used one that you may or may not own now. Oh, you might say you would buy new, but most here won't due to the price. As for non-Wheel Horse owners, they would just go buy a MTD or AYP product for a fraction of what a new Wheel Horse would cost. All they want is something to "cut" the grass, they don't want something that they can admire, show off at shows, do extra work, etc. And for those who had the money, they would buy a more updated design with diesel engine, 4WD, etc. or they would hire a land scaping company. Believe it or not, but there is a lot of people who just aren't interested in owning, maintaining, bragging, showing off, etc., their classic garden tractor.
-
2 pointsI picked up a new set of vintage tire chains at an auction this summer. They were made to fit car tires so I'm cutting them down to fit my tractor. A guy at work gave me a pair of pliers made to replace cross links, they sure make this job a lot easier. He used to run a service station back in the 70's and used them quite often back then.
-
2 pointsI took the sickle bar off and put the mower deck on this morning. I bought this with the intent to make it a worker, I'll use it to mulch leaves this fall then put the snow blower on it for the winter. I've been tinkering with Wheel Horses for a few years now and I finally have one that I can use. This is what it looked like when I brought it home.
-
2 pointsI got this finished up today, overall I'm pretty happy with how it turned out considering I painted this one myself.
-
1 pointI added some support to keep the barrel from warping with so much heat inside, and put a piece from the top into the bottom for a fire box.
-
1 pointDon't sweat it Tony. Mine does the same thing. Cheap, Chinese recycled metal muffler.
-
1 pointDell I didn't think I would do these at first. Sarge and I had this discussion last year and I thought about all the work just to make these .I told him I didn't want to get into them because of all the time and extra work involved . YOU DO KNOW THAT I AM RETIRED. I really don't make a lot of money on the seats I make after all the thousands of dollars I've invested in the material and equipment. I do it because I enjoy making them. And I like to see them make these tractors look nice. I'm not there yet on the designs or the lines in the seat and back but I'll give it my best try.
-
1 pointI resemble that remark! 😂
-
1 pointJust received same Actus rubber latches ($3.35 each) perhaps as mentioned, a bit shorter. Wouldn’t hesitate ordering more. Received the pins also (17 cents each). Excellent products. Excellent service.
-
1 pointJust order 3" Latch Strap. SKU is 069-0045


This leaderboard is set to New York/GMT-04:00