Leaderboard
-
in all areas
- All areas
- Markers
- Marker Comments
- Marker Reviews
- Articles
- Article Comments
- Article Reviews
- Classfieds
- Classified Comments
- Classified Reviews
- Wiki's
- Wiki Comments
- Wiki Reviews
- Blog Entries
- Blog Comments
- Images
- Image Comments
- Image Reviews
- Albums
- Album Comments
- Album Reviews
- Files
- File Comments
- File Reviews
- Posts
-
Custom Date
-
All time
November 28 2011 - November 28 2025
-
Year
November 28 2024 - November 28 2025
-
Month
October 28 2025 - November 28 2025
-
Week
November 21 2025 - November 28 2025
-
Today
November 28 2025
-
Custom Date
09/11/2018 - 09/11/2018
-
All time
Popular Content
Showing content with the highest reputation on 09/11/2018 in all areas
-
7 pointsMy local Battery Warehouse will make cables for me, any gauge, and length, any lug size. Usually around $5.00 each or less.
-
7 points
-
5 pointsHello everyone this is Brennan Bo, Steve Bo's son since I am 11 years old I told my dad that I wanted my own account so here I am.
-
5 pointsI have my reasons, cause I'm allowed to.. Will be 71 years "young" next month so.....I do whatever I like. This evening however I totally lost it. I think? Went into the corral with my doggie, and waxed (Turtle Wax) my '90 520-8 while the doggie sniffed around. This Stallion works hard! Deserves a rub down. Now I'm thinking, "Tire paint. Why not?" I have a gallon (haven't used any in a year or so ). Think I've gone too far, too far gone? Guess it's WHA (Wheel Horse Addiction). Could be worse. I guess? Goodnight Deere ().
-
5 pointsHello all, Took my Mossberg 500 out and a box of slugs. Its that time of year and I added a scope to mine. Started smashing 1 ounce slugs at 1400 fps into 2 propane tanks I have out back. Man it caves in the side at a minimum and punches clear thru 50% of time. I hit both tanks and they go sailing and crash to ground. I pick em up to reset and this little guy is looking out all big eyed going WTF was that! Lmao... session over, Ill leave you alone (unless you move into one of my Kohlers!) Tony
-
5 points
-
5 pointsHave been making my own for a few years now. I buy good quality mig ground cable from princess auto, the stuff with high silicone content in the jacket. Then clean the inside of the lug with a little wire brush and flux it. Strip the cable end so about 1/16 will stick out and flux the cable too. Set up in the vise with a 5/32 drill shank and the lug and squish it down with the wire in it. Heat and solder fill till it comes to the top. Then clean with alcohol and heat shrink. I've done them without solder and never had one come loose even though it's not a true toothed crimp. Works for me
-
5 pointsGot the call to see if I was interested in a few signs. Couldn't get there quick enough. Plus some other parts.
-
5 points
-
4 pointsCleaned the gas tank out. New fuel and no gas at the carb. Took fuel pump apart someone had it together wrong. Now it runs like a watch .Thanks for everyone's help !!! What a great forum.
-
4 pointsWelcome @Brennanbo. It's nice to see young men doing something constructive with there lives and there's nothing better then working on something that you love doing. I think holding a wrench beats holding a cell phone any day.
-
4 pointsWas told by the son of the original dealership owner that arrow sign was given to them from Wheel Horse when they started the dealership.
-
4 pointsI have the luxury of working at a place that deals with heavy electrical cables. I can purchase material from work or bring in my own materials and use their crimper to make custom fit cables. This Panduit crimper produces 6tons of pressure.
-
3 pointsMy name is Paul and I am a WH addict.. I have a problem. I have more tractors than I have needed implements for. I do not swap implements anymore each implement has its own prime mover. So I need some new different implements. So the question what is the most useful non-common (mower deck, snow plow blower) implement that you have. i may need one like it!! (Note my wife's suggestion that I get rid of some excess tractors is a non starter.)
-
3 pointsDoesn't need a puller, a couple of 1/4 X 20 bolts will push it out.. Looks like this.
-
3 points
-
3 pointsMake sure the regulator is well grounded. A regulator that has a bad ground can produce over 20 VDC when the grounds connection is broken.
-
3 pointsMy bad ...bit of American history here EB ...in 1900 Theodore Roosevelt said SPEAK softly and carry a big lunch bucket ....errr big stick! I had to it!
-
2 pointsBeen wanting to figure out a better way to move dead tractors around - some, just isn't cooperative at being towed - the AC 916H is a great example around here. Since the rear axle is a hydro, it does not disengage fully for some reason and the tires are really shot badly. The 16Auto dug some big holes the last time I tried to move it around, so the idea here is to use the D's 3pt lift and it's size/weight advantage to move other dead tractors. I also wanted a toolbar that could have adapters added for various tasks - such as cultivators, tines, rear blade, ect. I've wanted to build a wrecker for years, just never had the time to do it - this year, I decided I've had enough of my aching back and legs - this needs to get done before I end up in the hospital. Always seems there is no help available when I need it, so now is the time - here is where I'm at as of now... All built from 1/4" thick iron, except the hub mounting plate which 1/2" thick A50 steel. Trailer hub/stub shaft is a 1750lb rated unit. In hindsight, if I ever did it again I'd use a heavier DOM tubing and just turn it to accept bearing races, make the shaft on the lathe and be done with it. Not to mention, I could control the thickness of the assembly a lot better. There are "rear tire carrier builder" parts available out there to do just that with pre-built tubing, the correct bearings and shaft - you just weld it into the square tubing of choice. Still a lot to do - need to make a set of centering springs, locking pins (for toolbar use), tire carrier arms w/tie-down rings, rear blade adapters, ect.... Just thought I'd share a bit - need to some lift testing today, hopefully. Sarge
-
2 points
-
2 points
-
2 pointsI use my ACCEL spark plug wire crimper (vise and hammer style) on those bigger lugs, I don't use solder and so far for 30+ years nothing has failed me yet.
-
2 points
-
2 pointsThe joystick, brake lever, and drive belt tension release look like a 1988 or 1989. The hood looks to be from a later 520H.
-
2 pointsSome of the knock off carbs i have I found the float setting to be wildly off 11/64" is correct
-
2 points
-
2 pointsIf your aim was better you could have saved setting yourself a mousetrap later....
-
2 pointsHeres the lower plate. Didn't turn out too bad either. Don't try this when you're tired or just waking up, make too many booboos.
-
2 pointsSeveral types of crimpers. I go to my local Mennonite auto electric shop and tell them " Make this cable with these ends but go up a size on the gauge." They mount this tool in a vise and wail on it with a big hammer. Then shrink wrap the ends.
-
2 pointsNow Jim @WHX20 , employee theft is not nice. Having permission to use a nice Panduit cordless crimper with 6tons of pressure is quite nice though. The cable ends are fairly cheap, the tool to crimp them is not so cheap.
-
2 pointsSorry for the delay I am traveling in California. Happy Birthday my Sipping Friend.
-
2 pointsOK, guys, success at last! The temporary setup with the washers worked fine, I was not not completely thrilled with the solution. I feel like it is not addressing the cause, but treating a symptom. So I tried the belt that is 1” shorter. I could not get it on! So I decided to make the best of it, and machined a couple of guides to replace the washer stack. I installed them this evening, and the belt now stays on the pulley. I found in my Dad’s notes ( he bought the tractor new), the notation the main dive belt is 81 7/8” long. I guess the 5L-820 is as close as I will get. I also have no idea where Dad got those numbers... Bottom line is the tractor works as it should, and I am happy! Thanks again for everyone’s help! Danny
-
2 pointsI dunno if Dan @Achto willing to give up his secrets EB....... or his employer who has the stuff to have them made professionally..... hey wasn't ther a president who once said walk softly and carry a big lunch bucket?!?!?!?
-
2 pointsJust the nature of the Eaton 1100s. I have them in 312s,417s, and a 520 and they all act differently. Like Jeff said, the manual states they should all be warmed up before use. Some of mine require a 5-10 minute warm up before the lift will work and some lift immediately. I chained them all to a tree and they are all strong enough to dig holes.
-
2 pointsI have two 520H's. My 1995 starts and the lift immediately works as it should. 320 hrs on that tractor. My 1988 takes a long time for the lift to work. 1000 hrs on this one. When I start it up, I get no lift at all. In about 3-5 minutes, the lift starts working and then continues to work normally for the rest of the day. Both tractors have 10W-30 Mobil One in them and Toro oil filters. Lots of posts on this issue over the years. General consensus - it's just the way Eaton 1100's are.
-
2 pointsI have a sundstrand in my C160 and I use mobile1 10w30 and even in the cold of winter the response is immediate. No delay at anytime. I know the Eaton 1100 is bigger and better but it should be almost immediately able to lift and go in the summer time. I do let mine warm up some in the cold only because the manual says to.
-
2 points
-
1 pointit's marketed by green and yellow tractor people. There's no way this stuff works or does anything it's supposed to. Okay, okay, I'm kidding. Actually, it probably does exactly everything that they say that it does do and that is why I would not use it. Here is where I stand on belt dressing and why I don't use it.... On ANY belt. If you are using a clutch type Drive such as on our engine to transmission belts, They MUST slip when disengaged. As previously stated, this stuff is meant to prevent that. On most other situations, the belt is never ever meant to slip. The reason I don't use it in the other situations is that a squealing belt is almost always a symptom of a problem. Could be a pulley out of line. Could be something is just plain dirty. Could be a bearing going bad. Could be the belt itself is getting aged and glazing over. Could be a malfunction in the drive piece or the driven piece. I'm sure others could point out some other issues. I'd be glad to hear them. I guess I just come from the old school of thinking where when the belt was new it did not squeal. If it starts squealing, there's a reason that it's doing it. Fix the reason. Don't coat the belt. ..... IMHO.... Signed respectfully, guy in Maine with all kinds of crazy ideas but none of which include belt dressing.
-
1 pointClick on the pictures. The C-145 Automatic was sold 1980-1984. The tiller in 1980 was this one By 1984 this one was supplied. Anything newer should be plug and play. Here is a list of the tillers in the order they were produced. DNA 1977 model 77-36TL01 replaces 1966 model RT-366, 1967 model RT-367, 1968-73 model 7-1211, 1973-74 model 7-1251, 1975 model 7-1252, 1976 model 67-36TL01 1977 model 77-36TL01 replaced by 1977 model 77-36TL02, 1978 model 87-36TL01, 1979 model 97-36TL01, 1980-82 model 07-36TL01, 1983-85 model 07-36TL02, 1986-89 model 07-36TL03, 1990-91 model 07-36TL04, 1992 model 07-36TL05, 1993-2001 2003-07 model 79370 Best to study the parts lists so you get all the idlers, hitches and lift parts which often get separated. Garry
-
1 point
-
1 pointtypically buy a made up battery cable, but always add a wire lug https://www.google.com/search?q=electrical+lugs&tbm=isch&source=iu&ictx=1&fir=wecwGOPIDW4eWM%3A%2CRFvGliPtUrHykM%2C_&usg=AFrqEzcMswovRQE9E_JqIzFsv6xf8TnDyg&sa=X&ved=2ahUKEwjiisu587LdAhXKT98KHaMDAF4Q9QEwBXoECAYQDA#imgrc=wecwGOPIDW4eWM at the battery post bolt on point, that way I always have a safe and solid go to point if I ever need it. pete
-
1 pointAlways pleased dealing with Miller. http://www.millertire.com/categories/lawn-garden-tires/
-
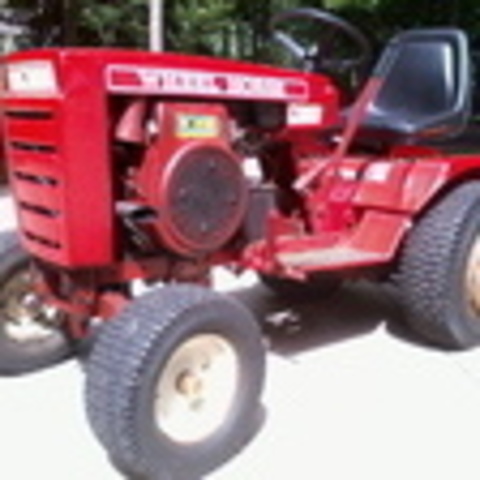
1 pointMaroon is the colour of the decals on the early models like this. The close one has a swept axle with dust caps like a trailer hub has. The upper / back one has a straight axle and little plastic dust caps that snap onto a washer holding the wheel on. Later models had black decals like this. Cleat
-
1 point
-
1 point
-
1 pointNo the SG reg will work just fine . I believe Richard @953 nut has a nifty wiring diagram for doing that conversion. My 1067 had this done by a PO years ago so I just left it as is when I restoed her and it works good. BTW those original 70 amp switches are still available and fairly cheap if you want to stay original. Some pics of my conversion. Custom made battery cables courtesy of @Achto
-
1 pointHad another good year at Pioneer Power... we hit a max of 50 display tractors, not counting at least another half-dozen that were seen at various times driving around the show that weren't displayed. This year's feature was the Historical Construction Equipment Association, so there were some great examples of some of the old heavy equipment. Enjoy the pics... I am not posting everything I took, as others will have some to share too.
-
1 pointWhat you have is what we laughingly refer to as a "FrankenHorse". Enjoy it as it is or if you want to find the type hood it was born with you can use one from any 300 or 400 series .
-
1 pointMy early Wheel Horse LTD -24 dump cart had some small rust holes in the bottom when I purchased it . I decided that the best option was to place a new bottom in it that was tig welded into place and coated with black spray truck bed coating. I oiled down the ret of the trailer and have since doing oiled it about once a year. I bought the trailer and a 1958 RJ together and I decided to keep them in the general condition I found them. I painted the wheels and upgraded tires and motor on the RJ but they are a pair for sure.
-
1 pointI don't think it was commercially made, looks like a very handy home built trailer. Too much craftsmanship for a mass produced unit.


