
Leaderboard


Popular Content
Showing content with the highest reputation on 09/06/2018 in all areas
-
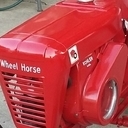
11 pointsTook the plastic dash plate off my D and thought I would give it a try on painting the letters and symbols on it. 1st time doing it but it turned out ok for a worker. Half a dozen flaws but whos counting. I didn't take a before pic but there was no white color on it. Some one painted it black, I tried to clean the black paint off but not successful. So I just re sprayed it black satin and began the lettering. I found Rustoleum chisel tip marker and a off brand point marker. I will take the lower plastic plate off and do it too soon.
-
8 pointsCouldn't get the Horse up there - just a day at work.... Sarge
-
6 pointsClean the carb, clean the carb, clean the carb. It actually took three carb cleanings to stop the surging on my 520.
-
5 pointsI've been talking to the owner of this wheelhorse for about 3 weeks in an attempt to reach a good agreement for both of us. Well, this morning, he called and said, Come and get it. So, I did. The wife and I went for a 3 hour ride, to and from. The new to me C120 horse is home.
-
5 pointsI'm not really sure why I feel compelled to post this, and my daughter might kill me, but she finally got on the horse. It is a rule in the family that you cannot get your learner's permit for driving until you get significant seat time mowing. My 3 older boys had no hesitation, my younger 14 year old twin daughters have been getting some time, but 16 year old daughter has been reluctant to say the least. This has not been one of the forced chores, but a lesson in "If I want to do X, I'll need to suffer with Y". Well, the other day I asked if she wanted to mow, same question as all summer, and I expected the same answer, "No thanks, dad, I'm good." But, finally, she agreed. Took instruction with great care, listened intently, and did a great job. The 416-8 is not the easiest thing to master, but she had no problems with the clutch, or keeping the tractor on a good mowing path. Got confident going around trees. It was awesome.
-
5 pointsPictures from the Argyle show on Labor Day weekend, in Colchester IL
-
4 pointsGet a grade on this...
-
4 pointsA few of my garden tractors at the show in Avon IL
-
4 points
-
3 pointsTwo weeks ago purchased what turns out to be a 1054 { 1964 } Wheel Horse tractor serial # 42654 . Transmission shifts poorly , currently locked into two gears . I plan to down load manuals for tractor this weekend .and clean and split the transmission to see what needs to be repaired . I can't thank WH members enough for getting back to me on " What Do I Have Here ? " and identifying it as a 1054 . Look forward learning more from all of you members who have shared conversations on your Wheel Horse tractors . Manny Bartek ...AKA "Skyliner"
-
3 points@Manny Bartek ...your 1054 should have a #5047 transmission...that means you should have 1 1/8" axles...the (what is called the) Heavy Duty transmission. It also means that you have the bevel gear differential. There is nothing wrong with any of this. The fact that you are stuck between 2 gears is not uncommon with these early 3 speed transmissions. To fix what is going on...lift the shifter boot to expose the Allen head (dog point) set screw and lock nut...loosen the lock nut...the set screw will probably turn out with the lock nut. If it does not, use a 1/8" Allen wrench (coming in from under the frame to loosen the set screw enough to pull out the shifter). Pull out the shifter and take a look into the shifter hole...You should see 2 forks that are not in line (making a square)...use a long screw driver to position the forks so that you are looking at a square...welcome to neutral. You can now roll your horse...replace the shifter and drive your horse. If you end up opening the tranny, you will see that the way that the shift fork shafts are made can create a suction when shifted and actually get suck back into gear while you shift into one of the other gears. It is very important to come to a complete stop before shifting gears with your transmission. changes were made in later years to get rid of this suction thingy. We do have some threads on this subject in the Archives, that deal with this. If you do open your trans, it would be easy to solve the problem by taking a 4" grinder and putting a flat side on the shift fork shafts so that the oil has a place to go and thus not having any suction. If you are interested in knowing all of this and doing it...let us know and we will point you in the right direction. This is what neutral looks like.
-
3 pointsWell, mine might have 800 miles since the rebuild...
-
3 pointsThe hardest part of the job may be removing the hubs from the axles. There are several posts on this site about hub removal, but on the 1054 you have the advantage of being able to split the case,split the differential and remove the roll pin then pull the axle. once that is done you can move the axle to a hydraulic press. There are several threads on here about hub removal. This thread from @stevasaurus is great and will guide you through the process.
-
3 points
-
3 pointsMaybe not what I've done TO, but what I've done WITH my Wheel Horse today. No pictures, but me and my D-180 spent about 5 hours grooming a new cross country course for our local school district of which I am the middle school cross country coach. The land, which was a former strip mining operation, was donated to the park district. The course was bulldozed into shape, but it was rutted, rocky and hard. Grass would never grow. The parent's group raised the money to have dirt hauled in (probably 150 yards so far). It was strategically dumped on the course. Then, one of the parent's club dads borrowed his dad's Kubota to spread it out in small piles. Rather than hand raking those piles by hand over the 3.1 mile course, I loaded up my horse and graded every pile into submission using my mid mount grader blade, then dragging a couple of recycled plastic landscaping beams behind it across the route, smoothed out all the deviations and made it ready for grass seed. Still not quite done with the whole course, but my D made short work of what could have been a long, manual process of raking those piles by hand. I wish I had an odometer on the thing. I probably put 8 miles on it the last couple of days.
-
3 points. I will be going down to Norman tomorrow and will go buy and see what it looks like and let you know if I see anything wrong. The car dealerships down in Norman on the mile of cars are pretty trust worthy. Would sure like to meet you. Have a safe trip. If you like BBQ try Swaldys BBQ in Okc.
-
3 pointsYou could use some old cub foot rest as I did. Then I just fabricated a bracket holding the rear of them up and bolted to the frame. I made the bracket to hold them at the position I wanted. I'm only around 185 pounds and they hold up to me pushing on them and all the abuse I put to them.
-
3 points
-
3 points
-
2 pointsWhat parts ya lookin for Slider ... I got that motor but another member has got dibs on the crank. Hopefully get it off the tractor this weekend and see what's salvageable.
-
2 pointsNice tractor you have there. Be very careful, these things tend to multiply like rabbits. Which is why many of us are here trying to deal with these situations 😜😜😂😂
-
2 points'Nuff said below, I know I like my 520 and deuce...
-
2 pointsThanks to both of you , great advice and video !! Mcgrew , you are right about our floor jacks , I just picked up a second jack that I will put into a future photo . I was really sweating this tear down , your video was detailed but I will definitely fallow your lead on a " Clean Table " with basic layout and labeling of all parts ! Thank all of you again ..Manny
-
2 points
-
2 points
-
2 pointsThe girls have been helping me expand the chicken yard. We just opened the back snow fence to let the birds roam... I want to build a wide gate between the chicken house and the barn, then have a small back door for the birds. I have enough chain link fence that I’ll be able to bury 2-3’ back around the perimeter to keep digging predators out. Still want to give them a netting roof of some sort too. Oh and work on siding the joint some day, too!
-
2 pointsJim I will remember that the next time you bring home another '67and you become @Whx21
-
2 pointsTo get a better view on whether or not it is charging, Take a battery reading after the tractor has sat overnight. Then take a reading with the key on. Then startthe tractor and take another reading. It just might be that the battery is about gone and will not take a charge. !2.15 is really weak for a resting battery. Never assume that a battery that isn't taking charge has a bad alternator. Dirty terminals or a poor ground need to be eliminated first..
-
2 points
-
2 points
-
2 pointsOne thing I've always had a lot of pride with my daughter - fearless when it comes to mechanical things/vehicles. She drove my lifted Samurai with her learner's permit, ceramic clutch and no power steering with 33x12.50 Swampers and all (albeit through the neighbor lady's front yard). At 14, we had her drive a buddy's Ma Duece 6x6 ('74 White 2.5ton) with no power steering in a field, that one did make her a bit nervous. I even had her back out a conventional Peterbuilt out of the shop once - she grinned the whole time. My rule was simple - from food to everything else, all that was required is you at least try - she was reluctant a lot but learned a lot of things in the end. I say it's a good thing, although the Demo Derby made Dad a bit nervous last weekend, lol....she wants to do that again! Sarge
-
2 points
-
2 points
-
2 pointsI've worked on many vintage cars and full size tractors but have never worked on one so clean ...no rust !! Tractor was owned by a 98 year old who cleared all neighbors snow and dirt work as a favor to them . He was a city farmer for sure ...
-
2 pointsSorry guys and Karen I got more use for the tub....'sides I'm saving for the Holy Grail.... a Senior or a C-160!
-
2 pointsMy other project this winter besides the flood tractors was building a stainless steel sickle bar mower for my 854 I'll post some pic's with it on the tractor tomorrow Brian
-
2 pointsSteve, I can understand how you can get Kevin and I confused, other than the 25 + years difference in age, the 100 + pounds weight difference and the color of the beard and hair, we could be twins.
-
2 pointsFour heads are better than One! The next Mount Rushmore, @giddyap, @Achto, @Coulter Caleb & myself getting out of the rain @ the big show 2018. I think @PeacemakerJack is behind the camera.
-
2 pointsMy co pilot lol
-
2 pointsI like that "family rule" you have there...it makes a lot of since, cents, sense. BTW, that is an excellent picture.
-
2 pointsBig ol butts .... lol
-
2 points28,000 MILES ON THE OLD GIRL NOW......
-
1 pointHi Everyone. I recently rebuilt the pto clutch on my 1976 C-120 and figured id post some pictures and part numbers to save other time who are doing the same. I have the 6.75" OD clutch plate and didn't want to spend the money to get a new one from Toro so i ended up doing some research and re-lined it myself. I wasn't sure on the material so i took some measurements it looks like the originals are .125" thick stock. Clutch Material: McMaster #60895K11 http://www.mcmaster.com/#60895k11/=11rane8 It comes in a 7.5 x 7.5" square so you also have enough to re-line your brake like i did. I found the easiest way to cut it was to trace the OD of the old clutch plate and for the id i found a 4" angle grinder blade was the right diameter. I used a set of snips to trim the OD and a jigsaw to do the ID and seamed to work well. Extra material: Thin jigsaw blade i used: Final product: Now i also increased the contact area versus the original. The old one only contacted about an inch in width this one i had full contact on the bell of the pulley. My pulley was scored so i face it clean on the lather removing only the minimum need to get a full clean. YOu can chuck the narrow end of the bell on the pulley, just make sure the face is true (axial run-out <.005") I now have 2" of width on contact, it should work much better now. I prepped my old clutch backing plate by removing the old work clutch and the worn out broken rivets. Using a die grinder with an abrasive wheel works good. I then used a rougher disk to make little rough grooves in the face to make sure the clutch adheres better with the epoxy. Note the old contact area. Once the backing plate is cleaned use air and carb cleaner to thoroughly clean the new clutch material and the backing plate. Now i used Loctite 380 Instant Adhesive. We use this at work for similar materials on clutches and brakes. its oil heat and impact resistant and is literally the strongest fastest drying adhesive i've ever used it really works wonders. It cleans up with carb cleaner (even on your hands) t available the cheapest from amazon: http://www.amazon.com/Loctite-135423-Toughened-Instant-Adhesive/dp/B000132VEE/ref=sr_1_1?ie=UTF8&qid=1459388480&sr=8-1&keywords=loctite+380 A zigzag pattern gives the best coverage to ensure it contacts and sticks evenly. Now make sure you just stick the clutch onto the backing plate and not the pulley I used the pulley as a plate to clamp the new lining onto the plate with the help of 3 clamps and left it there overnight. Just make sure the pulley is up so any drips don't stick the pulley to the other half. Now you can use those leftover pieces to also re-line the brake: same idea and process here... Since i had the whole thing apart anyways i decided to replace the bearings, they are a fortune from Toro and some aftermarket ones just didn't seem to be of high enough quality. I ended up finding a package deal on the originals on ebay so i figure did post the OEM bearing specs so you can find them yourselves locally or online its easier knowing the bearing manufacturers number than a Toro number. Ball Bearing (on the end taking the PTO thrust): Fafnir P204RR6 Alternative: http://www.amazon.com/Fafnir-P204RR6-Single-Ball-Bearing/dp/B00FAY909S Needle Bearing (on the inside of pulley holding the radial load): Torrington J-2420 Alternative: http://www.amazon.com/Koyo-Bearingd-8600rpm-Maximum-Rotational/dp/B007EDPF4C Grease Seal: CR 14810 (Chicago Rawhide) Alternative: http://www.amazon.com/SKF-14810-Small-Style-Diameter/dp/B00CLIVXNM/ref=sr_1_3?s=hi&ie=UTF8&qid=1459389503&sr=8-3&keywords=CR+14810 Locally here in RI/MA i always use Eastern Bearings in Prov, RI to get all my bearings and seals they have reat pricing and can get you anything you need but you can also find them online at many places. Just be careful the letters on the ends usually mean different seal types so make sure you look into the whole part number. Hope this helps! Good Luck! if you have any questions ill try to help.
-
1 pointAd is no longer there. Hopefully someone got a dream Wheel Horse.
-
1 pointProblem has been resolved. Insufficient common grd.
-
1 pointThere are times when I need to lift or move something I can't manhandle alone.So with a little scrap iron and a cheap HF winch this is my solution.
-
1 pointNo thanks! I work in the body shop of a chevy dealer and when they have some of those torn down, I'm glad I work in the dept. I do! Randy
-
1 pointGood one! Funny thing is, this summer I eliminated mowing the 1 ac "playing field", and it now takes half the time to mow. I'm not burned out of too much seat time, so having my chores taken is not a big deal. Same with plowing come winter. I love going out a midnight with only me and the snow and the 310-8. However, perhaps getting them the opportunity to appreciate that would be good for them!
-
1 pointIt needs wheelie bars. It will do mean donuts but won't keep the nose down even in wet grass rolling. It's quick
-
1 pointHere's a few for ya


.JPG.9f2ecb26065c66527b0730084ab7fc7a.thumb.jpg.7dc8a04d9a53d44ee2b23f26ee94496f.jpg)


This leaderboard is set to New York/GMT-04:00