Leaderboard
-
in all areas
- All areas
- Markers
- Marker Comments
- Marker Reviews
- Articles
- Article Comments
- Article Reviews
- Classfieds
- Classified Comments
- Classified Reviews
- Wiki's
- Wiki Comments
- Wiki Reviews
- Blog Entries
- Blog Comments
- Images
- Image Comments
- Image Reviews
- Albums
- Album Comments
- Album Reviews
- Files
- File Comments
- File Reviews
- Posts
-
Custom Date
-
All time
November 28 2011 - November 28 2025
-
Year
November 28 2024 - November 28 2025
-
Month
October 28 2025 - November 28 2025
-
Week
November 21 2025 - November 28 2025
-
Today
November 28 2025
-
Custom Date
08/04/2018 - 08/04/2018
-
All time
Popular Content
Showing content with the highest reputation on 08/04/2018 in all areas
-
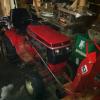
5 pointsI picked up a second Farmall Cub, a 1950, to go along with my 1947 one I bought last summer. This one runs good, but has some unique modifications that I have been addressing. It came from a buddy of mine's neighbor. He had passed away recently and his son wanted John to sell it for him. John already has 3 Cubs so he put this one up for sale. The previous owner, before he passed, had a bit of dementia, which is perhaps why the odd modifications. The generator, which is supposed to go under the hood, was relocated to the right side of the hood, and there was wires spliced everywhere. The 6V battery was connected backwards - in the Cub 6V system, the positive terminal is the ground. The front seal was leaking and there were a few other issues. I left it at John's place, and with his help, we have been working on it. First relocating the generator to it's proper place, plus a new voltage regulator, a new starter to negative terminal cable, the correct fuel strainer bowl, and are rewire the whole tractor. A new fuse holder and another light switch, was also added. I ordered a free safety gas cap from IHC and will need to still address the Woods mower issues. Here are some pictures, first the way I bought it.
-
5 pointsThought i'd share these with you folks . Not something you see every day . The Canadian Flagged Manitoulin left one of Buffalo's grain elevators today . It's the same elevator our mill gets all their grain to make flour from . To put this in perspective : This ship visits 2 times a year . We have 3 grain men running 40 foot bottom-drop grain trailers 6 days a week . They dump 12 / 20 loads each ..PER DAY ! Das - a - lotta grain !
-
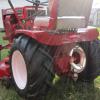
5 pointsA few more. I will be removing the deck, even though it has new blades, I don't need this one to cut grass.
-
4 pointsNext, the work in progress. We should finish her up today and I will be taking it home. Hopefully, that is, and will include more pictures of it "fixed" then.
-
3 pointsAfter looking near and far, I finally picked up a 312 8 that was found close by to me. It seems to be in good shape, with 300hrs on it, and it fit my budget. Now I need to figure out how to put a sleeve hitch on the back so I can start turning over some ground. Any advice on that or maintenance would be appreciated.
-
3 points
-
3 points
-
3 pointsAre you talking about the outer brg? The Napa #'s are: P204RR6 cheapie version PP204RR6 Primeline # 704250
-
3 pointsAnother thought. The pin that actuates the parking brake (circled in yellow) will wear. The parking brake arm (blue) it moves will wear a deep groove in the pin thus the brake arm may not move enough to completely disengage the parking pawl
-
3 points
-
3 pointsHappy Coast Guard Day! Chicago is probably not thought of as a Maritime port but actually has 52 movable with 43 still operable bridges. A part of Chicago history was the infamous Medusa Challeger (built 1906 and 562 feet long) that was legendary for snarling traffic and having bridges fail to open or close while transiting the Chicago River and its branches. I can remember a time being on the wrong side of the river while grabbing lunch when I worked downtown. Back then it was the oldest freighter on the Great Lakes until converted to a barge in 2013.
-
3 pointsOk so let the guy throw out the first price. Has he got replacements for the tractors ? If so a cheap price is what you throw back but if he still might need them he might need a higher price to help him let go of the tractors. It is very hard to give price evaluations with out seeing of looking over detailed photos of the Wheel Horses. Market value, depending on where you live can easily determine price, a Wheel Horse Pennsylvania is worth more then one is southern Arizona. Are the tractors running and have you taken them for a test drive ? Any hydrostatic Wheel Horse should be driven for at least 10 minutes to see if the transmission is in good working order. Check the engine oil and look them over to see what kind of maintenance they have gotten over the years. Remember it's your name that is on the line when making deals, you get a tractor cheap because you fast talked some little old lady and she finds out .........she just might not tell you about her friend who has a perfect condition RJ-58 with all the attachments for sale. Sorry for the rambling on but see what the guy wants for them and if your willing to pay the price then you both should be happy. Wild Bill in Richmond, VA
-
2 pointsHappy Birthday @GlenPettit, we are all glad you were born and pray your recovery is going well!
-
2 pointsWay to go ...gotta love the Onan sound, wait till you get it in snow up on the governor.
-
2 points
-
2 pointsMowed the back yard... with the new REO skiff this afternoon. Not a bad cut, considering it rained all night, and today until noon. Then snatched up the high rise tub cart, just because it was there.
-
2 pointsMy new '67 REO skiff (#36)... followed me home today. Was successful in my rescue of another ... across the Connecticut state border.
-
2 points
-
2 pointsThe one near center slightly right with the 1"+ diameter flat washer that has a 9/16" nut (but first I would take the it completely apart degrease/clean the cam plate and friction washer then put back together, then start your adjustments while you are there you can fix neutral creep speed up forward and/or reverse the procedure is in the downloadable owners manual here on RS) the only lube I would use on all other joints besides the friction washer is dry graphite powder so it doesn't attract dust/chaffe ect, Jeff.
-
2 points
-
2 pointsWhen they are running right they don't make much more noise than a sewing machine.Nice tractors you got there.
-
2 points
-
2 pointsThe parking pawl in the later C models and others from '73 onward used a set of teeth to engage the main gear - these were much stronger but could still be stripped if someone put it in park while moving. That series Sundstrand piston to piston type was the best hydro made, in my opinion. I'm not much of a fan of the Eaton system, they take far too long to warm up and don't seem to have the hydraulic grunt of the Sundstrand. As to the grinding noise when engaging the hydro unit - that is from a very badly worn linkage arm. That arm does two things at once - it engages the tension pulley on the drive belt, plus it also releases the parking pawl. On those later model piston to piston units there is a lever on the pawl shaft that actuates the internal part. On the linkage arm there is a stud that moves the lever down to engage the pawl with a spring to return it to an open position to allow the internal gears to move. If the spring is missing, the thing will ratchet loudly until it breaks the teeth off inside, which is a bad amount of damage. It's all in the manual for the B & C series tractors, also showing all the parts in the illustrated parts list. I've rebuilt the teeth on one pawl by welding them up, then grinding them to fit again - another I had just ordered a new park pawl. Sarge
-
2 pointsI also had to run a shorter belt. I think the eaton pump sits a little closer forward than the sunstrand. Also the brake pedal linkage took a little shortening/rethreading but I have full braking abiltity and it returns to neutral like it should. It took some work and head scratching but well worth it. There will be an eaton 1100 going in my wife’s 1054 too. Gathering parts at the moment. I plan on doing a small write up with pictures when I do it. (After looking at the pictures above, I believe the pump drive pulley may be a tad smaller diameter on the eaton. I’ll try to get a measurement )
-
2 pointsIf I mow damp grass I lower the tailgate on my truck, put the ramps on it and pull the front of the onto the ramps. I wash it down and use a brush to remove hard packed grass. Each winter the deck gets a good cleaning and a coating of Plasti-dip.
-
2 pointsI think enhancing the moisture level on a deck ( with a flush down ) and then thinking you are done ,and then leave it soaking wet till your next cut , is begging for a rotted deck and bearing failure. I don't know what horse you have, but it takes minutes to drop a deck on a horse,( excluding a 60 in deck ). my 42 r/d., is very simple, I regularly drop mine, regularly to clean out and get it in the sun to dry out and oil spray it down. unless you want mushrooms under your deck, you have to break the moisture / grunge cycle. most of the decks I see are junk , rotted, spider cracks, impact dents, zero maintenance, they are also expensive, its up to you, pete
-
1 pointAs if we don't live far enough out in the sticks already. We're going to go a few hours North and hang around rough camping with the moose for a few days. Can't even begin to tell you how much I'm looking forward to it!!
-
1 point
-
1 pointCraig- Nice patina on that baby. Bring it to the pull tomorrow in Montgomery. I will be there with the 953 and Economy. Meeting Kyle and Bill .
-
1 pointThanks for sharing Lane! The garden tractor races look like fun, Fun to build one then fun to see how it does. They used to have some garden tractor drag races a few towns over but haven't heard anything about it for 10 years or so.
-
1 pointNo process photos but it is really pretty simple. The main thing to have is a strong well mounted vise on a table that will not move. Most of mine were done on a blacksmth's vise with a leg to the floor. Clamp the metal in the same orientation for each bend . Heat the metal sufficiently so that it is easy to bend . The rest is just machining work. Perhaps I will have someone take photos or video on the next batch.
-
1 point
-
1 point
-
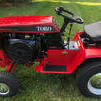
1 pointNow that's "bare-bones" ! No cup holder Cigar lighter Safety switch(es) Etc , etc , etc .... I love it !
-
1 point
-
1 pointthat 12 hp works well on that 36/42 single stage, slush is difficult on any blower. I found that chain lubrication is vital for easy smooth use , its also important to use polymer wax or silicone on the inside of the chute, the smoother the better. I would detail any friction point with lubricant , auger handle, spring tension double pulley frame mount. the lift bar mounting points. tractor supply has a very good lift spring for these, makes lifting much better. don't forget wheel weights and chains. with each use, you will adjust to snow conditions, and learn from them. that 2 stage is big and heavy, best left to 20 hp , only my opinion , good luck , pete
-
1 pointLooks more like a bathroom every day! With the tub set, I’ll be able to install the drain, the finish all my supply lines and test my fittings before I finish ceiling and walls.
-
1 pointAll those tractors and people, and I see a push reel mower, what the . Looks like you had a great day. Hope Steve, didn't think it was my birthday .
-
1 pointHe has every thing you need. I suggest the rock shaft under the seat also, your 312 probably doesn't have it. You don't need it for a breaking plow, but it helps. Anything heavier like a tiller it definitely helps. He sells the rock shaft also, all of his stuff is new and well made.
-
1 pointCheck out "Wheelhorse Parts and More" in the Vendors section below. He makes one better than the original from Wheel horse.
-
1 pointHope ya have good weather, it’s raining like heck here in Connecticut ⛈
-
1 point
-
1 pointEverything in this picture except for the kitchen table is about to be stuffed in the SUV
-
1 pointUse the ramps too, same routine. Deck upon Horses each winter; clean 'n paint. New spindle belt if required. Never had a problem with Hardee Kevlar belts. On the shelf at Tractor Supply. During the mowing season, always vac top of the deck. Use CRC Belt Dressing now and then.
-
1 point
-
1 pointI wanted to stop in and say hello to everyone, over a period of many years, I have owned just about all the big 3 brands of garden tractors. They have all been traded or sold. I am back trying to find the one I enjoyed and miss the most. Looking for a C160. Hopefully with a tiller. I'm glad to be back to RED.
-
1 pointI will tomorrow maybe with pictures. I have followed the forum for five years and have gained a lot of information that has been good
-
1 point
-
1 pointThought I would share the latest work on the 551 Rat Horse. I picked this up from @dells68 at the PA show in June. It is a Rat Rod based on a 1961 model 551. It is powered with a 6.5 hp Predator engine. When I picked it up it was in a clear coat over rust. Pulled it apart and sandblasted it and repainted in flat black with blasted cast iron sheet metal. Repaired the head stand and restored it to it's original upright orientation which allowed the hood and fuel tank to mount in their original positions. Shortened the steering shaft to mount a three spoke deep dish lawn ranger steering wheel (hub bored to 3/4" dia), and shortened the shift lever. Fabricated a heat shield to cover the top of the engine and direct the hot air from the blower housing away from your right leg, and installed the Predator performance intake and carb jet. This past weekend it was pin striped by Rudy (out of Sandusky) at the New London Ohio FARM show. Am contemplating installing a flipped front axle to drop the front, and may drop the trans mount to lower the whole tractor, and replacing the black wheelie bar rollers with a new pair of red hub WH deck wheels. This fall will get a custom fabricated polished stainless steel exhaust pipe and muffler and a set of retro headlights. Looks a lot different from when it came home in June!
-
1 pointThe 42" single stage is the simplest, lightest and works well. One from 1973 up is plug and play. DNA 1977 model 76-42ST01 replaces 1966-67 model ST-376, 1968 model 6-1211, 1969 6-6211 plus 6-9111, 1970-72 model 6-6212 plus 6-9112, 1973-74 model 6-6212 plus 6-9113, 1974 model 6-6213, 1975 model 6-6214, 1976 model 6-6215, 1976 model 66-42ST01 1977 model 76-42ST01 replaced by 86-42ST01, 96-42ST01, 1980 model 06-42ST01, 1981-82 model 06-42ST02, 1983 model 06-42ST03, 1984-87 model 06-42ST04, 1987-89 model 06-42ST05, 1990 model 06-42ST06, 1991-93 model 06-42ST07, 1993-2001 model 79360, 2002-07 model 79362 Garry









.JPG.9f2ecb26065c66527b0730084ab7fc7a.thumb.jpg.7dc8a04d9a53d44ee2b23f26ee94496f.jpg)


