
Leaderboard


Popular Content
Showing content with the highest reputation on 02/14/2018 in all areas
-
5 pointsI bought another project tractor about a month ago and I made a new flag to make it easier to swap out my snow blower from my other tractor. Not because it is hard to do but just for something to do.
-
5 pointsI would also run Seafoam through the gas as well...
-
4 pointsIf ethanol blended fuel was ever used in that tractor it is highly likely the fuel lines have rotted internally and deposited small particles in the carb and may have plugged up the check valves in the fuel pump - that is really common, the stuff is evil. Not only use ethanol-free fuel, but replace every inch of fuel line, clean/inspect the pump if it's possible and rebuild the carb along with a deep cleaning. Might want to do the spark plug as mentioned too - ethanol will damage them over time. Welcome aboard...btw. Sarge
-
4 pointsWhen draining the transaxle it is important to jack up the front of your to get complete draining. Also, a new rubber boot on the shifter is a good idea. Ethanol free gas should be used to protect the fuel system from damage. As suggested above, Seafoam will do a good job of cleaning the fuel system. https://www.pure-gas.org/
-
3 pointsI have no problem painting the wheels on a patina tractor. Whatever you decide it will look fine.
-
3 pointsNote: When you clean a starter shaft (that goes out to engage the gear-flywheel, then retracts), WD-40 is great for cleaning it to dissolve the oil, grease & crud, BUT, WD-40 is not a lubricate, it will not stay on the shaft and does not protect it, actually leaving it unprotected. Always use a heavy grease (I like to use white lithium grease, but there are probably are even better lubricates). That starter shaft is exposed and in a very dirty environment and must be cleaned at least annually, then lubricated, otherwise it will continue to stick and wear more and more often.
-
3 pointsAt that point I'd just start over with a new piece of metal, lol...hard telling why previous do what they do but it does make you scratch your head at times. I honestly believe that to own tools you need an exam and a proper license . Sarge
-
3 pointsIf you had one of these type of blades. I got this with the 520h and the guy said he used it to plow snow. So I did connect it to the front and it worked like a champ.i even posted it here to see if anyone ever seen this type setup. but I sold the 520h and kept this very heavy blade. But the one thing that you would have to overcome is the lift for both on the cylinder. You would have to put a winch on front for the blade and use the tractor cylinder to lift the tiller. To bad your so far away or I'd sell it to ya
-
2 pointsI don't listen to music while working. Call me crazy but I find it annoying.
-
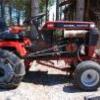
2 pointsBased on the serial number sequence it would be a 1963 model 753. Your tractor would have left the factory with a Kohler K 161S spec # 28626E and a rating of seven horse power.
-
2 pointsVirus-free. www.avast.com
-
2 points64's are my favorite model of the lawn ranger...and for sure it's priced right..IMO.
-
2 pointsAre you saying this extra pair of 1" five holes I have are like hen's teeth Steve? I may be able to part with the set pending an upcoming build I have.
-
2 pointsMany thanks to you all for the help and information. The specification of my motor is as suggested above so now I know what I need. I have just had a delivery of parts from A-Z Tractors so I guess there may need to be another as parts over here are in very short supply. The killer is the shipping costs which are very high but we have to keep these great machines running! I have been mowing with mine for 29 years so I guess a little investment is fair enough. All the best from the UK
-
2 pointsYou can also hover your mouse over the "Browse" tab at the top left of the page, you'll see a link to the calendar in the list that appears there.
-
2 pointsI thought I would try to make a tiller idler using an old deck hitch as a starting point. I used a little piece of 3/4" pipe to couple on a cut down 3/4" bolt. I think I used schedule 80 pipe but use whatever is basically a press fit. I then drilled and installed spring pins for added security. A 'V' pulley from a deck mule drive goes on the bolt. Two spacers are also made from pieces of 3/4 pipe but drilled or filed out until they are a slip fit. One has also been pinned into place. I added teflon washers for smooth operation but this is optional. This is the finished product. Here are the plans I drew up. Tiller idler plans 1.pdf Tiller idler plans 2.pdf I used a hydraulic press and 'V' block to bend the flat bar but I imagine you could heat and bend it in a vise as well. Cleat
-
2 pointsYou are good. The ball wasn't under the shift fork though it was in the oil. I'm thinking that whoever assembled this last tried to do it upside down with the wider case half on the bottom. When they put the other case on, the shift fork came out and so did one of the balls, but they slapped it together anyway. I will measure the overall axle width soon.
-
2 pointsThanks guys, Left him a message. Bout an hr drive for me. I'm going to go look like you've said can't hurt.
-
2 pointsThe Wheel Horse factory never used silicone or gasket sealer and neither do I. Really no need if you get everything clean. Yes you can pop out the seals and tap the new ones back in...I use a tool for pulling carter pins. The seals should be flush with the outside of the casting. As far as axle length, I am thinking that the Commando might have had the longest 1" axles that Wheel Horse used. Your axles are 1"...how long is your axle?
-
2 pointsI am working on a couple decals for a customer who is re-powering a 62 lawn ranger with a HF predator 6.5 to make it look a bit more Wheel Horse. Can someone tell me the dimensions of the two factory decals on this engine? Thanks
-
2 pointsYou could do a winch to raise the tiller. Mounting the plow forward 3-6” should be ok. Might need to weld a new lift point onto plow. Personally I’d get another horse.
-
2 points@Tankman I tried that once but she grabbed the stick and chased me around the yard giving me a wack ever step I took.
-
2 pointsYou might try this.......
-
2 points@giddyap I think it's looking great so far. Looking forward to seeing the finished product!! Here's a pic of my Rat Rod to help keep you motivated.
-
2 pointsApple trees from an orchard are going to yield relatively short logs and probably not more than 12" in diameter. When you cut the trees and look at the top and bottom of log you can first determine if it has heart rot which is very common . If it doesn't it will probably have some decent board material in it. I would right away paint the ends on them with a couple of coats of any paint you have laying around to prevent checking enamel paint preferably.I use paraffin but not everyone has that around. It should then be milled as soon as possible. 6/4 or 8/4 would be ideal for initial drying. There is going to be a lot of waste since apple will warp and twist like no other. Even if it has heart rot it will have great pieces that can be used to turn small items such as furniture knobs and small bowls. Since logs will be short and not too thick it can be milled with a re saw band saw if available.One would have to devise a cradle to mill the round log.I use a vintage Makita with a 3" blade.
-
1 pointMany of us myself included like to listen to music in our shops. I am curious as to what kind of gear everyone uses. Starting it off, since I have been an audio buff all of my life and I don't get rid of anything, so I use some of my accumulated components from past years. I am a big fan of analogue audio so my systems always reflect that. I use two vintage receivers, a Mcintosh 1900 and a tube HH Scott 340B. For speakers I use a pair of Dynaco's A25 which I switch back and forth between the two receivers. Since I am a big fan of vinyl I use again vintage turntables. A manual Pioneer PL71 and a full automatic Dual 1229Q. All my equipment is fully restored and updated. I also use a dedicated IPad to listen to downloaded music and a inexpensive small CD player. All can be switched at will between the two receivers. Everything is fit into one cabinet with intake and exhaust fans for ventilation. The Scott can actually be used as a room heater so it has its own supplementary ventilation.
-
1 pointWell, I've got my 857 running, cleaned up, and clearcoated. Got a few flow indicators on the seat pan because the air temp was in the mid 60's, but I wanted it to look old anyway. About half of it has had one old repaint and the rest was original paint. I wire wheeled down the wheels and scuffed them with 220. Now I don't know if I want to clear coat them or paint them white. Looking for ideas. One rear rim looked great, sadly the weather has worked in the others. Let me know what you think.
-
1 pointThanks Steve. It seems most patina tractors have their wheels painted. I just wonder if since the rest of the tractor is imperfect paint, should the wheels reflect age and a certain amount of imperfections. But, you've got to admit fresh wheels look really sharp!
-
1 pointMaybe you could tell us exactly what engine. Revisit that .090" valve clearance, did you mean .009?
-
1 pointI'll do it myself
-
1 pointJust a small update, As I was told something hit the pump so ive ordered a crack testing kit to try and find the leak before I refit it. Once it arrives i'll test it and update progress.
-
1 pointGood one Sarge!
-
1 pointyes it definitely was a governor problem. it had a plastic fly ball spacer which loosened up on the shaft so it was allowed to spin. got it fixed with the help of boomer. thanks for all the great replies and info mgk
-
1 pointCute Mike. Some times they do.
-
1 pointI saw in on of your pics that you had added a free flow air cleaner. I did this on mine also, I ended up buying a set of small numbered drill bits so that I could resize the main jet. Before i resized the jet it would not run right unless the choke was on. If you remove the governor please keep in mind that the stock Predator fly wheel is only rated for 5000RPMs, you risk having it fly apart past that. Fun is fun, but I don't want to see any one get hurt. The 6.5 Predator in mine is built to take 7000RPMs except for the fly wheel, ( that's where the money ran out on the build ). For this reason I've kept the governor on mine. I can still pull the front tires off the ground using only throttle, no need to pop the clutch.
-
1 point
-
1 pointWith all the rain we have been having the snow crew needs to be augmented by an amphibious
-
1 pointIf you add the second valve in the stack, both would work independently, & need no chains for either. I would look for a front mount blade, (vertical shaft?, some of the older ones?, or custom?, several ways to go,) and maybe just a little jua kali engineering might get just what you want.
-
1 pointSounds to me like you have the perfect scenario for the concept of a tractor for every attachment. Two C160s should be nice! Or, even go with a smaller engine tractor for the dozer blade. If hell bent on both for one tractor, maybe attaching a modified blade frame to the mid Tach A Matic ?
-
1 pointI think if you were somehow succesful in mounting both you'd still have clearance issues. There is also the matter of having still just one lift cylinder connection.
-
1 pointPure awesomeness! or
-
1 pointGreat! American and proud!
-
1 pointSweet. Spreads the word. Glenn
-
1 pointJust like to thank you all for your valuable input on this topic, a lot of information on a subject i know nothing about but don't fell so bad about tackling the fault and hope i can fix it whatever it turns out to be
-
1 pointOk...Thursday/Friday storm dumped right on 5" , plus a little more overnight into Saturday. I did plow it out Friday afternoon, just didn't have time to take any real pics - but here's the results. Winds here do some strange things - even with fairly dry snow - The D and it's blade worked excellent - had to do a lot of back dragging work on the north side of the building from the rough pavement over there - no issues with the locking arms. I do need to install a top flap to keep the snow from going over the top of it - the stuff is getting melted by the engine's hot air coming off the cooling fan and melting, forming thick ice on the trip springs/pivot sector and linkage. Glad I used SS on those parts - at least everything remained working despite being a solid block on the outside. The bushings on the blade center bolt have finally gotten broke in better, had to tighten the bolt down the rest of the way and it's smooth as butter, locks easily in position and releases very easily, like it should. Need to get a video - I can load this blade almost 2/3 full and just roll the stuff off to the side at a decent clip like nothing's there... More predicted for tonight into tomorrow early - expecting another 3"-4" , glad I pushed the banks well back - they are frozen solid now. Sarge
-
1 pointNo... sounds like a great price.
-
1 pointOk, so upon removing the rear wheels/tires/chains/weights I got a better look at it - the locks were installed backwards, nice. Not the first one I've seen like that , most times it's the main mount section is wrong but at least that part was correct, just the locks need flipped around. Just up/left of the bolt holding the lock arm you can see the hole by the factory bolt for a retaining pin to keep the lock in place so it can't open. Left side had a hole from the factory - as the IPL showed . Right side, however did not have the hole drilled so I bored through both parts and used a 3/16" hair pin clip on them - it won't unlock on it's own again now, or at least it shouldn't . Right side is now bored right through the lock and mount side plate - I was a bit surprised at finding a square hole for a 3/8" carriage bolt - IPL shows just 3/8"x1-1/4" standard bolts but I went ahead and used the carriage bolts I had on hand, makes it easier to set the tension on the lock anyway. Some new nylock nuts and washers finished it off nicely. Went out with it and finished moving back the banks and piles - up to 12" predicted for the next 24hrs so I figured I'd better move the piles while I had a decent chance. Turns out that was a good idea since they had been melted a bit by the sun and were frozen pretty hard to the ground. The D didn't care, just moved them as big pieces like they weren't there, only spun out once with the chains and 50lb weights. By the time I finished that and the other half of the parking lot we had a new 2" layer that had fallen early this evening before I came in - snowing pretty hard so we should get some decent seat time tomorrow. Sounds like it will be up near 30*F, so it's going to be fairly wet stuff, too - great. I love this blade, cuts easily, rolls perfectly even at low speeds and leaves the surface dead clean - the 1055HC cutting edge is working perfectly. Just need some time to get the skids done and set them up - it will move frozen gravel easily as well as sod, concrete and whatever it hits,lol... Sarge
-
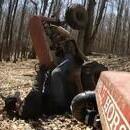
1 pointAt least he didn't do this!
-
1 pointUpdate. I have most everything roughed in. I decided the rake was too drastic to just bolt the engine on the frame.so I made a plate to level the engine. 2 bearing flanges sit nearly under the tower for the jack shaft so that took some time making it fit. Those pulleys will sit safely under the foot rest. With the jackshaft lower than a 551 Suburban engine pulley,.I'm hoping everything works as it should Wife thinks it won't be long before I complete it and then what will I have to keep busy? Well after the bugs are all out, I will most likely paint it.
-
1 pointHere is my updated engine build stand/station Stainless top/engine tools and parts in drawers. Clean workstation

.JPG.9f2ecb26065c66527b0730084ab7fc7a.thumb.jpg.7dc8a04d9a53d44ee2b23f26ee94496f.jpg)


This leaderboard is set to New York/GMT-04:00