Leaderboard
-
in all areas
- All areas
- Markers
- Marker Comments
- Marker Reviews
- Articles
- Article Comments
- Article Reviews
- Classfieds
- Classified Comments
- Classified Reviews
- Wiki's
- Wiki Comments
- Wiki Reviews
- Blog Entries
- Blog Comments
- Images
- Image Comments
- Image Reviews
- Albums
- Album Comments
- Album Reviews
- Files
- File Comments
- File Reviews
- Posts
-
Custom Date
-
All time
November 28 2011 - November 28 2025
-
Year
November 28 2024 - November 28 2025
-
Month
October 28 2025 - November 28 2025
-
Week
November 21 2025 - November 28 2025
-
Today
November 28 2025
-
Custom Date
11/17/2017 - 11/17/2017
-
All time
Popular Content
Showing content with the highest reputation on 11/17/2017 in all areas
-
8 pointsI figured since I am going to start to pull I needed a good stone boat. Found a real one locally on CL. I wanted to add metal plate on the bottom and found some free metal shelves. Worked out perfectly,
-
6 pointsBeen watching & following this thread since before I was even a member...this is so cool on so many levels; beyond even your build skills, Sir (which I think are outstanding)... I know it's been said many times, but it's the truth...Emory is one lucky young man. It'll be a Christmas he---or you, never forgets! And not just because of this cool build. It's no secret to my Dad that these Blackhoods jump out at me, and that caught my interest, for sure...but it's more than that, this one As a side note....this forum was the 1st place I was introduced to "stacks" on a lawnmower/garden tractor. My Dad, as well as I...well, I guess I just didn't/don't get it, on a using machine, though I s'pose there is a reason. But yours is the 1st machine I've seen with one that really speaks to me; shoot, I LIKE it, A lot! Emory made a great call, on that one...in fact, I'd probably do the same, someday, on one, if it came out lookin' that good; just like it belongs on there... Thanks for sharing this very special project.
-
5 pointsI have been bugging Charlie for years to sell me this one. I thank him for passing it along. Been doing some slight modifications and changes but the build and look is just cool. Thought I would share some photos with everyone. May name it the "Twin Killer" ... lol (inside joke)
-
5 pointsMe too. It's my very first WH. Got very lucky to get into the hobby with a loader tractor as the first one. Maybe it'll make down to the big show for 2018 and you can give it go! How about pranking someone by digging a large moat around their tent? Yes Sir, that and fishing. Check out Sparky's post. He's #2. There are plenty of jokes to be written about Sparky and #2 but he'll be let off the hook this time. Hammers, drill bits, saw blades, you name it and it got worn out including my back and knees. This was built before I joined RS or any forum for that matter. There was an old thread from when it was first posted but I think it got lost in the forum host move, as many of those old beginning threads had. It used to be used for snow, first with a snowblower and using the FEL as a lift for it, then with a custom made blade which fit on the arms of the loader, then back to the bucket. But now I use a big 44 inch blower on a 418-C and the trusty rusty 654 with a snow blade. Those 2 can handle everything from a dusting to 2ft plus, so the loader gets stored out back for the winter. And thanks everyone for the nice comments on the machine!
-
5 pointsYes I rewired my 1974 c160 and the B80 is the same wiring diagram. I did add a volt gage instead of the amp gage so that's the only difference . If you use a amp gage just rewire it as the old diagram says. Here is the diagram I used. I replaced each wire by color and this made it much easer.
-
4 points
-
4 pointsThank you for offering Bob but I'll use your diagram just as it is. I'm going to wire my lights that way as well. I'm using LEDs but I figure it's worth the cheap insurance.
-
3 points
-
3 points
-
3 pointsHiding out in the tunnels again are we ? Heck I’d be finding a way to get one of Mickey’s steaks out of one of the sit down restaurants . Hands down the best steaks I have eaten anywhere and this comes from a guy who grew up on them still walking around on four legs . @dells68 I’m still up for adoption ... Great progress on the resto . That black metal flake is really going to make it standout !
-
3 points@ebinmaine I also forgot to mention in this diagram I added different lights so I added a relay it's the blue wires. If you want a diagram without the relay I can post one . I made this diagram with a relay so I could add brighter headlights that draw more amp's without destroying the key switch.
-
3 pointsI think this thread needs a pic! I eventually used stainless one from McMaster since this was supposed to be a stainless themed trailer queen. Couldn't help myself and got it real dirty plowing with no hub issues.
-
3 pointsThe 520Lxi is a great tractor with a great engine. The engine seems more powerful to me than the 22 hp Kohler air cooled in the 522xi versions. Like Elmer Fudd, it's also very, very quiet. The lack of a blaring noise machine under the hood always made me think the engine wasn't reaching full throttle so I even checked it a couple of times with a tachometer to make sure. You'll think the power steering is a gimmick until you drive the Lxi for a while and go back to your other tractors. As a working tractor, the 5xi's are hard to beat. They are very easy and comfortable to operate, tough as nails, and heavy duty everywhere. Guys on this forum are finally coming around to them. Steve
-
3 pointsThanks for your kind words @12Horse Paladin. I'm really enjoying this build. I'm honestly working harder on it than on most of my own projects to hopefully make it a great Christmas for Emory. I'm not a fan of straight exhausts, but Emory loves the look and sound of them. Black hoods seem to have become my favorite in short order, with the exception of our suburbans. Oh, and to Redsquare. You won't find any nicer group of folks with more knowledge anywhere! Even better, come meet them next June at the Big Show!
-
3 pointsShot the first couple of coats of high build primer tonight. Found a few dents on the right front corner that will need to be addressed. All in all I'm pretty happy. Hopefully the next pics I post will be of the metallic black sometime early next week.
-
3 pointsCould be you get on and off on the lower side and put more strain on it, switch them out and they will even out in about four decades.
-
2 pointsWell I posted on another thread earlier today about wanting a tractor or two back which were sold, "just to take them for a spin and tinker on". Then after walking by one which I DO have, I decided to take the time to get this old neglected girl going, plus it needs to be moved for winter storage. It's been sitting in the same spot since early April and hasn't even been started. Time has been my hobbies' enemy among many other things since starting a new job, but today it just made sense (only to me) to take a moment and make the sacrifice to just do it. "The hell with making money and satisfied customers" I shouted. Just kidding, but that was the basic thought and the reality. So I pulled the carb, gave it a quick spray cleaning and some new gaskets, charged up the battery while doing that and fired it up. It was really nice to just take her for a spin and get the juices flowing through all of the hydraulics. It's such a fun machine to play and work with, too bad I don't have the time to really get into fixing her up. Can't even remember the last time I started a new thread.
-
2 pointsHappy Anniversary Red Square! Very glad I joined this group of great people ! Glad I have connected with many of the members and shared information, parts and the love of Wheel Horse tractors!
-
2 pointsIf you're sure it's the outer track of the bearing you're looking at, if you have a welder, lay down a few runs of weld,not an awful lot, on the bearing race. What will happen is, the metal will expand, then after cooling, will be slightly smaller than it was originally. The bearing should then drift out much easier with less chance of damage to the housing.
-
2 pointsYou can use a large socket, bigger than the o.d. of the race to support the pulley. Then use a thin punch to catch the race edge and drive it out from the inside.
-
2 points
-
2 points@gulftane first priority is to take care of yourself. Use the horses as therapy and keep us posted. Glad to hear you're doing better now!
-
2 points
-
2 pointsHeat will take the "spring" out of the spring. If height isn't an issue, it's probably easier to squish the other one in a vice to make them the same height. Or, wedge and a hammer like others replied to open it up a little.
-
2 pointsif you have a large vise or a hydraulic press you can find a deep socket slightly smaller than the bearing's OD and use it to press them out and a larger socket on the other end to press them into. Given the outside diameter, inside diameter and width any good industrial supply house or auto parts store can hook you up.
-
2 pointsExcellent! Here is another pair I am tempted to grab too. Now these are from a Cub Lowboy. 4 x 10⁻¹/2 bolt pattern as well. Very Tempted!
-
2 pointsI recall SOI stating the polarization is not necessary. Once you use the starter the voltage regulator is polarized. Garry
-
2 pointsBeen using Huskee Kevlar (green) belts. Most always on the shelf at TSC. Never had one fail. Great belts and inexpensive. Green belts? Green belts indicate oil resistant. Label the belt sleeves; i.e.: 416-8 Drive, 48" Deck. Staple gun the sleeve on the shop wall.
-
2 points
-
2 pointsand actually while I read this, I am eating popcorn and drinking a water. Looking great. Looking forward to seeing some paint 👍
-
2 points
-
2 pointsI drove a 522XI with 60 inch mower deck earlier this month! I must admit I was very surprised at how well it performed and how quiet it was even with the 60 inch mower engaged. And it could haul that heavy mower deck like it was not even on it! The power steering is impressive also. My place is not big enough to warrant a larger mower and mower deck but for those who do this would be a nice machine to own and use for a variety of purposes! Video of me in motion! 023.MOV
-
2 pointsThe dump site where we're allowed to get rid of yard waste is 3/4 mile away - and at times is quite muddy . Hauling out the Agrifab mow-n-vac yesterday to dump the leaves/grass out was interesting - the whole area out there was full of mud . The front/rear ags and rear chains did fine - had to drag another guy's CC mower out pulling a very small trailer of debris , the Horse never spun a wheel . Sarge
-
2 pointsI love this sign! But then, I love the looks of those Blackhoods! I don't have any of this stuff...yet. But, I've always been into the whole "sign"; anything "paper" bit....it's as much a part of the history as the tractors; any given item. I don't have a big garage; not even the room for a stable yet, but this I can and do, get. Been into "boomsticks" for a long time, Rugers in particular....it amazes people to find out that the box some of those older pieces came in can be worth almost as much as the contents, sometimes more, for example. Thanks, all of you, for sharing these cool photos...keeps the juices flowing for this hobby, now, too, for this newbie.
-
2 pointsI understand. But I've got to tell you - that's one really nice looking tractor with the ags. I've always thought they give our tractors that big tractor look!
-
2 pointsFound this wonderful drawing. The "G" terminal is GENERATOR!
-
2 pointsGuess I will continue with the 953 resto. as soon as the snow fleet is readied for winter and the leaves are gone.
-
2 pointsIt was really nice meeting you too Steve, and yes, it was a hectic few days. But as you say, I had good help and made good friends too, so all is good. Yes I will do some pics etc when it arrives. Hopefully it has not been spilled, or tipped upside down. It should arrive before Christmas, so I am making space for it all, and trying to prepare as much as I can.
-
2 pointsIf you add a second set screw ( i uses alloy ones from McMaster) be careful when you tighten down the jam nut. Wheel Horse machines a flat surface around the set screw hole. When you drill and tap you one you will have a curved surface surrounding the new hole that is also not quite level. If you over torque the jam nut you it it may snap off the set screw as it, the jam nut and the hub are not all in perfect alignment. Do not ask me how i know this. but some day when some one gets one of my electro 12s they will wonder why there is a hardened set screw snapped off flush with the hub.
-
2 points
-
2 points... and just starring at them (for me anyways) does the same. Very nice machine you have there wallfish !
-
2 points
-
1 point
-
1 pointour man Jim couldn’t help himself! his tractor did an awesome job as the videos testify...The harder you plan to work the tractor, the more critical this hub to axle connection becomes.
-
1 point
-
1 pointToo bad we are not closer. I have a K341 (low rise) sitting on my shelf (not tried to start it since overhaul) along with a K301,(about $400or slightly more) in parts, maybe run two hours, & a K321 I have to check out.
-
1 point
-
1 pointIt's my understanding that they are definitely hard to come by across the pond and parts are at a premium. Hopefully Tom got what he personally wanted and this all works out for him.
-
1 pointLooks good . Definitely a plus in wet windy weather. I actually have to open the door once in awhile to cool it off. I have a flexible dryer pipe coming off of the cylinder block fins near the exhaust valve area for heat. Kohler 16 model. Nice and toasty. You will like it.
-
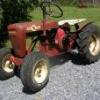
1 pointWaiting on some muscle! Also I checked my width and it is identical to the sunstrand transaxle I took out. This is good.


.JPG.9f2ecb26065c66527b0730084ab7fc7a.thumb.jpg.7dc8a04d9a53d44ee2b23f26ee94496f.jpg)


