Jump to content

Leaderboard


Popular Content

Showing content with the highest reputation on 08/15/2017 in all areas
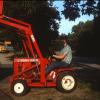
  1. 17 points
    I thought you guys may want to see this. Now excuse the sears has it was dads second favorite.
  2. 8 points
    What an awesome pic this is
  3. 7 points
    I mow over an acre of smooth flat lawn with the c-160-48" deck. 2nd gear works fine even in thick grass , but 1st gear high range is my favorite gear. I like to watch the clippings flow out of the discharge and the seat time is the only time i get to relax . I usually grin ear to ear the whole time. Over 40 years of memories with my Wheelhorses come back to me every time i drive it.
  4. 6 points
    Would be great to do a vintage calendar using some pics from our vintage pic thread ,for a trip down memory lane ,
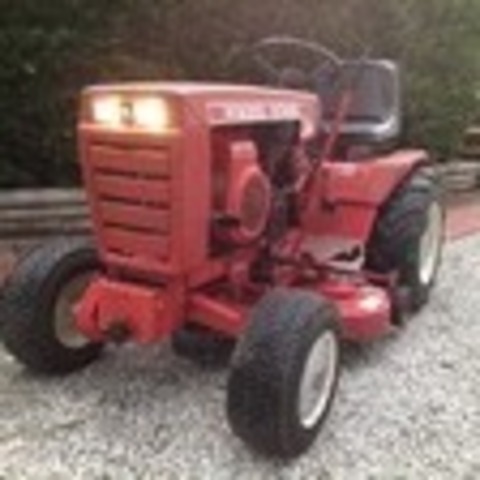
  5. 5 points
    Hello everyone! I recently inherited my grandpa's Wheel Horse 753. I remember it running before his health declined about 15 years ago. My intentions are just to get it running and do a mild restoration, it'll stay in the family. Without further ado, here it is! Having a hard time with pictures due to no phone service at my shop. I'll be sure to update soon.
  6. 5 points
    Hmm, looks like it's not only outa' state horse rustlers we need to watch out for....
  7. 5 points
    Here's a couple. 1961 551 1967 Lawn Ranger 1981 GT2500
  8. 4 points
    It's that time of year that we need to start thinking, planning, and preparing for our annual Wheel Horse Red Square calendar. If you want a chance to have your tractor(s) appear on next year's calendar, here is the thread to post your pictures. This year, I also asked that you put your username and year/model of your tractor for each picture you submit. We want HIGH resolution images only as they display better on our calendars. I would like season related images, i.e. snow blowing or snow blading for winter, grass mowing for summer, fall clean up for fall, and, of course, any tractor working or just sitting pretty for all to see are surely welcome. I don't know if we would want a theme or not, but that could be an idea. So, maybe suggestions for a theme, if we go that route. Examples are RJs, or Suburbans, or maybe big wheel tractors like the 953/1054/GT-14/C-195, or maybe a 70's theme? I don't know if we will do a theme, but I still like to have some suggestions and/or comments added here also. Thanks. OH, if anyone wants to tackle this project besides me, feel free to volunteer.
  9. 4 points
  10. 4 points
    Perhaps modern pics that have been "antiqued"? Just thinkin out loud here Terry... 1960 Suburban 400
  11. 3 points
    At the rate life is throwing curves recently I will be lucky to make it to the auction. Trying to figure out if the El Camino will make it 55 miles one way. If it does I will be the one dumb A riding in the tow truck hauling a El Camino and a , listening to " I told you not to drive it " on the phone while I am trying to explain why I am late.
  12. 3 points
  13. 3 points
  14. 3 points
  15. 3 points
    Well, honestly, I would believe your location has the most to do with it! You have to remember that Wheel Horses were much more abundant in the states than they were overseas. You may notice there are far more of these scores and deals posts from members in the states than there are from the guys over in the European countries. If I were you I'd scrap the quest for the 520 and look for a nice 512-D.... that's a model that was only available overseas. How I wish they would have made that one available over here! As to where/how/what you're searching... perhaps one of the gents from your side could chip in some better tips?
  16. 3 points
    Was glad that I had GPS in the boat this morn. Visibility was not good. Fishing has not been the best but still better than working.😀
  17. 3 points
    Now you can really haul some horses! Next up---an even bigger trailer! With that Cummins, you won't even know that you have your trailer attached AND
  18. 3 points
    Speaking of this type of situation...I had a middle aged couple come to my house tonight to buy a John Deere dealer sign from me tonight... both huge John Deere fans but she seemed worse then him, well he fell in love with my RJ and wanted her to fork over money so he could buy it.. before I got to say anything she says "we would have to paint it John Deere green for it to go to my house" they would of had to kill me before they took my little RJ(killer)....
  19. 2 points
    Found some old pics of my dad's tractors. Thought I would share a few. I think this one is possiblly a 704 or 854. He seems to remember owning a '64 model of some kind. Dad sold new Chevrolets and Buicks at the local dealer. That's a new '65 Impala in the drive and my mom's '62 Nova in the garage. This pic would be 1964-65. Oh, and that's me in the dump cart.
  20. 2 points
    I concur with the observations by both Lane and Garry. However, there is still something not right about the supports that hold the center bar to the shell. One or more of them is bent (someone hit a rock or a tree stump with the deck). Even though these are 1/4 inch thick steel, they will tear (or rip the shell). Disassemble the supports and check to see if the right angles are truly 90 degrees. If not, pound them into the correct alignment.
  21. 2 points
    @elcamino/wheelhorse, it's a heavy Chevy it'll make, have faith in the Bowtie as well as the , I think I might know a lil sumpthin' about fixing up a G body if you ever need anything, Jeff.
  22. 2 points
    Great job, Lane!!! I wouldn't want to have to change that drive belt very often. Looks like a real PITA to do, especially the thing mounted to the tractor. Remove bottom plate, remove bolts in bearing flanges, loosen set screws, move pulley shaft enough to install belt, then reassemble everything. Not much fun on your knees or on your back........
  23. 2 points
    @Jjohnny1 I already have 1984 SS Choo Choo one of 1389 produced that year. The wife would kill me twice if I brought another home. Make drive the El up to the auction @Skipper This is the auction thread. Check out the pictures.
  24. 2 points
    What I do is loosen the motor mounts then pull the engine forward as far as it will go (having the tension off of the belt will help this). Also at this time try and make sure the engine is sitting square so the belt is in as close an alignment as you can get. You won't get a lot of movement but it may help. Cleat
  25. 2 points
    1964 Wheel Horse 854 with 50 inch Wheel Horse Sickle Bar Mower
  26. 2 points
  27. 2 points
    I'm sure we can find 12 worthy vintage photos , even if they are a little on the grainy side , , I know the more you increase the size the picture quality deminishes , or maybe the front cover could have a collage of vintage pics all on one page ,
  28. 2 points
    I actually like the pic in B&W , shows the nostalgia
  29. 2 points
    I have found that when you are searching for a short that is blowing fuses it can best be done with a test light. Remove the bad fuse and replace it with a 12 volt test light connected across the fuse holder. When the short is there the light will be bright, move the wires around and when the light dims or goes out you have found the short.
  30. 2 points
    Just thought I would update this thread with some modern day pics...no Bob @rmaynard we're not saying your old just your thread! Like was mentioned this was done on a snow blower but applies to anything with hard to find insert bearings. Note these are 7/8 ID but need to go on a 3/4 shaft. My research showed that the correct ones are still available from Toro ....at anywhere from 60 -90 bucks apiece. That's nuts & and I am (sometimes) cheap. Bearings from here, 6.50 a piece with a little for ship, they have the needed 52mm OD to fit the 50 yo flanges. http://bearingson.com/category/insert_bearings/uc_insert_bearings/78_insert_bearings_uc205-14.asp?page=1&SortType=0 Bushings from McMaster 2868T172 https://www.mcmaster.com/#catalog/123/1175/=18ycui0 Bout 2.50 each shipped with some other needed hardware some pics Carefully press the bushing into the bearing until centered - use a little oil to help, it is a snug fit. Don't forget to remove set screws first! Use a small starter bit then up to about 3/16". Be care full when working around the existing threads. Next using a 1/4-28 tap rethread the set screw holes. Should take little to no effort. Blow off the chips with compressed air ...try and not blow the chips into the bearing (they are sealed BTW and NOT re-lubeable)
  31. 2 points
    Bottom plate off, remove shaft,
  32. 2 points
    That's the whole point Josh... I kept thinking about that climb out of the Mississippi river valley on the MN side on the way to Leseur, last year the trailer was passing the truck ...the old GMC truck couldn't get out of it's own way and the gas gauge went down faster than the speedometer! Your right maybe gonna wish I sprung for a 16 footer! I'm thinkin down the road as I near retirement may have to look at hauler/camping combos?
  33. 2 points
    Coming from a guy that is supposed to be thinning the herd?!?!
  34. 2 points
    Wow! Next time my wife wonders aloud how many tractors I have, I'll show her this and how much worse it could be. I suspect this will be a bargain hunter's paradise. With so many run-of-the-mill models and so many duplicates I think this will be a great place to be a buyer. And, I think the right crowd might help the selling family on a few of the special models like the RJ35, 1054, and backhoe equipped D-auto. I like the looks of a couple of those green ones and the old Case models. Looks like a great time. I just might be in that neck of the woods on the 15th...I wonder if a detour could be in the works. Good luck to all who go! Steve
  35. 2 points
    Jim you know you want it I know I do ... you just laid out how much $ on a truck don't let three batteries hold you back . My trackchair batteries are going on 6yrs old and still going strong . Deep cycle gels are the best but some good maintenance free will work fine. Break them in right and then keep them charged and you can get years of service out of them .
  36. 2 points
    Relax guys! It just isn't ripe yet. By the way, I painted both of my restored Wheel Horses FORD tractor red.
  37. 2 points
    Happy Birthday , Jim !! Nice Truck too !!!
  38. 2 points
  39. 2 points
    Happy Birthday Jim, nice ride we'll see you in a couple weeks.
  40. 2 points
    At the rate he is going that will be about 1- 2 years. @WHX12 If that's what I get for my 58th I am looking forward to next year's birthday!
  41. 2 points
    Full throttle high range in 2nd gear. I run 1st gear along the ditch or tricky spots. 3rd gear is too fast for bumps, it doesn't leave a nice cut. My dad mows in 3rd gear usually and the results are poor IMO. If I'm gonna put in the effort to mow, I prefer it to look good when I'm done, not have it look like it needs mowing again.
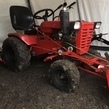
  42. 2 points
    Ok so.... I bought it 😉 cleaned up and now running I'll pick it up next week..
  43. 2 points
  44. 2 points
    Yes it will be there....doesnt quite look as good as that one though, maybe someday
  45. 1 point
    Wheel Horse B/C/D Tractor Dash Panel Restoration Tutorial How to properly restore a Tractor Dash Panel Wheel Horse Dash Panel Restoration Tutorial Originally posted by: MikesRJ - 03/06/2010 Click any picture in this article to view a larger version of the image Restoring old tractors (garden type or full-size farming equipment) presents the restorer with many challenges. Not so different from automotive or aircraft restorations, certain little tricks-of-the-trade are learned along the way which every restorer should have in their basket of tricks. The older a restoration subject is, the harder at times it is to locate a suitable "show-quality" part to complete the restoration. Sometimes you simply don't have a choice but to restore the part you have in hand because a replacement just simply does not exist. This how-to presents one of those tricks. The best part about this particular restoration technique it that it can be used on any part made of plastic, PVC, vinyl, leather, cloth or wood. The images above are of the Dash Panel before it was removed from a Wheel Horse C-160 Tractor, and after this restoration process was performed. Yes, boys and girls, that is in fact the same dash panel shown in both pictures. Excellent results can be achieved if you remind yourself to be patient, take your time, and follow the process presented here. Practicing the method on anything with raised letters beforehand also greatly enhances your chances of success. Simply follow this process on a "scrap" item and you should be ready for the actual piece in no time. PROCESS OVERVIEW: As restoration quality and New Old-Stock (NOS) Wheel Horse Dash Panels are harder to come by, it becomes necessary to restore what you have rather than replace the part entirely. This page is dedicated specifically to the restoration of an otherwise "good condition" dash panel that has been time-weathered, and return it to its original luster. Before moving on to restore your tractor restoration Dash Plate, it is HIGHLY SUGGESTED that you read through this entire article and perhaps try this method on a spare or "sacrificial" part beforehand. You only have one chance to do it right on your final piece, and a million ways to do it wrong along the way. As a side-note: This process can be used with very little variation on any tractor part which is made of vinyl, plastic, PVC, cloth, leather, or rubber. The VHT line of products is extensively used in the automotive/aircraft restoration worlds for returning anything made of these materials back to near original appearance. See more details concerning VHT Vinyl Dye products at this website: http://www.vhtpaint.com TOOLS REQUIRED: 1. Small bristle brush and Dawn Dish Detergent 2. 1/8" Metal punch and heating source (if making repairs) 3. 800 grit Wet/Dry Sand Paper 4. 0000 (fine) Steel Wool 5. Common Automotive Brake Fluid 6. Paper Towels 7. VHT Vinyl Dye, Gloss Jet Black (p/n: SP941) 8. Elmer's "Painter's" Opaque Paint Marker (fine & wide tip) 9. Dental Picks, Tooth Picks, and/or Exact-O Knife PAINTING TECHNIQUE: The white borders, letters, and symbols on the dash panels were originally manufactured using a screen printing roller technique. This method produces an extremely thin, opaque layer of material which is extremely strong and relatively long lasting. Since reproducing this technique is far more difficult for the "home restorer", the method presented here is relatively easy, and mimics the original process quite well. The technique I use is pretty straight forward and quite simple to do at home. In order to apply the thinnest coat of paint the tip of the paint marker should be as "dry" as possible, but still contain enough material to deposit on the surface. This technique is called "Dry Brushing" and is used by painters and modelers as a method for adding subtle details to whatever they are painting. For the purpose presented here we are using this method to apply the thinnest coat of material we can, in each successive pass over the surface. Once the paint marker is prepared for use per the package directions, the tip of the marker should be touched to a paper towel and dried off as much as possible before touching it to the part to be painted. When moving to the next paint area on your subject piece, re-load and re-dry the tip, then proceed. When painting with the white paint markers, insure the tip is about as wet as when using an artists "dry-brush" technique before touching it to the part. Apply the paint so it thinly "flows" over the surface, and use a paper towel to keep the tip "almost dry" of wet, runny paint between individual characters on the plate. Apply the paint with a very light touch in single passes only. Don't cover any more than a single pass at a time, building layer thickness with each additional coat. As always, follow the package directions for all of the products used in this process. When applying the paint, you are NOT wiping it onto the surface like a paint bush. You are also NOT trying to cover the surface completely in a single pass, rather you want to build successive layers, allowing each layer to completely dry, until an even and completely opaque coverage is achieved. If you attempt to wipe the paint onto the surface, you will produce "edge roll-over" and the paint will either bulge over the side edge of the surface, or run down the side, both of which conditions are undesirable. You should apply the paint in a very light tapping, or patting, manner where the tip is ever so lightly tapped onto the surface, moved over half of the width of the paint marker tip and tapped again; and the process continues from one end of the detail to the other. The only exception to this is when you are applying paint to long, continuous details such as the two border lines around the Dash Panel. These features should be lightly glided over using the dry brush method, from one end to the other end, and the tapping method is applied to finish the strokes at the very tips of these details. Aside from the method of application, the most important factor to keep in mind is that you are NOT trying to completely cover the underlying black dye color in a single pass. What you ARE trying to do is build-up multiple, very thin layers of paint until the white completely masks the black underneath. If done in this manner you are left with very sharp, crisp edges and an overall very thin opaque paint coverage of these raised dash panel details. The second most important aspect is that you insure your panel is well supported, i.e.: will not move during the painting process, while the heel of you painting hand is firmly planted on the work surface as you apply paint. This will insure the steadiest hand, and you will therefore have better control of the paint marker tip and where it touches while you apply the paint. Of third importance, as in any paint application process, starting off with a well prepared surface ALWAYS results in a higher quality final appearance. Complete and thorough cleaning, drying, repairs, and re-cleaning are all painstaking and necessary steps before applying any dye or paint to the surface. The instructions below go into greater detail where necessary, and if followed closely will result in a "better than new" looking part for your tractor restoration. Step 1: Thoroughly Clean the Dash Panel Here's where it started! Once removed from the machine, the entire dash panel should be thoroughly cleaned of all dirt, grease, oil, and old marking paint on all sides. Automotive Brake Fluid is a good paint and marking ink softener, but care must be taken to insure the brake fluid does not "melt" the plastic. I normally test the brake fluid method on the back side of the part, or on any surface which will not be seen when the part is re-installed, in order to insure the brake fluid will not attack the plastic material. Use the brake fluid sparingly, and allow it to sit on the surface at least 1/2 hour, to "loosen" any foreign materials (paint, ink, or hard stains) from the surfaces. Then with a combination of 0000 steel wool (try not to scratch the plastic), gentry scraping using the edge of an exact-o knife, and/or dental picks and tooth picks, you can easily remove all of the unwanted debris. Once all of the foreign matter is removed, the plate should be thoroughly scrubbed with a small plastic bristle brush and Dawn Dish Detergent. This will remove any remaining oil and dirt from the plate, the corners, and the edges. Rinse with warm water and allow the piece to thoroughly dry before continuing. Once it is completely cleaned it should look similar to the image below. Starting Point Step 2: Repairing Surface Blemishes This is the tricky part. If any surface blemishes exist, you need to make a choice whether to make a repair or leaving it as-is. Obviously, starting with a high quality unblemished panel is more desirable, but you may not have a choice but to use a "less than desirable" piece due to replacement part availability. Attempting to repair any surface issue may only result in a far worse appearance than leaving it alone. Choose wisely based on your abilities. Only one surface blemish was corrected on this example (the second "N" in "IGNITION"), the second blemish (the "wiggle" in upper left corner of the Electric Clutch "OFF" arrow-bracket) was left alone as it was too dangerous to attempt repair without further damage. The right side of the "N" was smashed down and the right "leg" of the "N" was partially split in two. A small round punch was used to "re-form" the letters edge by heating the punch tip to just below the melt point of the plastic, and "pushing" the letter back into shape. The split essentially closed up and re-bonded to the adjacent part. Care must be taken to not overheat the punch as you do not want to melt the plastic, only make it soft so it will "move". Once repairs are completed, re-clean the part as you did in Step 1. Step 3: Restore Plastic Color and Shine Many products exist which are designed to restore vinyl and plastic to their original luster. I have used many of them with varying results. VHT (A division of Dupli•Color, Inc., a Sherwin-Williams Company) produces a vinyl dye which comes in several colors, and in Gloss and Flat finishes. The product is NOT A PAINT, it truly is a dye designed for vinyl, plastic, cloth, leather, and wood. The vinyl dye, when applied to plastic, forms a polymer on the surface which actually transforms the plastic material surface into a new material matrix. I prefer the look of the hi-gloss finish as it makes plastic parts look more realistically like a "new part" than does the satin finished dye. VHT Vinyl Dye, Gloss Jet Black (p/n: SP941) in the 11 oz. aerosol was used to treat this Dash Panel, which only required a single, light coat to restore the dash panel to its original appearance. NOTE: Allow the dye to absorb and surface-dry at least 4 hours before proceeding to the white painting process. Step 4: Applying the First Coat of White Paint Applying the white paint is rather easy, but does require a little technique and a steady hand. For this step I used Elmer's "Painter's" Opaque Paint Markers (available in most craft and hobby shops). The markers come in several tip-sizes, I used the fine and wide tips here, and is composed of an opaque acrylic paint. The acrylic paint bonds extremely well to the dyed plastic, and holds up to temperature variations and the weather quite well too. LARGE PANEL DETAILS: When using the paint markers, do not press down with any significant force while painting. The driest tip (artists "dry-brush" technique) and the lightest touch (the least amount of downward force) on the plastic produces the best results. Using the wide tipped marker, dry the tip on paper towel and very lightly cover the large borders with a single pass. DO NOT go over them a second time, as doing so will leave "brush marks" in the paint. The result should be an almost see-through appearance of the white paint. Several coats will be necessary, so if the black shows through, leave it alone. Also, "paint" any large details on the face area; such as the choke symbol, large letters, rabbit and turtle; using the wide tip paint marker, but use the "PATTING" paint method described below for these smaller details. SMALL PANEL DETAILS: As before, you are applying a very thin coat, so make sure the marker tip is almost dry and apply only a very thin coat on the first pass. Using the fine-tip paint marker for lettering and small details, use a patting (or tapping) technique to apply paint to the tops of the letters. Begin at one end of the letter and overlap your taps, moving toward the other end of the letter. Don't wipe the paint on, PAT it on! Especially at the ends of the letters. This keeps the paint from "rolling over" the edges of the raised detail. Dry the tip on your paper towel frequently, and between every new detail painted. NOTE: Notice the black showing through the white in the image below. Keep the first coat VERY, VERY light. Step 5: Apply Additional Coats of White Paint ALLOW AT LEAST 4 HOURS BETWEEN COATS The application of paint continues as described in Step 4 until all of the painted areas are completely opaque and covered well. With each pass you will see the paint begin to almost "pool" on the top of the surface. As the paint dries it will flatten out to a nice even coat. The desired result is normally accomplished in just two to three coats of white paint. If you have blotchy or spotty coverage, you can use 800 grit wet-dry sand paper to lightly sand the white faces flat and even the paint coverage, then apply a final top coat after re-clean and dry the part. Make sure you allow the paint to dry thoroughly before sanding, and re-clean the part before applying the next coat of paint. Make sure all surfaces are evenly covered without brush strokes. The image below shows good coverage with very little over-painting or edge "rolling" after only two coats have been applied. Some letters and small details will need to be scraped and cleaned up prior to applying the last coat of white paint. Step 6: Finishing Up The final step in the process is to clean up any mistakes or over-painting (edge-rolling). This step is normally done BEFORE the last coat of white paint is applied, so that any scrape marks or edges can be covered on the final pass. I normally use dental picks, tooth picks and/or the tip of an Exact-O Knife to clean any edges which were over-painted or where errant paint has been deposited between letter lines. Any over-paint on the panels surface can be covered up by spraying some of the VHT dye into a small cup and using a fine tipped artists brush to "dry-brush" the paint drip into oblivion. Once the final coat of white marker paint has dried for at least 24 hours, crumble-up a piece of regular kitchen paper towel and buff all of the white painted details. The paper towel material is just course enough to polish the top surfaces and burnish the edges of the white details, giving your panel a "finished" look. The polishing will also remove any specs of dust which may have settled on the surface during drying time. Your piece will now be remarkably similar to an original new part, and is ready for installation on your pride and joy machine. The completed piece is now "Show-Ready" and looks like the images below. My thanks go out to Bob Maynard ("RMaynard"on the Red-Square forum) for the use of his B-80 dash panel in the creation of this How-To. Bob mentioned somewhere on the bulletin board that he was in the market for a NOS Dash Panel for his B-80 restoration. He also mentioned that he had an old usable one in-hand, but did not think it was show-quality enough for his restoration. I offered to restore his old panel for this tutorial, with the thought that he could perhaps use the result on his B-80 should he not find a suitable replacement. I hope you enjoy the tutorial, and Bob; Thank You for allowing me to use your panel for this example.
  46. 1 point
    I write this with tears rolling down my face as I think about my Father who has been gone for 30 years.Great tribute to your Dad.
  47. 1 point
  48. 1 point
    HAPPY BIRTHDAY JIM ... ... enjoy your new truck ... !!! Sorry I didn't show up for work today especially on my first day ... but when the boss is away the employees will play !
  49. 1 point
    That takes up a lot less room than mine. I like that. But I like that I have a place to set all my tools down while I work too! That works with a deck on? Doesn't look wide enough to make it to the center. Interesting. I may need one of those too! Would like to see a pic of a atop that bad boy! I can't read...Without a deck on....As Roseanne Roseannadanna said....Nevermind!
  50. 1 point
    Was that Cub Cadet a 100 or a 70? It's neat seeing the various vehicles, trucks,etc., over there that we don't get to see here in the US. Thanks for sharing the pictures. They were great.
This leaderboard is set to New York/GMT-05:00


  • Newsletter

    Want to keep up to date with all our latest news and information?
    Sign Up
×
×
  • Create New...