
Leaderboard


Popular Content
Showing content with the highest reputation on 07/31/2017 in all areas
-
12 pointsWho needs a FEL when you have talent like this?
-
7 pointsWhat do you want? It's in there, ain't it?
-
7 pointsSome how I don't think this was the first time he has done that, just the biggest!
-
7 pointsHey @Brrly1 ! " Well Caleb, I think we done snapped the park pawl offa C-6!
-
6 pointsOkay, INTRODUCTION: So if you've problem solved all other aspects regarding your non-starting Onan engine with electronic spark control and come to the conclusion that you need to replace the Ignition module, keep reading. This is a decent step by step and doesn't require the engine to be removed the from the tractor. Although it might be a little easier to work on while on a workbench. The part numbers for the Module and ring if needed are below: Ignition Module: 166-0785 Spark Ring: 166-0767 Here is a list of the tools that I needed to complete the job from beginning to the end. They are named from left to right in the photo with the tools at the top of the photo last from top to bottom. TOOLS: [From left in Photo] 1. T25 (for the stator screws but also may be three 5/16" head screws) 2. Phillips and Flat Head Screw Drivers 3. Needle Nose and standard slip joint pliers 4. Flywheel puller with 2 5/16" x 18 grade 8 bolts and washers (mine is technically a steering wheel puller) 5. 7mm and 5/16" deep well 1/4" sockets 6. 3" 3/8" drive extension, 3/8" socket 3/8" drive, 5/8" socket 1/2" drive and 5" 1/2" drive extension. 7. 1/4" Socket Driver 8. 5/8" open end box wrench 9. 3/8" and 1/2" drive ratchets [Top of photo- top to bottom] 10. Flash light (optional but very helpful at times) 11. Pry bar (used to lock flywheel from turning) 12 1/2" Torque wrench 13. Old Tooth Brush (for cleaning of dirt if needed) PROCESS: - Obviously the first thing to do for safety sake is to shut of the fuel at the tank and remove the battery cables - Next, remove the two screws that hold the fuel pump onto the shroud, move the pump off to the side and replace the screws into their holes for safe keeping. - Carefully pull the fuel pump away from the shroud enough to work the hose clamp out and use the pliers to pinch the hose clamp and remove the vacuum line for pump. - Tie the fuel line, wiring harness, choke cable and battery cable all out of the way towards the rear of the tractor allow easy access to remove the shroud. - Next remove the air cleaner box cap, then air cleaner cap and air cleaner tray by removing the three 5/16" screws from the carb and the two 3/8" screws from the tray and put all aside and out of the way. NOTE: Close the Choke all of the way and stuff a clean paper towel into the top of the carb to prevent debris contamination. - Next, twist the air filter box bracket to the left (right side up and left side down) to clear space and use the 7mm, 5/16" and 1/4" socket driver to remove the black condenser wire, the red and black ignition module wires and the yellow ignition switch wire from the coil and then remove the coil using the 3/8" socket. (optional as it can be kept on the shroud but makes it a little more difficult.) - Next loosen the rear cylinders top shroud and engine hoist mount bolt with the 1/2" 3/8" sock and extension. (no need to remove the bolt as the shroud just needs to move freely. - Next, locate the wire retaining clip at the top of the shroud by the coil and open it up so the oil pressure sensor, stator and ignition module wires can all be removed when taking out the shroud. - Last step before removing the shroud is to disconnect the throttle to gov arm spring and the throttle cable using the 5/16" socket and driver. -Next locate all of the shroud bolts and remove using the 3/8" socket. - To remove the shroud, pull the bottom out first and then shift the entire piece upwards while working it from underneath the rear cylinder shroud, underneath the filter box bracket and over the flywheel on the left side. Work slow so you don't bend or brake anything and it will come off pretty easily. - Although everything was fairly clean in comparison to other engines at this step, my shroud was dirty and this can slightly decrease air flow which is important to maximize and keep optimal with an air cooled engine. So I took mine outside and pressure washed it to give it time to dry completely before reinstall. Shroud off... - Next, place the pry bar into the fins of the flywheel and lock the flywheel in place by placing the handle of the pry bar under the foot rest. Then use the 5/8" sock, 1/2" extension and loosen up the flywheel bolt about 3/8" -1/2" out of the hole. This needs to stay mostly in as a pressure point for the puller. - Next, remove two of the flywheel grill center bolts and then use your two 5/16" grade 8 bolts and attach the puller to the flywheel while keeping the puller parallel to the surface of the flywheel to allow equal pulling pressure on both sides of the puller while cranking on the center pressure bolt on the puller. - Now it's time to remove the flywheel. It may be a good idea to use the 5/8" open ended box wrench to stop the flywheel bolt from turning while cranking on the puller center bolt. - It should only take a 3-5 good cranks after finger tightening the center bolt and the flywheel will give a good pop and be ready to be pulled off. Don't forget about the flywheel bolt first! - Next, carefully pull the flywheel off of the crank being very careful not to get caught on the stator itself. My flywheel was pretty dirty on the inside and between the magnets so I felt it necessary to use the toothbrush and air gun to clean it out. - Now you'll need to remove the stator by using either 5/16" socket or T25 torque bit or driver. - Next, set the stator off to the side securely on a clean rag or similar. Underneath, you'll see the ignition module on the bottom side of crank. There are two 5/16" head machine screws. Remove those and open the wire retaining clip on the side of the gear cover and the module comes right off. Make sure not to lose the black rectangular insulator that goes between the module and gear cover. That needs to be there. I'm not 100% sure but I have a theory that these modules may potentially go bad from getting covered with grass and debris over time from not blowing out the air shrouds with a leaf blower or air gun after each use. This debris builds up enough to cause insulation around the module. The module being an IC (Integrated Circuit) is designed to handle only so much heat. Over time the extra heat and expansion with contraction when cooled back down causes a when point in the modules chip circuitry and eventually breaks. Thus causing the engine to shut off during operation for the first time. Once the engine cools, the chip materials contract, allowing the circuit to bridge again only until the engine heats up enough to break that signal and then becomes a cycle until replaced. - Moving on.. While everything is out, if needed (or your OCD kicks in), clean the cylinder heat syncs and general area before re-installation of the Module, Stator, Flywheel and Shroud. Mine wasn't to bad so I quickly used the toothbrush and air gun to break free any layered gunk and blew it off with air. -Next, once the insulator, module (and spark ring if chosen to) and stator are all reinstalled and screws all snugged up, carefully put the cleaned flywheel back on, install the flywheel bolt with a tiny tad of anti-seize on it and use the pry bar again in the flywheel fins but with the handle on top of the foot rest and use the 5/8" socket, extension and 1/2" torque wrench set to 55lbs and tighten up the bolt. At this point, go ahead and reinstall the Shroud making sure that the fuel pumps vacuum line is accessible through the front hole in the shroud, along with the shroud bolts, coil, coil wires (spark, condenser, module and switch) and tighten rear shroud bolt. NOTE: Yellow Switch wire, red module wire and black condenser wires all go on the Positive coil terminal (7mm nut) which should be on the right side of the coil. Only the black module wire goes on the left terminal. Connect the throttle to Gov arm spring, throttle cable, install the fuel pump vacuum line again and replace mount screws. - Lastly, re-install the filter tray, remove the paper towel from the carb, along with installing the air cleaner, pre-filter and clean cap and shroud to filter tray pipe. Then connect the battery and turn the fuel back on. This should get you going again. I think that I got everything but please feel free to comment on anything that I missed as far as documenting the steps or ask any questions about the process. Hope this helps you see that it's not that bad of process to replace the ignition module (And spark ring if needed as some recommend replacing the module , ring and coil all at the same time). I had to first remove this module from a P220G that was on my bench and awaiting repairs but the whole process took me a few hours. A good Saturday Morning task to be up and running by the afternoon for some work before the heat hits. I also ran the tractor for well over and hour after install to insure all was well. I went from a warm up process of idling and then a lap around my property. Did that a few times while repairing a cutting deck and then installed the cutting deck and mowed the lawn. No issues. Ran great! Take Care and God Bless! Andrew C.
-
6 pointsAll set 👍 . Mike....
-
6 pointsGoing in the wrong room seems to be a new habit for you.
-
5 pointsMy first but not last http://www.symcoutc.com/Thresheree.html Enjoy!
-
5 pointsPeople are amazing.
-
5 pointsPulling... lots of good pulling going on and you could tell the club had done this before... two eliminators going on the same track so one puller was hooking up while the other one pulled. Made for fast action and no sitting around! BTW Dan brought back a trophy for 1st in 3500 lb Antique. Not an easy task looking at how many tractors in that class! I like this shot...note the angle of the fronts. Fronts off the ground! Dan's SIL also won a 1st in class with and outstanding run!
-
5 pointsSo what Dan is talking about is in his picture above just to the right of the oldddd well rig are the showers. So I goes in Sat nite to hose the dust off and I errantly went in the women's side instead of the mens! I says to this gal I think your on the wrong side....she says no you are you need to be in the side that has the short name.... oooppps I says I did that on purpose.... figured the women's side was cleaner! A few more shenanigans.... A real nice guy, I think his name was Pat but I called him sharpie all weekend cause he borrowed a sharpie from me to make a sign, camping right across from us had this neat economy with tris on the back gives Dan a ride ... needless to say this did not end well as the sulky? if you call it that had issues with Dan's weight dumping him on the ground for a nice digger! I was too busy laughing to get the shot! Rest of the weekend he had a tie down on it to keep from bending! Dan gets consoled by his Sophie for the misshap!
-
5 pointsMy phone was all but useless on the grounds so I didn't carry it all that often. I'll have to wait until I get home tonight to post more pics from my camera. I can how ever post this nice shot of Jim taking our Allis G out for a ride. That old rig behind him was used to drill a new well during the show. The well will be used to supply water for the new shower house.
-
5 pointsHe saved some time and money by not cutting it into smaller pieces, but now he has to buy a new truck. You gotta wonder about some people. Thanks for the good laugh. Jim
-
5 pointsI just realized I posted this in Europe shows if a one of the staff could kindly move it to the proper forum @T-Mo, @Sparky, @TT @Terry M
-
5 pointsFirst to the Second, trying to remove the blades while the mower deck is on the tractor can be, as you have found, very unsafe. Remove the deck from the tractor and turn it over to work on the blades. They can be sharpened on the deck with a 41/2" angle grinder. But I prefer to take the blades off and use a bench grinder and cooling water. I use a wood block to jam the blade to the deck, then if the bolt head is not damaged, use the correct size socket and breaker bar. If the head is damaged, I resort to a pipe wrench and I have used a 3' pipe handle extension w/o damage to the spindle. Good Luck. PS the deck is really easy to remove and reinstall. Other maintenance to the deck should be done while it is off the tractor.
-
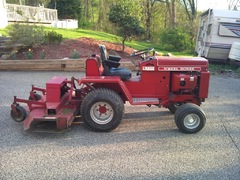
4 pointsA GT2500 followed us home today. The metal has some rust, but it is straight. It runs nice and strong to. Came with what appears to be a late 60's snow plow and wheel weights.
-
4 pointsWe may be looking at this all wrong, maybe his wife wouldn't let him get a new truck untill the old one was wore out! Guess he showed her!!
-
4 pointsJust needed a bigger truck.
-
4 pointsGot to meet fellow member Tom @Deadguy, see his fine herd and even some seat time on his 701. A pink dressed granddaughter got some seat time on his wife's @Blondeflutterby pink tractor! This youngster sure did take a fancy to Dan's rat rod!
-
4 pointsI agree...take the deck off and work on it. Secondly, if you aren't sure, have the blades sharpened by a lawn mower shop. They can sharpen to the correct angle and...more importantly...balance each blade. If they aren't balanced, you MAY notice some vibration which is detrimental to bearings and every thing else. Spend a few bucks and get them sharpened....after you get them off, of course.
-
4 pointsI had a pretty good day yesterday. I got the gear reduction unit installed. I decided to use the 520h front axle. I just have to mount some new wider tires and put the sheet metal back on. I think the next progress for wonderful machine is a foot control unit. 😆 I want to thank everyone for your advice and support.
-
4 points
-
3 pointswell about a couple of weeks ago I had a friend of mine make me a lift bracket that attaches to the roof rafters so I could hang my chain hoist from tested a john deere 112 on it and the rafters didn't make a peep!
-
3 pointsAny golf cart fans or owners here at Redsquare? We have an E-Z-GO TXT & a ClubCar DS Carryall. We use them for tooling around the yard & trailer the E-Z-GO to community garage sales where they are golf cart friendly & a big flea market in Lima, OH every summer. (Maxx's Trader Days & Water Dog Races). http://maxstraderdays.com/ We have a lot of fun with them. I picked up the E-Z-GO as it sits & other than adding a stereo haven't changed it. The Club Car was a former Notre Dame mail car & has the full cab (doors come off in the summer) , I put a 4" lift on with 23" tires, the front bumper & the LED lights. It's my go too for weedeater, chainsaw, bird & deer corn hauler. Any other golf carters here?....lets see them.
-
3 pointsLol, after i made this post i did just that, sorry for the waste of time, call it a pop quiz if you will
-
3 pointsAim was spot on...
-
3 pointsAnd, notice how that FORD is ready to haul it away!
-
3 pointsI'm thinking there's a strong possibly Steve on a stick might be spotted.
-
3 pointsI love how the hub cap falls off with the delayed reaction!
-
3 pointsWhen you have the backhoe attachment the gas tank is mounted on the fender. Other than that there is no reason with original set ups.
-
3 pointsPipe wrench is last resort because of the way it grabs the nut it will crush the nut and make it even harder to get off. Impact with right size (1 1/8 " ) socket I believe is the best way if nut is not too bad.
-
3 pointsI use a good impact wrench. Might be well worth taking the deck to someone as a slip of the wrench could be disasterous to hands or knuckles.,
-
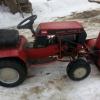
3 pointsNot sure if you'd want my help with that thing - it may grow into this.... @Tgtack might get a kick out of his old store site decal across the nose in front of the radiator . I had built a 1.6L Tracker/Swift GTi hybrid engine for this thing - over 150hp on 93 octane fuel.... Which all leads to days like this - result of a broken rear axle , the dumb thing just wanted to pivot over and flip - this was the 3rd time before we figured out why it wouldn't go through there...lol . Have fun , be safe... Sarge
-
3 pointsThanks for the warm welcome ! Well, after a while ... the onan engine sounds like it is..low on fuel.... probarbly carbon buildt up or dirt in system (?) So...decided to do a total "cleaning"... and refresh what can be done. The positive news !!!: The onan dealer here says he has about 99 percent of all parts for it :-))) Im now on holliday... but would rather work on it !!! Hihi.. Owh.. and i got one of these for 2nd project
-
3 pointsVery happy to help out. Glad that you got every thing home OK. It looks like Henry is ready to claim the 701 as his own.
-
3 pointsJust...awesome!
-
2 pointsSlot hitches are a bit hard to come by this side of the pond. I have one, but a couple of others would be handy. So Chris Sutton and I thought it would be a good idea to make two each, while I was staying with him on my annual trip down south. Last year we knocked up a couple of belly graders/ I decided to make a jig for when welding parts up. At the back of the bench, a piece of cast iron machined channel had been residing for years. Just the right size to fit inside the original slot hitch. A piece of plate and some bits of pipe and I had this. Apologies for the fuzzy photo. The crap welding is due to trying out a gasless mig welder for the first time. I told Chris I would get the steel and take it down with me. This was when I started to get carried away a bit. I decided to make a prototype. First I made some bosses for the hitch pin to fit through. Several pieces of cardboard cut outs were made to get the shape and angle of the sides, then I cut out some plate for the sides. Next thing was to get the bend on the side plates. I don't have a hydraulic press but I do have a pipe bender. With a 3/4" former mounted vertically instead of horizontal, with scribe lines on the centre and a line scribed on the plates where I wanted them bent, they turned out grand. I didn't take photo's of this, but I will while making the next ones. Plates cut for top and bottom of the slot, with a scrap slitting disc each side of the jig to give clearance inside the slot, things were tack welded. The assembly was removed from the jig, welded up and the result is below. I test fitted it to one of my horses and was pleased with the result. I then got carried away again and prime painted it. The eagle eyed of you will notice there is no lift arm. So flush with success I proceeded to set to on the other bits for the next three. Photo of two of side plates and two top and bottom of slot plates. Plates roughed out to fit bosses. 40mm black bar machined down and drilled out ready to make two bosses each. Plates finished off.
-
2 pointsCome along will work or for $10 get a boat cable winch and bolt it to the trailer. Use mine all the time - works like a charm...
-
2 pointsThis tractor had to go threw some surgery the week before the show as it had sat a while. The magneto was giving us issues so we sent that out for repair 2 weeks before the show.. The gentleman doing the repair said that it would take him longer than expected & gave us a mag to use until he was done with ours. A fully unexpected service that proves once more why I like my tractor hobby. After installing the new mag and cutting my head open when the crank handle popped off of the shaft & spun in my hand, we noticed a popping sound coming threw the air cleaner. Not good. This is what we found, note the 4th push rod from the left. One of the valves had seized causing the push rod to bend. I freed the valve by tapping it in with a hammer then working it back up with a vise grip. Several times of doing this & the valve worked like new. The push rod (which was shaped like a S) we straitened in the press, then finished straitening with a hammer on an anvil. $0 repair. Guess we should've put some load on the engine before the pull, then we would've known about the gov issue.
-
2 pointsPat did drive a ways before he realized that I fell off. The good news in that mishap was that I didn't spill my drink.
-
2 pointsA picture(s) is worth a thousand words (and there might be a thousand words there too.) Might want to get a MOD to pin this one to the top of the Engine section.
-
2 pointsI've been out of carts for a few years. I started because my son wanted one for running around the trails with his friends. I grew from there. I got into it, joined forums,bought and sold ,etc. When my son died I sold what I had and said the hell with it. It reminded me of him too much. I've always liked and had tractors so that became my new thing. Anyways my advice is either a Club Car DS or an EZ-GO TXT models. Yamaha makes a great cart but they aren't the easiest to get OEM or aftermarket parts for. Plus they have a million different models. Club Car and EZ-GO have produce a million of just those two and parts are everywhere for them. Carts were big years ago but the UTV market has taken over. The price on carts now is thru the roof . Lastly unless you are bound to having to have an electric, don't. Gas is the only way to go. You can carry a can of gas a mile but extension cords don't come that long.
-
2 pointshttp://gardentractorpullingtips.com/index.htm You'll find all the info you need on Brian Millers site.
-
2 pointsWARNING I will be there!!!!
-
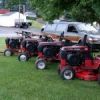
2 pointsHad a couple of the various years carts out, catching some sun here today.
-
2 pointsI had a 416H with 2 stage blower that I used for years.Loved that tractor.Any time the engine started surging,I added some Seafoam to the gas.Of course,I used non-ethanol gas as soon as it became available here.Never noticed the tractor speeding up.Probably due to the heavy blower dragging on the ground.Sounds like you've done all the right work on yours so far to classify it as " a keeper'"
-
2 pointsThe GT-14 deck is the same one used on a '67 1267. The lift attachment would not be the same but you could bolt the lift cradle from a later deck to it or you could use a chain.
-
2 pointsWelcome to Red Square Bill... Your correct in saying your 416h speeds up going down hill. I have an almost identical 416h (1997) and it does the same thing. Make sure to get that ATF OUT and keep 10w30 MOTOR OIL in the transmission as odd as that sounds. Some prefer synthetic and I've used regular with out issues. Not sure why the Onan would surge though. A couple things to do maintenance wise are take off the engine tins and make sure everything is clean. Lots of gunk ect can build up in there creating dreaded too much heat! Also give the carb a good cleaning and make sure the crankcase breather located under the air filter assembly is clean. That's all I got... Good Luck! Cory
-
2 pointsunfortunately that is the nature of the beast to pick up speed going downhill, that's one advantage of a manual trans. once you get use to it it not so bad. As far as the engine over reving, I have found that engines that sit for a long while that they tend to do that. The good part of this that from my experience is that the more you run them it tends to go away or stop. If mine starts to over rev, I just push the throttle down some and run at lower RPM'S. for awhile then raise the throttle back up till it does it again. Like I said after several mowing's it stops doing it. good luck eric j
-
2 pointsExactly, the early ones did not have the cast numbers. An evidenced by the early round 3 hole hubs.


.jpg.143ef73c68074a16cedfbe4d7536dc71.thumb.jpg.4896fc9ab6394b781c1c5f6c39deb441.jpg)


This leaderboard is set to New York/GMT-04:00