
Leaderboard


Popular Content
Showing content with the highest reputation on 07/17/2017 in all areas
-
16 pointsJust wanted to share a couple pics of the 876 i picked up at Portage Garden Tractor Daze. Here is the before i intended on polishing it and applying new decals (still have to get a hold of Terry) Before AFTER Hope you like them
-
14 pointsOnce again, thank you Glen Pettit... for keeping our dreams alive.
-
11 pointsGot all the fab work done and all painted.
-
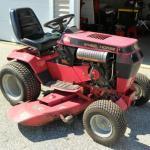
11 pointsJust finished this RJ 35. Can't decide if I should paint the seat red or leave it black.
-
11 pointsWhite foam indicates water in the oil. Before assuming anything really bad, check your hubs to be sure that you have not sheared a Woodruff key and the axle is spinning inside the hub, and also check the input pulley for the same issue. Good luck. Let us know what you find.
-
8 pointsVin- You do realize I am a mod here and have ways of making this thread go away don't you ... lol. I had to confirm my feelings about those green machines. It has been confirmed.. they are all junk.
-
7 pointsI thought I would share my story of the saga I've had with attempting to get my PTO and mower to work well on my 1977 B-80 that I've mowed with for 23 years now. Over the past 5-6 years I've had trouble with my mower deck bogging down in tall or thick grass, and sometimes the blades would completely stop spinning. I've done several things to try and fix this over the years. Check PTO belt tension and tighten Adjusted the clutch pressure at the trunion on the rod Swapped out clutch plate and hub from another tractor Cleaned and sanded the clutch facings of both discs and hubs Replaced the the housing rod hoop, the upper plate and lower bracket for the hoop as they were well worn (see pics) Replaced the clutch lever rod and the trunion Installed new PTO to deck drive belt last season (Wheel Horse brand belt) Each time I would make an adjustment or change a part it seemed to work great for a while. I was finally getting to where I had to mow the heavy grass twice to get it cut sometimes. (one pass with deck high and second pass with deck down in normal position) This tractor has had the clutch rod (from lever to plate on PTO) shortened by PO, it's obviously been cut and welded. I never thought anything about it until a couple of years ago when I got other tractors to compare, but this was not the problem as I put the shortened rod back on it eventually as it worked better. So, about 3 weeks ago I am mowing along and the blades stop spinning in heavy grass after it's done just fine the past few weeks. &$%^W*! I get off the tractor to check out the PTO and belt, etc., when I notice the roll pin is broken on the little red bracket that attaches to the hoop rod. I figure that must be contributing to the problem by not putting enough pressure on the clutch possibly, so I begin taking things apart and I reach down to check the belt tension and the pulley support (mule drive) was very hot. I had to put on gloves to remove it and after tearing it apart I discovered a pulley was locked up! I never had suspected a problem with those pulleys. It was the flat one that was froze up. So I grabbed a spare pulley support from the parts shelf, replaced the broken roll pin and now she cuts like a hoss! I was away on vacation a couple of weeks ago and didn't get the yard mowed for 2 weeks. It was tall and thick in many places, but she went through it like butter. It's like getting a new tractor to mow with! It's made me actually look forward to getting more seat time. I just love my . I've posted some pics of the busted roll pin and worn out hoop rod and brackets. The last pic is one of the trunion adjusted all the way up.
-
6 pointsHe said he never would... For your viewing enjoyment, LOL!
-
6 pointsIf your model # is 1-0301, your 72 Raider 10 is the same as mine. It is the #5086 transmission...8 speed with a 4 pinion differential with 1" axles. The symptoms that you describe are almost certainly a sheared wood ruff key...probably one of the hubs. check those 1st and then check pulleys.
-
5 pointsWe put just the left side up to simulate the tractor being in the furrow and only about four inches and go from there. We also do this on flat concrete and set the land slide so that is just touching the floor and the point is up just a little. Then once you hit the dirt the conditions aren't what you expected and everything changes! Don't fret as most plow days there will be somebody there to offer advice and help you out. That's part of the fun of it! Wheel weights all the way around with extra in front helps. You don't have to go all gung ho to have fun. I plowed on the 1257 with turfs and a 601 with diamond turfs just for giggles and had a blast! Only problem was a slipping belt on the 1257, went to A TSC belt and she really grabs! Nice 1045 no matter how you look at it! Thanks for the
-
4 pointsHi all. I have been a member here for a few years but have just been in hiding. Until now. I have recently started a build on MoM and have been urged, pushed, threatened by Chris, Mr Showman to post on Red Square too. So here goes. As some will already know, the Showman and I have been clearing a friend's land of his large collection of various garden tractors, horticultural machinery, workshop equipment and whatever else you can think of. Nearly 2 :1/2 years later the end is in sight. As friend John is having to sell up and move soon due to ill health, my Roper tractor which was stored on his land has now moved on to a new home. As I have very little room at home to work and store in, mainly a single car size garage which is already half full of stuff, thoughts turned to something small to build which could be transported in the back of my Meriva car. Small enough to fit in the car, but hopefully big enough to ride on, but if not towing a trailer which I can sit on and operate the tractor by remote steering etc. Various options were looked at, thought about and discarded due to too many compound curves etc. Then, after studying photo's of the D-series Wheel Horse which has very few awkward curves a plot was hatched. During the clear out lots of "might be handy one day" bits and pieces were kept. One of the few tractors which remained, unloved and unwanted, was this Bolens ride on mower. It was eventually stripped of useful parts, gearbox, axle / diff assembly, wheels and various other bits before the remains were left to be dumped much later. Also found among the junk in John's barn was the bottom end of a small engine which was later found to be a 65cc BSA 4 stroke. After further hunting by the Showman other parts were found in various locations in the barn loft. Enough parts to build a complete engine with spares left over. Engine just roughly assembled in this photo. John never stored related parts together and in one place. We think this was his anti theft device. Find a few parts, no good without the others, so leave alone. Appears to have worked as we have found on various occasions. Tri rib tires Chris. After looking up the measurements of the full size D-series Wheel Horse, a half size model worked out at approx 38" long, 22.5" wide and 23" tall. I did not intend building a 100% dead scale model, just something which looked right. If all the main measurements were close to half size and the main components looked compatible with each other, then Some parts, for various reasons, were altered slightly in size without being too obvious. First, a suitable building bench was required. I have one along one wall in my garage but too narrow and my creaky knees object to crawling around on the floor.. A tool trolley, unearthed from John's workshop, was pressed into service. The wheels moved outwards to give more stability, a mid shelf added which was boxed in on three sides, and a thick sheet of chipboard on top. Not shown on these photo's. The Bolens bits were cleaned up and placed onto some box section which would be used for the main part of the chassis, Due to the width of the gearbox, the rear end of the chassis had to be a lot wider than scale. This area was one of the main problems of the build, trying to keep the gearbox far enough back without touching the differential which revolves with the attached sprocket, plus keeping it and the surrounding frame within the width of the fenders and the upper sections of the footrests. Hours and hours of head scratching, trying different positions etc resulted in "This might work". When fitted to the Bolens, the gearbox input shaft pointed down. It was hoped by mounting with the shaft horizontal a short prop shaft could be used. This was found to be a no go due to the height difference of the engine crankshaft and gearbox shaft. The centrifugal clutch assembly also left very little room between the engine and box. The next stage was to work out a mount for the gearbox. Bits of angle were pop rivited or self tappered to the frames and lots more head scratching followed. The long lengths of box section had been cut down at this stage as they would have been too wide further forward. The next photo's show these in the correct, sort of, position with the engine roughly mounted to see how things line up. The axle bearings from the Bolens were used plus the front axle mounting bracket which was hack sawed from the frame, cut in two, excess removed, slotted and drilled to take the bearings. The extra holes were for possible height adjustment at a later date. Easier to do now than later. These were pop riveted to the box section ready for welding later. The front axle was then given a lot of thought. The full size is a cast, tapered in two directions, webbed unit. Something simpler was needed. A piece of thick walled 1" square was used with tube king pin mounts. A test piece was cut to gauge the angle required, followed by marking, cutting, bending, filing and drilling the main components. Small infill pieces were inserted to give the weld something to bite on. The axle mount was made up of 3/16" plate fastened to chassis box section cross members, with 1/2" bore bushes. The pivot is an old Austin 7 king pin. All a bit on the beefy side but just materials to hand. I should say that ALMOST all the materials used in the entire build were saved during the clear out at John's. Also, as I do not have proper machining facility's, most of the work was done by hand. Hand drill, hack saw, jig saw, files etc. I do have a small Unimat 3 model makers lathe which was used for some of the lighter machining jobs. Also an old Drummond round bed which is in need of work and a chuck adapter. Guess where this came from. I also adapted an old Picador drill press to take a larger hand drill. This wasn't too satisfactory, side play and too fast for the larger drill bits. These were more suitable for wood, not metal. Photo's later. The next few photo's show the chassis and axle mounted on a board ready for welding. The nails were just to hold parts in place before clamping and weighing down. The rear axle mounting plates drop into slots in the board. The two dark colored angles are temporary and just to help keep things square. A few photo's of a few welded up bits. The welds on the rear end of the chassis were nice and neat. No photo's of this. The welder decided to be naughty at the front. Wire feed kept jamming until speeded up which resulted in heavy welds. Some ground or filed down and others left as will not be seen. The used Austin 7 king pin for the axle pivot seen in the third photo. A bit rusty but good enough to use after a clean up. The chassis was cut away to allow for more axle swing. The rear wheel adapter hubs were made up from 2" thick walled tube and round plates into which the tube was welded. The plates already had bores of near enough the correct size. The cut to length tubes, after a lot of head scratching and measuring to make sure the holes would be in the correct place, were drilled 5/16" using a standard center drill for the first hole. I was going to use this as a guide for a 5/16" drill to spot the lower hole, followed by gradually opening up with other drills, but found a long series 5/16" center drill which did the job in one go. This also did away with numerous height adjustments on my not very accurate drill press conversion. The plates were drilled after marking out using a card template which was cut to just fit into the wheel dish and over it's hub. 4 holes were also drilled through the wheels using the same template. This ensured that all holes lined up. Even though my drill conversion was a bit of a blacksmith job, after drilling the axle shaft I found that it and the hubs lined up almost perfectly.
-
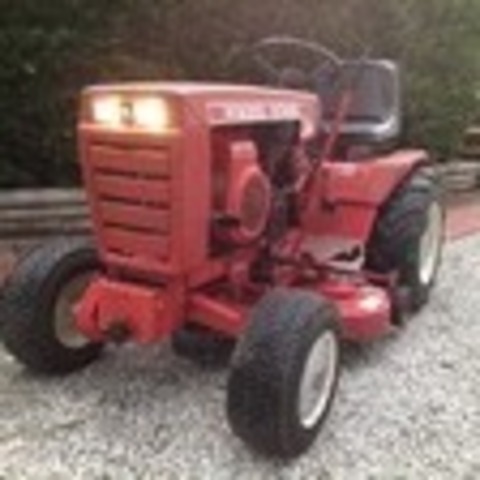
4 pointsWell I got the 1045 out today after fixing the lift cable so it would hold the plow, also adjust the belt so it would grab better, but now clutch won't go in far enough to let me shift without grinding the gears. I do believe I know how to fix that just don't have time tonight. But I did get it out for a few picture with the plow. Hoping I can have ags and maybe some weights on it soon so I can go to plow days!
-
4 pointsThe Baked Stuffed haddock is good but really any of Ray's fried seafood is delicious and fresh-and so was their root beer!.. and another sighting!
-
4 points
-
4 pointsDouble dip Sunday, on road trip, had to bring @wheelhorseman along to help load.
-
3 pointsNo one held a gun to your head, LOL!
-
3 pointsLIAR. .... you would take a nice 318 if someone were to give it to ya.......better say Yes but I'll trade it for a .....or a vintage 110.... Looks of that grass you could at least dropped the hammer and made it work!
-
3 pointsI grew up with a 110 almost exactly like that! They're not all that bad... Except when you have to change belts. Especially the drive belt. Or work on the variator. Or take the deck on and off and fiddle with the deck belt and the mule drive pulleys inside of the frame... Nice to ride, but when it comes to wrenching I'd rather work on my !!
-
3 points
-
3 points@stevebo I think he has gone to the dark side. Where is Luke Skywalker when you need him?
-
3 pointsI took a look at the listing, if it wasn't for the 1,000+ mile trip I would be all over that. I have a GT-14 and several 953s, just a sucker for a with BIG rear tires.
-
3 pointsYour welcome
-
3 pointsI have posted this in the classifieds. again thank you all.
-
3 pointsI got the Packard 56 series connectors (and crimpers) from: THE ELECTRICAL DEPOT.COM! I bought single, double, triple, quadruple and 5 position (what is 5?) male & female connectors as well as the male/female ends for the wires. I rewired a tractor using all new connectors and the correct gauge AND color of wire! Damn proud of myself!
-
3 points@AMC RULES Steve on a Stick sure has been traveling, I am glad you put a hat on his little head , would not want him to get sunburn. Did he purchase the Steamers or the Haddock?
-
3 pointsWater in the transmission wouldn't cause that but it needs to be flushed and refilled. It's almost certainly what Bob said. Remember, it only takes one axle key sheared to stop the tractor. I think you may have a 6 speed with the 10 pinion limited slip differential. I really don't know exactly how it would react but it might be why it creeps with no weight on it but it wouldn't go with any authority in any case. It could also be that the hub is tight enough to allow it to creep.
-
3 pointsWell by now most of you know his clone made an appearance here http://www.wheelhorseforum.com/topic/70923-garden-tractor-daze-2017-portage/ but I have a hunch he is going to pop up again at some other regional shows!
-
3 pointsNo wrong answer here. I like it as is and would like it with a red or white seat too. Great job.
-
3 pointsTips&tricks please.
-
3 points
-
3 pointsVery sharp looking tractor. I too thought it was a strong machine when you were doing the "chain pile" at Portage!
-
3 pointsalmost looks like you painted it, great job. Glenn
-
3 pointsGreat job Mike!! It doesn't hardly look like the same tractor.
-
3 pointsYesterday's haul. A four haul day.
-
3 pointsHere are a few of me and my Dad with his 1963 633. I was maybe 2yrs old in 1st pic, 3 or 4 in the next two. Check out the seat on the hood!! Yeah I lived through it and have a great couple of pics to show it! He died when I was 10.
-
2 pointsI was chugging along in 3rd gear mowing the grass last night and the old girl coasted to a stop. It will go in reverse but not in any of the other gears with me on it. She will go "slowly" in the gears when I am off. Checked the dip stick and white foam. Now I do know that there was fluid in the trans 2 weeks ago because I checked it. So I am assuming that something burnt. Any suggestions for the '72 Raider 10? My other half wants to get rid of the old girl and that is just not happening.........made that very clear.
-
2 pointsOh so that's it...old secret recipe. .. that's it you guys are cut off from rustling in Wisconsin.... yah right like that's gonna happen!
-
2 pointsTHAT is a calendar shot!
-
2 pointsHooked? He told me today we need another because "we" have tractor fever. I'll agree, but he was talking about himself.
-
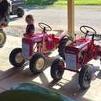
2 pointsGot a little further today. I got the motor finished up, foot rests on, wheels primed and painted (well, fronts anyway - just primed the rears as I hope to get to mount the ags I ordered last week mounted), and the grille and hood mounted. Hope to have it finished by Wed. I've actually got 2 GT14s. One is all original and the other is powered by a 13.5 horse predator. Both transmissions are in great shape. Below is a picture of my wife riding the original GT14 and Emory beside her on his lawn ranger.
-
2 points
-
2 pointsAlso in for info or products and process to get those results. Looks awesome.
-
2 pointsYou do great work. I have a 753 I should do that with. What is your process you use to make them look like that?
-
2 pointsThat tractor looks great.
-
2 pointsCheck with Lowell, he may have some. If not, take the old ones to a NAPA store and they should be able to match them up to an automotive application. https://www.wheelhorsepartsandmore.com/about-us.html
-
2 pointsThe original 15 amp regulator was part number 101450 and used on many models. The regulator is listed on the Main Electrical System page at the Toro MPV as item 36 near the end of the list. Garry
-
2 pointsI have Deestone 23x10.50x12's on the back of my 606. I was told they run small and they do. They fit nicely on the 7" wide rim in place of the 8.50 tire. They are much narrower than most 10.5" wide tires. I assume the 8.5" Deestone would run small too. Both tractors below have 10.5" wide rear tires. Carlysles on the left and Deestones on the right. I like both brands very much. Sorry I don't have a pic from the rear.
-
2 pointsGo with what you like an can live with. Tim
-
2 pointsI loaded the tires on my GT-14, only a few dollars per tire compared to a couple hundred for wheel weights.
-
2 pointsI love my loaded tires and keep them on my tractor year round even for mowing. I used windshield washing fluid that I buy 6 gallons for $8 at BJ's wholesale club. Basically to do it take the valve stem out and I use a valve stem to hose fitting from tractor supply. Fill the tire with the valve stem at the 12 o'clock position. I get about 5 gallons with my 23x8.5-12 tires. The only thing I will caution you on with the loaded tires is your front end becomes fairly light so you may need to hang some weight off the front or use wheel weights especially on a heavier trailer.

.JPG.9f2ecb26065c66527b0730084ab7fc7a.thumb.jpg.7dc8a04d9a53d44ee2b23f26ee94496f.jpg)


.JPG.ef4f4e37c6517f95bd36dbf5a1dfe0f6.thumb.JPG.2f2f4facf8a15b67d67829dcbaa787c9.JPG)


(800x673).jpg.cc3aefcd170c6bab1f22408014a1eb53.thumb.jpg.37c62115dec7a1fc65b8e86afd6af643.jpg)
This leaderboard is set to New York/GMT-04:00