
Leaderboard


Popular Content
Showing content with the highest reputation on 07/15/2017 in all areas
-
9 pointsHi all. I have been a member here for a few years but have just been in hiding. Until now. I have recently started a build on MoM and have been urged, pushed, threatened by Chris, Mr Showman to post on Red Square too. So here goes. As some will already know, the Showman and I have been clearing a friend's land of his large collection of various garden tractors, horticultural machinery, workshop equipment and whatever else you can think of. Nearly 2 :1/2 years later the end is in sight. As friend John is having to sell up and move soon due to ill health, my Roper tractor which was stored on his land has now moved on to a new home. As I have very little room at home to work and store in, mainly a single car size garage which is already half full of stuff, thoughts turned to something small to build which could be transported in the back of my Meriva car. Small enough to fit in the car, but hopefully big enough to ride on, but if not towing a trailer which I can sit on and operate the tractor by remote steering etc. Various options were looked at, thought about and discarded due to too many compound curves etc. Then, after studying photo's of the D-series Wheel Horse which has very few awkward curves a plot was hatched. During the clear out lots of "might be handy one day" bits and pieces were kept. One of the few tractors which remained, unloved and unwanted, was this Bolens ride on mower. It was eventually stripped of useful parts, gearbox, axle / diff assembly, wheels and various other bits before the remains were left to be dumped much later. Also found among the junk in John's barn was the bottom end of a small engine which was later found to be a 65cc BSA 4 stroke. After further hunting by the Showman other parts were found in various locations in the barn loft. Enough parts to build a complete engine with spares left over. Engine just roughly assembled in this photo. John never stored related parts together and in one place. We think this was his anti theft device. Find a few parts, no good without the others, so leave alone. Appears to have worked as we have found on various occasions. Tri rib tires Chris. After looking up the measurements of the full size D-series Wheel Horse, a half size model worked out at approx 38" long, 22.5" wide and 23" tall. I did not intend building a 100% dead scale model, just something which looked right. If all the main measurements were close to half size and the main components looked compatible with each other, then Some parts, for various reasons, were altered slightly in size without being too obvious. First, a suitable building bench was required. I have one along one wall in my garage but too narrow and my creaky knees object to crawling around on the floor.. A tool trolley, unearthed from John's workshop, was pressed into service. The wheels moved outwards to give more stability, a mid shelf added which was boxed in on three sides, and a thick sheet of chipboard on top. Not shown on these photo's. The Bolens bits were cleaned up and placed onto some box section which would be used for the main part of the chassis, Due to the width of the gearbox, the rear end of the chassis had to be a lot wider than scale. This area was one of the main problems of the build, trying to keep the gearbox far enough back without touching the differential which revolves with the attached sprocket, plus keeping it and the surrounding frame within the width of the fenders and the upper sections of the footrests. Hours and hours of head scratching, trying different positions etc resulted in "This might work". When fitted to the Bolens, the gearbox input shaft pointed down. It was hoped by mounting with the shaft horizontal a short prop shaft could be used. This was found to be a no go due to the height difference of the engine crankshaft and gearbox shaft. The centrifugal clutch assembly also left very little room between the engine and box. The next stage was to work out a mount for the gearbox. Bits of angle were pop rivited or self tappered to the frames and lots more head scratching followed. The long lengths of box section had been cut down at this stage as they would have been too wide further forward. The next photo's show these in the correct, sort of, position with the engine roughly mounted to see how things line up. The axle bearings from the Bolens were used plus the front axle mounting bracket which was hack sawed from the frame, cut in two, excess removed, slotted and drilled to take the bearings. The extra holes were for possible height adjustment at a later date. Easier to do now than later. These were pop riveted to the box section ready for welding later. The front axle was then given a lot of thought. The full size is a cast, tapered in two directions, webbed unit. Something simpler was needed. A piece of thick walled 1" square was used with tube king pin mounts. A test piece was cut to gauge the angle required, followed by marking, cutting, bending, filing and drilling the main components. Small infill pieces were inserted to give the weld something to bite on. The axle mount was made up of 3/16" plate fastened to chassis box section cross members, with 1/2" bore bushes. The pivot is an old Austin 7 king pin. All a bit on the beefy side but just materials to hand. I should say that ALMOST all the materials used in the entire build were saved during the clear out at John's. Also, as I do not have proper machining facility's, most of the work was done by hand. Hand drill, hack saw, jig saw, files etc. I do have a small Unimat 3 model makers lathe which was used for some of the lighter machining jobs. Also an old Drummond round bed which is in need of work and a chuck adapter. Guess where this came from. I also adapted an old Picador drill press to take a larger hand drill. This wasn't too satisfactory, side play and too fast for the larger drill bits. These were more suitable for wood, not metal. Photo's later. The next few photo's show the chassis and axle mounted on a board ready for welding. The nails were just to hold parts in place before clamping and weighing down. The rear axle mounting plates drop into slots in the board. The two dark colored angles are temporary and just to help keep things square. A few photo's of a few welded up bits. The welds on the rear end of the chassis were nice and neat. No photo's of this. The welder decided to be naughty at the front. Wire feed kept jamming until speeded up which resulted in heavy welds. Some ground or filed down and others left as will not be seen. The used Austin 7 king pin for the axle pivot seen in the third photo. A bit rusty but good enough to use after a clean up. The chassis was cut away to allow for more axle swing. The rear wheel adapter hubs were made up from 2" thick walled tube and round plates into which the tube was welded. The plates already had bores of near enough the correct size. The cut to length tubes, after a lot of head scratching and measuring to make sure the holes would be in the correct place, were drilled 5/16" using a standard center drill for the first hole. I was going to use this as a guide for a 5/16" drill to spot the lower hole, followed by gradually opening up with other drills, but found a long series 5/16" center drill which did the job in one go. This also did away with numerous height adjustments on my not very accurate drill press conversion. The plates were drilled after marking out using a card template which was cut to just fit into the wheel dish and over it's hub. 4 holes were also drilled through the wheels using the same template. This ensured that all holes lined up. Even though my drill conversion was a bit of a blacksmith job, after drilling the axle shaft I found that it and the hubs lined up almost perfectly.
-
8 pointsWell I got the 1045 out today after fixing the lift cable so it would hold the plow, also adjust the belt so it would grab better, but now clutch won't go in far enough to let me shift without grinding the gears. I do believe I know how to fix that just don't have time tonight. But I did get it out for a few picture with the plow. Hoping I can have ags and maybe some weights on it soon so I can go to plow days!
-
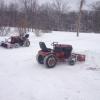
8 pointsWas muddy as all get-out . 3" of rain in the past 2 days . It was beautiful today though . Found some old rusty turn of the century oil machines .
-
7 pointsMatt said it wouldn't work on a C Series but I bought one of his kits anyway. A couple of his parts, a few I made and I got it working. No modifications and a 20 minute install. It works great on my C-160, and I can't imagine it not working on a 1075 and everything in between. I don't use Matts reverse pedel very often as the lever is still there and raising your foot high enough to use his is awkward. Matt might want to pick up on this. If not I can put something together or provide drawings if anyone is interested
-
6 pointsFought off Flu or food poisoning but I have mini goals to keep so I forc d myself into finishing the pump rebuild. I hope to tackle the Control valve and reinstall this and re-assemble most of the tractor this weekend. Since I'm just a brace but ignorant soul, forgive me if I call these parts by Theo incorrect name. I'm no expert. Just following my nose and advice from others. The squash plate assembly has a plate that will act like it's permanently attached. This is suction of the fluid that seeped behind it. It may not be necessary but I pop it loose and polish the surface that will mate to the slippers when reassembled. Take the time to polish any burrs or corrosion from the shafts. Including the section on the splined end of the main shaft so it will mate easier to the assembly again when done. The other shaft ends are done so you don't damage the new seals. Also note, I pulled pins on squash plate out of back side and gently started them on the front side for later assembly. I pulled the seal part numbers from daveoman1966 threads. The seal below is for the main output shaft. Install the seal clean the output shaft and the external surface of the bearing and lube it. Then assemble. reinstall the retaining ring. depending on shape of your o-rings when you De-assemble, decide whether you wish to re-use or replace. They are no longer available. I have a set of new old stock below on right compared to the ones I pulled out. I decided to use the new ones but also use the Seals that Daveoman1966 highlighted. If you go the latter route you end up having to leave a couple pieces on the table and not using. Note how flattened the larger is. These O-rings are on the Cam shaft between the Cam and pump. This seems to be where most of the GT14 pumps leak. Or at least seemingly so. May be that since the main output shaft seal can be replaced by pulling with a pick without having to disassemble the whole rear of tractor and to replace these requires complete tear down that I see a disparity. Irregardless, I like the idea of the Seal with added O-ring. Here is the seal used on both squash plate shafts if you choose to do same as I have in which case you need qty 2 The two parts that will not be used: since im going the seal route as opposed to only o-rings, I then install both seals and lube: Insert the squash shafts part way. Note, for the longer cam shaft you have a reference hole for aligning when you try to drive pins back in. Not the case for the shorter side. Take a moment and mark it. Trust me. It's worth the time. The next step is a bit of a chore. With both squash shafts partially started, gently place spasm plate assembly inside and for me, I blindly align by touch and press the shafts into the plate assembly. Using the mark, I first align the shorter shaft and drive the pin into place. Then the other side. Take time to wipe it free of any debris as the polished surface is the whole reason to do this project for most to reinvigorate their Hydro. That and the slippers. New seals are gravy. Make sure you have already cleaned the gasket surfaces thoroughly. And have new gaskets ready. At this point only the pump gasket need be close by... A quick note for anyone not having assembled these. The non pulley end of the main shaft I call the bottom. The bottom slides into a rotary pump type set up. It's a bit of a task to get all these parts together while keeping the slippers from sliding out. So align the rotary pump so it is centered. See next two pics. There are multiple ways to do this. After a few I think the easiest might be to situate the main assembly face up, center the rotary pump in center, place the slipper assembly on top with splined hole centered and slide the pump housing over and gently swizzle it around until both the splines on main shaft slip through slipper assembly and the bottom splined portion slips into the rotary gear. The pic below is for clarification. Back to my assembly. Note that gasket is in place before sliding pump hosing over. Assume the slipper assembly is on top of main assembly. Slide over and align the main splines. Then wiggle the main shaft and slide the bottom splines into place. Insert 4 bolts and tighten. with new seals, it will be tight but the cam shaft will rotate if you slide a punch or screw driver through the hole. If it's too tight, you may have to reverse a few steps and do over. It's now time to button up the covers for the squash shaft and cam end. With a seal now on this shaft end, the old oring can be re-used. It will be flattened from age but the new seal should do all the work. Pics are self explanatory: Now the Cam. As mentioned at beginning of this post, I chose to use a seal and that necessitates I leave the retaining ring off and not use the thick spacer washer. The Seal fills the space. As I had a new o-ring, I used it on back side of cam housing and doubled it up with old orings. As on the other side, these are insurance and aid in keeping dirt out of the seal doing all the work. Then assemble. Viola! Ready to re-install. Not sure why the below pictures force their way into the post at this point. I've tried to delete. Weird
-
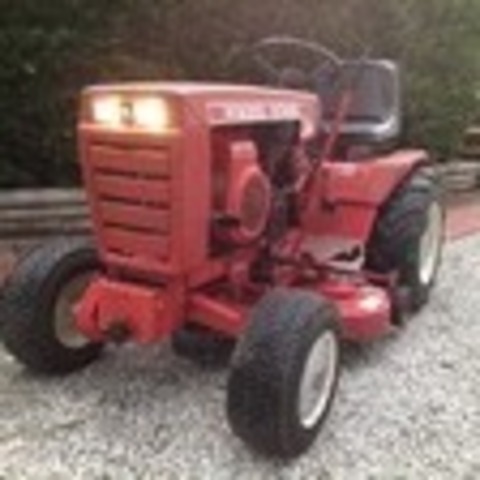
5 pointsHey guys, my name is Jake and I am 16 years old. I'm from southern Chester county, Pennsylvania and I am new on Redsquare. I have been to the show before. I am not new to the antique scene or wheel horses although I currently do not own any. I am however going to look at a suburban tomorrow, pics will come if I do purchase. Just figured I'd say a little about myself
-
5 points@Aldon, this may not be the longest post ever done, but it is the most informative and well documented!
-
5 pointsAnother outstanding and informative pictorial seminar by Dr. Trimble! Great work, Aldon!!! I'll be very interested in a performance evaluation once you have the machine back up and running again.
-
5 pointsOur thoughts and prayers are with you and your family. Caring for a terminally ill family member during end-of-life takes almost super-human strength from all those participating. It speaks volumes about the character and love of those family members providing care. I had to keep reminding my wife not to pre-grieve for her mother during our time of acting as care givers. It won't soften the inevitable grief process to come. When the going gets tough, reach out to the hospice people. They are trained to guide families through this. The gift of allowing a family member to pass in the comfort of home surrounded by their loved ones far outweighs any mistakes we may make as non-trained medical professionals. The hospice nurses are angels on earth by any measure during these times.
-
4 pointsAfter using my new to me York rake Ihe 3 point started acting up. it wouldn't raise the rake very far. First i thought hydro problem (it is a D series after all). The cylinder would hold teh heavy (200+ lbs) rake up all night so that must be OK. It would lift the rake a short distance even with me standing on it so there must have been adequate pressure (Doing a pressure test on a D is pain you have to remove the battery and tray....it is a D series..nothing is easy to work on.) Turns out the weld on the rock shaft failed. This is the second rock shaft on this tractor when I got it the rock shaft had a problem some PO had tried to pin it but didn't get it aligned quite right. I had it welded some more but couldn't correct the alignment. Got a replacement a few years ago and that is what is on there now and failed. Apparently the WH welder who did rock shafts needed more welding training. Bottom line if your 3 point acts up check the rock shaft weld
-
4 pointsI just wanted to share this with everyone. Recently I was tuning up my 74 d 160. I was trying to locate a new plug wire. The local dealer had one in stock for that tractor. The kit included a new wire and 3 boots. The price was $45. Now I know items for vintage tractors aren't cheap but that seemed outrageous to me. Now I'm not looking for originality as I work my tractor around my property, so function (and price) are more important to me. I was given this contact by a guy at work, who is also a member here. I called them to see what they could do. Explained to him what I had and what I wanted. He asked me 3 questions about the wire, length, what the coil end looked like and if the plug end was straight or 90 degrees. That was around 3 or 4 on Tuesday. When I got home Thursday afternoon the wire was there delivered. When I inspected it it was better than I thought. The contact ends were soldered on, not crimped, and it had the proper boot on each end, with a handwritten note explaining how to put the coil boot on as it is smaller than the original. Really was a well constructed wire that they built specifically for my order. The best part was it was only $9, plus $8 for shipping. Couldn't beat it for $17. I would recommend them to anyone needing electrical parts or repair. Their info is... weavers magneto repair 8474 planktown n.rd. Shiloh, oh 44878 (419) 896-2827 (888) 624-7733
-
4 pointsView of the Tippecanoe River on the west side of the Power from the Past Show. Parking area was closed off at north side of the grounds this am.
-
3 pointsPicture from Lars, our Norwegian Wheel Horse brother, preparing his garden for planting by picking up rocks . . . (Or better yet, having his spouse do it while he takes the pictures 😇).
-
3 pointsThis is my tiller steer RR-46 I've never seen another one. Does anyone else have one?
-
3 pointsRear PTO mounted now I need to modify the tool box a little more to give the belt clearance to the rear for easy hook up to attachments. The mule tape is for belt measurements and reference for clearances for new belt guard.
-
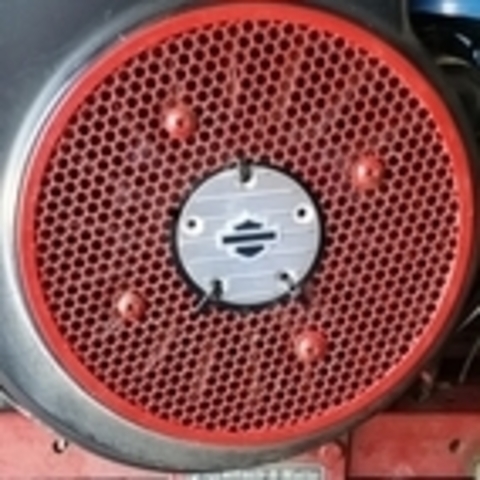
3 pointsI'm an advocate of setting the timing statically, that is using the Timing Marks on the Flywheel and adjusting the points accordingly- On an old set up, if you set the points to 20 thou on the firing stroke, it can be way out. I did a test on one of my engines and found it was firing almost on TDC !. So it depends on how much wear on things like Points, Breaker Rod and Cam Lobe can alter it. Set it to the Flywheel marks and it will be spot on and sound so much better when running. Well worth the extra effort.
-
3 pointsNice show, thanks for the great pictures. That is a pair of serious ditch witches there!
-
3 pointsSo sorry to hear about your father, but know that eternal life awaits those who love and trust in Jesus! And bless are those who mourn, for you will be comforted. My prayers are with you and your family. Vivat Jesus!
-
2 points@fast88pu has gone through a few rockshafts as well.
-
2 pointsI would power wash or use simple green (some degreaser) or something to get the worst of it off and then blast or wheel. The blast media will take it off, but if in a cabinet, it will just recycle it back through the gun. And go from this to that!
-
2 pointsI had a similar problem with my 88 520H. If I wiggled the plug on the back side of the ignition switch I could usually keep it going. I replaced the switch and plug and never had any problems again. Welcome to Red Square
-
2 pointsI would try a new switch. I've seen this before on a couple vehicles, and it cured the malady.
-
2 pointsI always use the double shielded bearings and I remove the zerk and replace with a 1/4-28 set screw (so no one can make a mistake and try to grease them). The problem with one side shielded bearings is that if you squirt in too much grease you pop the other seal and now water can get inside the bearing. Also, leave the key out when you reassemble-newer decks do not use keys. That way if things get rusty and you have to disassemble in the future you can whack the spindle out with a brass hammer if needed.
-
2 pointsHappily, it's not a Chevy so you don't have to make sure the distributor is not 180 degrees out or the timing 20 degrees out. Set them at .020, make sure 12V is getting to the coil (you can bypass the wiring with a jump straight from the battery, give the carb throat a squirt of cleaner and kick her in the pants. I'm the type that can't sit with a new engine unfired. For my old 125, it was jump to the coil and a screwdriver on the solenoid with Gumout in the carb the day after I pulled it out of the Georgia mud as a freebie - fired right up - well, did after I replaced the coil. Glorious smoke everywhere and the wife screaming that the house was smoky. Ah, memories. After that, the money began to flow from the wallet...
-
2 pointsindustrial engine would not be a poor option, they would be built using the same internals as any other kohler. Kohler's for different brands of tractors came with different cranks specs. among other things, also came painted ready to install on what ever make of tractor they where made for, Wheel Horse, John Deere Cub Cadet just to name a few.
-
2 pointsI blue color is and industrial engine, a gray one would indicate a new short block or factory replacement engine. not all engines will have K301 etc. on them especially the industrial models
-
2 pointsAlways glad to have some of the younger generation join us.
-
2 pointsIf you are referring to the marks on the flywheel of a Kohler engine they are used to properly set the points and timing of the engine. Kohler static_timing.pdf
-
1 pointThank you for the information and the files on timing. I checked mine with a meter and the S was right on just like you said. Thanks again for the help.
-
1 pointThat plow is hanging awful high. Are you going to have enough cable length for the plow to sink in when plowing?
-
1 pointExcellent - so, a tweak here and a tweak there...now I'm inclined to break out my old timing light. If you are wondering on the fuel pump pressure, I would think it unlikely. Of course, you could gravity feed it to see if you get the same result.
-
1 pointThanks again guys for your patience in the end it seems I have a replacement engine that is a K321 14hp so plan is to take it apart and rebuild so at least I know which kit to order but will check internals and bore measurement first.... A C121 with a C141 engine (blue industrial)....
-
1 pointThere you go...
-
1 pointOk guys and gals. She runs after a few years apart. Woo-hoo!!!! now for driveline belts and pulleys. ill report again soon. Of course the belts are probably original. Im hopeful for an evening cruise around the yard though..... randy
-
1 pointGlad to hear it runs! Couple of thoughts on the carb. If the carb has not been used lately it could have a little crud build up and a little Seafoam in the gas could clear it up. If the throttle shaft has some play I could be pulling in some excess air preventing it from operating well.
-
1 pointMine did that also. It was the 9-pin connector to the motor.
-
1 pointK321...14 hp. Looks like you now have a C-141 instead of a C-121. Now that's some good news.
-
1 pointLooks like the model determined the type of steering rather than the age. Always wondered what the differences were but obvious when you see them together. Garry
-
1 pointI've added 520H gear reduction to my '82 C195. I also added thrust bearings. Makes a difference in steering. Edwroy
-
1 pointWas just a lil one though.
-
1 pointWonderful message, thank you for sharing this heart warming moment with us. God bless you all.
-
1 pointFound this drone video though I would share.
-
1 pointThe anticipation was killing me.
-
1 pointHERE IS THE ANSWER FOLKS: These two brackets were used on the 953 bottom seat and were positioned to hold the seat bottom in place. I never saw one on a 1054 so maybe they learned the bottom seat did not move very much. Three wood screws on each bracket went into the plywood seat bottom material. I do not have a picture with them on the original seat bottom I bought several years ago as it was all deteriorated.
-
1 pointThis is 1966 Reo 4hp tecky 32" cut. I found this unit at a WheelHorse dealer who bought the remaining inventory of another WH dealer. They informed me that it was N.O.S. And never sold by the previous dealer. Of course I didn't believe it until they got a forklift and got it down off the rack it was on. The guy flipped it on its side and sure enough, it looked brand new. Never even had gas in it he said!!! The surface rust on the top is just from moisture and condensation build up. I bought it immediately! Brought it home, put some gas in it and wah-lah I'm mowin grass.( Only a little though because I didn't want to damage the paint underneath!!) I probably have only put no more than two hours on it in the 15 or so years I've had it, just driving it around. I brought it to the big show once or twice and everybody I talked to said the same thing, they've seen Reo's with the steering wheel but not tiller steer. So this makes me wonder just how rare is this little gem?
-
1 pointI'll pass that along. And TY sirs. I just noticed that little gif on everyone's posts oh and I wanted to mention before i forgot that the information Werner had was very incomplete. They didn't have any dimensions, component part numbers or anything on their drawings. I can get that stuff usually but in this case since Wheel Horse was bought out I'm assuming that stuff was all kept in house and was proprietary. Being as it was, I'm sure its lost now. If i am able to i'll mic the shaft/clutch and see what I can do.
-
1 pointHere's a couple of pics of my B-80 I have on file. Should be about the same. Some of the springs are different on some models.
-
1 pointGot to love the beautiful countryside. Nice photo.
-
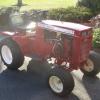
1 pointWe'll, I finally got around to tackling my 953 project. If you remember a member of my local tractor club approached me about some Wheel Horse tractors he needed to sell. I went to look at them and one was a CG8 and the other was a 953 that had a busted transmission and was in parts. I ended up with both for $175! Well, with the help of Buckrancher's machining skills (thanks a lot Brian!) I now have the trans back together. I worked on the original Kohler for a while and now it is running great. The wiring is trashed and I had to jump from the battery to the coil, but she is going good, drives, and works great in all gears. Next comes rewiring and getting the deck mounted. She ain't pretty, but she's mine! I'll probably break her back down and do a full repainted, but she's all original in her work clothes for now.
-
1 pointThis little lady was drawn to the tri-ribs on my barn fresh 953 too.


This leaderboard is set to New York/GMT-04:00