
Leaderboard


Popular Content
Showing content with the highest reputation on 04/10/2017 in all areas
-
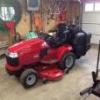
11 pointsMr Thomas When you get a chance to lay the tractor up take that lower steering gear apart and re-bush the lower socket. The lower socket is cast and wears more easily than the bottom of the steering shaft resulting in that slop even though there is a grease zerk ther. PO may never have greased it.This was my solution but you should be able to also replace the trunnion. Clean up and check the rest of the steering gear ...tie rods may be worn.
-
10 pointsCame home to this brand new 7x16 enclosed trailer sitting in my driveway! This is a huge upgrade from my tiny 6x8 open snowmobile trailer lol! Will be towing my horses in this to the big show. Working on painting the walls and putting black and white checkered vinyl flooring on the floor!
-
6 pointsThese may not be the exact models you have but close enough to get them attached to the tractor. It is explained in the operator manual. Single stage snowthrower Two-stage snowthrower if made by Toro. The was another supplied by BerVac and we have those manuals as well All sizes of mower decks hook up the same Garry Adding Mower decks are sized by their width of cut - not the width of the deck.
-
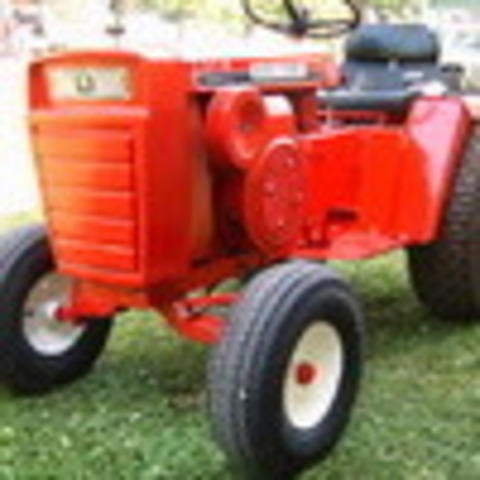
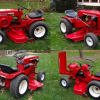
6 pointsI was lucky enough to get a C160 back that I owned years ago, and a Case 448. I will keep the C-160 and use the Case for trading material..
-
6 pointsThat's questionable.
-
5 pointsDefinitely not here.
-
5 pointsJust be sure you are not going down hill! The laws of physics still apply with .
-
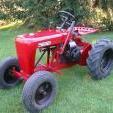
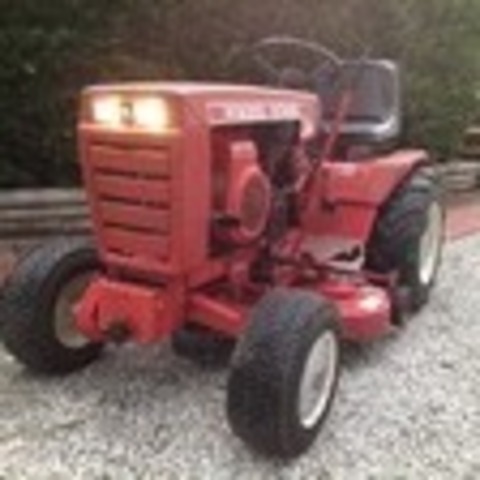
5 points1977 C-120 Was given to me in March. Just finished it i have to find a seat that looks more original. l just stuck that one on it for now.
-
5 pointsI have followed quite a few of the projects in this section of Redsquare and notice that many contributors name their creations, having given it some thought I've settled on 12 Automatic ILS (Industrial loading shovel) as I think this may have been how wheel horse would possibly have badged it. That is of course, if they had ever produced such a thing! Also one other thing that I failed to explain as a reason for building a ILS and not a FEL. Many members on RS have FEL's on their tractors and rarely if ever take them off, and with four other tractors myself I'd do the same. So sacrificing a tractor to be a purpose build loading machine made sense to me. Anywho in tonight's brief episode....welding the subframe towers and boom. Boom pivot plates at the top of the towers. bottom of of the towers and the bottom lift ram mount. This picture shows the driving axle lower clamp plates. (the angle was spot welded on the subframe to maintain square, later removed) And another view of the same. Back to the tractor tomorrow, Thanks for following along.
-
5 pointsThere are no dumb questions here...some times dumb answers ( we can`t help ourselves ) but lots of knowledge and good people...
-
5 pointsThe Battle Ships are an amazing monster of the sea, but recruiting and training enough personnel to operate and maintain one and the price of putting one back in service would be prohibitive. We do need to update the fleet, no doubt about that. The USS Carl Vinson, the carrier that took care of business in Syria, is 35 years old and is considered modern. It is now on the way to Korea and at 30 knots it will take forever. There has been talk of developing a rapid deployment force and with modern missile technology we don.t need mega ships, in my opinion.
-
4 pointsA couple of days ago we started to strip down the transmission from my RJ, it looks like it has been sat full of water for many years but at some point all of the bearings have been replaced (although they have all seized) and the seals look new? There was a mixture of bolts including some British (BSW) bolts holding it together and there was a snapped brass bolt which I managed to remove easy enough. The shaft on the part below is a little worse for wear, does it look like it needs replacing? The axles are in a very poor state and they are clearly never going to seal so we did a little bit of engineering and turned them around. One of the axles was turned around no problem but the keyway on the one above was in a poor state so we milled a new one. The holes and the old keyway were welded and turned down to create a tight fit on the gear in the diff. Its not perfect but hopefully it will last for years to come. I'd like peoples opinions on which parts they think may need replacing and also what do people do about the brass? bushings as mine are worn. Also are parts few and far between in the US as they are non existent in the UK. Thanks in advance!
-
4 pointsGood evening to everyone and hello, I am new to this forum, even though I have visited several times over the years. Allow me to introduce myself. I am Kevin Thomas, from Webb City, Missouri. I was first exposed to Wheel Horse garden tractors back in 1975 or 1976 when I first got to mow with a 16 hp Wheel Horse that one of my uncles owned. He was a long time Wheel Horse owner and used his to mow and plow his garden with. His parents had them back in the 60's and what impressed me about them and still does today is that that you just can't wear them out. I have owned several Wheel Horses over the years and currently own a 1986 414-8 (Model # 31-14K801) that I have had for several years and use it to mow our place with. I had been wanting another one and found a nice one which I purchased this past Friday. It's a 1988 414-8 (Model 31-14K803). It's in good shape but it's got some really bad slop in the steering and I read where it's been a problem on some of these mowers. It's hard to explain but you can turn the steering wheel about 1/4 turn before the front tires turn. When I look at where the steering wheel shaft meets the lower gear where the grease zerk is, you can see the shaft move around when you turn the wheel. Not sure what part of this needs rebuilt, possibly the area where the lower part of the steering wheel shaft is mounted but just looking for some thoughts on this subject, and if there are parts available. Thank you in advance! Kevin.
-
4 pointsHad some fun today, and moved a pine tree with my '73 Auto 18 Wheel Horse with and Ark front end loader. Had my wife film it with her iphone and decided to share with you a little fun of what amazing work this tractor does for me everyday! Enjoy!
-
4 points'specially without a horse head and this funky horn..... So does this mean if I can talk the missus into some goats and chickens she will let me get a FEL!?! Couple of nubians and some rock islands reds??
-
4 pointsI wanted to share pics of the replacement muffler I recently purchased from Jay Bee. This is a nice piece for the money, it fit well and sounds good.
-
4 pointsWe all probably move heavier loads than these little tractors are designed for on level ground. Just be aware they are very quick to do a back flip if the trailer encounters any obstruction. Never try to move a trailer that is heavier than the tractor down or up a hill. If you do don't forget to tell the cameraman. Hold my beer and watch this. I actually like to move trailers with the hitch on the front. It's much easier to push them into a tight space and there are no back flips.
-
4 pointsI was pulling a lawn sweeper. Brand new, by the way, this was the test run. Went to empty the second load and decided to go to the right of my previous tracks, since it was wet on the first trip. The right side looked nice and dry. Everything was fine until the sweeper wheels went in the 2 inch deep ruts the tractor was making. The frame of the sweeper started digging into the mud, and those ags with chains did a wonderful job digging a nice deep hole. Got off, disconnected the sweeper and moved it back out of the mud, And the tractor pretty much drove right out. Had to back up about 3' to get a running start, and it came right out after that.
-
4 pointsWell to Explain the Batman Kooky Camera Angle Thing, I am a HVAC Contractor by Trade.After working for myself for 10 years I went and got a REAL JOB 28 years ago at my Local County at the Sheriff's Dept. as Jail Maint Supervisor. Well that facility has over 350 Cameras. Anyways we Had a lil break in back in 2010 so I did something about it. I brought some of that Jail Technology home with me. I monitor 19 Cameras that record 24/7 through a Dedicated Computer with 20 Terabytes of hard drive space.
-
4 pointsTake a couple of Wheel Horse lift handles, here's one of them.. Then totally forget to take and photo's of the next few stages until you get to this point and remember again! The idea of the lever is so I have a quick release way of changing the lathe speeds as it involves moving a belt across flat pulleys. The lever will have two positions, all the way back which will keep the belt nice and tight, and of course pull it towards the front to loosen the belt.. Now, what could I use to lock the lever in the "drive" postion?? Once it's fully welded up then I think it will be strong enough for the job It will be welded to the bench soomewhere about here with an adjustable rod to connect it to the er... tilting Wh chassis/motor/pulleys mount And that be this thread up to date again
-
4 pointsAs others have said, got a specific question, feel free to post it.
-
4 pointsHi Richard, more like a messy shop tour More re-purposing coming a bit later in the build.. Hi Mike, was the motor at a set speed or did the tingling change with motor speed?.. If so what was you favorite speed? An answer from across the pond here Jim There's plenty I can't do, weld wood, fry water, swim, eat liver or kidneys, listen to the current music in the charts, watch soap operas... If a tool is in good condition then the age does not matter to me, as long as it does the job.. Older tools such as the Southbend lathe also have character, such as the ticking the join the "speeds" belt makes as it goes over the pulleys... It brings it alive.. My next project.... HHmm... I've still got the quad to finish! There's more space to think outside the box Used three phase stuff is quite cheap over here, as most home shops don't have 3 phase! Hi Jim, I just thought I'd get the lathe finished before I carry on with the quad build.. There have been times when having a working lathe would of been handy... And it's about time I got on with it anyway A bit more work has been done on the lathe, I needed to find a way of mounting this rather big motor mounting bracket.. A bit of big box with a slit later sort of thing.. The bit of big box slot's into the chassis like so.. It does need to go higher up.. But some plonker had dumped a big elecric motor in the way! Checking the pulleys line up. Not fully welded up yet, just a check to see if everything lined up as it should.... It does Now to find a way of adjusting the motor to pully belt... This will come in handy The sharp eye'd will of noticed a bit of pully damage on the electric motor.. I did try to get the pully off with a puller, but this just caused more damage.. As luck would have it the middle pulley is the right size and it also has no damage, so that's what I will use.. Time to fire up the Mig... I think that should be strong enough Clamped onto the bench.. Yep, that looks good I wasn't sure the bit of box that holds the motor adjust up was strong enough, so it got strenthened Looking at the photo I need to tidy it up a bit and plate over the hole.. Other than cutting an extra leg ( yes that is 2 bit's of WH chassis weled together!) for the bench, that's as far as I've got... Next on the hitlist is to make a quick release tensioner thingy for the top belt.. This is about the right point in the timeline to drop in a video.. With some rather big box in the power hacksaw thingy.... I had some thoughts about making a quick release system for the top pulleys to make changing speeds a bit easier... I think I'm on the right lines here, it just needs to be stronger! Once the box was sliced up it was welded to the bench and to the er.. big &rse hinge... I don't think it will move now The start of the splash back... Use what you have I say To give the splash back something to bolt onto a couple of lengths of small box was welded to the bench frame.. Before the splash back could be bolted on I had to make and fit a closing panel for the pulley end.. Starting with a panel cut from an old green shelf (thanks Rex ) which was firmly clamped to the bench.. I needed to bend a lip on it, so out came the long handle pliers type thingy for some gentle tweaking of the metal.. A gentle bend up only part way, then move a long a little. Which gives you this... Tweak it right the way along of course.. Then go back and do a second and third gentle tweaking until the lip is bent up all the way along.. Hammer and dolly time.. Using the edge of the dolly first to tidy up the "tight" bend.. Then along like this to tidy up the flange.. A quick buzz with the sander tidied up most of the hammer marks.. Meet Toby the shop dog... He actually belongs to Rob, who is now retired and is spending a lot of time at the workshop giving me a hand with the heavy stuff.. Thanks mate Toby is about 6 months old and had spent much of his life in a cage, so he is a bit nervious and scared of everything... But each day his confidence is getting a little better, which is nice to see Speaking of Rob The splash back welded up and bolted on.. I wonder if Rob is thinking, "maybe I should move in case this lot falls over and lands on my foot".. The "check the pulleys are in line" test.. To get some better photo's and to make it easier to get to the front the bench was pulled out a bit which almost resulted in me being squashed.. The weight of the motor wanted to tip the bench over when it was moved! Me thinks an extra leg under the motor is needed As the lathe tray is a bit er.. bent I wanted to make sure any cooling fluid that hit's the splash back will flow towards the center of the tray. So a length of angle had been welded to the base of the splash back with a kink hammered down.. This should make sure any fluid goes through the drain hole and back to the coolant tank.
-
4 pointsHi jams If you post up questions (however basic) and pictures in the appropriate forums on Redsquare, there are literally hundreds of members who will be more than willing to help you out, just ask away....
-
4 pointsto the Kevin. Jim has shown you the repair for the slop in the lower end of the vertical steering shaft. The upper bushing in this shaft may also be worn out and this can be repaired also, but will require removing the steering wheel which can be a real challenge. Poor engagement of the two steering gears may also be causing some of the slop in the steering. It may be possible to tighten the gears by removing the cotter pin at the rear end of the lower horizontal shaft and adding shim washers. And like Jim stated, the tie rods can also be worn and contribute to the sloppy steering.
-
4 pointsThat group looks just smart enough to get in out of the rain
-
4 points
-
3 pointsThis is not a political thread and I don't want it to turn into one. But as I read the news of carrier strike force 1s deployment towards NK, I wonder what are the chances of recommissioning the Iowa class ships? I still think a 16 inch round still works the way it always has when computers and electronics fail. Being that the current C in C wants to grow the navy and many of you members have naval service, is it possible? I'm thinking back to when Reagan brought them out of mothballs. Throw the U.S.S. North Carolina in the group to. She should still be seaworthy, no?
-
3 pointsMy son got bit by the Horse bug, and I think he likes it!
-
3 pointsMy shop Superintendent stopped by Saturday and dropped off the Allis Chalmers 912 Hydro that I picked up from him. Kinda tough when your Boss is also a collector.
-
3 pointsAmen!.... Same goes for a pickup truck. Always get a kick to see these suburban Subaru or Prius drivers try to fit a box or a piece of lumber in their nano-golf carts! Can't do the job, if you don't have the right tools!
-
3 pointsJim, Wheel Horses are one thing. Wives are a whole different thing, lol. There's a whole lot of blogs and resources on em and still none of em know anything for sure. Way above my pay-grade to answer that!
-
3 pointsAs we have small goat farm, there is no way that I'd be able to do the work without it!. I use it all year long. From moving logs, to mucking out goat and chicken manure, to filling in the potholes on our road with RCA, this is the beast that does it all! And purs like a kitten. Pretty much a wrench, some drivers, lots of oil changes and lubes and an occasional belt and it keeps on running
-
3 pointsYes it did. That was the more tedious part. Luckily the soil is very sandy and the manual labor wasn't to strenuous! lol
-
3 pointsYep, I didn't have a cameraman to hold my beer, but while slowly pulling a 2000# boat out of the level concrete garage with the 8HP in 1st gear, the trailer wheel hit a piece of 2X4 that I didn't see and before I could push the clutch, the Commando 8 was vertical and I was horizontal under the boat.
-
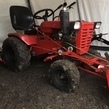
3 pointsI think those Nanco tires are the exact same as the Deestones. Those look exactly like the Deestones I have on mine. Even the lettering and molding on the side is exactly the same except where the brand is. Mine come out to about 22.5x9.5 as well, although I have mine on the 7in. rims.
-
3 pointsI am a John Deere guy, have a couple of 430's 420's 400's and 1 318. I know a little about the Deeres as far as value, not much about the Horses. My father in law was a tractor collector, didn't matter which brand. He collected and very rarely sold anything. He also very rarely restored any. Wheel Horse was his favorite followed by Simplicity and Power King Economy. We probably have 1000 lawn and garden tractors on his property of all makes and sizes. Also many attachments. In the next few months i will be going thru them probably selling most. Here is a list we found he made of his inventory 6 A80 C125 A90 C120 2 A100 C180 B11 C12 B80 D180 B165 2 D160 one with back hoe (rough) C10 3 D200 C160 D180 C114 3 GT14 C120 LT1100 workhorse C116 800 workhorse C195 2 C160 And others....i haven't checked this list but pretty sure its accurate
-
3 pointsAnd now that @Racinbob is back breathing mid-western air...his memory is coming back, he is sleeping better, his appetite has improved, and he has finally seen some snow.
-
3 pointsAlready been done...
-
3 pointsI would check the shims underneath the tractor on the horizontal shaft first. I'd bet most of the slack could be taken out there. Here are some pics of what it should look like. The shims are 3/4 I.D. I found them at Orscheln or Tractor Supply, called machine washers or shims.
-
3 pointsYes it is. The 3 gang mower covers more area though.
-
3 pointsYou could always do the "redneck" fix.
-
3 pointsWhat about a lace-up steering wheel cover ? Leather or plastic? That would have to be easier than removing the wheel - and would you be satisfied with the very skinny wheel if you removed the rubber ? Just some thoughts..
-
3 pointsBert Good looking worker. It should serve you well with that new muffler. Enjoy.
-
3 pointsAs Dennis seems very concerned as to where his backside goes I'd like to clarify,.. it's not behind the steering axle, and at the same time point out that, other than a small amount of cosmetic detailing, the LS carries no ballast or counter weights. Looking at the 'honey bee' I can't spot a steering wheel either, maybe it was autonomous.
-
3 pointsWhat happens at the Comfort Inn stays at the Comfort Inn
-
3 pointsSo, I use the quick couplers for ease of storage when I'm not using my loader. The pump has intake and output hoses that are about 3' long. I have couplers on the 3/8" pressure and 3/4" suction lines on the pump. This way I can put the whole pump and pump carrier in a Rubbermaid tote under my work bench. Those connect to the spool valve and the reservoir outlet.
-
3 points@Retierd Wrencher, thanks a bunch, here it is breaking in those new "shoes" today leveling out some fill for my FIL, Jeff. I hope so, I'll keep my tubes in a cool dark place till I need 'em again, thanks Jeff.
-
2 pointsSix months in the garage idle. Some fresh gas, check the oil, grease, sharpen the blades, and then this ... IMG_0738.MOV
-
2 pointsThe Red Square Members!
-
2 pointsDon' tell me let me guess...you finally getting at and resurrected this old project because you need the lathe for another project??


This leaderboard is set to New York/GMT-04:00