
Leaderboard


Popular Content
Showing content with the highest reputation on 03/03/2017 in all areas
-
11 points
-
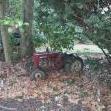
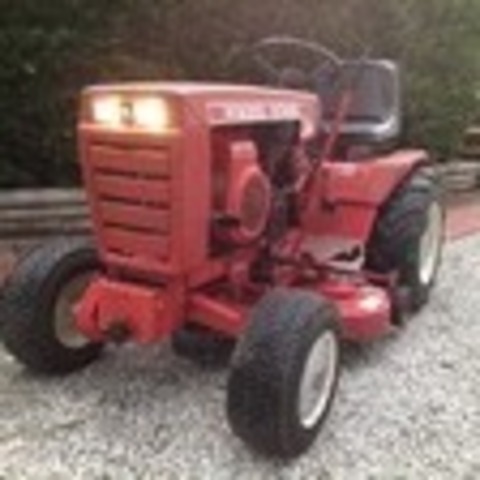
8 pointsPicked up another RJ-58 today that a guy had in his yard. Not as good as my last find but not too bad for $175. No original engine but it had the pulleys from it, belt guard, muffler guard and serial sticker. Hood has a couple small dents but in decent shape otherwise, no holes. Front rims are not rotted and the fuel tank is in good shape too. Check it out. I'm cleaning it up. Ill get a few more pics up soon.
-
7 pointsIts beginning to seem that the intent is to see how much more I can fit into this little tractor. Now it has a serious tachometer.
-
6 pointsYes it does, might be a few other things to check but those are the first things you'll want to do. Might be helpful if we knew what model we are talking about. Now there's something you don't hear around here too much! She got any sisters!?!?! K9
-
5 pointsI like actone, just don't soak the decal with this. A little on a cloth will loosen the paint (soften) and a little more will clean it off. It works very easy...no hard or long rubbing. Do in a well ventilated area.
-
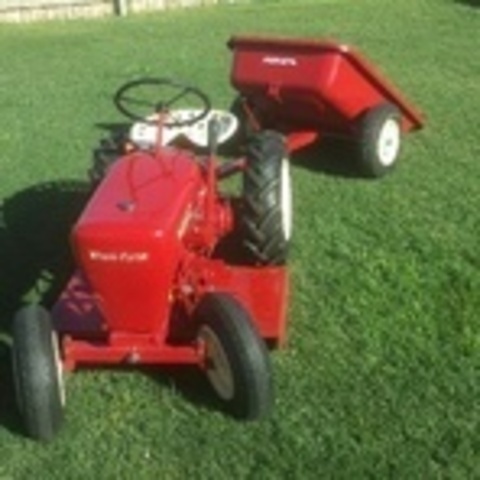
5 pointsIn the summer I remove the blocks from my weight rack and can carry quite a bit on it. It mounts to a 2" receiver and can also be used to tow a cart.
-
5 points@k9searchandrescue to Check the axle and hub...Sounds like the woodruff key is broke and the axle is spinning inside the hub. If so, the wheel may fall off, so be careful checking this out! Or the pulley on the transmission is slipping because it's key has sheared off.
-
4 pointsI just finished up an HD-42 plow with the RJ mount. Just need the decal/decals for it now. I think I've seen a few with a decal on the upper left on the back side of the blade but I don't recall the type of decal. Does anyone know exactly what the original decal/decals are and their placement on the plow or mounts?
-
4 pointsA Kohler 7 or 8 hp will bolt right in. Just don't use the plate that's under the Techy.
-
4 pointsSome of the wire locks on these pins have been known to rub and machine grooves in the PTO bell. I use a 1/4" socket head bolt and a locking nut.
-
4 pointshave you tried farm and fleet or Tractor Supply? They each sould carry PTO Lock pins.
-
4 pointsQuit looking Drydock and just PM @wheelhorseman1000 ...he's got a boatload of them. Plus seals & any other bearings you might need. His prices are right and he does fast ship.
-
4 pointsAcetone or Lacquer thinner, you need to be careful with them as they can eat up the decal. PO had spray painted this 1045 with some orange paint, I washed it off with Lacquer thinner.
-
3 pointsSo I decided to upgrade my 308-8 and do an engine swap. Main reason being the 8 horse Kohler struggles with the snowblower. It's a great engine, just not quite enough hp. Just about every machine I have has a Briggs in it and I've never had a problem with any of them. So I thought why not drop an opposed twin in the big horse. After searching for awhile, I found an 18 horse out of a workhorse on eBay. Had the pto and engine mount I needed on it. Turned out to be too far gone to rebuild, just flat wore out. A few months later I got a nearly identical engine off a buddy for free, he was going to scrap it. Long story short (too late!) I am making one engine out of 2. The carb, tins, oil pan, and air cleaner housing are off the junk engine. The junk engine was a 1983, the rebuilt one is a 1984. Parts are very hard to find for this engine anymore, lots of late nights searching eBay. Model is 422437, splash lube ball bearing 12v electric start horizontal shaft. The free engine I started with. It sat outside for a few years. After some tinkering and the carb and oil pan off the other engine, she fired right up! Disassembly The timing pin on both engines was worn, almost sheared off on the junk one. Briggs only used this for a few years before going to an 1/8inch woodruff key after. It is very apparent it was a weak point. Had to drill out the old one.
-
3 pointsMy first Automatic in the stable, '76 C-120. Found her on a local CL ad, owner wanted to pretty it up someday but had inherited a JD & didn't have room for it. He said it ran great, needed new battery. Hooked a jumper box to it & she fired right up, no smoke, no ticks, no knocks. Tranny is strong & tight, 48 inch deck in great shape & 42 inch plow that looks like it was used once! $350.00 later she was on the trailer headed home. Here she is home next to the C-81 I got two weeks ago...
-
3 pointsSent the block out to get punched .020 over and sandblasted. I did some minor port and polishing and cleaned up the heads. Some guys say to shave the lip off where the gasket goes to up the compression. I've talked to some guys I trust and they say these L head opposed need more airflow than compression so that wouldn't gain anything. Port/polish is the only easy gain I'm told.
-
3 pointsBeen nice and warm the past few days but too windy outside to do any welding on our corrals at the farm, so taking advantage of free time to get some equipment ready for summer. Put my old aerator up on the bench with the intention of just lubing it up and getting everything moving freely like it should. Next thing I know I've got it all tore down and stripping it for new paint. Had some bent spikes so straightened them out as well. Ordered a new decal for it last night, and picked up paint for it this morning.
-
3 pointsNICE! But still room for: Cup holder, heated steering wheel, cig. lighter, sun canopy, heated seat, wi-fi, usb port, flashing LED safety light for night time work, the list is endless...
-
3 pointsHey no problem Rusty except for the fact that there are no 1. Torque them all if YOU feel the need to. Not really necessary but some guys sleep better at night. Torque value charts for common fasteners can be had for download & printing for the shop anywhere on the "net. As for the motor - yes torque all to manual specs. One advantage about torqueing to the charts is you avoid over tightening, twisting off and more cussing. A hobbyist's set of click style of torque wrenches can be had at HF for little $. 2. Again if it makes YOU feel better go for it. Not really necessary if using lock washers or other type of fastener lock device. if you do use it and especially the RED high strength flavor, heat will more than likely be necessary to remove it. So try not to use it around seals and things that don't heat well. Read and heed the Loctite instructions. Use where indicated in engine manuals. Still not a terrible idea to check & do a visible inspection for loose fasteners once in awhile. Use just the reverse.... anti-seize anywhere you had to at something to get apart during disassembly. Keep in mine these little red guys will not be flying at 33,000 feet or going down the road at the posted legal limit so if a bolt loosens up no life will be in jeopardy. Except when you have a plow day and some of your bro's tractors start shedding hardware & engine internals all over the turf you need to mow and just sharpened the blades! Others will be along to chime in on things I have missed. Good luck & have fun with your build!
-
3 pointsI picked up an old Raider 10 last year. Looked rough and had only one gear. It had a utility bed fashioned on the back, which I removed. I've since replaced the transmission with a 3 speed and replaced the tires. Everything else works, including the lights and cigar lighter. I think I would like to rebuild the bed to allow it to haul cargo and or tools around the yard. Any pickures of simular projects would be great. Thanks, Ted
-
3 pointsYou need to change your name to "The RJ Whisperer". Congrats on another RJ score , looks like your kicking butt in the RJ location department ! How do you just happen to run across two , look to be pretty much original RJ's with belt guards and serial #'s intact for $375 ? @AMC RULES you might have to start following this guy around....with his luck a senior will just show up in his yard ... Oh yea... we definitely need more of both these little guys !
-
3 pointsIf you look at the pinned topic top of the transmission page there is a cross reference. The WH# 1526 was replaced by 9416 for 1-1/8" axles. Torrington# is B-1816
-
2 pointsCheck it out! I found this RJ today as a lawn ornament. I knocked on the door and the guy ended up selling it to me for $200 with a plow and mower deck in awesome shape and all the manuals and receipts and even spare parts! I couldn't believe it. Hood has been repaired but its not destroyed, no muffler guard (typical), but its the original engine, belt guard, serial # sticker. Attachments are in remarkable shape compared to what I've seen. The skid shoes on the plow aren't even worn. Heres a couple pics, Ill take more tomorrow.
-
2 pointsI can't be there, but there is an estate auction today in Mt Crawford, VA that has a nice looking C120 to be auctioned off. Hope someone in the group can get it.
-
2 pointsYou are correct, the slide bar was frozen & one of the spindle bearings was locked up so the shaft was just spinning in the race. I freed up the bearing but they are the old Double D non greaseable spindles, so I'm not going to waste too much time on them. I have a newer style of round hole greasable spindles I plan on using instead, too hard to find blades for the ol' Double D's anyhow. I've been wanting a 48" side discharge deck for many years, now that I have one I'm going to fix it right. There is a sign on the wall at the sandblasting company I go to that says, "If you don't have the time to do something correctly, when are you going to have the time to do it again?". Thank you for the tips, I love the Formica trick, I will give it a go! I agree about the belt guard too, big debris & water trap. Still a Wheel Horse part though, so I blasted & primered it anyhow.
-
2 pointsThis kinda explains the problem.
-
2 pointsFunny, I actually been mulling over a sun canopy.
-
2 pointsThank you mods. You might want consider a Harbor Freight predator motor in the 6.5 to 8 HP flavor. . Might have to rearrange some mounting holes but not too terribly difficult. Might be easier to find than an appropriate Kohler. Can't beat the price as well. You can get the specs & dimensions from their site (HF) to see what you might need to do.
-
2 points
-
2 pointsto the K9. "a SLOW rhythmic squeak" Relative to the pulley, the axle turns slower than the input pulley, so I'll pick a sheared right axle/hub key. And Bob has dibs on the pulley key.
-
2 pointsMy money would be on this one.
-
2 pointsThats a very nice horse. looks like thier is something funny going on with the dash tower. $1500 seems a bit high to me but i'm a bit of a cheap skate.
-
2 pointsEver hear 2 neighborhood kids talking loud,,,and you wounder.....are they just loud or friends arguing.???? well kids..........this looks like the street corner,,,,,olololoolol I'm just happy they don't have launch codes....But I did see an extra key..... Ducking in Va
-
2 pointsBe careful with this as the front axels can't hold the weight that the rear can. I know this because when I was using my FEL as a crane picking up my Onan generator one of the front axels broke tipping the tractor sideways. Then the cut pieces of railroad track I had for additional ballast on top of the rear counter weight slid off. Without that additional weight on the rear,the tractor tipped forward, the generator came crashing down. I had a very short chain so the bucket hit the air cleaner snapping off the carburetor on the generator! Moral of the story is be careful of what and how you pick things up!!!! P.S I didn't have the HD spindle kit at the time.
-
2 pointsI always use high quality bearings, sealed both sides from Motion Industries. After install, I remove the zerk fittings and install a set screw to keep water out. My reason for doing this is simple, it keeps the machine cleaner as there is no grease squirting put of either end of the axle. All my machines are workers, but grease can and will drip onto the garage floor where inevitably it gets stepped in and tracked into the house and on the carpet. It is a personal preference but I prefer to not get yelled at for tracking in grease and then having to pay to have the carpet professionally cleaned.
-
2 pointsDuh! I missed that! Makes sense. Thanks for clearing that up for me.
-
2 pointsI use sealed on my show horses so that I don't have grease on my wheels. I use open on my workers so they can be well greased to keep water and dirt out. It's all about personal preferences.
-
2 pointsBe really careful using electricity to remove a bolt - if done absolutely correctly it works fine , if one little thing is out of place you'll end up fusion welding it in the hole.... For slotting smaller screws like the 10-24 and similar sizes , try using a nearly worn out fiber reinforced disk , or the HSS slotting saw on a Dremel . The Foredom units are basically an industrial moto-tool with a much larger motor and cable driven hand wand - they are vastly more powerful than any Dremel and much easier to work with on delicate objects , yet still have the power to do the work . Good quality solid carbide cutters are getting hard to find , if you want to go that route for use in harder materials stick with US made bits . Just be aware , carbide is amazingly brittle due to it's hardness and can snap easily when side loaded too hard .Use double cut tools on ferrous metals (iron/steel , ect) and single cut tools for non-ferrous metals such as aluminum . Sticker shock soon to follow - I've paid $15 for one lousy double cut flame head long radius cutter in 1/8" shank , just used it yesterday to finish removing the last brass machinery tag off the head unit on the Clausing drill press - those are some of the hardest steel rivets I've ever encountered . Sarge
-
2 pointsRichard, Good post. First off, we have a Joke's section, so if a post or thread can be place in that venue, please do. Just remember, even in that section, political, ethnic, and religious comments are forbidden. Second, we all have our political views, our religious beliefs, and we all have opinions on things. But, they're your own personal views and beliefs, and rather we believe it or not, not all members are going to share your opinions and views. So please keep your political and religious opinions and views to yourself, and please no ethnic or racial slurs. If you have to share your opinons, then share it with friends and families on facebook and other social type medias, or try the old fashioned way, through face to face conversations, phone calls and emails. Keep it off the site. I have my own strong personal views, but they probably won't agree with everyone here, so I keep them to myself.
-
2 pointsI'd like to add 1 other helpful hint on drilling these bolts out. NOBODY starts off as a master machinist, but when I was young and wanted to show the old guys I knew what I was doing, I would "Practice" on parts from the junk pile. If this is a one time learning experience, go to a small engine shop or junk yard......There's ALWAYS mistakes there that you can practice on. AND, it's junk......there's no more damage you can do to it. The NUMBER 1 tip would be to ALWAYS use sharp bits!!!! I have a few Drill Doctors* and always have sharp bits. If you don't sharpen successfully, buy a new bit......It's cheaper that a new block or head. GLuck, Jay
-
2 pointsI have a couple of sets of Snap on Cobalt Left handed drill bits for this. FYI- be careful with the smaller sized cobalt bits. Whereas they cut a nice hole the cobalt is weak side to side. Get a little too aggressive or start wobbling and they will break making your life even more difficult.
-
2 pointsFound a single stage and blade on Craig's list last year. The blower was in mint condition and just needed geased basically. The blade was in typical condition and just needed a weld and paint job.
-
1 pointMy boss has an extremely clean 1961 Wheel Horse H55D-2113 with a mower deck, snowblower, and pull behind plow. Everything is or close to like new condition. Starts/runs. Any idea what this unit with the attachments may be worth? We are a Kubota and Bobcat dealer in Des Moines, IA. S/N is 0137658. Thank You!!!
-
1 pointGetting back my dad's C-120 next month. It was his first wheelhorse. They are nice tractors.
-
1 point@ACmanits been years since ive came across an RJ at all so just lucky I guess. I wish i could find a senior. Maybe one day. Ill get pics up of all of them this weekend.
-
1 pointFirst off you have a 1961 551.
-
1 pointLooks like another great project!
-
1 pointfinally got around to cleaning the nos one up
-
1 pointobone I am redoing this tractor with all the original bolts. I just wire brushed them and clear coat. Looks ok to me just my . Enjoy what ever you feel is right to you.
-
1 pointAlready made mine, 3" X 4" double sided. The back side is for dyslexics like me.


This leaderboard is set to New York/GMT-04:00