
Leaderboard


Popular Content
Showing content with the highest reputation on 11/21/2016 in all areas
-
11 pointsPicked up this nice 4 wheel wagon on Saturday. 2nd trip to Wisconsin in a week. Pretty stoked to add this to my collection .
-
9 pointsAnyone remember these? For sale on ebay for $499. I must have destroyed $10,000 dollars worth of these when I turned them into ash trays by tapping the top of the cone with a ball peen hammer till the cone was inverted down into the can.
-
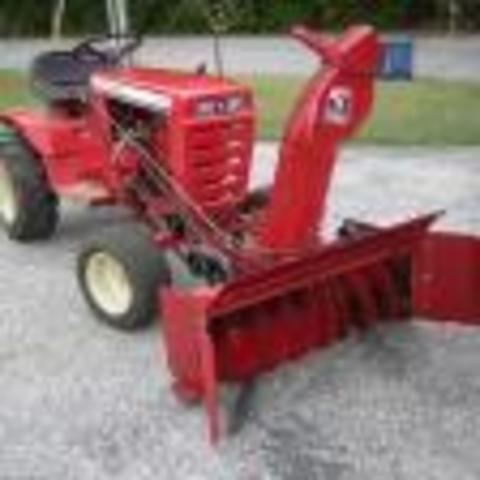
8 pointsFound a parts blower for short money to convert my short chute that I reconditioned last year into a tall chute. Very easy to change over. I ordered a new chute gear ring and retainers as there was too much play in the chute to rotate smoothly. Also got a set of wheel weights with the deal, 50# a piece.
-
7 pointsI was finally able to talk my wife into a wood stove a few yrs. ago. I'm all about not having to rely on the man to keep my family warm.. My dogs and the cat really enjoy it as well. I get and split all of my wood myself. This is something you really need to enjoy or you will hate a wood stove. (you could call the man for wood, not me) its all part of having and enjoying a wood stove for me. It brings back great memories of fetching and splitting wood when I was a kid with my Dad with our 64 Ford F-100.
-
5 points*update* I allowed the member number to be seen by all, so you know what your member number is.
-
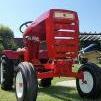
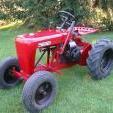
4 pointsI'm asking for help to identify what year and model this tractor is. 1978? C-121? Any guesstimates on its dollar value would be appreciated as well. It has recently been given a lot of TLC and is in perfect running condition.... although it leaves a little to be desired in appearance at the moment. Appreciate your input.
-
4 pointsWe are needing some advice! We have a model 104107 and do not know the year. From what I have found, it's early 70's, I think. We've been doing a lot of work on it (decals, paint, new battery-starter-fuel pump-3pc set of blades). The muffler is almost new. It's a beauty! We also have 2 look-like-new attachments: snow plow and grader. Ok....so that is what we have.....and it's all set to go to someone who will appreciate the power and the awesomeness of this machine. We want to get this listed (Locally? Across the States? Ideas?) and sold before the snow flies here in Iowa. So I'm asking for knowledge on what year this is, what y feel the complete package should sell for, and suggestions on placing an ad. I have more photos, if needed. Thanks much!!!
-
4 pointsGrowing up we had a bit larger unit that shelled and cracker the corn, it was powered by a goat on treadmill. I wish I had a picture of that operation, Every Saturday that was one of my chores; gather corn from the bin, get the goat in place and convince her she was going to get those carrots. Life was good!
-
3 pointsToday while reading through the threads that I'm following to gain knowledge for future use I seen a picture in Lagersolt's snow blower auger bearing replace thread. And since I have been meaning to post this idea I have used since entering the work force I seen it as perfect time to pass it on. This setup makes it easy for me to find tools and also when putting tools back after working on a project a open slot keys me in to a tool I over looked while picking them up. I take wire trough cutting it to the length I need to hold the number of tools I want to organize. I then cut it to heigth needed to clear when closing drawers. Once those 2 steps are done I widen the slots that wires went though to fit the tools I've chosen. I split the trough for use with wrenches and used scrap for boxing in the side cutters and snap ring pliers. Though the years I have learned that once these steps are done it is best to set the tools up and position the whole setup were you plan to mount it. I originally used 2 sided tape this is okay but may need to be repaired if glue drys out. I now drill a hole in each end and pop rivet them from under side so rivets don't interfere with anything below the drawer. Some times the length will dictate the addition of a second or third rivet for stability. I spent majority of my career in industrial settings allowing me access to used wire trough for free so I can't say what it would cost to buy a length of it.
-
3 pointsSome of you wanted to see a short Video of this Muffler here you go. HDV_0002.MP4 HDV_0002.MP4
-
3 pointsMy young co-worker and friend brought in some more pieces for the BIG TEN today that he rounded up in his barn this weekend. The 42" mower deck is nice and solid. The magic penetrating oil solution of ATF/ Nexgen metal and mold cleaner already has rusted parts freed up.
-
3 pointsNot only "for sale" on ebay, but SOLD today for $499. Anyone from Pennsylvania knows Rolling Rock, but I can't believe that someone is crazy enough to spend that much on a can of beer that's probably skunky tasting. Reminds me of the wine collector who spend $5000 on a bottle of wine that he opened and it had turned to vinegar. Some people have more dollars than sense. But then I can't believe that someone on ebay is asking $110 for a WH generator belt guard, when I bought two of them at the WH show for $20 each. Jim
-
3 pointsAlive and well since 1939 in Latrobe, Pa. Jay
-
3 pointsWe use to have a John Deere when I was a kid we used to shell and make crack corn for the chickens . Got knocked over and shattered the cast iron housing .
-
3 pointsYes, most likely. Many mid to late 60's tractors had cig lighters. Our 875, GT-14 and Gilson S-14 all have factory cig lighters.....that still work!
-
2 pointsI'm not getting any younger and everything I work on gets heavier.... picked this up the other week for £30 ($33) and with some recycling of an old bike rack brought back from the US that was built like a tank. I've got this A handy crane with a 4ft boom that swings inside the workshop (the axle is for my 3rd 4x4 I'm designing)
-
2 pointsOn the dash of my 875 wheel a matic i have an empty hole to the left of the steering wheel. Was that for a cigarette lighter?
-
2 pointsI am not a serious collector (or a marketing expert), but I follow the CL listings in Missouri, Iowa, Nebraska, and Kansas. That is a really nice setup, and I am curious about how much you want to ask. I see similar setups listed in the 1200-1500 range, and I think they look reasonably priced. I have also seen a very nice restored Wheel Horse with lots of attachments listed for over 2k, but the seller has been walking the price down over time. In my opinion, I don't think your market is collectors. Your market is the guy getting ready to drop $1800 on a box store riding mower without attachments. You just need to persuade him how much more awesome it would be to own this! I would consider putting it on a trailer with a for sale sign and showing it off.
-
2 pointsIn the old days it was steam, but the high pressure was dangerous. So in the interest of safety, now we use low pressure smoke. 😂 And if you will buy that..... Mark.
-
2 pointsNo problem! Can you please explain why they build electronic stuff with that magic smoke? Every time it gets out, nothing works again!
-
2 pointsThe solenoid has no bearing on the ignition other than to activate the starter.
-
2 pointsWith a double acting cylinder, the difference in fluid volume to the reservoir is the same volume as the rod since fluid flows out as fluid flows in. The rod takes up space in only one side of the cylinder when retracted. The change in fluid level from fully retracted to fully extended for that rod is about 3.5 fluid oz. Volume of 1" rod x 8" long = 6.28 cu inches--6.28 cu inches converts to about 3.5 fluid oz. There are plenty of online calculators to confirm this. So not much change to the fluid level. Make sense? Much different for a single acting cylinder. It's the total volume of the cylinder and not the rod
-
2 pointsAnd further more. don't care!
-
2 pointsWho cared.
-
2 pointsNever watched it and still don`t know who shot him...
-
2 pointsJust dug this corn sheller out. Goes to show how far things have come. 20161025_184740.mp4
-
2 pointsAnother pictures of my 1054
-
2 points1964 Wheel Horse 1054
-
2 pointsOne VERY important thing to know before disassembling a starter, starters REQUIRE sufficient amperage to operate properly. Poor battery connections, poor solenoid connections, poor starter connections all reduce the amperage fed to the starter. I recommend all the above be checked with an OHM meter BEFORE taking a starter apart. Cleaning and lubing a starter is relatively simple, but why waste time when that is not what was needed? If you don't own an OHM meter, get one and learn how to use it. It will become one of your best friends when troubleshooting electrical problems.
-
2 pointsShynon Nice wagon. Around here these go for up $400.0 if that condition. They are handy but not for that price. Enjoy it looks like it will haul just anything want with it. Made very well.
-
2 pointsThat's a Nice one , Tom
-
2 pointsI like this thread. Unfortunatly..I don't have a picture handy. We live in a ranch, and have a fireplace insert in our living room. It's a Pacific Energy Vista stove. Take 18" logs. In the ceiling above it, I ran three 12inch pipes back to the supply side of our central air unit. (I put in blockers for the normal supply setup during the winter). Heats the house pretty evely. I'll try to get some pics for tomorrow.
-
2 pointsThere are many manufacturers of this muffler. I have seen high quality and I have seen junk. The higher priced ones "usually " are heavier /made out of thicker metal. Some are nothing more than tin cans. Even the Primeline Brand (which Napa sells) isn't what it used to be.
-
2 pointsI'm new to red square. Been reading forums from here for years off and on when I had a question and I usually always found it. I have two wheelhorse's one is a 1978 c141 and the other is a 1995 416-8 that my dad bought new. I still have the owner manual and bill of sale for the 416-8. As well as the service manual. I just bought a used snow cab for it. Can't wait for snow now.
-
2 pointsIt is a plastic channel used in industry to contain wiring. the slotted sides allow wires to enter and exit at any location along the length of the "trough. It has a removable snap on cover
-
2 points56-57-58-59-60 RJs
-
2 pointsI used international red myself.
-
2 pointsHere's some photos of my stove in the kitchen, just doing some breakfast. the rack above lowers down so i can hang my Wheelhorse parts up for drying ( when the wife's out of course)
-
2 pointsHere's mine! 1 July 4th at the Lake!
-
2 pointsYou got the first step of the 3 steps done, in becoming a Wheel Horse veteran of stubborn part removal. The next step is the frozen hitch pin removal. Once you have conquered that you will graduate to the ultimate test. The dreaded stuck steering wheel removal. After you have accomplished all of these three feats you will be awarded the badge of frustration. You will have learned and used every cuss word known to man plus invented a few more along the way. You will have earned the right to have joined the many that have come before you and walk down that hall of fame of the most frustrating Wheel Horse parts to remove. A very lofty goal indeed. Remember many have tried only to have their sprit ripped from them in a very heartless fashion. Very few have succeeded and those that live to tell about it are scarred physically and emotionally. That's why they are held with the highest honor.
-
1 pointOk , been asked a lot of questions about how I rebuild front axles - unless they are physically broken no axle is really past the wear point of being rebuildable . I'm starting with an early D series front axle and upgrading to a later model D series 1" spindle type with the heavier casting . Since I could never find any pics of a comparison - here we go.... If you look closely - there is an obvious difference in the castings at the spindle end - the later model axles were thicker and larger diameter to accept the heavy duty 1" spindles. Later model (post '75 , I believe). This photo really shows the obvious difference in diameter - early models were much smaller and a thinner casting for the early 3/4" only spindles . Need to find someone with a tape measure and one of the oddball early D-200 1" spindle equipped tractors to find out if those were a thin casting or the thicker type . The machined relief is for the roller thrust bearings that were originally used - if you ever buy a D or I believe the 520's , this is the first thing to check as many were never properly greased and destroyed that bearing . This can really wreck an expensive spindle and make it more difficult to rebuild the axle casting itself . I will be re-machining these reliefs to mimic the factory design to keep dirt out and retain the grease inside the bearing . Early castings , at least on this 18 Auto or D-180 that I have (missing the stupid id tag completely) measures roughly 1-1/2" outside ... Later model upgraded casting is a whole different animal - there are major differences in how they were cast and not just at the spindle ends . Later models were 1-3/4" on the outside . Since I've never seen a new old stock replacement I'm not certain as to the original finish quality of the machining on these things - it is obvious that over time dirt has entered and a lack of proper grease results in the bores being worn badly - some are literally egg-shaped , especially tractors from the late 60's with high hours and heavy use . Snowblowers and other heavy front implements of course accelerate this wear issue - I'm out to cure that and make the unit more serviceable . The biggest , #1 problem with these is how they are greased . I've bought and sold tractors for years and had some that had huge grease balls around the spindles , inside the wheels and all over the front end . At least they were trying but the wear is almost no different than one that was seriously neglected . With the weight on the spindle , the grease is forced upward and exits at the E-clip at the top , never lubricating the bottom where it rides on the spindle base for the steering arm . The correct way to grease these things is to lift the tractor BY THE FRAME , NOT THE AXLE ITSELF . Also , do not lift it by the front mule quick attach - you will bend the cross rod for the latch and destroy it . Best way is to use a block on the frame itself or make a spreader to fit the jack , maybe I can take the time to get pics to show better ways to pick these things up since they aren't exactly lightweight ...lol . No make or brand was exempt from this issue , they all did it . The problem becomes parts availability - there are only so many parts left and finding good spindles and axles is becoming a serious problem . Some brands aren't too bad (such as the green ones) since they still support most of their older models . Unfortunately for us - Toro has chosen to drop these parts and stock is quite limited . I got really lucky and a parts dealer friend had a pair of NOS 1" D series spindles , one of the last pair to exist to my knowledge . Those are getting blueprinted and angles mapped for later - I may tackle making new ones in both the 3/4" and 1" versions . I believe with a little engineering the earlier models made in the 60's could use a sort of generic spindle since there little difference in the many models - it was mostly down to the axle's angles and width . My D will be upgraded to heim joints for the steering . Many of the tie rod and drag link ends are NLA and finding steering arms that don't have the tapered holes wallowed out is getting pretty tough . The low angle taper on those automotive style ends allows them to work loose despite having fine thread castle nuts and cotters - the force required to turn the wheels due to the above mentioned lubrication issues , combined with a gear reduction Ross type steering box makes the holes in the arms wear - I've seen 4 of these spindles on different D's all worn the same way with the tapered factory holes oval in shape and the shanks on the rod ends could be easily turned with a wrench, which should not be possible .Converting to heims is not too hard and less expensive in the long run - the only issue being the left hand threaded rod ends at the steering bell crank (or idler arm) . Since it sits so close to the underside of the frame and being tight quarters we may have to resort to using a reduced size heim joint which are easily obtained if you know the part number systems . I have a NOS pair of factory rod ends (ball joints in the parts manual) so this one won't be getting this upgrade for now . The factory bell crank is subject to wear like everything else . It's buried up under the engine and I suspect most were neglected being so hidden . Inside is a steel bushing riding on the cast iron bore of the bell crank . The retaining bolt , bushing and iron casting all get worn - which results in sloppy steering . On a D that's a real problem since their turning radius is huge to begin with . I've modified mine slightly by moving the turning arc point of the drag link inward by 3/8" - when it's done I'll test and measure the turning radius to see how much it helped and if there is any interference or other issues . Models with working turning brakes in either the stock D-200 or kit-equipped smaller models of course helped when in dirt or grass - just never use those on pavement or hard surfaces since it can really bind things up and possibly cause rear axle damage . It's all mentioned in the manual and instructions for the kits to add turning brakes . Not sure yet if I'll just make a separate thread on the steering parts or include them here - plenty of info to make a long thread on the cast iron axle alone . Depending upon how well it works out I may offer this as another service to the long list of other parts I build or rebuild currently . Guy with a lathe , far too many tools and a TIG welder must stay busy during the long winters....lol . So far, it hasn't been a cheap venture - tooling bits and parts totals are well over $400 and climbing - haven't really started any machine work on the axle as of yet since I'm still waiting on one tooling bit . I will try to document what is used in the rebuild and a parts list as well as sources . All bushings and bearings used will be off the shelf parts so it's nothing that isn't easily available . Lathe work my be required to avoid using custom ordered parts and their associated extra costs . Anyhow , more to follow.... Sarge Going forward
-
1 pointcan anyone tell me the propper dark red colour for the 1960 suburban please and has anyone got close up photos and sizes of footplates many thanks
-
1 pointOk, it's mine. Cleaning fuel tank and replacing lines. Removed and took carb apart. Looks like carb would be better off replaced with a new one. Will check fuel pump tomorrow. Throttle shaft is worn, is real loose. Chinese carbs on eBay ok? Thanks.
-
1 pointWelcome to the forum and the no-name model year. Garry
-
1 pointI suggested the method for two reasons; there is no need to find and rely on timing marks, and this way you can be absolutely sure the lobe is well away from the follower. That said, you are correct in your statement, I provided the information so that there would be no doubt in accomplishing a successful adjustment. Since you mentioned high performance engines, they do have lobes that are a longer duration and give less room for error in positioning the cam for adjustment. Again, the procedure I suggested gets the lobe opposite the follower.
-
1 pointShould need about a gallon including the filter, you will want a new NAPA 1410 filter when you change oil. Also, it is important to use the same oil as is in it; if it is amber use 10 W 30, if red use Dextron ATF.
-
1 pointSorry Bob....no help from this dummy.
-
1 point
-
1 pointNice job @T-Mo already got one printed, bound and hung up in my office next to my favorite time keeper!
-
1 pointWow things have gotten busy here at home but I have managed to find some more time to finish writing this thread. Next install the rings on the piston starting with the wavy oil ring then the two thin oil rings one above and below the wavy ring. These rings are easier to put on the piston, you have to take your time and walk them into the groove. Once you have them installed offset the ring gaps of the oil rings. I place the wavy ring gap above the piston wrist pin hole, and one of the thin rings to the left and the other to the right about 1/2" from the wavy ring gap. It is hard to see in this picture but I will show it in a later picrure. Now walk on the 2nd ring and the top ring. Use the diagram that comes with your piston for directional install of the rings. Most all of the rings have some sort of notch in them like the one below. Place the connecting rod in a vise wrapped in a towel, mark the orientation of the rod and cap with a marker. After you have marked the cap remove it, and slide the wrist pin through the piston and the connecting rod and install the two clips that retain the wrist pin into the piston. I measure valve lash next, small block kohlers use solid tappets so the valve lash must be set by grinding off material from the valve stems. I first check to see what lash I do have and then take the valve to the grinding wheel. When I have the gap close to spec I hand sand them in my tile with 600 grit sand paper. Then re check your lash with the camshaft lobe on the base circle of the cam this means that the tappet is in its lowest position. For those who don't feel comfortable doing this you can pay the machine shop to set this lash for you (they do have better grinders). So here is a picture showing the orientation of the ring end gaps for reference the piston wrist pin holes are in the 12 and 6 o'clock potions in the picture. This spacing of the rings makes it that much harder for the oil to "blow by". Heavily coat the cylinder wall connecting rod and crankshaft journal with clean SAE 30 oil. I usually use my fingers to apply it, then pour clean oil on the piston and the rings apply some oil to your ring compressor and squeeze the rings down on your piston You need to have the compressor tight enough to get the rings into the cylinder but loose enough for it to slide out of the compressor into the bore. Once again this style works just fine I have built enough engines that I have invested in a nicer ring compressor set. Line up your piston in the bore, note the orientation of the mark you made with the rod and the cap this will need to line up in a little bit. The other crucial thing is the location of the hole in the rod cap. THE HOLE MUST FACE THE CAMSHAFT SIDE OF THE BLOCK! if you do not do this your rod will fail. This is because of the rotation of the crankshaft and oil lubricating the crank journal. I turn the crankshaft so the rod journal is at its lowest point so the connecting rod doesn't smack into it in the next step. Using the handle of a deadblow or a wooden handled hammer make one firm and swift downward tap to put the piston into the block. If you don't get it in the first time make sure everything is lubricated and in the right positionand try again. You want to get it in one tap otherwise you run the chance of breaking a ring. Note the hole in the rod cap and it's relationship to the camshaft side of the block. Tighten the rod cap down to the spec in the kohler manual. There are two specs stated for some of the rods the first is a cap style which I used and looks like regular bolts holding the cap on, the other is posi-locked studs which the connecting rod has two studs sticking out of it and you The internals are pretty much done at this point. Install the valves you need your springs, valve keepers and retainer rings. Feed the spring and retainer into the block spring first the push it up toward the valve guide and over the tappet. Slide your valve into the seat, and using your valve spring compressor, compress the valve spring and retainer together When you have enough room, place the keepers on the stem. TIP: a small telescoping magnet, patience and a little axle grease goes a long way. When you have both valves installed properly turn the crank over by hand, so each valve has opened once or twice, you now know that the engine turns, and if the keepers arent on all the way they usually have fallen off by now and you will know. Install one of your breather gaskets (I apply gasket sealant on these gaskets) and then the breather plate and reed. NOTE the oil drain back hole is at the bottom. Place the rubber spacer, then the other gasket and the final cover with the nut, snug it down if you over tighten the nut you will bend the outer breather cover and oil will seep out. Lube up the points rod and place it in the block hole. Add your points (most all kits come with new points) Set the gap at .20" when the points rod is in the block the farthest it will go in during a hand rotation of the crankshaft. Bolt on your points cover, don't forget your gasket, and grommet, this can wait till the engine is on the tractor and wired, but mine will sit in the shelf for a couple weeks. Put on your head gasket, and head, torque to spec using a torque wrench, and install your spark plug. I personally do not use the spark plug that comes with the kit, I throw it out and buy a quality Champion spark plug, in the case of a small block kohler a J8C. Bolt on your engine tins and your almost done I still need to clean and rebuild the carb, after I do this tomorrow I will attach the govenor arm and set the governor.













This leaderboard is set to New York/GMT-04:00