
Leaderboard


Popular Content
Showing content with the highest reputation on 03/09/2016 in all areas
-
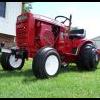
11 pointsWow, it was in the 70's here in south central PA which is almost a record for us Sooo, I figured a good day to bang off a half day of work and paint some parts!
-
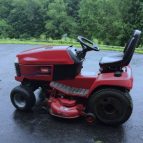
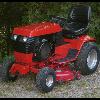
6 pointsI took the herd out for some sun. It's such a nice day in York, PA.
-
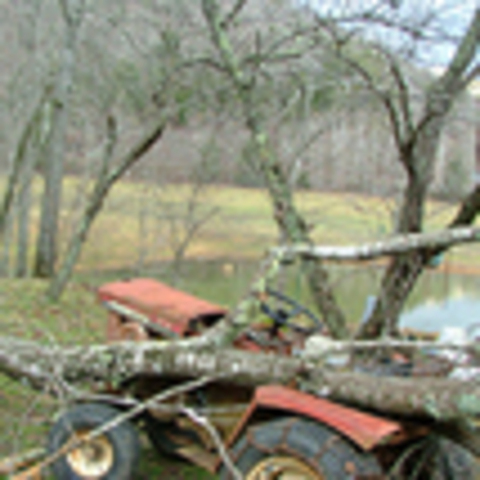
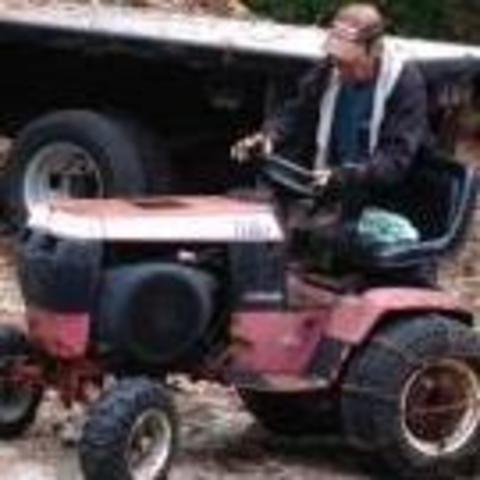
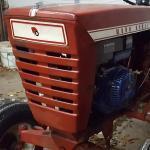
5 pointsHello All !! Here is a rant with a few pics explaining why POS junk riding lawn tractors are made and sold... because of people like this... So I have this parts tractor that has been laying in my bone yard for awhile.... I had to go out and get a few parts for a project I'm working on.... Picture one is of some idoits idea of a good way to repair a spun hub... Pic 2 is the absolute height of lazy... Okay--I'll give the guy credit for greasing the machine... but once again--ARE YOU KIDDING ME? There wasn't a rag available to wipe off the extra?? Pic 3 is what somebody considers proper maintenance in the "keep engine fins clean " department... Okay that's it... let the comments fly.... I'll admit it I love these little tractors maybe a little too much and seeing stuff like this gets me fired up. Tony
-
5 pointsI took the 854 I’d been working on back to the owner. During our conversation he mentioned a welder that he wanted someone to haul away as he doesn’t weld so we loaded it up. It’s not pretty but it works. It will be repainted and I’ll need to do something with the cables but haven’t decided what yet. There’s a bunch of rod with it. Only part of it is in the bucket. The rest is in the bed. I had a Lincoln 225 when we lived in Indiana and I welded pretty good for an amateur but I’m certainly not experienced with all these different rods. Here’s what I got in rod: 7014 6011 MG745 Dytron 205 The following Eutectic brand: Xuper Beautyweld Xuper Exotrode Staintrode Most of the containers are nearly full. I know about 7014 and 6011 but that’s about it. I did some research and it seems there’s some for cast iron, stainless steel and specific purposes. Any welders here know about some of these rods?
-
5 pointsYesterday I got some quality seat time on the GT-14 using the York landscape rake to remove all of the branches that came down over the winter. Lots of tulip poplar trees along the creek, the way they drop branches it looked like a war zone. Now I need to pull the mower deck out and get it ready .
-
5 pointsHeres how I deal with loose hubs.... I thread the axle LEFT HAND THREAD and tap the hub... that way as I drive forward they stay tight and if I need to take them off I simply dump the clutch in reverse!!! Tony
-
5 pointsHad a neighbor come over last spring and ask me if I wanted there old lawn tractor (TSC Brand) she said it leaked oil and gas I knew it was only about 10 years old used only to mow about every other week so I said sure why not at the least I can get a few parts off of it. Well I pressure washed it off and got it into my shop the fuel line was extremely rotted (AKA fuel leak) then I let it run a while to find the oil leak she had put to much oil in it and it was coming out the over flow spout on the engine fixed a few things and sold it for $250.00 she spent $1,500 on a new one a little routine maintenance would have saved her $1,475
-
5 pointsI thought you were a better welder than that!! Mike....
-
4 pointsSaw these two little horses on a front porch this morning. No one home and no phone #. I just checked again and the Mrs. was home but she said he works second shift and she doesn't know anything about his tractors. I'll try again tomorrow. Sorry about the double post. When I first posted, I got " something went wrong, try again". So I posted again and now I have two pair of 8s.
-
4 pointsWhat is that Tom... like the longest driveway know to man? New looks and sounds great.
-
4 pointsGreat gift! I have had a Lincoln 225 for 40+ years and love it. I also have a Lincoln Wire-Matic 250 Mig, but am so accustomed to the old buz box and not having to do all the fussy stuff that I just grab the stinger and a few 6011s and get-er done!
-
4 pointsIt's never happened to me. It's never happened to me. And if the forum software hadn't merged my replies, it would have happened to me. Again.
-
4 points
-
4 pointsShhhhh... that was before I got "sub certified"
-
4 pointsOk guys I just couldn't help myself. I freed up the stuck valve in the k91t and the seats looked good and the cylinder wall looked perfect! So I put it back together, changed the oil and added a bit of Lucas to it. It had good spark and I got all the out of the carburetor. I put the engine back on the tractor and put gas in the tank (after I cleaned it out) and believe it or not the tractor fired up on the second pull!! Smoked a little at first and then nothing! Ran it around for an hour or so until the spark plug that was in it fouled. Put a new one in and kept going! Next I need to fix the recoil but overall it worked great!
-
4 pointsWith this project going so slow I usually search the title of this thread to bring it back up. The search hasn't worked well. I just discovered why. Look at the typo in the title. SuRburban Can one of the men in blue fix that? Anyways, here she is. Among many small changes from original is the kill button on the dash. It was the one on the motor when I got it. If you remember the PO spun the rod and installed a different crankshaft with a tapered shaft and welded a pulley on the taper. That had to go. He gave me the original crank so I had it turned .010 and reinstalled it with a new rod. The exhaust port wasn't tapped so I tapped it 1/2" NPT, ran a nipple in then a 1/2" to 3/4" street elbow. There's s few little things to do such as a fuel line, exhaust heat shield, a flanged bushing for the steering column a new starter rope handle and I'm sure I'll find other things. Next up, the 500 Special.
-
3 pointsGot to use the 520 to clean up some snow!! Now I think it will be the last snow day.
-
3 points. Well I’m done motorizing my snow thrower except for a on - off switch, coming in the mail, just in time for 70 degree weather. There is a 10amp in line fuse and there is a disconnect for each motor and the power. I made this setup so it can be easily taken off and the original crank put back with just one clip. I think it looks a little crude compared to some of the setups on this site. I made it from items on hand around the shop. The box for the switches was to small to fit in the power switch so I’m going to mount it on top .( The white cap ) I still can't master the uploading of pictures . I gave up .
-
3 pointsLooks great Zeekster... here's hoping your boss isn't a member here.
-
3 pointsI've had a Lincoln 225 since 1978 and have welded a lot of stuff with it.Always wanted a dc machine but never could afford one.That is until Everlast Welders came along.The powerarc 200 has a 60 percent duty cycle at 200 amps and a variable amp selecter for $349.00.I think learning to weld on an AC machine is easier when it comes to striking an arc.I have always liked my Lincoln tombstone but for the money new I love this Everlast.Any welder will increase you capabilities and that is a good thing. JAinVA
-
3 pointsSeeing as how nice out it was today, I made a video! She had a dirty carb fit somewhere in the 8 minute mark, but other than that, she runs great!
-
3 pointsDidn't miss it too far! Lincoln Electric Stick Welder AC225 K1170 Regular Price: $297.99 Special Price: $279.99
-
3 pointsI think every farmer in a 50 mile radius of me has one of the "buzz boxes" like you have. I also have one from my father-in-law, 2 buddies and I built a log-splitter back in the early 80's and we used one of these that belonged to my 1st F-I-L! They used to sell for about $100 40-45 years ago, but probably $350 now,,,just guessing. Nice machine.
-
3 pointsSubframe is tacked together to test position and fit, all that is left is to weld it together at the intersection of the cross piece and the front/back rails and add gussets. Then on to cutting and building the pedestals. I couldn't figure out for the life of me why I couldn't get this nut started on the U bolt. And, just for fun....
-
3 pointsAnother bad thing about these disposable lawn tractors is that they cost money. A lot of money to put into something that is disposable. All the info I could gather on the Sears Automatic mower transmissions said that you could not rebuild them. Mine would start, mow, get hot and quit pulling. I traded 3 of them to a neighbor for a GT-14, and I don't regret it. I guess the new ones are made so you are discouraged from working on them, the Wheelhorse tractors on the other hand can be fixed. If needed.
-
3 pointsI see them on my listing. Wonder why you guys can't. ? I try again
-
3 pointsWell we're back in the states now and I'm going through some pictures to put up out of the 686 files on the memory card! Here are a few of Koen's family toys and the beloved bar (with license plates from many members here). I'm sure some nice white lies have come from inside those walls on Friday nights! Once we caught up at the other farm, it's bar tour time! Found a video of firing up the Farmall too, that thing just purrs!
-
3 pointsThere is a lot of that going around these days. We want our kids or grand kids have more or better than we had at their age and we end up with people who don't know left from right and just throw it away and buy another one.
-
3 pointsMy friend's brother once bought a brand new sears rider. His first time using it he blew the engine after just a few minutes running it. He call my buddy and told him what happened and that is when he was asked if he put any oil in the engine ... Opps. That is typical for this guy... no mechanic ability nor common sense.
-
3 pointsI have to agree, it's what makes you happy. I have some unrestored workers, semi-restored workers, and some 100% restored that I only take to shows or to put out in the yard and just look at!! Cecil Pond told me "It didn't look that nice when it left the factory" in reference to my c-121 Auto. Problem is now I can't use it for work. That is why we all need to have a mix of tractors, depending on the task at hand. Restored or not if it makes you happy it's a good tractor. Just my 2 cents.
-
3 pointsI keep staring at the hub, axle and 5 pounds of used welding rod. I'll think of something clever to say, soon, sometime, maybe,,,
-
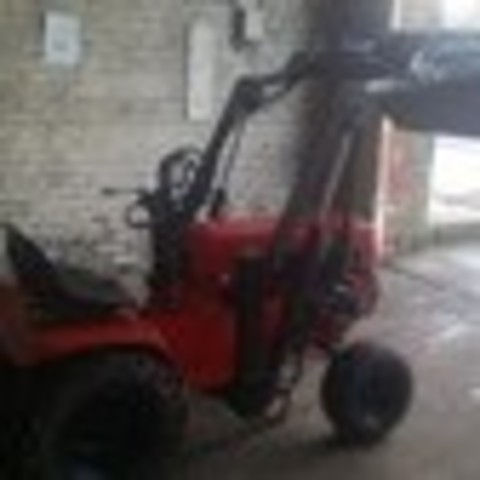
2 pointsfinished my front end loader
-
2 pointsHere is a forum that will give you more info than you probably want. http://weldingweb.com/ I always seem to end up here when I have questions and they do a lot of restorations too. Nice score on that welder!
-
2 pointsLove the RJ; but that is not a calendar shot.
-
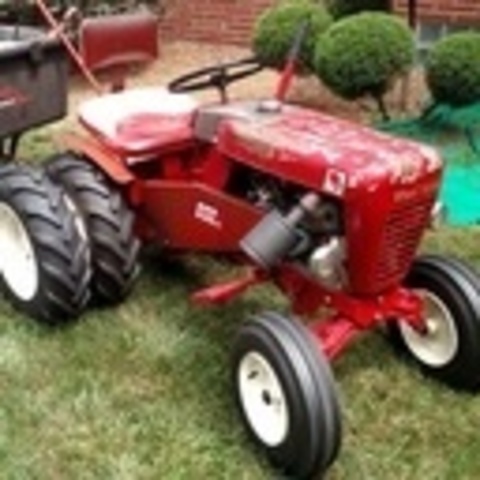
2 pointsHello all, new to Red Square, I recently bought a 502 with no motor and re-powered with an old H60(can't find the 5.5) and its running great! I've been finding original parts here and there at various steam and tractor shows and the old boys around town with their gold mines of tractors and parts. My question is does anyone have a parts manual and/or breakdown of the mower deck for that year tractor? Im breaking everything down on the deck and tractor to sand blast and paint this summer. Thanks for any help!
-
2 pointsBased on a modest budget and a worker, I'd use Rustoleum Regal Red with a self etching primer underneath. A good wire wheel or sanding disc on a drill will work wonders. Harbor Freight has some cheap sanding equipment for this use. Buy a sanding pad that fits the chuck of a drill and buy the replaceable sanding discs for it. Use 80 grit to remove the old paint and then use a 220 to smooth the metal. No need to remove all paint if it is bonded well and there is no rust under it. Rattle can spray is fine for your expectations. Degrease and wash the tractor before you begin sanding. If the tractor is greasy or oily, you will grind the oil into your old paint and or metal and you will have a nightmare when your new paint begins to fish eye and bubble. One thing to consider though, high heat paint does not have the same resistance to fading as regular spray enamel. It will fade and become chalky if it sees a lot of daylight. I'm not sure a cast iron block or tins would ever get hot enough to need engine paint. I'd paint the engine with the Regal Red as well. Paint it right over the engine enamel. Post some pictures as you go. The project doesn't need to be high dollar to gain interest here. Some of the lower budget builds are the best. Just realized you're working on a 854. Even better. Great round nose. Let's see it! I've got a 702 that is now a 852.
-
2 pointsNice gift .
-
2 pointswoo hoo! Nice! Sorry, I haven't stick welded since I was 16, and barely knew how even then.
-
2 points3-9-1959 Barbie makes her debut On this day in 1959, the first Barbie doll goes on display at the American Toy Fair in New York City. Eleven inches tall, with a waterfall of blond hair, Barbie was the first mass-produced toy doll in the United States with adult features. The woman behind Barbie was Ruth Handler, who co-founded Mattel, Inc. with her husband in 1945. After seeing her young daughter ignore her baby dolls to play make-believe with paper dolls of adult women, Handler realized there was an important niche in the market for a toy that allowed little girls to imagine the future. Barbie’s appearance was modeled on a doll named Lilli, based on a German comic strip character. Originally marketed as a racy gag gift to adult men in tobacco shops, the Lilli doll later became extremely popular with children. Mattel bought the rights to Lilli and made its own version, which Handler named after her daughter, Barbara. With its sponsorship of the “Mickey Mouse Club” TV program in 1955, Mattel became the first toy company to broadcast commercials to children. They used this medium to promote their new toy, and by 1961, the enormous consumer demand for the doll led Mattel to release a boyfriend for Barbie. Handler named him Ken, after her son. Barbie’s best friend, Midge, came out in 1963; her little sister, Skipper, debuted the following year. Over the years, Barbie generated huge sales–and a lot of controversy. On the positive side, many women saw Barbie as providing an alternative to traditional 1950s gender roles. She has had a series of different jobs, from airline stewardess, doctor, pilot and astronaut to Olympic athlete and even U.S. presidential candidate. Others thought Barbie’s never-ending supply of designer outfits, cars and “Dream Houses” encouraged kids to be materialistic. It was Barbie’s appearance that caused the most controversy, however. Her tiny waist and enormous breasts–it was estimated that if she were a real woman, her measurements would be 36-18-38–led many to claim that Barbie provided little girls with an unrealistic and harmful example and fostered negative body image. Despite the criticism, sales of Barbie-related merchandise continued to soar, topping 1 billion dollars annually by 1993. Since 1959, more than 800 million dolls in the Barbie family have been sold around the world and Barbie is now a bona fide global icon
-
2 pointsAgreed some of the paint you see here is truly show automotive quality with clearcoats. Probaly done by the pros in a very expensive paint booth! I do see some nice paint on machines at the tractor shows tho that are done right out in a the garage so it can be done!
-
2 pointsI had heard that some folks had broken the standard spindles under arduous conditions. It might be operator error, or the fact the just aren't rated for an additional 2-300 kilos over rough ground. I've certain acquired at least one broken front axle over the years, the mind boggles how the hell you can break one!!!!!!
-
2 pointsbeautiful pictures kevin i like the little video, normally it starts first yank on the crank
-
2 pointsThere should be power at the ignition switch B terminal all the time. When turned to the RUN position the R terminal should have power. Sounds like the ignition switch has failed but to prove that theory run a jumper from the battery + to the regulator DC+ terminal or that wire. Check the voltage across the battery posts. Start the engine and see if the battery voltage increases as the engine runs. The starter will take a bit from the battery so it will take a few minutes for the voltage to come back up. Saw the picture you drew of the ignition switch terminals. Are they push-on or have a screw to attach the wire. If screws move the regulator wire to the A terminal if it has power in the RUN key position. Just another way of doing it. Don't leave the regulator temporary connection hooked up when you are finished. Does this switch have 4 key positions? OFF, RUN with Accessories, RUN and START A 3-position switch has OFF, RUN and START Garry
-
2 pointsSnow, snow, go away. Time to rebuild, replacing stone the Horses shoved onto the lawns while playing in the snow! Those Stallions think all the work is fun. They want to graze on grasses, take it easy for a bit. Me too!
-
2 pointshi mate I have a couple of 90 degree gearboxes was thinking of mounting the gearbox direct to engine and use a shorter belt this would allow me to keep my drive gear the same and also keep my gears. I haven't started the project as yet as I have been real busy building loaders, however I can forwards pics of the tractor the gearbox I intend to use and also the engine besides I like a challenge the loaders are far to easy now and only made two hiccups on first one that was getting angle of arms correct and in proportion to the tractor and also the bucket mounts and cylinders to get tip at low level aswell as high level completed that now to. next project 4 wheeler hydraulic tipper trailer, rear mount log splitter, log grab for loader, and a d950 conversion.
-
2 pointsNot since Gorilla Tape! Removable!
-
2 pointsEver who did this should know you never weld on a axle hub. You super glue them.
-
2 pointsThis is a throw away generation. Hove you noticed how many people who have tractors have no basic tools/??
-
2 pointsWoodruff key update: I took daveoman1966's advice and fully supported the axle I was to work on, the right side axle. Since I had absolutely no luck moving the key after days of mapp gas torch heat cycles, liberal applications of Kroil, a variety of different punches, several hammers, I finally threw in the towel and decided my only hope of getting the woodruff key off the axle was to try center cutting the key lengthwise and attempt to collapse the sides until the key came out. I actually started the cutting yesterday afternoon and was very cautious and deliberate in my cutting, trying to avoid damaging the key slot and the area of the axle surrounding the slot. It is tedious work and I tired of it late in the afternoon and started back up this morning. On occasion, several times as I deepened the cut, I would stop and attempt to punch the sides of the key toward the center of the cut, gradually opening up on both sides. I repeated heat and Kroil cycles a few more times and each time cutting a little deeper and continually making depth calculations using the good left axle woodruff key as a gauge compared with the depth on the cutting disc. Finally after cutting a little more and flat punching both sides of the key, the key began to rotate upward in the slot on the side closest to the axle housing. I was then able to actually wiggle it with my fingers and it came out! Eureka! Time for a celebratory Bacardi! I have somewhere between 4-5 hours from start to success removal in the cutting and punching operation. Interestingly enough, all my heat/Kroil cycles reveal NO PENETRATING effect in the lower half and bottom of the woodruff key. Dry as a bone. This sucker was definitely "rust welded" to the axle. I then started the tractor and put the tranny in forward to spin the axles. I dressed them with #220 wet paper with WD40, the progressed to #320 wet paper with WD40 applied to remove traces of corrosion discoloration and lightly dress the axle, not unlike what you would do on a lathe. Granted the axle doesn't turn particularly quickly, but the fact they rotated allow me to evenly dress each one. I also ran a second flapper disc I had of the same type I had used earlier to hone the hubs lightly, once again. Remarkably, both hubs now slide easily onto each respective axle. Looks like progress to me. It's about friggin' time! The right axle key slot near the top of of the slot needed some very light filing to dress the edge which had been dented slightly inward. I filed until the good woodruff key would slide about half way into the slot. I decided to stop that procedure until I actually located and have in my possession the appropriate, new woodruff keys for installation, and alter the slot as need to fit easily. So, it's time to clean things up a bit. Then drain the tranny and remove and replace the axle seals. I'm hoping that goes smoothly because I believe I've had more than my fair share of problems between removing the hubs and dealing with the obstinate woodruff key. The workplace: The cutting tools: Comparative examples: Good used woodruff key vs. shot split key There has to be a supplier or two or three that has these large woodruff keys out there in the world of industrial suppliers. These keys weren't made special for Wheel Horse. They had to have been picked from regular industrial stock and inventory. What reinforces that theory in my mind is the woodruff keys aren't shown at all in the parts illustrations and parts listings..........probably because they aren't/weren't proprietary parts.......they're a generic part that was/is available. Maybe not at the local hardware store, but still accessible and available in general terms. Aldon theorizes, and I think reasonably so, that it's highly like any Wheel Horse tractor with 1 1/8" axles likely had the same size woodruff keys to secure the hubs. How about you D Series owners out there??? What do your woodruff axle keys look like??? If I can just bump into the right supplier(s) who will sell in modest quantities......I don't need lots of 25 or 50. I might go for 10, if necessary. The jargon used with the key sizing left me scratching my head a bit. Finally I figured out the 2 3/4" spec referred to the diameter from which the key is machined. Depending on the supplier, they may describe the key by the diameter from which it is cut, or another supplier may describe it by the key's actual length. On the surface you would assume they are two different keys when in fact it can be the same key......it isn't just readily apparent. Who among us deals with woodruff keys and their sizing on a daily basis. Almost NO ONE. I got out my dad's old drafting tools and swung a 1 3/8" radius to draw a complete circle of 2 3/4". My good key fits perfectly to that drawn radius. 1/4" (W) x .58" (H) x 2" (L) on a 2 3/4" diameter, full radius This is like a Star Trek voyage with Captain Kirk and Dr. Spock........into the unknown world of woodruff keys.......... C'est la vie, Steve
-
2 pointsFound another image here.


.JPG.9f2ecb26065c66527b0730084ab7fc7a.thumb.jpg.7dc8a04d9a53d44ee2b23f26ee94496f.jpg)


This leaderboard is set to New York/GMT-04:00