
Leaderboard


Popular Content
Showing content with the highest reputation on 03/02/2016 in all areas
-
10 pointsWe are on a trip to visit family in Germany so we stopped by Buurse this morning. thanks again Koen @c-101plowerpower for the hospitality during our visit!
-
8 pointsAfter 1 1/2 days of raking the stones out of the grass and back on the road, I was ready for a fun project. So this afternoon I made a blade centering device for the 312H. I also wanted to stop the hydro lift from pulling the plow frame up against the front axle, so I incorporated a stop into the centering device. Two 5/8" bolts salvaged from a utility pole, a piece of a scrap electrical panel door, a piece of old fuel line, and a piece of a worn out blade scraper bar. It was even warm enough to throw on a layer of Regal Red.
-
4 pointsHow about we just start a pinned thread in "Non-Tractor" ?? If it sticks to what is going on and keeps out the usual banter, it would be a very useful thread. I don't think a new section is going to work....past practice. but a pinned thread would. No rules...just don't muck it up with BS. What say you guys.
-
4 pointsWhat a nice surprise. I turned the pictures up right for you. Check out Koen's shoes.
-
3 pointsWhen clearing the driveway the other day it dawned on me that there must be a lot of side to side force on the blade leading to a lot of stress on the rear axle and the blade attachment. Especially with the extension kit installed. Therefore, I copied the stabilizer that Toro implemented on the xi series and adapted it to fit the 520. It is just held together with a couple of hose clamps for now to ensure blade is held in the center of it's side to side play. Without any stabilizer I get 5/8" side to side sway measured to the inside of a front wheel rim pulling on the blade by hand. With the stabilizer installed, I get 3/8" side to side sway measured to the inside of a front wheel rim pulling on the blade by hand. Therefor the stabilizer is holding the blade centered and the rear mount should see only the fore and aft forces. That makes me feel better. Snow blade stabilizer.pdf I will add pics once the rod has been welded up.
-
3 pointsSo true Slammer. I recently sold a plow assembly ,blade, frame, and axle bracket, to a guy who was installing it on his neighbors 520. When he called to arrange pick up, he said BTW, he wants me to haul the deck to the scrap yard for him...do you want the 60" deck. Yeah, sure, I'll pay you scrap price of $35 and maybe more after I see it. The deck had good tight spindle bearings, no rust, and 90% original paint and decals and the good spring loaded mule drive came with it. It is in in pics above.
-
3 pointsI still need to break mine in too! Thanks Steve for fixing the pictures for me.
-
3 pointsNice pics kevin Here's some of mine Are you walking around on yours yet?
-
3 pointsThought I'd better help you get that thing turned right side up so the crankcase oil doesn't seep into the head....... What a monster!!! What are the CFM air delivery specs on that behemoth?
-
3 pointsThe way I look at it is I'll have a good working tractor and at less than half the cost of a cheap big box lawn mower. It will do anything I want it to do and I know it is mechanically sound because I will have gone through every inch of it. The bonus will be I will have a tool box and fenders left over to use on the modifications on my Raider that is my go to all purpose worker. I will be going through the Raider the same way when I complete the 854.
-
3 pointsFrom my brief experience so far, I'd have to agree with squonk about the hub puller for the most useful, single, specialized purpose tool a guy could probably have. I got a real education pulling the hubs on my GT 14 which hadn't been removed for about 35 years. With a lot of help and suggestions from other members, I was finally able to get the job done using another GT 14 hub I bought specifically to use for this procedure. squonk's puller is more versatile because it can be adapted to multiple bolt patterns than what I came up with to get those stubborn beasts off their axles. After the fact, I learned if I had used a fine thread bolt for the "pusher", I would have spread the load over greater number of threads for a given distance, and decreased the effort required to turn the bolt. Also a bolt welded to the outside of whatever you choose to use for a puller, will allow closer placement of the two hubs to each other in the beginning of the operation, thus applying force as close to the axle as possible. It would also have allowed for more travel distance of the bolt.
-
2 pointsWe use a weather rock in these parts, more accurate than the talking heads on TV: If rock is warm, it's sunny. If rock is wet, it's raining. If rock is white, it's snowing. If rock is missing, there was a tornado...etc.
-
2 pointsWell, sure... it's that too.
-
2 pointsI was wondering what those d_ _ _ green pins were. I thought it was part of secret handshake or something for the Grand POOBAH.
-
2 pointsWell known for the worst weather predictions known to man.
-
2 pointsyep, i think Kevin took some pictures
-
2 pointsOne thing...you can use a piece of rope if you do not have a long enough belt. This is like bypassing the starter. If it starts and runs, you know it is the starter. The link I put in gives you some numbers for parts. Let us know...this was a lot of fun today...it is cold outside here. Thanks for being so receptive to all of our ideas.
-
2 pointsI am back in the house and we are getting to the limits of my knowledge, The lack of grounding for the field coil is an issue. no ground it will not create the electro magnetism needed to run. The ground is controlled by the voltage regulator if it is stuck open no ground and no electro magnet. Use a small jumper wire to ground the F terminal to a known good ground or the battery the one last time jump from the battery positive to the A terminal. After that I give up and take mine to my S/G guy
-
2 pointsSee the bottom of my post # 50...cranking the engine using another tractor.. I used this method to get my Tecumseh pull starts running.
-
2 pointsI agree that decks are under appreciated. When i go to look at a horse the deck is one of the first things i look at. I'm surprised how many horses i've sold were the person doesn't even try out the deck and some just don't want the deck at all
-
2 points@TVR I just bought a blade, frame & axle bracket for $100. I didn't need it, but thought it was priced right so I jumped at the opportunity.
-
2 pointsI keep my deck on.
-
2 pointsI do have them on when I am sitting at the computer sometimes. It does take a little getting used to.
-
2 pointsDo what Paul is on to 1st. You should see a short on every wire, if you have a probe on each end of a wire. This is like checking a fuse for continuity. I am wondering why you are only getting 2 volts on the one measurement. Maybe you have a bad cell or cells in your new battery. You should get 12 volts going across the 2 poles.
-
2 pointsWonder how much it costs. It doesn't take up a lot of space, that's for sure.
-
2 pointsMy rule of thumb. "If it goes too easy, something is wrong"
-
2 pointsWooHoo Look what arrived today and my door! Probably take a couple weeks before I get it installed as I avoid working in garage in low temperatures. Fir a while I would occasionally turn my phone horizontal to get a picture and that was causing images to be posted rotated 90 degrees. But lately it rotates photos 90 degrees on its own initiative that were taken with phone camera in the vertical. No idea what's driving that....
-
2 pointsHave you tried turning the engine over a bit by hand and then try the jumping from Battery to the Armature terminal. May be a dead spot in your SG. Turning it a bit may make it work
-
2 pointsNow, I want to see this movie . . . . someone will find it, there are those that have a photo memory for these things. Not me, this is what I have, it's the C-Nile Virus:
-
2 pointsWe were out to lunch this past Sunday at a place on Cayuga Lake. Lot's of geese ,swans and ducks in the water. A Bald Eagle came in and made a bee-line for the ducks. Word got out and all the ducks scattered in different directions. The Eagle finally landed on the ice and just sat there thoroughly pissed!
-
2 pointsThis is a common problem on the 300/400/500 series, not so much on earlier tractors. I know there's lots of threads on this topic, so you might try another search to see what else is here. There's one in particular from member sorekiwi that might work for you, I'll see if I can find it for you.
-
2 pointsI'm going with a clogged vent in the gas cap. Next time it does it, just remove or loosen the cap. It should start.
-
2 pointsI always start at the carb to look for fuel delivery problems. Pull the fuel line off at the carb, hold it in a container and crank the engine. You should get a good spurting of fuel. If your supply to the carb is not strong, check the supply into the fuel pump. If you don't have supply to the pump, the blockage may be a clogged gas cap vent, a dirty screen filter in the tank, old blocked fuel lines, dirty fuel filter. Make sure you have a good free running supply to the pump before replacing it.
-
2 pointsRight after typing that last post I went out to check things. The TOP of the fuel pump was wet. Ah ha! Lookie at the bowl bolt. See the droplet there? I might be on to something here. Ya thunk?
-
2 pointsThe K301S-47812 was only used in 1985 and the Kohler serial number 14167247 was made in 1984 which makes sense. That makes your tractor a 1985 model that used model number 21-12K801. Here is a parts list but not the best as it is shared with models that used different engines. In most cases it does not tell us which model used which part. If in doubt post the query so you don't end up with the wrong parts. A 36" width of cut rear discharge deck possibility - not necessarily what you have 42" width of cut rear discharge deck possibility - not necessarily what you have Garry
-
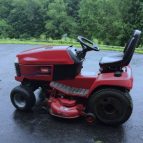
2 pointstoday i picked up my newest toy here's some photo's
-
2 pointsWell then I don't believe Red Square has an official chaplain, so I say Manny should be it! Lord knows we can all use a little prayer in our lives. Sometimes our friends here need a little support so Manny just may be our man!! It may be a serious matter or something like "Dear Lord, Please help me control this Wheel Horse addiction and have my wife NOT freak out when I buy another tractor"!!!!! Thank you Manny for helping those in need.
-
2 pointsIt is called "Skid Guard" and you can buy it from Ace Hardware, Lowe's, Home Depot and others.
-
2 pointsnice work lane,i had bought a tractor 312-h and it seemed seized,got the tractor for real cheap,anyway it turns out the flywheel was full of nut shells and wouldn't turn over
-
2 pointswere getting 12 inches,as of right now 5 inches in a few hours
-
2 pointsI could not get my steering wheel off and didn't want to breal anything getting it off,i soaked it for months giving it a spray with pb blaster,kroil etc so I took some 1/4inch plate,cut it in the middle,ground the 3/4 hole in the 2 halves,its on an angle so I took my time and replicated the angle on both halves,then bolted it to the plate the battery sits on and it holds it tight and has for years,a few drops of oil and the shaft spins nice in my homemade bracket,i like the bearing idea better but like I said the wheel wasn't comin off,sorry no pics but photo bucket isn't workin for me today
-
2 pointsWell , this Michigan snow making machine decided to start working last week bringing me 13" of wet heavy snow . Luckily that all melted before she started back up last night . Here's a pic out the front door .
-
2 pointsStabilizer rod welded and polished. I will install and take more pictures this weekend.
-
2 pointsTerry, Please add me to this awesome thing you are doing!!! I will display it proudly in my shop! THANK YOU!!! for all you do to promote this hobby! Doc!
-
2 pointsCraigs solution, is the solution! Great job but, they like it too! Lucky you!
-
2 pointsI think there a least one of them guys... in everybody's neighborhood. After installing my rock collection a couple years ago... the issues on my bank have pretty much all gone away.
-
2 pointsA little more progress on the RJ rebuild. My rear hitch is all cleaned, primed and painted Rustoleum Regal Red. A big thanks to Jake Kuhn for selling me this one ! I bought before I realized that one of the other 4 transmissions Steve has had a rear hitch on it ! Also thanks to Craig (AMC Rules) for posting the information about the NAPA throttle cable that they sell for $15.99 (Part No 703906) that lines up perfectly for the holes on the RJ Hood used by the original throttle cable handle base. Mine was very badly rusted and pitted so I did need to find a replacement. The Kohler K 91 motor is almost ready to use. I have a new Kohler cup and screen to go under a Kohler recoil that I have for this 4 HP motor. This motor was the original motor on another RJ I bought two years ago. I had it removed to repair a wire that had been chewed on by mice as they established a major housing complex under the tin of the Kohler while sitting in a barn. If you have never had to removed one of those mice messes you just have not lived. Sunday afternoon I started more work on the RJ frame. My clutch pedal was rusted up on the 3/4 inch foot pedal rod. Also some previous owner had installed three steel spacers that moved the clutch rod further out from the frames. The pedal and spacers were all heavily rusted so I started applying PB Blaster every half hour or so. I did this for four hours. Finally a couple hammer taps started to move the clutch pedal. I then used my pry bar with a flat head surface to knock the clutch pedal off making sure to do so around the closest points on the clutch near the 3/4 inch round foot pedal bar. Off came the clutch and I cleaned rust with a Dremel (sand paper head) and then started work on removing the three spacers. 2 photos of the frame and foot pedal show rust after I removed with Dremel and wire brush. I did buy three brass 3/4 inch washers ( I wanted stainless steel but the local hardware store only had 3/4 stainless washers that were large like for auto application) on the foot pedal to allow the lift handle to set away from the frame about a 1/4 inch but still be able to lock on the hoodstand lift tab. Going to start focusing on the motor work remaining and my wheels and front tires and then my RJ hood redo for now. I also did get the underside of my RJ fenders painted with Regal Red today too!
-
2 pointswhere I live you wouldn't touch that machine for under 500 dollars,and with a second machine 750.00,ya I wouldn't pay that much but if its in good shape,lower hours,been taken care of,you can check the grease nipples for fairly fresh looking grease,look at air filter,if its plugged then that's a good indicator it might not have been well maintained,500 is a fair price for a decent tractor with USABLE deck,and if it comes with her grandmother then that's a bonus
-
2 points...or, maybe one strategically placed dino... for that really slippery stuff. Anyone know where to find a big dinosaur we can use for ballast?
-
1 pointEven the SB says the lift being slow is normal the SB is about movement of the tractor


This leaderboard is set to New York/GMT-04:00