
Leaderboard


Popular Content
Showing content with the highest reputation on 02/28/2016 in all areas
-
15 pointsits 55 degrees and sunny up here in PA, so I decided to let the horses bake in the sunshine
-
10 points...but, fighting the urge... to pull both the plows too early.
-
8 pointsMy wife and I went to the Florida Flywheelers show for the first time yesterday. It was a great day with Richie (19richie66), his wife and Mike (jd110). I was shocked at how massive this show is. As usual, I took my camera with good intentions of getting tons of pictures but, again as usual, I don't get all that many but here's what I got. Now this is truly a log home. A sampling as we walk in There wasn't much in the way of Wheel Horse red but it really didn't matter with all the cool things to see This one caught my wife's eye because a GT1100 was 'her' tractor in Indiana Two 18hp twins A moment of silence please (not for the faint of heart) Some nice Fords and John Deeres I always liked the Patio JD's. Mike is checking out the ones under the canopy. Land and water I was just curious to find out more about this This John Deere actually did pretty good But........... These shots don't depict the size of this show and what all there is to see. I intended to get a group shot but failed You'll definitely get your exercise here. My wife has an app thingy on her phone that counts steps. On the drive home she checked it out and got this message: "Congratulations! You set a new personal record. 15,128 steps. That's awesome!"
-
7 pointsA lady here in MO has these.
-
7 pointsI was just going to say..."Knock it OFF!!" It will be soon enough that I have to keep turning left with the Horse. We are looking at snow here this week. It doesn't get any better then this!!!
-
7 pointsYou don't use the lift to adjust the plowing depth. You adjust the suck of the plow by lowering the toe of the plow to go deeper or raise it for a shallower furrow. The way I start out is to place the tractor's left front and rear wheels on blocks equal to the depth you want to plow. If it is 5" sit the left wheels/tires on 5" blocks. Lower the plow to the floor and adjust it so the bottom of the plowshare (front) and landslide (rear) sits flat on the floor. That gets you real close to the adjustment you want for a 5" deep furrow. After the first pass your right wheels travel in the bottom of the furrow which will be about 5" deep. Try it for a few feet. Now you can fine tune it. To go deeper tip the toe of the plow down a bit. If too deep raise the toe a bit. The plow will pull it's self into the ground until the landslide prevents it from going deeper. That is called adjusting the suck and once you get it set you won't need to change it unless you want a different depth or different soil conditions change the way it behaves. Mine is on a 3-point hitch which gets used for other applications so I have to use the blocks each time it is hooked up to get the top arm adjusted correctly. Garry
-
6 pointsNo grass or flowers here...only nice peace and quiet and NO BUGS.
-
6 pointsOnce you set your Avitar...it is yours forever. I've had mine for 6 years now. It is nice to look at in August, but it gets old in late March. Actually, go to your profile and you can take care of it there.
-
6 pointsI dare you to take all the plow and chains off!
-
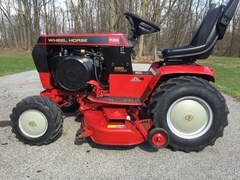
5 points

From the album: WorkHorse
-
5 pointsI got the tie rods repaired today. Other than the rust they are in excellent shape so I wanted to use them instead of buying or making new ones. A little mig welding and grinding they came out pretty good.
-
5 pointsI'm thinking...the more you use that cup holder...the better that horse is going to look. Finish painting the tires and see what she looks like.
-
5 pointsRest assured. When you need it.. .has you covered.
-
4 pointsBeautiful weather here in central North Carolina today. Not a cloud in the sky and in the 60s. Graded one garden plot, and tilled them all. Also built one compost bin.
-
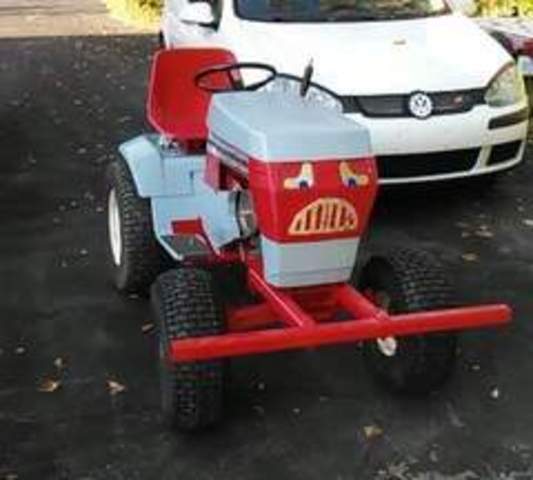
4 pointsWanted to introduce my WHs Found the '73 8 4 in a guys basement in Sioux City...doesn't run and in lot's of pieces. He says he couldn't get a spark. Gonna work on her and get her started. The other two came home last night from a journey to Minneapolis area. Front is a D200 that runs well. Bought it from a young man who has been working with it...nice kid, I applaud ambitious youth. He built the weight rack on the back that you just fill with concrete blocks. When full it holds 300ish pounds. Another nice surprise was a remote controlled wench he installed on the front. The rear is a C160 that came with all the original manuals, a tiller, a 42"ish deck and a snowblower. It's a little owly, but runs and works. They all need some work, but my son and I got up this morning and went out on the property to break stuff with em...had a blast. I got the bug and these things are just way too cool!
-
4 pointsSlow but sure, I'm getting this under way ( I have three other tractors "underway" as well), but this one is going to get finished. I wont paint, but mechanically this is going to be right. Its a 1980 Onan D-160 that I swapped all the parts (and engine) out from a Kohler single D-160. It was in better shape and I got to save the electric clutch switch as an auxiliary switch for rear sprayer or something else (maybe the Kohler k341 gets an electric clutch). I did swap out the dash and other parts, but I did save the extra gauges which I will re purpose. I am putting on the 30x10-12 rear Interco Interforce tires as soon as I get the rear wheels painted. The 12" steel four hole wheels should be here in the next day or so, the tri-rib tires and tubes are already here as are the cast iron 4 bolt trailer hubs. I finished the steering wheel pull today and put the new plastic bushing (4.00) from EZ-cart on and the foam washer from Parts Tree. I'll install a new cam follower and maybe some ball bearings if need be. I have a few electrical connections to coil and lights to do and I need to install all new fuel hose and fuel filter. I'm having a guy build me a rear quick disconnect for the PTO, (may make more than a few if the price is right. The 50 inch tiller I got will go on this tractor and the other D-160 will get the deck and be a mower. It seems the adjustable PTO shaft is frozen or tight, any help on this would be GREATLY appreciated. I go to college four days a week and work five hours after I get out of school on a elementary school remodel, then do homework after that. I've been struggling with some health issues since last September and this Tuesday the VA has finally got me an appointment to have an MRI, but I know realistically I'l probably be in pain at least another three months. Pictures soon. Alain
-
4 pointsThis could be it! I'll watch it and let you know. Thanks My profile isn't 100 percent correct so as to protect my true identity as a CIA special agent. Doh! I wasn't supposed to say that! But seriously I was not 3 years old. More like 10 or 11 when I saw it.
-
4 pointsJust so you guys know...I did have to open it back up. It was the key I used for the large reduction gear on the cluster gear shaft. It just did not feel right when I put it together. Sure enough, the gear was up a touch and bound up the works once it was bolted together. Everything should fit together easily...if you are forcing anything...pull it out and see why. I had to force this gear over the key and I went with it. Pulled it back apart...grabbed a different key and the gear slid right on. Bolted it back up...after checking things and all is good. I had a feeling about that key yesterday, so I kind of knew where to look. What I did to verify...unbolt a few turns the bolts on the side plate (brake shaft side) that are around the cluster gear shaft. Everything loosened up and turned freely...I knew it was that key. It does take a little playing around with to make sure things fit nice. It only took about 1/2 hour to fix this, but it had me thinking about it all night. When I give this horse an apple, I am going to take a bite out of it 1st.
-
4 pointsWe should have yellow daffy dills for Easter.
-
4 pointsYour ahead of us Craig.
-
4 pointsI see a horse that probably had a hard working life, but accumulated a lot of character in those 40 years.
-
4 pointsSince both lights went out at the same time I wouldn't suspect the bulbs. If it's not the fuse, I would have to guess it's a bad ground. Since the lights are grounded through the hood, my guess is that the hood ground is bad. I'm not sure where the hood ground point is, but on earlier models it was through the pivot assembly.
-
4 pointsI have purchased alot of horses and have gotten buyers remorse a few times but in the long run they seem to always work out for me. I either sell and get my money back or trade or end up needing parts. I recommend parking it off to the side and give your self sum time to figure it out.
-
3 pointsBought this the other day and been workin on it here's the progress. Put a k181 on it because the original engine is impossible to find so this will do.homemade clutch linkage jus have to weld a little to connect it to the pedal. Next is wiring and dash panel on its way. Front wheel bearings and different rubber on the back. When I got it nothing moved steering etc but a little grease and pb blaster and all is good.the last missing piece to get it driving is a belt guard anyone have one?
-
3 pointsBecause who doesn't need more tractors... Complete ARK550 loader. There is a weight box of some sort on the backside too. Bucket has some random holes drilled into it so will need a few minor repairs. I'm going to swap the front tires around so the ribbed ones are on my predator tractor. Otherwise I'm not terribly sure what to do with the rest of this tractor that came with the loader.
-
3 pointsAs was noted in the "What is in my mirror" thread, I went and picked up a Sickle Bar mower for the restomod and will tackle restoration once I have finished the GT14+2 beast. Another GT14 hopped in the trailer so I now have another to tweak and either resell or redo. Maybe the latter as it came with snow blower and manual PTO. reasons I decided to risk the ire of wife are that it had some items I may want to pilfer for the GT14+2. As it has manual PTO, the PTO switch is in almost mint condition. The steering wheel insert is in good condition and I will blast and refinish the inside wheel weights which will work nicely with the Rototiller attachment. And I'll snag the tiller rear hydro pulley as spare just in case. And to ice the cake, it had that elusive belt guard cover so many of these have lost over the years... Also managed to get some initial prep work done on engine. Trying to get head start on the warm weather. With mid June deadline I have some anxiety that I'll git'r'done in time. Managed to get the old drive pulley off. Located a replacement from forum member since it had damage to one edge. Slight but as I am taking the pains to restore it, figured might as well fix an obvious sore spot. I wrestled with a Briggs flywheel 2 years ago and man that almost made me give up tinkering on these tractors. But the flywheel on this K341 came off pretty easily. started to pull the plate off in last pic and I need to research if there is a retaining ring or something as it does not wish to simply drop off after removing the armature windings and the 4 bolts holding the plate to the engine block. Not a bad day considering.
-
3 pointsIf you had a couple more workers Craig... you wouldn't have to be swappin implements.
-
3 pointsA little welding???? That is an awesome job.
-
3 pointsPart it out.... .... I looked at the first picture and fell in luv with it. Definitely parade material for the Big Show customs.
-
3 pointsWell been putting in a lot of hours at work so not much getting done. Ordered up some parts, new cables HL headlight switch, ignition switch, decals from Terry. Decided to build the 10hp kohler I got from Penn, so I blasted the block and got it primed up today. Tore apart a starter generator and blasted parts, it has one broken on the brush holder, I am going to order a new one, just wondering if anyone else has replace this? How did you rivet it back on? The clock is ticking and I don't want to be working on this the day before I load for Penn. I know I have time but before I know it it will be time.
-
2 pointsWhen clearing the driveway the other day it dawned on me that there must be a lot of side to side force on the blade leading to a lot of stress on the rear axle and the blade attachment. Especially with the extension kit installed. Therefore, I copied the stabilizer that Toro implemented on the xi series and adapted it to fit the 520. It is just held together with a couple of hose clamps for now to ensure blade is held in the center of it's side to side play. Without any stabilizer I get 5/8" side to side sway measured to the inside of a front wheel rim pulling on the blade by hand. With the stabilizer installed, I get 3/8" side to side sway measured to the inside of a front wheel rim pulling on the blade by hand. Therefor the stabilizer is holding the blade centered and the rear mount should see only the fore and aft forces. That makes me feel better. Snow blade stabilizer.pdf I will add pics once the rod has been welded up.
-
2 pointsI use to chain one end to the bottom of our A-frame and use the chain fall to pull them apart . Make sure to put the guards on the pto shaft . We wouldn't let a pto leave the shop without one .
-
2 pointsYeah baby. Use two of the herd today. One to grade and one to till. The only reason to Garden is to get seat time
-
2 pointsWe need to begin a grass roots campaign to change it to RED!
-
2 pointsOH! Sure Gene... blame it on me.
-
2 pointsThis will be the last time I do. once the 175's deck goes back on... I'll be done swapping attachments here.
-
2 pointsCaught Momma just now... taking the leap.
-
2 pointsOk guys i habe it figured out if ya wanna change your avatar you habe to add the pic you want to the gallery,, then tap on the pic and you will see options appear upper right hand corner and waalaa !! Lol
-
2 points
-
2 pointsI've nosed around a bit at that well known 4 letter auction site, and it would appear there were/are a number of oil filler tube/dipsticks combination offered, likely depending on the intended service situation for the engine. I think switching the existing filler tube to the back side and the pipe plug to the front side of the engine would work, exchanging those positions. Hand clearance would probably be improved over the current positioning, but access would likely be restricted more that what might be desired or ideal. This appears to be like Aldon's: My tube is like the one below and is mounted in a position on the rear of the engine near the outside (clutch side of the engine) where the right side mounting hole occupies the location of the bolt and washer on Aldon's engine. Two other mounting holes are used with my filler, and straight bladed screws are the fasteners. To utilize a filler tube like this, there has to be a port machined into the block for the dipstick access, along with two more threaded holes. I've seen several different length filler tubes and corresponding dipsticks which can fit in this location......again likely dependent on the original service design and purpose. The tube I have appears to be the longest that was used for the assembly to attach to the block at this location. shorter version: medium length version: As to the question of pipe size, I believe pfrederi is correct. Below are pics of a filler tube which appears to be the same as Aldon's along with two pics of an new auction item. Sure looks to be the same to me. The ad text specifically states: "The tube is 1-7/8" long and has 1/2" pipe threads and is for the K161 and K181 engine models." Aldon's engine is a K341 and looks to have the short tube as in the three pics below. I contend any length (or shaped) threaded filler tube could be used, as long as it is matched with a dipstick that is long enough to measure full oil level, yet not interfere with any engine internal moving parts. By that same token, there's nothing to prevent the use of another tractor brand's variation which was on a Kohler, as long as the threading is correct to use on the engine and application in question. The oil filler tube below is advertised as being removed from a Gravely G 16 with a 16 hp Kohler Magnum engine. Appears to have the same size threading as the above filler tubes.This tube appears to have only a screw cap and no actual dipstick. The threaded lock ring allows for position to suit. The most critical thing in modifying the oil filler/dipstick from stock is making sure the correct full oil level can be monitored and visualized in some fashion. As long as that done, I'd say anything that meets your satisfaction and convenience is absolutely fine. There's no point in having a filler tube you either can't get to, or can't get to relatively easily.
-
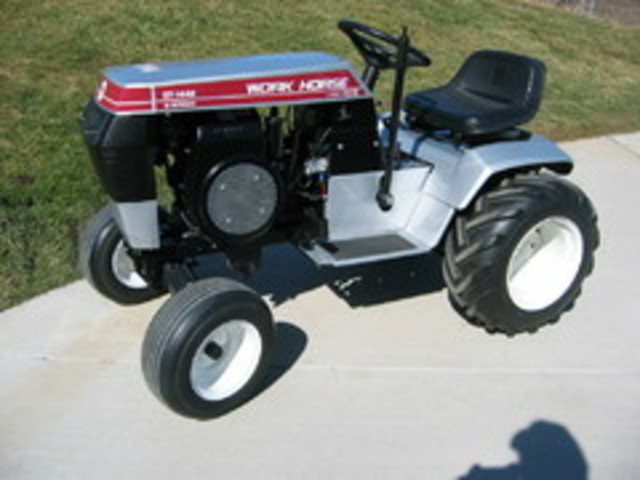
2 pointsWell i had a avatar set, and in the gallery if you tap the pic you will see the option to set as background so i did and it chamged my avatar lol,, wanted it as back ground on my i pad,,, maybe i have to upload a pic to the gallery and do it from there,, hope the guy that owns that beautiful silver tractor dont get mad at me for using his pic lol it was pure dumbness i did that
-
2 pointsBrian, i just emailed you the dimensions you're looking for. Before I got going on my build I asked the forum for dimensions help in this thread: Doc sent me the dimensions and they worked out great. A=4 1/2B=5 1/8C=12 7/8 (measured to the cross bar) The gusset between the longitudinal frame and the cross bar is 1/4 inch thk. There is one on either side (front and back) of the crossbar (total of 4)D=8 3/16E=2 1/2 Other notes.... The longitudinal subframe member s are level with the ground, the rest flat against the bottoms of the rear axles and the uprights are plumb to ground.
-
2 pointsThe sirloin sandwich at Parkers tasted great! Those hot dogs were advertized as Hoffmans but I think they made them from some kids Play-doh machine !
-
2 pointsNow that they've finally got that beam of wood moved out of the center of the nest... I think it clearly shows just how much of the nest was lost/blown away during Wednesday nights storm.
-
2 pointsI'm almost ready. I ran out of welding rods but most of it is tacked up.
-
2 pointsI started running a wire from one of the hood hinge bolts to an engine mounting bolt to assure a better ground. Put a disconnect in it so you can remove the hood if you need to.
-
2 pointsI read (don't rmember where) that Viton rings were more resistive to transmission fluid. I use ATF in my older Sundstrands. This chart also shows they are better for synthetic lubricants (if I ever decide to change my D200 to Mobil 1 I will be ready)
-
2 pointsThanks for the welcome everyone! So glad red square is here. In browsing it's obvious there's a lot of knowledge openly shared. And I get why yaall are into these....they are really cool machines. Also finding out wives don't get it as much.
-
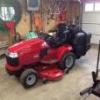
2 points
I spent last year building this back up from a rusty abandoned shell. Unfortunately it was stolen from my yard. That's Flint MI for you! I am working on another one now, just waiting on the snow to go away.
-
2 pointsBeen using it for years. If it doesn't work, it's not coming apart! Originally introduced into the industrial/commercial markets...real torture test environments. In my opinion, there is no other product that compares to it. And yes, the price is worth it.


This leaderboard is set to New York/GMT-04:00