
Leaderboard


Popular Content
Showing content with the highest reputation on 01/19/2016 in all areas
-
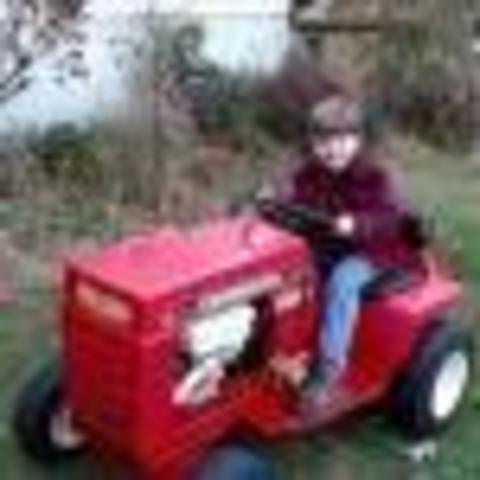
10 pointsSaid Mrs. K yesterday. Sure, If I can pick up some tractor batteries at TSC. First stop was the 10:30 AM movie @ the Regency Cinema to see The Reverent . Those recliner seats are great. Next stop....lunch @ the Olive Garden ...good Lasagna. Then shopping @ TSC, Gander Mt., and Wallmart ...got my batteries. Then drove 40 Minutes West to watch two Grandsons play in two basketball games. Last stop @ McDonalds for sundaes. Me thinks I'm getting tooo old for these 10 hour dates.
-
5 pointsWhen the "gettin' some" on your date is referring to new batteries? Then, it's no wonder you've become old and cranky.
-
5 pointsC'mon Man When you haven't been asked for a date in 50 years, you don't ask too many questions. Anyway....ol folks gotta go in the morning so they don't fall asleep and waste the 20 bucks.
-
4 pointsOK, I just happen to have 3 of these transmissions...2 are RJ #5003 and 1 is a Suburban #5010. The original goal was to build one good RJ transmission from these 3. This is sometimes a neat trick in itself. LANE RANGER (Lane Ralph) dropped these off at my house last weekend with that original goal in mind. (1st) this RJ tranny was on the tractor yet and froze up (the one on top in the wagon). We dropped the tranny in about 20 minutes...it was cold outside. (2nd) Suburban transmission (in front of wagon) was picked up as a spare. (3rd) transmission was already disassembled and in a box. My thought with this thread is to show tons of pictures and some videos of taking these apart, what tools really come in handy, cleaning, fixing and going through bearings, gears and seals, some tricks (methods) that have worked for me, getting parts and what to look for, and maybe being able to save...not one...but 3 transmissions. This thread is going to take some time to do...it's cold out...and I already know I am going to need some parts to make 3 transmissions. Feel free to add to this thread, or ask any questions. Here is the RJ Lane picked up...I think you can guess what the transmission looks like inside. I put the 1st transmission on the bench and proceeded to try to see what is going on inside by turning pulleys and axles. I could spin the hubs in opposite directions, but I could feel that something was not right. I think some broken teeth on the axle gears or pinions. It would not shift at all...the shifter is there, but the forks will not move at all. The transmission is in neutral, as you could turn the input pulley CCW and axles and brake drum did not turn. I was lucky, the hubs came off with a little help from my puller...the keys, hubs and axles are in great shape. Same with the brake band, brake drum and input pulley. Notice the tension pulley in the above picture. I did not have any luck getting that brake, tension pulley mechanism apart. It has a roll pin holding that together and it was not going to come out. I cut the rod in the middle of the transmission front with a 4" grinder. I think I can get a new rod and drill the one end and weld the other. Also, notice the dog point set screw is broken off flush with the casting. Now I could take this apart. OMG...a 1/2" of goop, some water, a lot of rust. You can see why the shift rails will not move. After cleaning, electrolysis is in order here. This transmission needs a good scraping and cleaning to see what else is good here. I think the case will clean up great in the E-Tank. Transmission #2...this was picked up as a spare. This is the suburban transmission. Notice the regular tension pulley. I was shocked, but the hubs, input pulley, brake band and brake drum came off easily with some assistance from my puller. I was also able to get that roll pin out and tap the tension pulley shaft apart so I could open this up. As you can see, this one had no oil in it. Somebody had rebuilt this and put it on the shelf. All the gears and bearings look real good. Differential turns nice, but I have not opened it yet. The bad thing...the 2 bottom bolt nubbies are broke off. They are stuck on the side plate...looking to try to fix this. This transmission has the needle bearing for the brake shaft. opening. Transmission #3...already apart and in a box. This one has had a tough life. The casting has been welded 3 times all the way across. ..and I think I see another crack. something else what a camera and flash will pick up. We have a issue with a couple of the bolt nubbies. One is about gone, and the one south of that looks like it has a crack. The welding looks top notch and the case appears straight. The side plates look good. The differential housing appears to have a crack. A couple of the pinions are half gone. Notice this is the newest differential for the 3 piece with the separate bull gear bolted on. The rest of the gears look good. OK...that is all for now. Looking to take the differentials apart next...purchase a gunk tank and clean up gears and plates.
-
4 pointsWayne...thanks. That is just the kind of thinking I would like to see in this thread. How can I say this?? I think we are getting to a point where we need to figure out how to fix what we have left...that wagon load of transmissions is getting hard to find, and you know... you never know what waits inside. Would you still weld it and then have it turned?? Let me say this...I took a casting for some welding a few years ago...DClark now has that tranny...and as far as I know...it is still OK. This guy was at a radiator shop and told me that this older cast iron is excellent stuff and, unlike the newer cast, is not hard to weld and it holds. All of the casting things that are broke here is why I titled the thread like I did. Hardest part might be finding the right welder. The thing is, if these castings can be fixed...the price of RJ's and Suburbans will come down. This is not just about welding. Can we fix teeth on gears?? Can we repair pitting on gears?? Can we do it cost effective?? I would think most if not all members on Red Square are not really looking to fix an RJ 58/59 or Suburban to go out in the field all day, but pulling a cart or wagon for hayrides...driving around at shows...and maybe even mowing a lawn like mine (you could cut it with a pair of scissors)...getting around the "Cap Seal" for the axles. This is what this thread is about. I just kind of refuse to accept getting 3 transmissions like this, and it is going to be tough to get 1 transmission back out of those 3. I already know I can make 2...I am looking to make 3.
-
4 pointsEd , these young kids don't know about old age. I don't know about you but "my Dates " are dates on calendar for Doctor's appointments.
-
4 pointsWhat! No pics of the most important part of the day! BATTERIES!
-
4 pointsI wish I could a job forecasting weather. I could be 100 wrong all the time and as long as people keep watching the channel , never get fired.
-
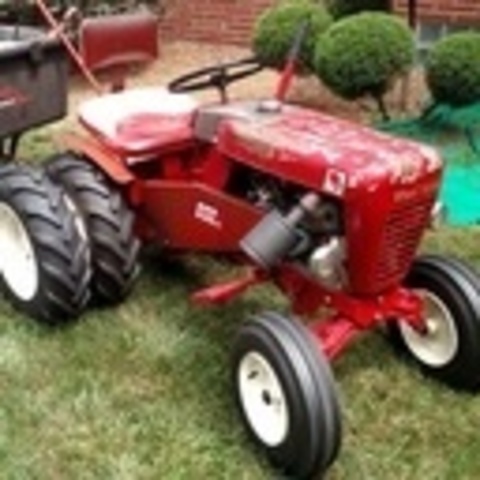
4 pointsMy Mrs. drives the little 111-6. She can't reach the pedals on the 520's. But getting her own Wheel Horse keeps her quiet about mine. Cleat
-
4 pointsThanks Lane...I was just going to order the short and the long set of those Grace roll pin punches. They look like they are the sets to have. I really like the fact that they have a short set. A huge THANK YOU to sorekiwi (Mike) for that info. pfrederi (Paul), you are correct...that blue handled set is just pin punches, not roll pin punches. I do have another set that is a roll pin set, has the bump on the tip,..GRIP (GRAND RAPIDS INDUSTRIAL PRODUCTS). The one in the shape of an "S" is from that set. Lane, I would not go looking for parts yet. Wait until I get them all apart and cleaned. I'm thinking we can weld that housing, and so far, 2 of the three castings need some welding also. Going to take apart the other 2 differentials. Being the Big Chicken that I am, I am going to do what I think will be the easy one first...from the transmission that did not have any oil in it. I am just going to post the pictures, since I took one apart above. She looks pretty, doesn't she?? A little wear on the axle ends, but not too bad. All the parts in this differential are good...E-Tank the housing a little and change out the bronze bearing, and good to go. Pay no attention to that puller above for the time being...I am going to try to use it on some of the bearings in these transmissions. OK, now for the gunky, rusty differential. Remember I said the axles did not feel quite right, like spider gears or axle gears. They would turn in opposite directions, but it felt like there was a bad spot every once in a while. Surprisingly, as nasty as this looks, it came apart as easy as the one with no oil. You just never know. You can see a few teeth missing out of the one axle gear. bottom-center below The one spider gear (pinion), that is laying down, is missing some teeth also, The rest of the spider gears and the other axle gear are OK. The differential housing looks to be alright. We will take a good look when these parts are cleaned and rust free, Off the top...looks like total 3 bad spider gears out of 12...1 bad axle gear and 1 that is a maybe OK for riding around in the yard and at shows...one differential housing that may be OK with some welding. That is not really too bad considering what they looked like in the wagon. All the wood ruff keys and notches and key ways in the hubs, axle gears and axles are great. That is a real +. Waiting for my gunk tank and some nice weather to be able to continue. Then comes someone to look at the welding.
-
4 points==================================================================== This morning, I see that the National Weather Service is now calling for 12"+, for York. I have 7 snow blowers, so the little Homko will stay in the shop. I have this machine, that I want to try out. I bought it on Craig`s List last January and restored it this past summer. I picked it up down your way, a bit West of Rt. 74, just off of Rt. 425. --- John
-
4 pointsHello all. Ive been busy! got a new wire wheel attachment for my angle grinder so i was using that and it work really well i love it! i also managed to split yet more bodywork off from the chassis! so all the stripping is done (unless i do anymore) Enjoy the pictures ok so here i just had a go at my new wire wheel attachment, then i decided i would take the rest of the body off the chassis This is up close and my handy work. pretty good if you ask me. Theres always one bolt ahah took some persuasion to get out but thankfully i managed it! separated!! yay! a better look at the chassis now it was separated. still work to do but it was getting late and cold so that is all for now. up next will be going over with a manual wire brush and sand paper for the bits the grinder missed and working on the under side. then red primer! Thanks james
-
3 pointsYes, I have decided to start on another project. I'll learn someday but couldn't resist! This one is a 56 or late 55 rj35 with the stamped frame. I started working on it a couple weeks now, but just now taking the time to get it posted it I know I still have other projects to get finished and I will, but starting on this 1 because it should be very easy and straight forward, the 59 and 400 are on hold until I can get some help with the hoods at the body shop and it has been too busy. But I hope to have all 3 of these done by the end of the summer. I have decided to put the 701 on hold for now, its going to take a lot of work, I do intend to finish it someday but its on hold for now. here's what I started with Slowly coming apart Parts blasted and ready for primer And these went right to paint I decided to build a k90 for it and had been slowly gathering parts up over the last year. It recieved a complete rebuild. Bored .10 over , crank was turned .10 under. New gaskets and seals, crank bearings, reground the valves, and due to the valve guides being worn out I had the machine shop install bronze bushings in them to make them tight again. Also got new points, condenser, coil and a carburetor. Put it together on saturday and it runs great ready to fire up And ready for paint The steering was a little sloppy on this 1, so I drilled out the holes and installed bushings in the spindles. I also am going to make a new tie rod, this 1 was worn and bent. Got the piece made, now need to get a friend to make the pin so it can be welded in. Also picked up a pair of New steering pins from the member Smitty. front axle and speed selector arm still need a little work before primer And the first patch of parts that were primed Frame and wheels are still in need of blasting, but not the funnest time of year to be blasting outside. New rubber for it, went with carlisle super lugs for the rear and kenda loadstars on the front. They are trailer tires, but look identical to the original schenuits it had. And finally the last for now, the hubs, Hoping to have a friend braze up the holes in these. Someone had drilled a hole in them and had a bolt running through the axle, while it made the hubs a little ugly, there in great shape due to not being used how they were supposed to be.
-
3 pointsAll over the place with this now. Originally, 8 inches Friday and Saturday the same. Now its 3" to 20" depending which network. Probably get a dusting. Lol.
-
3 pointsWAIT UNTIL YOU GET AS OLD AS ME. (86) RUSS
-
3 pointsWhat did I start now ?
-
3 pointsWhy do you think most weather forecasters are hot younger woman now days?
-
3 pointsAll these years I thought she was talking about ice cream. Sometimes I need a picture drawn for me.
-
3 pointsSteve: I logged in last night and this am to this Transmission Trilogy! I am more impressed every posting you do on your knowledge about these RJ transmissions! I have sent a new Grace short roll pin set I bought for you as a set to do as Sorekiwi notes above. I wish now I could find a piece to mate the cracked differential! As you noted the third version of the RJ differential has some better features even though the one I had was cracked! I told you the story that I traded an RJ front Wheel for the transmission in a box with one of my other Wheel Horse buddies. The transmission center case with the welds was done by the original owner. He used his RJ with a garden plow every summer. However he had a stump in his backyard where he had his garden . The stump was low in the ground and he hit it hard and placed a crack in the case. One crack that was welded and the transmission was placed back on the RJ with new internal parts including the newest version of the RJ differential. Some years later he hit the tree. Stump again but this time cracked the transmission case in two more places. The case was welded but the differential had a bad crack in it as Steve's photos show us above. The RJ owner then bought two other transmissions at an auction (not the two other ones I brought to Steve) and placed one on his RJ and kept the other as a spare.
-
3 pointsThe next step is to take the 3 differentials apart. I picked the one in the middle to start, which is actually the one with a crack in the housing. This differential has the crack on one side. In the 1st picture, there is not even a bronze bushing in the housing on one side. The other side looks OK (as far as not being worn from side to side.), but this is where the crack is. You need to tap out the roll pin that holds the spider gear shafts (pinions). Those push out the back and then the gear can come out. It is the same on the other side. You are now looking at the axle gears with their roll pins. You need to tap out the roll pins...the axles go through the axle gears and are keyed (just like the axle hubs on the outer ends). The axles pull out, with the wood ruff key, and then you can slide the axle gear into the differential chamber and pull it out. After taping out the roll pins. Use a blade screw driver, or a 2' pry bar to go in between the axle gears to get them started to come out. You can align the wood ruff key notches to tap the axle on to the other axle to help push it out. Now this transmission is totally apart...except for popping out the bearings and seals. the axles themselves look OK. The one has a little groove where the seal might hit. You can drill a 1/4" hole in the end of the axle a turn the axle around. We will see later. The plan is to take it all apart and clean it up first. We have 2 bad pinions out of 4...a crack in the differential housing...a couple of small chips on 1 of the axle gear teeth, a worn area on 1 axle where the seal would hit, and the bronze bushings in the differential carriage (while worn evenly) are grooved pretty bad. Some how, I need to find a good quality set of roll punches...the ones I have are just junk. And this is just the 1st differential out of the 3rd transmission. We will get them all apart and cleaned up, and then take inventory and see what we can do and what we have.
-
3 pointsSadly the Police didn't find it and it was definitely no practical joke. I don't wish to go into it too much on a public forum as I have what I set out to recover, all I can really say here is that persistence paid off and the tractor was dropped back to the spot that it was last sighted at.
-
2 pointsHere's my weather forecaster. Cheap and always accurate...
-
2 pointsTo remove paint, I use this stuff called "paint remover". Seems to work pretty well too!
-
2 pointsFor the most part, yes. There's lots of talk about that but I've done it for years. Sometimes the original paint puts up a fight but it makes it easier to scrape, sand, wire wheel, etc. off.
-
2 pointsheres a pic of my set up,works really good and I run it with a normal cheap charger,it seems to remove all the paint when ive used it,but if the parts are going in the tank then they are rusty also,but ive never uysed it in the winter,it would freeze solid in no time,but e tanks work great
-
2 pointsInteresting.I out my blade on to move some compost for the garden and used a solid link. There were times when the blade rode up a little. Could be that the ground at the rear of the tractor dropped off a little at that point but I did see the blade rise a little. Secondly, when the blade meets an immovable object, isn't it designed to trip down to absorb shock. I also think that in unknown territory you should be plowing slow enough to not really give the tractor a damaging shock. It seems I also get slightly better traction going slow.
-
2 pointsRuss , you are not old , you are mature.
-
2 pointsSteve you could have the cracked differential turned smooth and have a sleeve pressed on it, That wood stop it from cracking more and give some extra support. Just a thought. -- Wayne
-
2 pointsBring it on .. new tire chains & bearings in the blower....would be better than the - 12 we had here last couple of nites!
-
2 pointsI am using all these posts to prove to my wife that I am actually just normal like everybody else.
-
2 pointsYou are not old and cranky yet. Wait a couple of years. I was old and cranky the day I was born and it got worse as I aged.
-
2 pointsA 10 hour date I would have ended up in the hospital. A date is" do you want fries with that order ,I am on my way home now".
-
2 pointssnow1 /snō/ noun atmospheric water vapor frozen into ice crystals and falling in light white flakes or lying on the ground as a white layer: something that resembles snow in color or texture, in particular. verb snow falls: mislead or charm (someone) with elaborate and insincere words: Powered by OxfordDictionaries · © Oxford University Press
-
2 pointsa lot of people like the down pressure because of ice and stuff, if you have your blade floating ice is kinda hard to ged rid off
-
2 pointsI have a set of the Dasco punches, looks just like yours. They are NOT roll pin punches as they have a flat tip. True roll pin punches have a bump on the tip that slips in to the hollow center of a roll pin. I got a set of Mayhew punches from McMaster
-
2 pointsGreat write up and pictures Steve.
-
2 points1993 was the year I began my "toy" story, I got my first Wheel Horse tractor.
-
2 pointsThanks for the punch info guys....I got the same set as Steve....
-
2 pointsI'm enjoying watching this thread Steve. As far as punches go, my favorites right now are from Grace USA http://www.graceusatools.com/ They make a great set of roll pin punches with the little doo-dah on the end to center the punch. I have both the short and the regular set, start the thing moving with the short punch (less chance of bending the punch) and switch to the long ones when you need to. Apparently lifetime guaranteed, but I've never bent or broken one. Not expensive at all thru Amazon - http://www.amazon.com/Grace-USA-Gunsmithing--Gunsmith-Accessories/dp/B00H407C1O/ref=sr_1_9?s=sporting-goods&ie=UTF8&qid=1453163140&sr=1-9&keywords=roll+pin+punch+set At work we need to remove tapered pins that have usually been in place for over 100 years. My punches at work are mainly Snap-on, but I break or bend a 3/32 or 1/8 punch every week, so I need to keep 2 or 3 of those sizes in my box. I think about $20 apiece but no problems exchanging them when the Snap-on guy calls on Wednesday mornings. I keep meaning to get some Grace punches for work.
-
2 pointsYou can think if these E-tanks as de-platers, the opposite of plating. And they will remove plating so keep that in mind! Brian, the washing soda ( at low temps as least) will leave solid paint intact, but any paint that has been undermined by rust is likely to fail just as though you were sanding or wire brushing, which is not a bad thing since that paint has already failed anyway. I'm a fan of more aggressive removal and the use of or addition of lye which is more likely to remove paint but also is MUCH more aggressive on oil/grease and I think makes the whole process much more aggressive, including the removal of some layers of skin if you aren't taking precautions! As Steve and perhaps others has/have mentioned, the washing soda is less hazardous. My comment about "de-plating" might need further consideration. Hex a-valent chrome is frowned upon and "might" be created if you happen to be "de-plating" something that has been chromed! I've read conflicting comments and I don't know. Perhaps others will chime in. Not a concern for ordinary sheet metal but perhaps if your part has been chromed... Might not want to pour that on your tomato plants... Or in your drain... Or anywhere!
-
2 pointsYes it will guys. If there is rust under the panit it wil pull the paint off. I wouldn't use a 24v charger things might get a little scary. It's been said that more electrodes the better up to a certain point. This process works on line of sight between the part and the electrodes so odd shaped parts may need more electrodes
-
2 points
-
2 points
-
2 pointsYou guys got this all wrong. There's no such thing as a Wheel Horse addiction, sickness, depression, anxiety, or affliction. There is only DENIAL!! DENY, DENY, DENY, DENY, DENY, DENY, DENY, DENY,DENY,DENY,DENY,DENY,DENY,DENY,DENY,DENY,DENY,DENY,DENY,DENY,DENY,DENY,DENY,DENY,DENY,DENY,DENY,DENY,DENY,DENY,DENY,DENY,
-
2 pointsYou found the very best place. Remember Once you determine what you need post it in the wanted section. Ebay is another source but sometimes the price gets out of hand.
-
2 pointsWay cool. Good to see that you get the recognition you deserve. (I like the hood ornament) Like Russ said, don't forget about the Rat-rod. That thing was way cool, and stupid fast. (had some cool rear meats on it as well.) Oh...and this little short as well. http:// Very creative and talented indeed. Good for you John.
-
2 pointsYou could get the Mrs. A real Horse! A Mustang!
-
2 pointsNow! Now! Don't be too hasty. As a last resort, there's always plan C to fall back on... you could always try getting the Mrs into the hobby too.
-
2 pointsHAPPY NEW YEAR!! Here's a tip, if you haven't figured this out yet, use post-it notes around a wheel to keep paint off the tires. Simple, cheap, and a TON easier than using any type of expensive masking tape!! Some guys use 3x5 cards, but their expensive, and hard to reuse. You can get post-it pads 3/$1 at Dollar General, and one pad will do a couple small wheels, or one large wheel.
-
2 pointsSo, I spent most of the day Saturday and half of Sunday working on this and now have a working plow. I made my own quick hitch for the rear end, I used the front part of the JD plow and fit my square tubing into it. The rear part of the frame I copied from wheel horse plow pics I've seen. It's nice having the electric lift on there, I even pushed a little bit of gravel around the drive (after dark) just to see it work. I think it'll do just fine. I'll pretty it up some and paint it. And may work on remote angling when I get the itch to tinker some more. If I leave it yellow - I think it needs a Meyer snowplow sticker to cover up the Deere Now the question is will it be more fun snowblowing or plowing .............


This leaderboard is set to New York/GMT-04:00