Jump to content

Leaderboard


Popular Content

Showing content with the highest reputation on 12/26/2015 in all areas
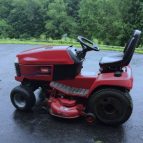
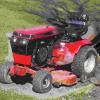
  1. 6 points
    I have been looking for a 417-A for over a year. Found one 5 miles from my place. 1986 with 1025 hrs in nice shape, came with ag tires and also got the turf tires on rims with it. Included snow plow and nice 42' rear discharge deck. Needs a little TLC. Biggest blemish is a nasty ding right in the front of the hood, that will be taken care of next spring. Finally have some time to post pics; First pic is the way I got it. The rest are after I cleaned it up.
  2. 6 points
    Happy Birthday Jim. All things considered, I find the trek from one birthday to the next to be a challenge, but when you finally get there, it's better than not.
  3. 6 points
    May you have a visit from 3 Wise Guy's on your birthday!
  4. 5 points
    I've always wondered what you'd look like Jim if you let your hair grow out! YIKES!!!!!!
  5. 5 points
    That is a beautiful tractor As far as powder coating, there is a facility here where I live that does all Harley-Davidson's powder coated pieces. A friend of mine works there and did some parts for me. I agree that if it's done right, you should have zero issues. I found that PC is best on things that are multi-surfaced (not flat) because the PC gets EVERYWHERE and bakes on to a smooth finish. I had some motorcycle wheels done in a candy coat and they were outstanding. For tractor parts I found you can get very good results with regular paint. Some guys here even ramp it up to automotive paint and hardeners for some beautiful finishes. This tractor is wet-sanded and buffed Rustoleum (including the engine shrouds). The finish came out great with some work. The only thing I'll say is they tend to be a little more delicate for chipping than auto finishes, but they are very easy to touch up. The wheels on this were initially powder coated, but I wasn't happy with the lack of gloss, so I sanded them off and painted them
  6. 4 points
  7. 4 points
  8. 4 points
  9. 4 points
    A HUGE HAPPY BIRTHDAY TO YOU JIM. Do you remember when you used to look forward to your Birthday??
  10. 4 points
    Hope it's a great one Jim!!
  11. 4 points
  12. 3 points
    Finally found the right front wheels for my 57 thanks to my buddy Al. Just got em back from paint.
  13. 3 points
    The basic concept is to develop a comprehensive data base on as many Wheel Horse tractors, mowers and attachments as we can. These will include links to photos and manuals along with photos and data from reliable sources. There will be information on changes that took place during a production run and easy ways of identifying various models. We all have a model or implement we are very familiar with, pick out one you know a great deal about and use the existing wiki files as a guide and write one up. If there is an issue that needs clarification or additional information other members can make comments. This will be a great resource for all of us and will only be worthwhile if we have a lot of participation. We have a lot of cold winter days ahead of us so we can all begin "populating our wiki.
  14. 3 points
    I love my pencil because it comes with an eraser..
  15. 3 points
    I would be at the Top if I would have picked to Win ALL of the teams that I thought would LOSE. How cool is that?? I'd be 9 wins and 4 losses.
  16. 3 points
  17. 3 points
    There are some things that you really don't want sliding!
  18. 2 points
    Might sound nuts but I use my wood splitter to break the beads on mounted tires.Heavy block of wood on the wedge and the push block close to the rim.If you are careful it works like a charm.Luck,JAinVA
  19. 2 points
    Hey Mike, lay a 3-4' long 2X6 on the tire with the end close to the wheel. Pull your car up on it and maybe it'll pop loose. Also can use a hyd jack under the trailer hitch to push it down. I have also laid them on the plow frame with the blade flipped down, and with a short 2X4 wedged between the bead and the frame, used the 4 wheeler winch to pull the plow frame up and break the bead. Keep your fingers clear.....you don't need another hand injury.
  20. 2 points
    OK. Finally sort of figured it out. The manual is pretty useless. Part of the problem is that they identify parts using specific names that aren't intuitive. I had the parts manual so between looking at the exploded view, the owners manual and the tractor I figured it out. There is only one set screw but the manual says "set screws". I got it adjusted but its not perfect. Will give it another shot on a day when I have more patience. At least it doesn't creep in neutral anymore.
  21. 2 points
  22. 2 points
    I'm trying to figure out how to sneak a puller into the garage . . . My wife thinks I'm having an affair with the FedEx guy because he's here all the time Anyway, welcome to the forum! You should bring that beast to the SHOW in June It's the year for customs!
  23. 2 points
    Powder coating gets a bad rap for no fault of its own. there is nothing wrong with the paint itself once you understand how it differs from regular paint. the biggest enemy for powder is sharp edges...... in fact in the industry i work in, powder passes salt spray testing way longer than any of the wet coat industrial paints available today. its all in the preparation. the metal needs to have a 'profile' for proper adhesion and edges need to be slightly rounded. prep is the key here and that goes for any paint.......
  24. 2 points
    What a nice gesture Steve to come down here in the basement and give me a hand! LOL I've been stinking it up this year!!! But...... Quit sliding!! Let's get going now!!
  25. 2 points
    I had a pressure washer that I assume was powder coated, and it was a pain to get it off, paint was much easier. The pressure washer had a wrinkle type finish
  26. 1 point
    Wheel Horse B/C/D Tractor Dash Panel Restoration Tutorial How to properly restore a Tractor Dash Panel Wheel Horse Dash Panel Restoration Tutorial Originally posted by: MikesRJ - 03/06/2010 Click any picture in this article to view a larger version of the image Restoring old tractors (garden type or full-size farming equipment) presents the restorer with many challenges. Not so different from automotive or aircraft restorations, certain little tricks-of-the-trade are learned along the way which every restorer should have in their basket of tricks. The older a restoration subject is, the harder at times it is to locate a suitable "show-quality" part to complete the restoration. Sometimes you simply don't have a choice but to restore the part you have in hand because a replacement just simply does not exist. This how-to presents one of those tricks. The best part about this particular restoration technique it that it can be used on any part made of plastic, PVC, vinyl, leather, cloth or wood. The images above are of the Dash Panel before it was removed from a Wheel Horse C-160 Tractor, and after this restoration process was performed. Yes, boys and girls, that is in fact the same dash panel shown in both pictures. Excellent results can be achieved if you remind yourself to be patient, take your time, and follow the process presented here. Practicing the method on anything with raised letters beforehand also greatly enhances your chances of success. Simply follow this process on a "scrap" item and you should be ready for the actual piece in no time. PROCESS OVERVIEW: As restoration quality and New Old-Stock (NOS) Wheel Horse Dash Panels are harder to come by, it becomes necessary to restore what you have rather than replace the part entirely. This page is dedicated specifically to the restoration of an otherwise "good condition" dash panel that has been time-weathered, and return it to its original luster. Before moving on to restore your tractor restoration Dash Plate, it is HIGHLY SUGGESTED that you read through this entire article and perhaps try this method on a spare or "sacrificial" part beforehand. You only have one chance to do it right on your final piece, and a million ways to do it wrong along the way. As a side-note: This process can be used with very little variation on any tractor part which is made of vinyl, plastic, PVC, cloth, leather, or rubber. The VHT line of products is extensively used in the automotive/aircraft restoration worlds for returning anything made of these materials back to near original appearance. See more details concerning VHT Vinyl Dye products at this website: http://www.vhtpaint.com TOOLS REQUIRED: 1. Small bristle brush and Dawn Dish Detergent 2. 1/8" Metal punch and heating source (if making repairs) 3. 800 grit Wet/Dry Sand Paper 4. 0000 (fine) Steel Wool 5. Common Automotive Brake Fluid 6. Paper Towels 7. VHT Vinyl Dye, Gloss Jet Black (p/n: SP941) 8. Elmer's "Painter's" Opaque Paint Marker (fine & wide tip) 9. Dental Picks, Tooth Picks, and/or Exact-O Knife PAINTING TECHNIQUE: The white borders, letters, and symbols on the dash panels were originally manufactured using a screen printing roller technique. This method produces an extremely thin, opaque layer of material which is extremely strong and relatively long lasting. Since reproducing this technique is far more difficult for the "home restorer", the method presented here is relatively easy, and mimics the original process quite well. The technique I use is pretty straight forward and quite simple to do at home. In order to apply the thinnest coat of paint the tip of the paint marker should be as "dry" as possible, but still contain enough material to deposit on the surface. This technique is called "Dry Brushing" and is used by painters and modelers as a method for adding subtle details to whatever they are painting. For the purpose presented here we are using this method to apply the thinnest coat of material we can, in each successive pass over the surface. Once the paint marker is prepared for use per the package directions, the tip of the marker should be touched to a paper towel and dried off as much as possible before touching it to the part to be painted. When moving to the next paint area on your subject piece, re-load and re-dry the tip, then proceed. When painting with the white paint markers, insure the tip is about as wet as when using an artists "dry-brush" technique before touching it to the part. Apply the paint so it thinly "flows" over the surface, and use a paper towel to keep the tip "almost dry" of wet, runny paint between individual characters on the plate. Apply the paint with a very light touch in single passes only. Don't cover any more than a single pass at a time, building layer thickness with each additional coat. As always, follow the package directions for all of the products used in this process. When applying the paint, you are NOT wiping it onto the surface like a paint bush. You are also NOT trying to cover the surface completely in a single pass, rather you want to build successive layers, allowing each layer to completely dry, until an even and completely opaque coverage is achieved. If you attempt to wipe the paint onto the surface, you will produce "edge roll-over" and the paint will either bulge over the side edge of the surface, or run down the side, both of which conditions are undesirable. You should apply the paint in a very light tapping, or patting, manner where the tip is ever so lightly tapped onto the surface, moved over half of the width of the paint marker tip and tapped again; and the process continues from one end of the detail to the other. The only exception to this is when you are applying paint to long, continuous details such as the two border lines around the Dash Panel. These features should be lightly glided over using the dry brush method, from one end to the other end, and the tapping method is applied to finish the strokes at the very tips of these details. Aside from the method of application, the most important factor to keep in mind is that you are NOT trying to completely cover the underlying black dye color in a single pass. What you ARE trying to do is build-up multiple, very thin layers of paint until the white completely masks the black underneath. If done in this manner you are left with very sharp, crisp edges and an overall very thin opaque paint coverage of these raised dash panel details. The second most important aspect is that you insure your panel is well supported, i.e.: will not move during the painting process, while the heel of you painting hand is firmly planted on the work surface as you apply paint. This will insure the steadiest hand, and you will therefore have better control of the paint marker tip and where it touches while you apply the paint. Of third importance, as in any paint application process, starting off with a well prepared surface ALWAYS results in a higher quality final appearance. Complete and thorough cleaning, drying, repairs, and re-cleaning are all painstaking and necessary steps before applying any dye or paint to the surface. The instructions below go into greater detail where necessary, and if followed closely will result in a "better than new" looking part for your tractor restoration. Step 1: Thoroughly Clean the Dash Panel Here's where it started! Once removed from the machine, the entire dash panel should be thoroughly cleaned of all dirt, grease, oil, and old marking paint on all sides. Automotive Brake Fluid is a good paint and marking ink softener, but care must be taken to insure the brake fluid does not "melt" the plastic. I normally test the brake fluid method on the back side of the part, or on any surface which will not be seen when the part is re-installed, in order to insure the brake fluid will not attack the plastic material. Use the brake fluid sparingly, and allow it to sit on the surface at least 1/2 hour, to "loosen" any foreign materials (paint, ink, or hard stains) from the surfaces. Then with a combination of 0000 steel wool (try not to scratch the plastic), gentry scraping using the edge of an exact-o knife, and/or dental picks and tooth picks, you can easily remove all of the unwanted debris. Once all of the foreign matter is removed, the plate should be thoroughly scrubbed with a small plastic bristle brush and Dawn Dish Detergent. This will remove any remaining oil and dirt from the plate, the corners, and the edges. Rinse with warm water and allow the piece to thoroughly dry before continuing. Once it is completely cleaned it should look similar to the image below. Starting Point Step 2: Repairing Surface Blemishes This is the tricky part. If any surface blemishes exist, you need to make a choice whether to make a repair or leaving it as-is. Obviously, starting with a high quality unblemished panel is more desirable, but you may not have a choice but to use a "less than desirable" piece due to replacement part availability. Attempting to repair any surface issue may only result in a far worse appearance than leaving it alone. Choose wisely based on your abilities. Only one surface blemish was corrected on this example (the second "N" in "IGNITION"), the second blemish (the "wiggle" in upper left corner of the Electric Clutch "OFF" arrow-bracket) was left alone as it was too dangerous to attempt repair without further damage. The right side of the "N" was smashed down and the right "leg" of the "N" was partially split in two. A small round punch was used to "re-form" the letters edge by heating the punch tip to just below the melt point of the plastic, and "pushing" the letter back into shape. The split essentially closed up and re-bonded to the adjacent part. Care must be taken to not overheat the punch as you do not want to melt the plastic, only make it soft so it will "move". Once repairs are completed, re-clean the part as you did in Step 1. Step 3: Restore Plastic Color and Shine Many products exist which are designed to restore vinyl and plastic to their original luster. I have used many of them with varying results. VHT (A division of Dupli•Color, Inc., a Sherwin-Williams Company) produces a vinyl dye which comes in several colors, and in Gloss and Flat finishes. The product is NOT A PAINT, it truly is a dye designed for vinyl, plastic, cloth, leather, and wood. The vinyl dye, when applied to plastic, forms a polymer on the surface which actually transforms the plastic material surface into a new material matrix. I prefer the look of the hi-gloss finish as it makes plastic parts look more realistically like a "new part" than does the satin finished dye. VHT Vinyl Dye, Gloss Jet Black (p/n: SP941) in the 11 oz. aerosol was used to treat this Dash Panel, which only required a single, light coat to restore the dash panel to its original appearance. NOTE: Allow the dye to absorb and surface-dry at least 4 hours before proceeding to the white painting process. Step 4: Applying the First Coat of White Paint Applying the white paint is rather easy, but does require a little technique and a steady hand. For this step I used Elmer's "Painter's" Opaque Paint Markers (available in most craft and hobby shops). The markers come in several tip-sizes, I used the fine and wide tips here, and is composed of an opaque acrylic paint. The acrylic paint bonds extremely well to the dyed plastic, and holds up to temperature variations and the weather quite well too. LARGE PANEL DETAILS: When using the paint markers, do not press down with any significant force while painting. The driest tip (artists "dry-brush" technique) and the lightest touch (the least amount of downward force) on the plastic produces the best results. Using the wide tipped marker, dry the tip on paper towel and very lightly cover the large borders with a single pass. DO NOT go over them a second time, as doing so will leave "brush marks" in the paint. The result should be an almost see-through appearance of the white paint. Several coats will be necessary, so if the black shows through, leave it alone. Also, "paint" any large details on the face area; such as the choke symbol, large letters, rabbit and turtle; using the wide tip paint marker, but use the "PATTING" paint method described below for these smaller details. SMALL PANEL DETAILS: As before, you are applying a very thin coat, so make sure the marker tip is almost dry and apply only a very thin coat on the first pass. Using the fine-tip paint marker for lettering and small details, use a patting (or tapping) technique to apply paint to the tops of the letters. Begin at one end of the letter and overlap your taps, moving toward the other end of the letter. Don't wipe the paint on, PAT it on! Especially at the ends of the letters. This keeps the paint from "rolling over" the edges of the raised detail. Dry the tip on your paper towel frequently, and between every new detail painted. NOTE: Notice the black showing through the white in the image below. Keep the first coat VERY, VERY light. Step 5: Apply Additional Coats of White Paint ALLOW AT LEAST 4 HOURS BETWEEN COATS The application of paint continues as described in Step 4 until all of the painted areas are completely opaque and covered well. With each pass you will see the paint begin to almost "pool" on the top of the surface. As the paint dries it will flatten out to a nice even coat. The desired result is normally accomplished in just two to three coats of white paint. If you have blotchy or spotty coverage, you can use 800 grit wet-dry sand paper to lightly sand the white faces flat and even the paint coverage, then apply a final top coat after re-clean and dry the part. Make sure you allow the paint to dry thoroughly before sanding, and re-clean the part before applying the next coat of paint. Make sure all surfaces are evenly covered without brush strokes. The image below shows good coverage with very little over-painting or edge "rolling" after only two coats have been applied. Some letters and small details will need to be scraped and cleaned up prior to applying the last coat of white paint. Step 6: Finishing Up The final step in the process is to clean up any mistakes or over-painting (edge-rolling). This step is normally done BEFORE the last coat of white paint is applied, so that any scrape marks or edges can be covered on the final pass. I normally use dental picks, tooth picks and/or the tip of an Exact-O Knife to clean any edges which were over-painted or where errant paint has been deposited between letter lines. Any over-paint on the panels surface can be covered up by spraying some of the VHT dye into a small cup and using a fine tipped artists brush to "dry-brush" the paint drip into oblivion. Once the final coat of white marker paint has dried for at least 24 hours, crumble-up a piece of regular kitchen paper towel and buff all of the white painted details. The paper towel material is just course enough to polish the top surfaces and burnish the edges of the white details, giving your panel a "finished" look. The polishing will also remove any specs of dust which may have settled on the surface during drying time. Your piece will now be remarkably similar to an original new part, and is ready for installation on your pride and joy machine. The completed piece is now "Show-Ready" and looks like the images below. My thanks go out to Bob Maynard ("RMaynard"on the Red-Square forum) for the use of his B-80 dash panel in the creation of this How-To. Bob mentioned somewhere on the bulletin board that he was in the market for a NOS Dash Panel for his B-80 restoration. He also mentioned that he had an old usable one in-hand, but did not think it was show-quality enough for his restoration. I offered to restore his old panel for this tutorial, with the thought that he could perhaps use the result on his B-80 should he not find a suitable replacement. I hope you enjoy the tutorial, and Bob; Thank You for allowing me to use your panel for this example.
  27. 1 point
    Happy Birthday Jim. Hope you have a great one.
  28. 1 point
    I second McMaster-Carr too. Personally I used p/n: 6058K28. Less than $5 a piece. I just cut the original tie rods, then faced, drilled, and tapped and used lengths of 3/8-24 threaded rod to attach the ball joints. Many other ways to do it, that's just what I did. Looking back on it, rod ends would be stronger (much larger load bearing surface) and likely last much longer, but I can still replace mine quickly and cheaply when the time comes.
  29. 1 point
    Chrome just isn't as shiny as it once was.
  30. 1 point
    I only have 4 decks loose, the rest are on the tractors. The loose ones are 2 on dollies, 2 in the shed standing up into the wall, leaning. Good as I can do right now. Oh Brian, re heat in garage, 60 thousand btu, modine hot dawg heater, ceiling hung, natural gas. Glenn
  31. 1 point
    @Larry Chamberlain http://www.mcmaster.com/#tie-rod-ends/=10ew7g7
  32. 1 point
    The spring for the HY-2 is part #4837 and can be purchased from JC's Farm and Garden Supply (219) 229-4708. The "O" rings should all be standard industrial supply items available at NAPA or any good industrial supply house.
  33. 1 point
    Thanks. Much better picture there
  34. 1 point
    ... Or an old style bumper jack.
  35. 1 point
    Thank you all for the Birthday wishes. It has been a very nice day!
  36. 1 point
    Don`t think I`ve had the pleasure, maybe in June. Happy Birthday
  37. 1 point
    Here is what you really want to look at...did not know if you had this.. page like 19 for neutral adjustment. http://www.wheelhorseforum.com/files/file/24-transmission-hydro-sundstrand-sm-492-4206pdf/
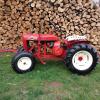
  38. 1 point
    The HF ATV winch has power in both directions. Now I need to find some heavy duty pulleys.
  39. 1 point
    I have been researching powder coating and would be interested in what others have experienced as well.
  40. 1 point
    Well I found a way to get some seat time today After the rain we've had my quarter mile driveway got a bit soft so I took the plow tractor out and graded the center hump down and pushed it into the usual tire paths. Now it's a little flatter. That should help some when it does come time to actually plow snow. So, I got some seat time and got out of the house for awhile. The sun was shining, it's still 50 some degrees, what else was there to do with a house full of women yacking.
  41. 1 point
    (Psst, it's today. )
  42. 1 point

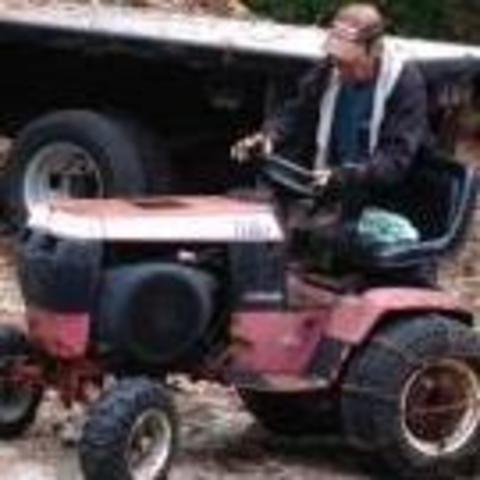
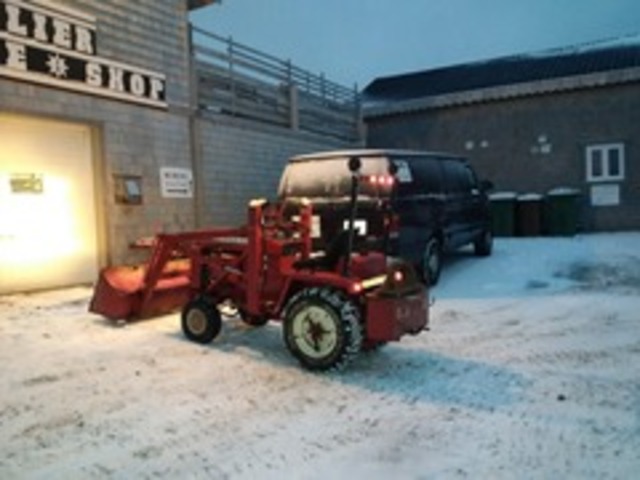
    From the album: New Toy

    My new toy ! From Magdalen Islands in Canada long life to my 1974 Wheel Horse D180 model 1-0611 equipped with a Kohler K532 and an Ark Loader 550
  43. 1 point
    Steve, thank you for starting this thread. I too want to wish you all a very Merry Christmas on behalf of the staff here at RedSquare. Christmas is about family and friends, and this community is both. As we all celebrate please remember those who can't be home with their families, those recovering from injury and for those who have lost loved ones this year. This is a wonderful and loving community, the least of which is the technical forum itself, it's all about the people, so Merry Christmas to all my friends and family here!
  44. 1 point
    Honestly Dennis, you have wanted every make and model that has been posted on here. If I did a search of "I want one" you would lead the pack. But, I have no room to talk because I want everything I see.
  45. 1 point
    http://www.millertire.com/products/wheels/lawn-garden/12x10-5-rim/
  46. 1 point
    Xtreme sells wide rims for our Cubs too. http://xtrememotorworks.com/Parts%20Catalog/Rims%20and%20Tires%20Pages/Cub%20Cadet%20Parts%2010x12.htm As AMC posted, Miller tire also supplies wider rims. Both vendors are excellent to deal with too.
  47. 1 point
    A member here name Hammerhead has this awesome army horse and he used copper hard line for the fuel if you want he has a thread about it just search army horse. I've been wanting to add hard line to my lawn ranger i think it will hold up better to the junk gas we have these days. I put all new rubber line on my sons lawn ranger last year and its already very hard and i used the good stuff and my suburban got all new line after i restored it a few years back and the line is toast on it too.
  48. 1 point
    Very hard to tell what's going on there. I'm thinking either a mutt, or an 867 with a replacement engine. PTO shaft coming out of the engine is way long... motor is not original anyway. They probably took the battery tray off to accommodate the engine/starter. Measure the width of the seat pan... 67 and down were narrower than 68 and up. That flip up seat base appears to be just drilled and bolted on.... it would have been from a later model with an under-seat access need. Measure the frame length. For me kind of hard to tell proportions with wrong engine, and wrong/no tires mounted up. Based on the hood mount, I'd expect it to be a short frame. Cutout for headlight bucket would fit with the 867. Bottom line to me is that you saved a horse from scrap that sort of looks like an 867. Plenty of workers out there with mixed, modified and replacement parts (mutts) and no identificaiton. Enjoy it, should make a good worker!
  49. 1 point
    since the d250's are pretty much the same as gutbrod 2500, parts can be found in germany http://gutbrod-schrauber.de/ersatzteile-f-r-2500-s.html http://ersatzteilhandel.jimdo.com/gutbrod-2500-getriebe/ if you open the pdf on that site you'll get an exploded view of the transmission http://ardiehl.de/Gutbrod/Gutbrod_2500_Benzin_Motor.pdf engine pdf hope this helps Koen
  50. 1 point
    Figured I would add a pic of this tractor (in prior post) as I found it in the attic of an old wheel horse dealership where is sat along with 4 other RJ's for about 25 years...
This leaderboard is set to New York/GMT-04:00


  • Newsletter

    Want to keep up to date with all our latest news and information?
    Sign Up
×
×
  • Create New...