
Leaderboard


Popular Content
Showing content with the highest reputation on 12/03/2015 in all areas
-
8 pointsSo Mrs. M took a picture of me walking the halls. Sorry guys, I promised no pics, but I couldn't resist.
-
7 pointsI'm still here. Everything is fine though. I'm walking good and pain is manageable. Taking 5mg Percocet every 12 hours. The reason they haven't let me go is because the surgical drain is still draining more than is allowable under the doctors protocol. Probably tomorrow morning.
-
6 pointsI knew is was going to take a little effort to replace the manifold on my D180, but I had no idea! Holy smokes! I should have just planned on restoring the thing while I was at it! The good news, though, is that I found that the "T" bracket that supports the steering column was totally cracked in two near the weld. No wonder my steering was sloppy. Got it re-welded and the new manifold installed. Working on putting everything back together. I wish I wasn't so anal about making sure every bold makes it back into it's original spot! Just hoping this resolves my front manifold leak. After two attempts at putting new seals (and failing), I came to the conclusion that there must be a hairline crack where the tubes insert into the mounting plate. I'll find out soon enough.
-
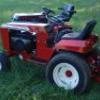
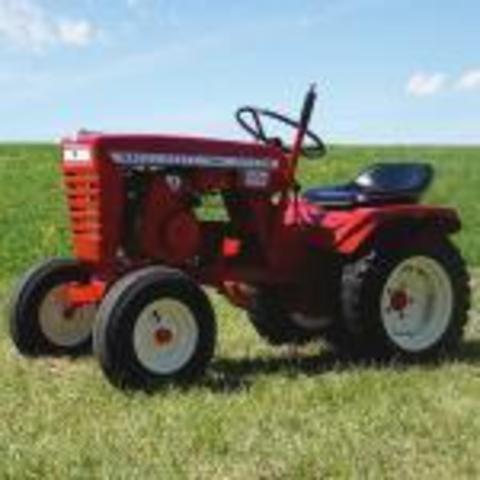
5 pointsIt has been a long journey, but my wheel horse is finally back to work. I would like to thank every one here for your help along the way. From identifying it when i first got it to what color to do the wheels(to be put on in spring). Today I rewired it, got the charging system all wired up, and she got a new exhaust. Once that was all complete it was right to work!! f
-
4 pointsHope mine never leaks. I'll use the bucket method, but a bucket under it and pore it fluid back in the tractor
-
3 points
-
3 pointsOK, I added the belt guard. Ready for the OSHA inspection and the patent application.
-
3 pointsI made that picture my desk top wall paper. It will remind me to be safe. Good to see you up and walking Bob.
-
3 pointsThe plastic quick clamp shown in the photo actually took the worst of it! Couple of spatter turds landed on it and it was smoking some. Who'da thought a plastic clamp and 3,000 degree melted steel couldn't get along. One thing I know for sure now with this project, having nearly all the necessary parts cut, for me, was critical. There's no way on earth I could have gotten this far without them. The thought of having to cut all those pieces myself... yeeesh. Game over. The other thing, having generous folks here at Red Square to share part dimensions, manuals etc, is invaluable. Thanks!!!
-
3 pointsDid they restore those tractors
-
3 pointsWe're all glad you didn't have a wardrobe malfunction when that picture was taken Bob............ You're no Janet Jackson.........
-
2 pointsEspecially for you, Craig!
-
2 pointsHey all few months back i picked up a FEL for my 76' D-250. I believe it was off a older bowlens tractor. Im running the loader off the pto with a northern tool 4-8 gpm pump, 5 gallon hydro tank, 3/8" hydraulic lines, 20gpm filter off return side of tank. I got it working, it lifts weight. But my issue with it, is that it lifts very slowly. When the pto is on and pumps running, the gauge on the inlet side of the valve body doesn't read anything until the pistons max out, then i belive it reads 2000psi. Friend of mine suggested upping the pump supply line from 3/8" to 3/4"?? My other concerns now are: does the pto spin fast enough to run the pump correctly? And is my 20gpm filter on the return slowing anything down?? If theres any advice yall could share with me to help improve my situation, ill really appreciate it. Thanks Tomorrow ill take a video of the loader running so you can gauge the speed
-
2 pointsOK Dennis, here is the @buckrancher award.
-
2 pointsHi guys, thanks for the welcome, much appreciated. I currently own a b111 it's complete and running with good tinwork but I want to give it new paint. I recently acquired a 1991 312-8 complete with WH trailer, WH tiller, and mower deck all good condition. The 312 has just been stripped down for sandblasting and repainting and engine getting rings and gaskets as required. I will get some pics posted soon. My own background is steeped in agriculture working as a tractor driver when I was young then moving into agricultural engineering for the last 30 years . got a small collection of tractors and garden tractors and as I am semi retired I will not be idle. Jim.
-
2 pointsYou know, that could come in handy this winter to break up the frozen slush that always accumulates at the end of the driveway.
-
2 pointsDougC, exactly! And in the process, you find out the door jamb wasn't attached to the studs! I'm gonna look at it as a blessing in disguise, but my fear right now is that I'll get it back together and the doorknob is defective! Really hoping I've got the leak fixed in the process. If not, you might see the beer cans!
-
2 pointsIt appears your suction supply and pressure lines of the pump are too small. The suction supply to the pump should probably be 1" and the pressure supply to the valve 3/4". Having a larger supply hose to the pump will stop it from having to vacuum the oil in from the reservoir. Then a slightly smaller hose but larger than the working hoses is used to supply the valve with enough oil to run multiple cylinders without starving for oil. These larger hoses also allow the system to hold more oil, stop any cavitation in the reservoir and dissipate heat better. A 20GPM filter will have no problem handling 4-8 GPM. Check the speed of the PTO and the pump specs. Both should be around 3600 RPM BTW, NICE tractor!
-
2 pointsThe first and second previous pictures is of the new one. I will try to get a good close-up shots. On the original, the ends are slightly bent inward. I hand worked the ends with a file and sandpaper til I got it to fit the way I wanted.
-
2 pointsI have the ugliest duckling, but it is really a LSE. Looking for a louvered hood, and I am getting a decal set. It is getting a complete overhaul next summer, so hopefully it will be saved from a rusty death. This one is and always be a worker. I was curious if anyone had an indication of how loud their LSE was. I have a 417-8 , and being a similar motor, I thought they would be about he same, but my LSE is VERY loud. Is it possible my muffler is gutted, or were they designed to be a little louder from the factory? Anyway, great pictures! Ill be following along to see all the clean ones, and continue to dream.
-
2 pointsSince this has been discussed at length, on various threads, would it be possible to have document that covers battery selection, and maintenance AND pinned to the top of the electrical section? I always learn something from SOI.
-
2 pointsKinda like having to tear apart the entire house to replace the front door knob... I see you picked up all the empty beer cans before you took the picture......
-
2 pointsModel 701 tractor was not new - only new to me in about 1974. The dealer at the time was an hour away and could not figure it out. In the end everything was replaced but unfortunately the shift rails were the old style without the flats. The only new part that was not replaced was the donut because the new shifter came with one on it. The last thing I tried was making my own pin which is still in it. I replaced the spring with a bushing to keep the pin centered on the balls and kept shortening the pin until the 2nd rail could be inserted. Then the bushing was replaced by the spring. That was teardown number 6. Number 7 was when I discovered the oil was sealing the rail to bore clearance. I just installed it back in the tractor and have been holding the shift rail in the neutral position until the pressure or vacuum dissipates to test my theory. It works. Wish we had this wonderfull resource back then. Perhaps I would have received rails with flats instead of NOS rails and problem would have been resolved. I know what I'm doing to it the next time it comes out. All the 1964 model transmissions got a new model number in 1965 and suspect that was a result of the new rails with flats being used. The photo of the rails with flats posted above is the first time I have seen them. Garry
-
2 pointsKeep walking, the more you walk, the quicker they'll let you go home. The thing with pictures, they can't be unseen.
-
2 pointsI think what has happened with your hub is that the keyway in the hub has wallowed out. Now the key will be sitting in that wallowed out piece instead of the groove that goes all the way through the hub. What you have to do is line up whatever is left of the key with the groove in the hub, and then the hub will come off.
-
2 pointsI need to do that too, best of my recollection I have a nice work bench and a concrete floor; just haven't seen them lately!
-
2 pointsFound this on CL . It's a k91t with 3/4" shaft . The guy had in his basement for 30 years and decided it was time to let it go . He put gas in it and it started on the third pull . Only thing missing is the recoil . Now if I can't fix the one that's on my RJ ,I at least have a kohler to shake it .
-
2 pointsI think I was happy when I knew nothing. Now I`m really confused.
-
1 pointNope, not a "making something on a lathe" thread, but a "using the best bits from two lathes" sort of thing My 80+ year old Southbend lathe has served me well for many a year and all sorts of things have been made on it, but lately it has been suffering with belt slip problems and as you can see from the photo the bench it is on is starting to bend! My other lathe is/was a TW Monoturn which to put it politely is very worn! The base is good (apart from a crack in it) and the motor is very strong.. The rest is scrap really! Strip down of the Southbend to make it lighter to move about.. A chance to give it a good clean as well.. The TW Monoturn soon looked like this.. And eventually it was reduced to a pile of parts. Rather than use the lathe base/tray legs I will be using just the tray. The bench will be strengthened a huge amount to take the extra weight of the tray and bigger motor. This is only a mock-up so the big bits of box will go and the tray mounted level on the bench once I have cut a hole for the drain bit on the tray which is lower than the rest of the tray.. The lathe and tray look good together, a good time worn match
-
1 pointHi from Perthshire, Scotland.
-
1 pointThanks for the help!
-
1 point
-
1 pointWell now! Would you just look at that! I know something of the Shaws, I even know where one is (and my understanding is there's not a lot of them around!) but I know NOTHING of the Mighty Mite! Well, until @buckrancher came along! Gads! Trying to learn all there is to know about Wheel Horses is absurd! Can't even know all the tractor brands! I've been told that are a LOT of brands that most folks have never heard of but now I'm pretty sure I've not only heard of a Mighty Mite tractor but seen pictures of more than one! Some old dry and stale brain cells tell me there was a Mighty Mite track tractor or dozer, though! Thank you buckrancher! I think you have won whatever prize is associated with this contest! Richard? Would you please be sure that he gets it!
-
1 pointJim. Welcome to the forum. Looking forward to your pictures. Scotland is beautiful.
-
1 pointWell, Ohio is not that far from Iowa. Let me know if a beer run is necessary and I will do my best to deliver and even help you empty the cans. I hope however you have it fixed and the empty cans you show us are in celebration. Either way........ It's Miller Time.
-
1 pointI hate to admit when I'm wrong (just ask my wife), but I think I have to change my mind and agree with Buckrancher. After comparing that front axle with the Mighty Mite and the Du All, it looks more like the Mighty Mite. Also, the shape of the I-beam frame is more like Mighty Mite. I have to confess that I've never heard of the M M, but I've seen a few Du Alls, so that was the first thing that came to mind. Very similar tractors if you're not standing right next to them. Jim
-
1 pointThanks ranger, once I get some time to work on things once again I'll give it a try. Too many projects sitting on the floor and not enough hours in the day
-
1 pointDiamondred, that is some interesting wear on that spring. You wouldn't have some more pictures of the spring you made, would ya? I would like to see what you did at the opening. Thanks
-
1 pointI think that's an excellent idea, and no I'm not volunteering, but I would certainly appreciate somebody else doing it. It could also be added to the reference section (it's not totally clear to me which topics go there, and which ones get pinned to the top of a "regular" section).
-
1 pointThank you for posting my dads Wheelhorse. He would have been happy to see it on the calendar. This tractor was what I use to mow our lawn when I was a kid. It has been in his garage for the last 40 years and I just got it out last year and got it running. Dad past this summer but I know he is happy seeing it on so maney walls. Thanks Dave
-
1 pointGot some more fab work done! It's hard right now with a 3 year old with walking pneumonia, a 4 year old with a bad cold and my wife with the flu to get some shop time in. Today I stayed home from work just to tend to the "patients" here in the sick ward. With them all hitting the sack early, I got out to my shop determined to get one of the "pockets" for the uprights welded up. I kind of like calling these things horse shoes instead of "pockets". I'm pleased with how it turned out. This took about an hour for me to put together. The fitment is primo, with a tad under 1/16th of an inch gap on each side and the same at the tail where the upright slides into the horse shoe gap. Here are a bunch of photos: For reference. Here is a photo of a factory kwik-way "horse shoe". Photo is courtesy of doc724 from his loader. Thanks!!!
-
1 pointTractor club did the last machine. My boy and I did the 500 special together.
-
1 pointThis is awesome. I was just thinking about this as an option yesterday. I'm glad to see you did it with great success. In my case I'm looking to adapt the Predator to my recently acquired scrapyard 416-8. My current Onan P216G runs ok, but it clearly needs rebuilding and seems down on power. After checking into a rebuild kit, I quickly realized it most likely wouldn't happen. Thus the repower notion. I don't know when I'll start the process, but your description will make the effort and anxiety much less involved. Any updates to reveal??? Thanks, Greg
-
1 pointRon,,,,,,,,that is one very nice looking machine......We have a question.......What can you tell us about hose rear fenders......???? NICE !!!!
-
1 pointI have a D180 project tractor that now is a gear drive. Not sure yet what engine it will get. Tom
-
1 pointThe professionally printed calendars are ready to be printed. On the top bar of the forum click on the 2016 Calendar and the paypal button should be there. If you don't do paypal PM me and I will respond on where to mail the payment too. For international shipping and pricing PM me also. CUT OFF DATE TO ORDER IS DEC 16 8:00 P.M. ! ( I want these out for Christmas! )
-
1 pointJust make sure there's no little black pellets in the bottom
-
1 pointDon't let him BS you ....he's got one of these on a cheese grater.... If he don't he should
-
1 pointI have a new old stock one #198 Brian
-
1 pointI picked one up recently too, but it's pretty ugly right now. The tractor runs as smooth as can be, but cosmetically it will need a redone sometime in the future. The serial tag sticker is all but gone and the plate on the hood was never engraved with the number. I do have the Kohler serial number and was curious if there would be any correlation between that and the tractor serial numbers. If a pattern could be established, such as sequential numbering of engine serial numbers used for the 420-LSE tractors, then perhaps I could get a close estimate of where mine was on the production line.


This leaderboard is set to New York/GMT-04:00