
Leaderboard


Popular Content
Showing content with the highest reputation on 09/03/2015 in all areas
-
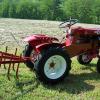
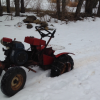
8 pointsOK, so I picked up a plow for my C-175 off CL, guy wanted $60 for it . (the guy said "hey you want that old snowblower attachment too?") tch... duh, free? c'mon! anyway, I decided to attach the plow and push some dirt around just for fun . That's when I found out that steering, controlling the height of the blade, and speed of the tractor (forward/reverse) was a challenge to say the least... Of course with the Sundstrand hydro, the available pedal mod is zilch. I thought about looking for a different Horse, but I like this one. so being a machinist, I made this... I took it for a test ride last night and it works great! As it stands, I was using both pedals to control the speed, the brake pedal moves the lever back toward the neutral position to slow the tractor down in either direction. I was looking at using springs for return to neutral, but it was pretty easy to just use the pedals. I think the rear PTO belt should clear too. Total out of pocket cost ~$42.00 for the pedal and Heim links. The rest, well I work in a shop, lol The only thing I regret is cutting original sheet metal... . there are a few of those belt guards available, so I could grab one just in case
-
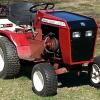
8 pointsJust have a few minor things left to do and then onto the 42" SD deck. A few of the changes I made to simplify things include eliminating the rubber motor mounts and the separate brake pedal. The clutch pedal is also the brake like the older models are set up. I noticed that the lift handle on my C is too far back and sticks out so far that it rubs against my leg and forces me to hold my leg at an unconformable angle. I would really like to swap out the steering tower for the simpler and narrower older style like my 857 has. I think it looks better too. Sometimes engineers should leave well enough alone.
-
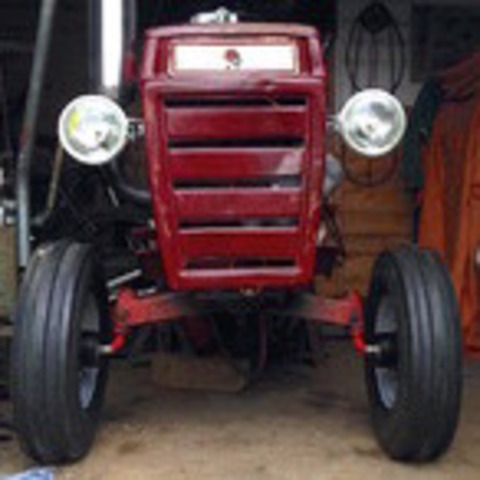
4 pointsNaw, I can't make fenders , Dennis, they are stock from Northern Tool, but I can bend up belt guards and covers , etc. on my cheapie Harbor Freight metal break. I made the hood for the "FrankenPanzer" in the bottom picture. The top picture has the home made belt cover on a tractor that started out as a Commando 8, I had some round hoods and a couple fuel tanks, so I changed the Commando over to look like a 753 or 854 type tractor. An English Wheel is still on my wish list, lol.
-
4 pointsBeen working on my "jalopy" pretty hard the last couple weeks, It was my 657 that I flipped the frame upside down. It is still all original WH, except the sheet metal and the seat. Same rear end, frame, front axle, steering and engine. It's a centrifugal clutch now and the belt is routed under the floor pan. It's really working great, took it for a 4 mile ride the other night up along the back road by the creek. It's name is "Old Shep", lol It looks more and more like a little truck every day , so I'm building a stake body bed on the back of it now.
-
3 pointsC'mon now... he did make it one night.
-
3 pointsWell I couldn't help it. Project has Begun! I'm going to just start off by getting it back to a roller frame again and then it may sit for a while or I may build the rest off of there. I have a rebuilt trans sitting here for it already. And I can borrow a set of tires that were going to be used on the 59, because that project is going pretty slow. I may start blasting parts today.
-
3 pointsHi Craig and Steve and Mike and ever one else. I am getting this from a R/S member here hopefully he will reply. Well here she is. I think next week I will be getting this 607. For the members who are not familiar about this little tractor I have been looking for over 2 years for this one. I still think it`s because of the recoil start? I would say very rare. I have only seen 2 and one was a basket case the other 1 had a line on this already. I think most opted for the 657 which is electric start. I seen lots of those and the same for 65/66`s I had a 606 until this spring but still not a 607. So this completes the series for me. From what I under stand it was dealer stock so it has a few Minor issues like decals and the seat which I have. And the engine is a 7 hp snow blower engine. I will put in the Commando 6 engine and make it look pretty. Sounds like Terry will be getting a phone call soon. This all stared years ago with a 1257 Hence T1257. I will do a complete video of what I will be doing to this tractor. I hope you enjoy the picks.
-
3 pointsThanks, Dennis , that is a nice compliment, much appreciated ! I try not to be hoggish when I sell something, because I hate to spend a dam fortune on that kind of stuff myself, lol ! I always wanted to find a 1 inch muffler somewhere like these for a Kohler , and no luck, so I thought I'd see if I could cobble up something myself, the first ones looked like hell, but gradually they improved once I got the hang of it. If I get flooded with orders, it will take a couple weeks, sorry 'bout that, and I hate making people wait for their stuff, but we all have to take care of our other day to day duties, too.
-
2 pointsSounds like you you guys were handed some lemons. It's kind of funny how different people - and perhaps different regions - view things differently. Until I went to my first WH show in 2000 I had never been to a tractor show where guys were just cruising around. And I used to go to a LOT of them. There was always the occasional tractor moving from one activity to another, but other than the parade, plowing, or pulling they all just sat there stationary. Guys meandered and talked. Lots of old timers sat in lawnchairs next to their machines. Nobody had a tent or canopy. When I saw constant driving around at biglerville it struck me as odd. It was just implied that the shows in my part of illinois were for walking. I've seen one backflip and a lot of close calls at the big show. One young kid ran over my right foot on a suburban. Seems like a matter of time... I have more fun walking anyway. But I'm a talker, so... Make lemonade, steve
-
2 pointsAs far as Ag's on the front. Many tires will have embossed on the sidewall the direction they should go.These Carlisle Tru Powers have an arrow and you can see they want them on normally for traction end (Rear) and reversed for rolling (Front) People keep asking me why I have the Ag's reversed on the front and this is why. They work rather well too!
-
2 pointsMICHIGAN "GO BLUE" TCU MICHIGAN ST ILLINOIS IOWA MARYLAND RUTGERS STANFORD PENN ST. NEBRASKA INDIANA ALABAMA NOTRE DAME MARSHALL OHIO ST
-
2 pointsthanks for the help everyone, I've found some good videos now and thank you west_ca-(file mod) for the write up, always good to learn the terminology. i've also downloaded the brinly manual. callum
-
2 pointsI bought a cheap 3/4" socket set from harbor freight. All the sockets and extensions are used to drive in bearings. The ratchet is used as a persuader bar or to keep un-savory types out of the garage!
-
2 pointsJust take a punch and tap out the old bearing sleeve...start the new one in from the out side...use a piece of 2 x 4 and tap squarely until it is in...use a punch or arbor to get the bearing to flush with outside of case if it is a cap bearing...and indented about 1/8" if you need to place a seal. Sometimes, the right 1/2" drive socket inverted on an extension will work as an arbor.
-
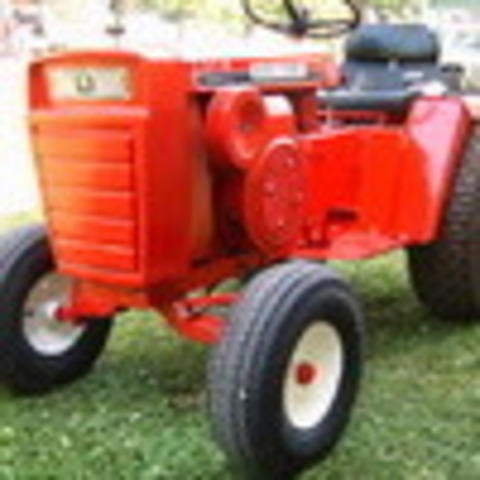
2 pointsI like that look. I did it with my 1054 (front and rears) but went with silver instead of white. Mike........ Final pics on the tractor... Mike............
-
2 pointsSure.
-
2 pointsHello, fellas, Thanks for liking my stacks. This is how I make them, they are good and heavy duty and should last for years. I was welding them together, but lately I figured out how to crimp them together and they look much nicer now, like the one in the last photo. It takes me about 2 hours to build one from scratch and the materials cost me between 10 and 12 bucks, depends on where I can buy stuff. I ask 30 dollars plus shipping ( usually 8 dollars more ) when I sell them through the mail. Thanks again for your interest , much appreciated ! I don't always have them made and on hand, I work in spurts, LOL It's just a hobby, not a job, but I like helping out with your tractors whenever and as soon as I can. I make reproduction Wheel Horse cigarette lighters and hood screws for round hood tractors at times, too. Thanks for looking, I am usually on Facebook at Wheel Horse Junkies more than I'm on Red Square, its much easier to get ahold of me there.
-
2 pointsI thought i would post you sum motivation!!! Pic is from last years M&G
-
1 pointHi All, Just wanted to introduce myself and my newly acquired 1990 Toro Wheel Horse 512-D (well almost, I pick it up in a couple of weeks!) I've been researching these for some time and managed to find one in excellent condition. From what I have read these were only supposed to have been sold in Europe, but apparently they must have also been offered in Australia too. I also noticed it seems to have the seat option with arm rests... not sure if this is a retrofit or an additional option, maybe someone on the forum knows? Anyway looking forward to learning a few things on here and getting to know a few people! Bliksem
-
1 pointAlrighty everyone, Im starting this build log early. Will try to update as soon as possible but the farm is hectic since harvest will be starting in about 3 weeks. I barely have time for anything these days. I bought this raider 12 for my engine overhaul class coming up in October. I will be performing almost everything in the shop at the college. But I will get some things done in these next few weeks when I can. I will put a list on here since I myself am very forgetful lol. But anyways onto some pics to hold you all over and a list of what will be done. Future upgrades and Parts already obtained: -Lug nut conversion -Completely repainting the whole unit flat black besides the hood (will respray copper with a high gloss clear) and maybe do some body work. - Paint a couple accents with Sea Foam Green - Pin stripping on some parts (hood, belt protector panel, rear end behind seat) -Custom old school headlights -LED tail light in place of old tail light -Custom gas tank (If I can find one) -Extend shifter 4-5" with a custom shift knob (thinking about a beer tap or a piston) -Some kind of knob for the high/low shifter -Find some sort of seat -Build a panel for the shifter and a block off plate for the hood where the headlights used to be. (Going with the brushed aluminum look) -Maybe add some LED of CCFL tubes (white) for a little extra lighting - Redo most of the wiring and clean it all up so it looks presentable (May even try to hide the wiring for a cleaner look) -Try to find wider rear wheels or a wider tire with a shorter sidewall (having trouble with this one) -Find new front tires similar to whats on it now Motor wise its not the factory motor. Its a Briggs 8hp. I have been scouring craigslist for a bigger motor but if I cant find one then I will settle with the 8hp. -Completely tear down and clean the whole motor (maybe paint with hi temp black as well) -Rebuild motor (Gaskets and all) -Rebuild or clean carb (Possibly get a newer carb) -Add open air cleaner similar to a cold air intake -Clean and polish exhaust stack And last but not least the lowering/suspension parts -Re do the front end. Its a hack job. I don't like it at all. -Figure out how low I want the rear. Measure, Measure, Measure lol. I am thinking of just doing somewhat of a 3-4" body drop. -Clean up the trans axle (I know it wont be seen but still haha) Been tossing around the idea with a couple friends of somehow incorporating air ride into the suspension. I'm thinking I will either spend way too much on the whole thing or get way too far in over my head and never finish the project. But I will still try to figure out how to fabricate such a crazy idea someday. I plan on keeping this for quite a while so who knows. Never seen a mower period with air ride. Would be pretty cool but I would have to rebuild EVERYTHING to do such a thing. But who knows with me. If I come up with any other mods a long the way I will add them. I will take pics throughout the whole process. For here and for the class so I can make sure I document everything. Thanks for checking out my build log.....If you have any suggestions go ahead and throw them up in here. I'm open to hearing them all. I know this is a lot to read through but I'm also keeping this as a way to remember what I wanted to do! I will also go out to the farm tomorrow and get a bunch of pics of the whole thing for you guys!
-
1 pointIf that's all done with a rattle can then you have mastered the rattle can...LOOKS GREAT! Are the front rims different colors? Mike...........
-
1 pointNot a fan of all white rims.....and Wheel Horse didn't sell a tractor with all white rims if you are ever shooting for an original look. There were black, almond and silver to the best of my knowledge. Mike.....
-
1 pointlol..you don't like it? Should I go all white? All black? I'm all up for opinions...
-
1 pointMichigan , TCU, Mich St, Kent St, Iowa, Maryland, Rutgers, Stanford, Penn St, Nebraska , Indiana , Alabama , FIGHTING IRISH, Purdue, Ohio St.
-
1 point
-
1 pointBrian, I use a right angle grinder with a few different types of wire brushes to remove wheel paint. Don't forget to wear your safety glasses as sometimes a bristle will come loose and be thrown off the brush. You don't want one of those things hitting you in the eye.
-
1 pointThe $18 was for the grommet AND the valve.
-
1 pointI'd like to see a little more about the custom Wheel Horse/Farmall. Maybe some more pictures from various angles, and some info on how the modifications were made. That one just might qualify for an entry in at next year's WHCC show. Featured tractors are Wheel Horse "customs".
-
1 pointThis NOS was an Ebay find for $30.00. I had a heck of a time finding a shop that would turn the crank down for anything near a reasonable price. Finally I was told about a small shop not too far from here. I took the crank in and he wasn't sure he could do one that small on his machine but was willing to give it a shot. He was successful getting it .010 under and I'm good to go.
-
1 pointI recently acquired this trailer. Before i got my hands on it, it looked terrible! But now after sanding and a good raddle can paint job it looks great! My 212 likes to do yard work with it.a
-
1 pointI really like the look of through the hood on the Panzer.
-
1 point23x10.5x12 are stock tires on the 520s, should fit with no modifications! Are you using the 8.5" rims or stock C 7.5" rims? If you kept the narrower rim I could see how it may get close because the tire will "balloon" up in the middle a bit more when inflated. Just took a look at the pics, and you are most likely using the narrow rims! Makes more sense now.
-
1 pointHad a C-141 auto with a loader on it come through here a couple of years ago. It had a similar setup on it. It made operating that tractor and loader so much easier. Not Red neck at all! "Necessity is the Mother of Invention".
-
1 pointDon't have to be Red? That's good, cause our horses are purple and Pink now. The Wife now has "Sparkling" Gramma horse, the black hood, now sparkly hood type. Might have to bring a Speedex too, THAT is red!
-
1 pointYou need these two extension brackets.... and a different index lever (long red lever).
-
1 pointI'm with you STEVASAURUS I will get gasket material and make my own. I don't like the idea of any getting into hydro gear and plugging up a port and mess up a good drive unit.
-
1 pointlooks really good, do those ones tip? callum
-
1 pointI did review this on the web, but I got a axle and hub coming from shuboxlover he did me good but I will have a spare axle and I can try this if I need to.
-
1 point
-
1 pointExceptional piece, If mine I wouldnt touch it. Best of luck and thanks for sharing. Glenn
-
1 pointSprocket, that is excellent back ground. I have been helping Gary look for a 607 for most of this year now and they are rare for finding at shows. Terry M has a 606 that is to die for...he brought it to the LaSueur show last weekend. (pictures of that are in the LaSueur show thread down in shows on the main page). I'm going to try to put a pic of Terry's horse in here.
-
1 pointGuess who got 2 year supporter title! as stated, pictures. As I got it... Sooo, after rolling it in it had progressed to this stage... Also may be able to view the crack in my console for the steering support... Also that steering tube seems squeaky and rather unattached? any fixes or advice? Ill get the photos of sandblast and other assorted photos up here as soon as progress continues.
-
1 pointNow I know you're gonna think this is boring, but this was a project. First, it is a little ornamental piece, the diamond plate filling the hitch that is ... so I couldn't justify cutting a 3 foot wide piece of aluminum for this little job, so I had to cut it out of scraps. Yea, not as easy as it sounds, to have the two pieces match up and fill the space. Then I had to re-route the wiring, drilling and mounting retainers in the frame, etc. It's hot out here, and my heart doesn't like this crap. So there, it's done, it's minor and cheesy but I'm proud I accomplished it.
-
1 pointThanks Bob, to be fair I had fallen behind with updating this, so your not all to blame Thanks Roadapples, I'm going to need good attention to detail as this is how she looked at the end of today! I think this may of had something to do with it
-
1 pointHere is an option to fix that axle. The Wheel Horse RJ, Suburban and the first 3 speed uni-drives had 1/4" roll pins in their axles that held on the axle gears. You could drill a 1/4" hole and get a roll pin for your 1 1/8" axle.
-
1 pointInternet search brinly moldboard plow manual. I found a newer manual but the principal still applies. They made the plows they now how to set them up.
-
1 pointOr open a Photobucket account .
-
1 pointYes I may be wrong..the tranny to engine drive belt is 5/8s, mower belt may be 1/2"
-
1 pointI'm going to make it Scott. For the last 5 years, the 1st Saturday in October is when I break out the Carhartts...I always love that first taste of fall.
-
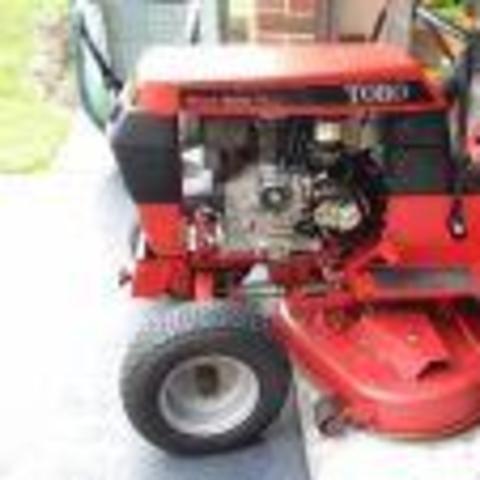
1 pointThe old deck is pretty quiet, just getting soft in one spot so I decided to get this deck and swap a few bits around. For the price, I couldn't turn it down! I'll most likely be selling the old deck since the spindles are good and I don't need it. Someone could. I am glad I put the swept forward axle on, think with the different gauge wheels on it may not fit! Here is what it looks like.


This leaderboard is set to New York/GMT-04:00