
Leaderboard


Popular Content
Showing content with the highest reputation on 09/02/2015 in all areas
-
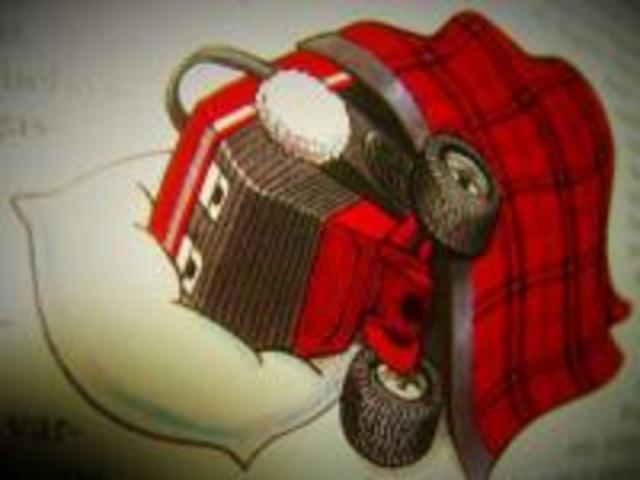
11 pointsHello, fellas, Thanks for liking my stacks. This is how I make them, they are good and heavy duty and should last for years. I was welding them together, but lately I figured out how to crimp them together and they look much nicer now, like the one in the last photo. It takes me about 2 hours to build one from scratch and the materials cost me between 10 and 12 bucks, depends on where I can buy stuff. I ask 30 dollars plus shipping ( usually 8 dollars more ) when I sell them through the mail. Thanks again for your interest , much appreciated ! I don't always have them made and on hand, I work in spurts, LOL It's just a hobby, not a job, but I like helping out with your tractors whenever and as soon as I can. I make reproduction Wheel Horse cigarette lighters and hood screws for round hood tractors at times, too. Thanks for looking, I am usually on Facebook at Wheel Horse Junkies more than I'm on Red Square, its much easier to get ahold of me there.
-
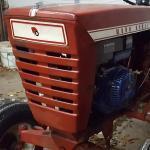
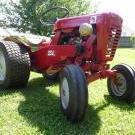
6 pointsWell I found yet a another project to work on. lol. Been wanting a 701 for a couple years now but just never found the right deal on one. Got this one last week. Traded a 48" mower deck for it. Its in pieces but mostly there and not in too bad of shape. Has pretty much all the hard to find parts on it which is a plus. It will probably be on hold for a while but figured I would post it for now. I want to at least finish one tractor before I start on this one but that may change. When I do start on it I will probably just build a rolling chassis and then figure out what all is missing and find them then or sooner if I'm lucky. I did get the engine running yesterday and it ran pretty good but did smoke just a little bit. It will probably be torn down to inspect and at least get a valve job and honed but whatever it needs to be right will be done. Anyways here's a couple pictures of it. Its kind of scattered all over! It had the incorrect wheels on it, but I have a good set that will be used on it.
-
5 pointsI recently acquired this trailer. Before i got my hands on it, it looked terrible! But now after sanding and a good raddle can paint job it looks great! My 212 likes to do yard work with it.a
-
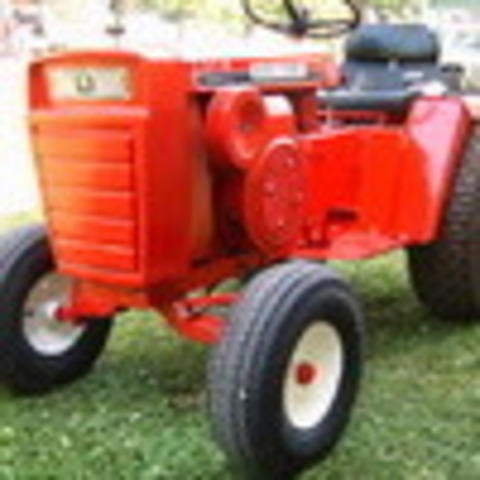
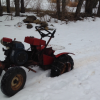
5 pointsHi Craig and Steve and Mike and ever one else. I am getting this from a R/S member here hopefully he will reply. Well here she is. I think next week I will be getting this 607. For the members who are not familiar about this little tractor I have been looking for over 2 years for this one. I still think it`s because of the recoil start? I would say very rare. I have only seen 2 and one was a basket case the other 1 had a line on this already. I think most opted for the 657 which is electric start. I seen lots of those and the same for 65/66`s I had a 606 until this spring but still not a 607. So this completes the series for me. From what I under stand it was dealer stock so it has a few Minor issues like decals and the seat which I have. And the engine is a 7 hp snow blower engine. I will put in the Commando 6 engine and make it look pretty. Sounds like Terry will be getting a phone call soon. This all stared years ago with a 1257 Hence T1257. I will do a complete video of what I will be doing to this tractor. I hope you enjoy the picks.
-
5 pointsThe lil red cart was called to duty today.
-
5 pointsSprocket, that is excellent back ground. I have been helping Gary look for a 607 for most of this year now and they are rare for finding at shows. Terry M has a 606 that is to die for...he brought it to the LaSueur show last weekend. (pictures of that are in the LaSueur show thread down in shows on the main page). I'm going to try to put a pic of Terry's horse in here.
-
5 pointsI've got it right now and if I had to name it I'd call it Frustration - the Tecky carb is what's doing it to me - well the whole engine really... Anyway - the gray caps I got off CL but the chrome caps came with it so those will be leaving when the machine does. I've been applying RuGlyde once a week or so and it's helping. The metal looks to be about 3 different colors and there's honest wear on it. The front bearings are new and I put the wheels on backwards for some reason. I installed a new brake shoe and had intentions of stickers, etc. but working with Gary on this I know he's gonna get 10x what I would from the project so it will be going to him hopefully next week. In the meantime I'm looking for a replacement - something in the medium frame or round nose variety, 32"-36" deck due to storage constraints. I've seen some great machines for sale here but transport from mid-PA to MA looks challenging. Is there a "train" network to help get machines from one state to another? I'm glad you guys like the machine, I do too but I think helping Gary complete a set is a good enough reason for me to move it along.
-
5 pointsI thought i would post you sum motivation!!! Pic is from last years M&G
-
4 pointsCalendar shot right there!
-
4 pointsP.S. > they sound as good as, if not better than, any store bought muffler, they are not loud - about the same as a stock one. I've been painting them with High Temp Rustoleum stove and grille paint and it seems to be holding up good, otherwise they would be just bare metal and would rust if left out in the damp. They are standard 1 inch pipe threads, the coupler can be changed that is on the bottom if you need to reduce it up or down to another size by getting another coupler at your hardware store. I only make them this one size.
-
3 pointsYeah boy, I'm gonna do the tractor parade... wouldn't miss it...too much fun cruisin' around town with all the big guys. Been the only there for the past couple years.
-
3 pointsPot Kettle Steve... And its all your fault!
-
3 pointsReal nice job there Ed! I really like that cart never saw one like that before looks just like a wheel barrow. It would be cool if it had quick attach handles so it could serve as a tow behind like it is and also a wheel barrow?
-
3 pointsYou about put me to sleep Brrly1,
-
2 pointsBeen working on my "jalopy" pretty hard the last couple weeks, It was my 657 that I flipped the frame upside down. It is still all original WH, except the sheet metal and the seat. Same rear end, frame, front axle, steering and engine. It's a centrifugal clutch now and the belt is routed under the floor pan. It's really working great, took it for a 4 mile ride the other night up along the back road by the creek. It's name is "Old Shep", lol It looks more and more like a little truck every day , so I'm building a stake body bed on the back of it now.
-
2 pointsSure.
-
2 pointsIll have to do that for sure then! I have a couple of real old ones out in the shed! Thanks for the idea!!
-
2 pointsThat's awesome Gary!! I'm sure the rim color and the hubcaps aren't original but they're cool as heck. Mike.........
-
2 pointsI went to the Files and did a search for Chart. 33 of them will come up and I just go through them to find the one I want. This belt chart in many cases requires a long model number to find the correct one but the later models have the model name listed as well. The whole chart is listed by model year. Garry
-
2 pointsI like your idea Paul. I may have to consider that.
-
2 pointsBuckrancher (Brian) used Yamabond #8 (??) as a gasket fix for one of his 2 piece gas tanks on a round hood in a Restoration thread. Personally, I would cut my own gasket for the tranny. It is too easy and the material is only $6...the Yamabond is probably $25 or more for a tube of it. Autozone carries Karo-Pak gasket material...it is 1' x 3' x 1/32"...I've used this in about 15 transmissions, with no gasket sealer, and have not had a leak. You only need to cut out the inside and punch the holes, you can trim the outside after you get it together with a razor knife. ACE sells the punch, if you want, or you could use the right size shell casing or the razor knife to do the holes. I too would be concerned about sealer getting loose on the inside of a hydro. I would think TORO still has the gaskets for about $6.
-
2 pointsCareful. As I said I have never done this repair but triple check about using rtv or any other liquid sealer. I can't remember what the material was but somebody was talking about their hydro being gummed up with something they had used as a sealer.
-
2 pointsAfter the work I did on it tonight it is going to sound much better..... You will have to do another blow by... Pretty darn clean in there. It is in fact the original engine, I checked the numbers.
-
2 pointsIt's a push in grommet. It is probably cracked and hard. New ones are cheap. Drain the tank, pull out the old one with a tug and a twist. When installing the new one, i always lubricate it with a touch of grease.
-
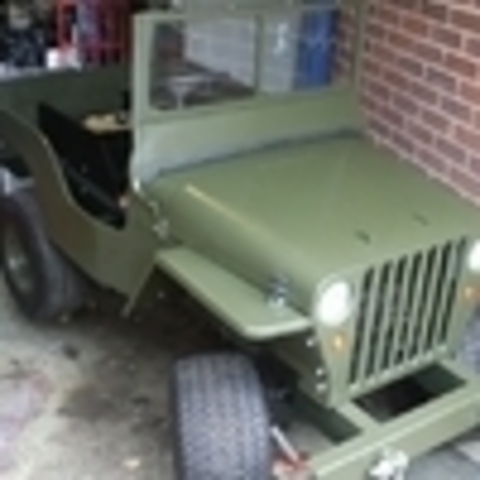
1 pointHi I'm Tim. I purchased my c105 about two years ago as a non runner, eBay - I paid £200 for the tractor, a very tired 36 inch deck and a nice little trailer and a really nice rotivator. The deck was quite out of shape although un-mollested without any repairs on it. Unfortunately un-salvageable though, it must of taken a hell of a strike at some stage. The tractor was in good shape overall, the plastic rear fender was split but the machine had clearly been garaged and we'll looked after all its life, one owner from new before me... A little carb cleaning, a new battery, fresh fuel and a squirt of cold start soon had it firing. The engine has clearly done many hours work and knocks a little, quite smokey until really hot too but it's fine really. I soon purchased a B series machine as a doner for its fender and cutting deck. Both of which were easily adapted to fit. I'll soon be selling what's left of the B series... My C105 has never use of the low ratio gears, aparantly they went in the 90s according to the guy I bought it from, I guess that explains the good condition of the rotivator then! In spring this year I started her up and the gearbox immediately seized..... uh ho I thought. I opened up the transmission on the workbench and found many bits of the low ratio cog everywhere. Cleaned it all out and put it back together and she lives on..... whines a little but functional. I will be fully refurbing the machine in time but I want a good transmission first as I'd like to use that rotivator ( 1st in high is too fast for it). I have already found this forum invaluable so thought it was time to contribute. ..
-
1 pointI'm with you STEVASAURUS I will get gasket material and make my own. I don't like the idea of any getting into hydro gear and plugging up a port and mess up a good drive unit.
-
1 pointOK......im being patient...cat bag is torn open.... .these look as good as factory could have done it..... Lets see.. two now... two at the next big show.. ok...time ta send a e-mail,,,
-
1 pointI have put a loader and a deck on a 12 hp. 312 A and it handled it just fine. and it had a 48 in deck, The 20hp Onan will do great as far as power. I even put a loader on an electro 12 and run a till also All that being said, you still have to know the tractor limitations as far as frame strength, and spindle strength. and as with any loader on a garden tractor, never steer it when it's sitting still with a load in the bucket, wait till it moving. And if you have a D series make sure your thrust bearing under your front axles are there and in good condition. Day 6, everything I thought was right yesterday turned out not to be . So after some rework on the loader under carriage, to the tune of 4hrs. I got the deck on the tractor and it works with the loader frame, so back to more grinding and welding tomorrow.
-
1 pointHam and eggers. That's what the crazy Viking fans call us Packer fans!
-
1 point@Lars, why dont you have a go at guessing the hand egg game's
-
1 pointOk glad to hear your aware of Majestic theyre one of the first places I check for stuff now. The oem belts are for sure pricy and considering your just adding it to your backup supply I see why you wanted to save some dough. Havent thought much about my snow gear yet expanding my garage is on the horizon at the moment, going from 24x20 now to 24x40. I have a mustang, 4 running wheel horses plus lots of attachments and parts, 2 snowmobiles, and all my other crap so saying im in need for more room is and understatement. Once that's complete I will go through everything and get myself ready. Need to be ready before the month of November as im sure you remember last year. I also picked up a plow for this year and an actual wheel horse tall chute from Cutlas(Shawn). Im still going to keep the chute I made and hopefully do some side by side comparisons. I also will be running the blower with a 417 this year as compared to the 312 I had last year so hopefully ill be able to chuck that snow even further!! Another year anything like last ill be able to test all of my equipment many times over.
-
1 pointthats why I say don't gob it on there, if you get to much, when you put it back together, it squeezes some of the sealant to the inside then eventually comes off in there, witch really won't hurt it anyway, the oil in it wouldn't allow it to harden or hurt anything, unless it's just ALOT , like a whole tube or something, lol, then I could see it gumming something up. But anyway, iwouldjust go with regular gasket material, cut to to fit and wah-la
-
1 pointThat's funny Ed because as soon as I finished my post I went to craigslist and searched 'wheel barrow' thinking if I could find a good used one I could go the opposite way and put a hitch style mount on it. I think the 2 wheelers are harder to come by though and I don't think converting a 1 wheeler to a tow behind would work very well
-
1 pointI like the looks of the lights and a back rest would also look good. Your steering wheel looks to be in good condition too!
-
1 pointis this the grommet you need? http://www.oreillyauto.com/site/c/detail/PRI0/707461.oap?ck=Search_7-07461_-1_2126&keyword=7-07461
-
1 pointGlenn while you were on ebay did you check for any Toro belts? I have bought quite a few of brand new toro belts off of ebay now. I have dealt with seller majestichardware quite a few times they seem to always have the belts ive been looking for along with the best price and their service has always been great. The local used to be wheel horse dealer can still get parts but mainly sources aftermarket stuff through stens. I got a few of the stens belts from them also and they have worked just fine but I haven't had any of my belts nearly long enough to tell if they compare longevity wise. Those belts are about the same money of the Toro ones I find on ebay so I stick to buying the oem Toro belts now.
-
1 pointWhat is taking you so long?? Don't you have a boat to restore or an outboard motor to rebuild too?
-
1 pointI have a pic of when I first took it apart, I can't guarantee that it's correct either, but it's how it was when I took it apart!
-
1 pointWhat I want to know is where is this fuse slot switching fairy going to strike next?
-
1 pointA warm welcome. It's so cool to see Wheel Horse crazies from all over the world. I didn't have a clue Australia had them.
-
1 pointYep , you're sick . But I like it !
-
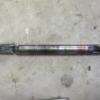
1 pointHere is an option to fix that axle. The Wheel Horse RJ, Suburban and the first 3 speed uni-drives had 1/4" roll pins in their axles that held on the axle gears. You could drill a 1/4" hole and get a roll pin for your 1 1/8" axle.
-
1 pointBob, great minds really do think alike! I did the exact same thing to my Suburban and could not have been more pleased with it. The bed liner holds up as you would expect and should give the old girl another 50 years of good service.
-
1 pointAll the Kohler 8 thru 16 hp carburetor bowls are the same. There should be a round seal to go into the groove, and an anti-splash seal to go over that. All carburetor kits whether for Carter or Walbro carbs are the same. Just ask your supplier for a standard carburetor kit. They include both seals. And yes, a sooty plug usually indicates a "rich" condition.
-
1 pointThanks for the comments guys, I Have just serviced and cleaned up a partly "red" piece of kit that I purchased for use at work. I have also been doing the garden for Mrs rog, raised beds with a gap big enough to drive a wheelhorse through The next photo's will be of more work on the red one with a bit of luck.
-
1 pointSo, how long has it been back there?
-
1 pointI did an 18 HP Vanguard in a C-120 It's a tight fit. I didn't buy a kit as I did it in 1990 with a 16 HP and up graded to the 18 in 2010. The 18 and the 23 are the same size. In a 416 you shouldn't have any problems as there is a lot more room.. I'm not sure how high your power take off shaft is on your engine. I had to raise the engine 7/8" to get mine to get it to the same height as the 12 Kohler. Buy the engine with the wiring and switch already on the engine and with a 1 1/8" shaft you don't really need a kit If your good a doing a little metal work.
-
1 pointJust take time, get help. Its quite hard to lift a Magnum 18 by yourself to a counter top. them key ways are sharp! needles to say i didn't complete the task alone
-
1 pointi'm still in Niangua MO hoarding wheel horses
-
1 pointtwo posts to add to the blog. first post: TT - you da man anyone know the part number of the collar? I see a collar in the parts diagram, but it does not look like a big piece like the one I broke. Next post is going to be how I am documenting the process so I can remember how to put back together.


.JPG.9f2ecb26065c66527b0730084ab7fc7a.thumb.jpg.7dc8a04d9a53d44ee2b23f26ee94496f.jpg)


This leaderboard is set to New York/GMT-04:00