
Leaderboard


Popular Content
Showing content with the highest reputation on 08/21/2015 in all areas
-
5 pointsI live in a small (700 population) community and this weekend (Friday & Saturday) is a "Town Wide" yard sale. There are about 75-80 different sales going on and folks sent in a list of goodies they would be selling so a map could be made for "out of towners". I saw a drill press listed and was at the guys house before sun-up this morning. I got it or $50 and I know it isn't the world best, but I feel I got a decent deal. I know how everyone wants photos, so here is my new drill press..Oh, the rust is only surface rust and comes off with a little WD-40 and fine grit sand-paper.
-
3 pointsI am about ready to outshop the Electro 16. This is part of my project to align the best power and implements and most importantly not have to change implements ever again or have to add subtract wheel weights and chains.!!! ( may need some more wheel weights) The alignment I am looking at is as follows Snow Plow 1 Charger 12 Hydro for speed and lifting blade limited slip transaxle (amazing ability to move snow) Snow Plow 2 C120-8 My back up and used by my neighbor (saves me having to clear his driveway) Blower Electro 16 Was an electro 12 but with manual PTO need the HP for the blower, i prefer manual PTO for a blower to the sudden/violent engagement of electric Grader Blade Charger 10 Waiting addition of hydro lift Tiller C-81-8 Repowered with Magnum 12 can't beat 8 speed for tilling Sweepster C-175 Well used Series 1 motor from a JD317 smokes on start up but for only a couple hours of use each year she will last.... 48" Deck 418A With foot speed control 48" deck C-175-8 Some rough stuff 8 speed has advantages and is a good back up Sickle Bar 753 Converted to 8 speed to better utilize the sickle Trailer hitch 310-8 2" reciever hitch for respotting big trailers has 8" fronts and new ags on the rear also hauls lawn sweeper FEL D200 Also has 5ft finish mower on the 3 point but rarely used for that Maintenance Float molld board plow C141-8 Haven't used the mold board yet May need ags for the C141 Duty Tractor L107 My favorite --hauls her wagon in the summer coal in the winter. Now has studs to make swapping the summer ags for the winter turf with chains easier Restore project Commando 8 Always seems to be deferred
-
3 pointsThe other stuff is not for your 400 tractor
-
2 pointsCopy a picture into Paintbrush and play with it a little...save it and then copy and paste. I know it is not that easy, but pretty close.
-
2 pointsWith all this farm truck posts going on I thought I would show some final pics of my truck. Was waiting to install the repop front hood emblem and rear reverse light to call it done. Only other thing I "may" do is to have it clear coated but for sure not this year. Ken and I will be dragging our old vintage boats to the next outboard meet in September behind these.
-
2 pointsIf I were a betting person... I'd say you'll find the number 1-7041 or 1-7241 right here, making it a 69 Charger 10 or Charger 12. More likely the 10. (Tecumseh HH-100 originally) So do you suppose this was "cruise control?"
-
2 pointsBob, I think you may be closer to the truth than I am. I was basing it on the 8 HP Brigs, but they used a starter generator at that time. Sooooooo, hopefully there will be a ghost image of the decal on the steering riser or a transmission ID tag that will tell the truth.
-
2 pointsAlways glad to see a new member with a project. Based on what I see my guess would be a 1971 800 Special. If we knew what transmission the tractor has we may be able to nail it down. Of course we don't know what changes were made by previous owners, but we can do the best detective work on our little red . As you begin your project please feel free to ask questions; now and then we actually give correct answers! to
-
2 pointsHey John....You could make some post-holes and sell them at the show.
-
2 pointsCome on, real guys don't read manuals or instructions!
-
2 pointsAbsolutely normal. From my 1986 300 & 400 series operator's manual: "Never attempt to shift gears with unit in motion. Severe internal transmission damage may result".
-
2 pointsSpent 3.5 hrs. down at the DMV yesterday after work registering the truck. What a nightmare. Thank God for Smart Phones! The time went by pretty quick as I was able to kill the time browsing Craigslist...
-
2 pointsWelcome! That will be an excellent first tractor if you get it. Easy to fix, the 8 speeds (or 6, same transmission different name) are indestructable, and worst case scenario if you have trouble with the Tecumseh you can swap in an easy to find kohler. Though there are MANY people on here than run them for a long time with no trouble. The 10 Hp can do a lot of work and is easy on gas!
-
2 pointsI've had too many other things to do recently which has meant only occasional progress with this project but here's the update. Painted the shell and was pleased with the way it looks in terms of having rescued all of the detail like the strengthening ribs. Installed the spindles and blades only to discover that one of the blades fouled on the fiberglass where it was too thick in one place so it had to be ground back a little. The geometry of this particular deck is unusual in that the clearance between blade and original metal shell was always tight at this point. Also ground flat areas round the holes drilled through to mount the center pulley and tensioner so that the bolt heads would sit flush with the shell. It took a while to mount all the bits and pieces - surprising how many bits there are on this little deck as it hangs from four mounting points on the tractor, and has two adjustable anti-scalp wheels. Since that photo was taken I've painted the underside of the deck. Why you ask? Well being fiberglass now it really doesn't need painting but aesthetically to my mind it should be red underneath even if you don't see it and its going to get filthy. Hmm, I expect it will stand up to standard use pretty well otherwise I wouldn't have put all this time and effort into it. The previous fiberglass job hadn't been done that well by the PO but it appeared to have served for many years like that before I got it. Obviously if its going to be used on rough ground with stones being whacked against it the fiberglass will get worn away round the sides over time but I'll be cutting a lawn so it shouldn't be a significant issue. Wish I was but I've had other more pressing things to do. Very close now though but it will have to wait for a couple of weeks till I get back from vacation.I'm determined to mow with the A-800 and this deck before the end of the season! Andy
-
2 pointsCool was to show it John. You're right on the no parking brake Jim. You've got some pieces there for a little later tractor deck. The two flat plates and the bracket to the right of the pedal are an early tach-a-matic and the gizmo right and center as well as the pieces just below it are for a late60's mower deck. The little piece just below the brake band rod is the catch for the foot PTO, again, a bit later in the 60's.
-
2 pointsfor $250 you should be all over that like Oprah on a baked ham! Looks like a well kept tractor I believe that's an old HH100 engine. Solid engine, poor carburetors. Buy a brand new carb off ebay and enjoy!
-
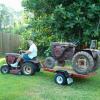
2 pointsLoaded up and ready to go and plan to be there between 6 and 7am. Weather looks real good so it should be a pretty good turnout. I'm bringing a 401 to cruise around on, some Homelite 2 stroke powered tools to display and the General post hole digger.
-
1 pointThis thread deals with lack of spark or ignition issues with the P216, P218 and P220 engines used in the late 80s and all 90s tractors originally equipped with the Onan. this would be your 3,4,500 series tractors that typically look like the one below with the Onan twin engine...... Parts of the manuals you will need to diagnose the issue........ testing of these components is also in the demystification guide as well..... typical engine wiring diagram..... Aside from any other issues, the coil and/or module are usually the culprits IF anything needs replacing. I say that IF, because not always are the ignition components faulty. it can be a simple wiring or terminal issue not letting 12 volts to the coil. if any components need replacing here is the part numbers you will need.... Coil Toro Part # 71-6000 Onan Part #166-0761(old part #) superseded by part #541-0522 kit (includes a mounting bracket and 166-0820 coil to mount in the oem location) if you wanted to buy new. If looking for used or nos use the 166-0761 or if you don't care about using the oem looking coil, a 3 ohm Harley coil can be substituted. Module. Toro Part #71-6380, NN10444 (old number) Onan Part #166-0785 (insulator if you need to replace it is 166-0786) rarely do the rotor and condenser need replacing, but if you are after their part numbers here they are...... Rotor Toro Part #71-6010 Onan Part #166-0767 Condenser Toro Part #59-1180 Onan Part #312-0256 ​Places these parts can be purchased (shop around the prices vary big time) http://www.onanparts.com Your Local Toro dealer Ebay (harley coil) check with Boomer a recent new member on the forum as well. I've heard his prices are good. http://www.wheelhorseforum.com/user/13637-boomers-influence/ I just threw this together fairly quickly, i would like a few of you guys out there to critique or comment on what i have here. maybe it need some additional input, maybe some stuff needs changing. i put this together in the hopes of helping some new to the world of Onan get one with ignition issues hopefully up and running.
-
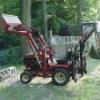
1 pointThis horse was found upside down in a dumpster by my friend(tunaslayet). He brought the oil-covered 312-8 to my house with a crushed hood, broken steering wheel, and crushed center console. The hour meter read around 1000 hours, but the engine ran with little effort and the transmission shifted smoothly. I quickly began disassembling the horse and fixing/replacing any damaged parts. Sourcing a steering wheel proved to be a challenge, so i retrofitted a boat steering wheel which came out great and was very inexpensive. I cleaned up and repainted the entire tractor and freshened it up with throwback redo-your-horse stickers and fresh turfsavers. I initially began to set this up as the mower that it once was, but shifted my focus to creating a front end loader after my friends father hooked me up with a great selection of hydraulic equipment in exchange for a custom cabinet. I quickly found a loader on craigslist in Maine. The loader was properly sized, in great shape, missing most of the hydraulic components, and well built from PF engineering plans. I quickly picked up the required steel and began fabricating. Here is the 312-8 the day I got it. The loader on the day I bought it in ME. It is nested with a Kwikway that my friend (tunaslayet) purchased on the same day. We both sourced loaders in ME and took the road trip from Southeastern MA to pick them up. Very exciting weekend. Initial mock up of the loader on the 312. I sacrificed the attach-a-matic and welded it directly to the frame. I decided to modify the support trusses to allow for better PTO clearance and maintainability. I added a slight bend and welded a support gusset to add strength. The PTO and belts are completely serviceable without removing any components from the loader. The back of the frame is supported by 3/8-16 carriage bolts around the rear axle. The weight box is small, but designed to tightly hold a 220lbs stack of exercise cable weights. The weight box alone adds another 40lbs. Wheel weights will soon be added. Here are all of the loader parts painted and ready for assembly. Upgraded to a 520 swept forward front axle with gear reduction steering (Thanks Dennis!). I used trailer hubs instead of the 520 rims. After countless hours of wire-wheeling, grinding, welding, painting, and day-dreaming, my re-rehabilitated 312 is ready to do work for me. I just had to lift something for fun, so i threw my troybilt commercial walk behind mower in the bucket and took it for a ride. The loader lifted the mower with no effort at all.. I may try to lift my 416-8 for fun. Thanks everyone for the help. -Justin
-
1 pointI thought I would share this for anyone looking to build a hitch for towing their trailers around the house. I searched on the forum for ideas for a hitch and saw some nicely built one but finally came up with a design of my own, fabricated it, mounted it and it works great. It's bolted to the axles as most others but decided to go an extra step and add support braces. I attached them to the original hitch retaining pin to relieve some stress on the axle tubes and for additional support and strength for moving my 7X14 around the house.
-
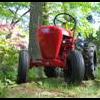
1 pointHere it is...pics to follow...Wheel Horse has got to be the best "little" tractor in the world at 50+ with no major rebuild it puts the new tractors on the market to shame (no the new tractors should be ashamed of themselves...their makers too...mere toys). She maintained 7 acres of lawn, snow, gardens and anything you could throw at her for 50 years ****50 YEARS**** once more ****50 yes 50 years**** without a grunt or complaint at a third less hp than the new offerings. For Pete's sake my dad drug a milk tanker semi to the gas station after it failed How Bad A$$ is that. Today even though it could belong to AARP this little horse will leave you in awe.
-
1 pointIts fine I liked answering it since I'm new and im a kid so it felt good to help somebody haha
-
1 pointPlease do stop. These are not synchro trannys. I hear you can damage the low/high selector also, when shifting while moving.
-
1 point
-
1 pointMaybe lookin' for that camper for the bed
-
1 pointI'm thinking maybe a 68 Charger. I doubt that the motor indicates anything.
-
1 pointThank You very much!
-
1 pointSounds like you are on your way to becoming a proud owner, nice find. to
-
1 pointgot one pic to post...deck is in very good shape!!!!!
-
1 pointthe insulator is most certainly a thermal barrier and not an electrical insulator. The mounting bolts for the ignition module provide the ground connection for the module. The insulator is most likely sandwiched to the module to limit the thermal transfer from the engine block / oil pan into the module body. The flywheel provides some level of heat relief to the module and the insulator delays any "hot soak" when the engine is shut down. Further proof the insulator is used to prevent heat transfer INTO the module is the lack of any silicon grease on the module / insulator. Silicon grease would indicate the designer was interested in extracting heat FROM THE MODULE as in the example given for the GM ignition module.
-
1 pointWith the manuals you need to come to a complete stop from my experience
-
1 pointThe Eaton manual says 5 quarts, however that assumes that the pump and the lines to the lift cylinder are drained as well. The only way to get all the oil out is to crack open the lines and vent the system. I changed mine recently and chose not to do this. I just drained the transaxle and replaced the filter. It took about 3.5 quarts when I refilled it. I then started it and let it run a couple of minutes to fill the filter then checked the level with the dipstick. It needed about 2 more ounces to bring it up to the correct level.
-
1 pointGive it a try you can all ways sell it later. Not a bad price. Enjoy the ride.
-
1 pointI have a C-114 automatic that came from the factory with a c-114 auto decal on one side of the hood and a c-114-8 decal on the other side of the hood. I'm guessing it was built on a hung over Monday or a "I can't wait to get outa here Friday"
-
1 pointSeems like you have every situation covered except.....riding in a parade!! You'll probably have to go out and find another machine for parade duty.. . Mike.........
-
1 pointLook under the dash panel, on the tower, there should be an ID plate there (I think). Maybe 855? Sheet metal looks pretty straight but I don't think the engine is right. Someone here will set us straight shortly.
-
1 pointDefinitely get it. Don'sweat the deck engagement thing. Take lots of pics and ask away with the questions. We all love to help out. Oprah on a baked ham..........
-
1 point...dry, right up until that ol' tub sinks. Papa's right, them old Chevy's rule Ken.
-
1 pointWelcome aboard . I love my 72 , though I don't get as much seat time as I'd like .
-
1 pointIf it starts and runs buy it
-
1 pointWhat size chain is that on the ground, must be at least a 160, that is one big bicycle it fits. That will make a good ride around unit for the big flea markets.
-
1 pointhttp://www.wheelhorseforum.com/store/
-
1 pointThat ugly cart is awesome. A friend of mine had a green one like that for sale at our local steam show. He wanted 60 bucks for it and I offered $25. He said he had that much in 1 tire. Yeah right, He pulled it out of the dump. He aint foolin me! He ended up loading it back in his truck! They are nice to haul goodies in so you don't bang up your nice cart!
-
1 pointNothing like asking someone who's full of hot air to talk! Anyway there's these 3 bears at the Iowa Illinois game see. Steve, John and Duke. They emptied out the concession stand and well .... oh never mind. More pics as promised. After the first wash.
-
1 pointSparky, you had to go and ask Mike for a story; when will you ever learn? But, Mike had a real good story so I guess it's OK. Thanks Mike.
-
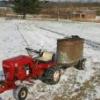
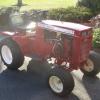
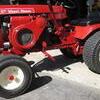
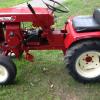
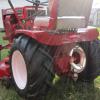
1 pointYou want a story? Ok Once upon a time there were 3 bears. No wait a minute! I saw this tractor on CL. Decent price. He said it was a 13 HP Which didn't make sense. Crappy pic with snow on the ground. Coutn't even tell if it was a stick or hydro. Called and left message. Older Guy calls me back just as I'm leaving work Monday. 15 miles away so I go look at it. Ad said mint condition but it had sat under a cover for quite some time. The hood is stained and it's into the paint. Deck has 2 small holes that he didn't see untill I got there. Also came with an older snowblade. I beat him up some and we strike a deal in the nice sunshine iI do not have ramps or the room in my truck for it so I have to come back the next day with the trailer. Tues comes and I'm driving into a severe thunderstorm. I see lightning bolts like in the B.C. Comics ZOT!!!!!! I get there just as the rain lets up enough to not drown pay him and take off the deck as the next wave hits. So I'm allready wet so load up and go! it's a 93 314-8 but it wasn't sold until 98. It has 306 hrs. On it and man was it dirty from sitting in a dirt drivway under that cover. I don't know what my plan will be. I need to clean it up and go through it. I'm more of an old school 60's and 70's WH guy. If it was a hydro with an 1100 I'd definetly keep it but somthing has to go either this or Ezra. At least my cab will fit this tractor like it should Got it's first bath tonight. I think it will need a couple more. I get another pic soon. Now how's that for a story? Is anyone asleep?
-
1 pointHere you go. The dealer (Weingartz) verified over the phone that the tractor was purchased from them with that configuration. They could not verify if they changed the engine for the customer, or if the tractor came that was from the factory. Their records listed the tractor as a B-100 Automatic, 12HP.
-
1 pointWho's that peering thru my back window?
-
1 pointBeen going to show for years but this is the first time I will be bringing stuff plan to bring a couple wheelhorses and a couple full size john deeres but don't know what I need to do any help would be appreciated
-
1 pointFriday afternoon: decided to strip the remaining parts from the scrap deck then got sidetracked having discovered one spindle was good but the other had seized since I got the deck three years ago. Pressed the bearing out - hmm, doubt you can get these now, its the sealed unit with double D shafts. Managed to get some penetrating oil down into it (same way the wet got in where the seal had worn on the rusted shaft). Eventually got it turning again but its too rough to use and there's play in the shaft - so scrap value only. The cast casing though came in handy when I did finally get round to cutting the matting late in the day with shadows getting long. For those not familiar with using this stuff I thought I'd cover the next stages in more detail. I began by cutting pieces that would overlap each other. Working my way round... Until the whole deck shell had been covered once. Then repeating the process but the pieces were staggered from the first pass so that the overlaps didn't correspond. Stopped at this point and left the matting in the deck shell like this overnight. Day 2: first task was to make a rough sketch plan of the jigsaw as I removed the pieces in reverse order and put them on a pile. Then sanded off the rough bits of the filler paste before masking off.- in the pic below the hinge for the exit flap that a PO had added to the deck needed masking off. Not sure why it was added - to turn it into a recycler perhaps or maybe just to reduce grass being flung over the patio, but whatever the reason I decided it was worth keeping to give it a try. I can always cut it off later if it really isn't needed. Also masked off the mounting holes in the center of the deck and a couple of rust perforations in the sides of the shell before mixing the first batch of resin and catalyst in a clean plastic bucket (below top right) The first step was to coat the shell in resin using a roller with disposable head until the whole underside of the shell was covered. Until the whole shell had been covered. The table I was working on was covered with cardboard - this is a messy business and the card is useful as a surface for 'wetting out' the matting before applying it. There are special metal rollers specifically for the job and I had some to hand but ended up using the paint roller for most of the work when applying the matting. (The special metal rollers are either ribbed along their length or look as though they're made from washers spaced apart by smaller washers - indeed some are actually made just like that.) First layer of matting applied and rolled out to remove any trapped air pockets and work the resin well into the fibers. At this point the resin in the bucket started to set so a second batch was needed. Starting with a clean new bucket is important in that the solidified resin wont stick so you can turn the bucket over and knock it out before using it again to mix a new batch. Here the second layer has been applied together with an additional layer round the edge. The deck was getting quite warm by now from the heat generated as the resin cures which in turn lessens the work time you get as heat speeds up the chemical reaction. It had set perhaps ten minutes after the photo was taken but I left it for an hour or so to cool down and harden fully before the final step. Having cut must of the excess off using a cutting disk in an angle grinder it was finished with with a flap disk in the same. This makes a lot of dust and a mask is a must here. PO used red pigment in the resin he used which is a nice touch in that the underside of the shell wouldn't require painting. The down side is that without pigment you can sort of see through it and pick out any areas which need an extra bit of matting - there were a couple of these thin areas despite my mapping plan which I was able to correct before the resin went off. Anyway, hopefully Sunday will see the spindles removed - they've got to come off before priming the top of the deck and it will be the best one from this deck (one has a bit of a grumble as you spin it) together with the good one from the scrap deck that will end up being used. To be continued.......

.JPG.9f2ecb26065c66527b0730084ab7fc7a.thumb.jpg.7dc8a04d9a53d44ee2b23f26ee94496f.jpg)












This leaderboard is set to New York/GMT-04:00