
Leaderboard


Popular Content
Showing content with the highest reputation on 08/06/2015 in all areas
-
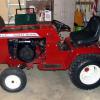
11 pointsHi all, Picked this one up a few weeks ago but haven't gotten a chance to post it yet. Found this one for sale on the side of the road about 10 miles from home! Its a 550 and I really like the original paint on it. I'm planning to go through the motor and trans on this one and just leave the paint as-is. Looks like it has the original engine too, it has a h60 tag on the shroud but has the indent in the back side of the block like I've seen on lausons. I'm also thinking about repainting the wheels on it, but still haven't decided yet. I will probably see how they look after being pressure washed before deciding to paint or not. Anyways, heres a couple of pictures. Jake
-
9 pointsThis horse was found upside down in a dumpster by my friend(tunaslayet). He brought the oil-covered 312-8 to my house with a crushed hood, broken steering wheel, and crushed center console. The hour meter read around 1000 hours, but the engine ran with little effort and the transmission shifted smoothly. I quickly began disassembling the horse and fixing/replacing any damaged parts. Sourcing a steering wheel proved to be a challenge, so i retrofitted a boat steering wheel which came out great and was very inexpensive. I cleaned up and repainted the entire tractor and freshened it up with throwback redo-your-horse stickers and fresh turfsavers. I initially began to set this up as the mower that it once was, but shifted my focus to creating a front end loader after my friends father hooked me up with a great selection of hydraulic equipment in exchange for a custom cabinet. I quickly found a loader on craigslist in Maine. The loader was properly sized, in great shape, missing most of the hydraulic components, and well built from PF engineering plans. I quickly picked up the required steel and began fabricating. Here is the 312-8 the day I got it. The loader on the day I bought it in ME. It is nested with a Kwikway that my friend (tunaslayet) purchased on the same day. We both sourced loaders in ME and took the road trip from Southeastern MA to pick them up. Very exciting weekend. Initial mock up of the loader on the 312. I sacrificed the attach-a-matic and welded it directly to the frame. I decided to modify the support trusses to allow for better PTO clearance and maintainability. I added a slight bend and welded a support gusset to add strength. The PTO and belts are completely serviceable without removing any components from the loader. The back of the frame is supported by 3/8-16 carriage bolts around the rear axle. The weight box is small, but designed to tightly hold a 220lbs stack of exercise cable weights. The weight box alone adds another 40lbs. Wheel weights will soon be added. Here are all of the loader parts painted and ready for assembly. Upgraded to a 520 swept forward front axle with gear reduction steering (Thanks Dennis!). I used trailer hubs instead of the 520 rims. After countless hours of wire-wheeling, grinding, welding, painting, and day-dreaming, my re-rehabilitated 312 is ready to do work for me. I just had to lift something for fun, so i threw my troybilt commercial walk behind mower in the bucket and took it for a ride. The loader lifted the mower with no effort at all.. I may try to lift my 416-8 for fun. Thanks everyone for the help. -Justin
-
7 pointsThe 875 was busy today.... mowing trails and hauling apples for the deer,deere, dear.
-
4 pointsI'm willing to bet those apples would make some good cider.
-
4 pointscheck fuel flow from tank first remove incoming line from fuel pump and hold it down below the frame gas should pour out if not clean tank filter and replace inline filter and try again be sure gas tank is half full brian
-
4 pointsHey Joe from Feasterville, See if this helps: http://www.wheelhorseforum.com/topic/16582-help-my-shift-lever-pulled-out/ And
-
4 pointsI like them both just as much. I'm lucky and have good access to tools to do body work so that probably is why I don't mind doing it, I like going through the transmissions and motors on my tractors too, guess I would say I like both of them pretty much the same.
-
4 pointsGood poll. I hate body work. I can never leave it alone, I can't stop playing with it, I always have to touch it before it is dry, and I hate sanding. I would rather change out a kitchen faucet and I hate plumbing. My blood pressure is up just typing this response.
-
3 pointsNice photos, and I vote for a fresh, hot piece of apple pie with a dip of vanilla ice cream....Now I made myself hungry!
-
3 pointsIronically, I have bought and sold off Craigslist many times...from vehicles to boats, tires, and hammocks. Never once have I experienced anything "weird" as a buyer, rather it is usually someone who clearly doesn't have the same level of OCD that I have. For the most part, everything has been as promised and spot on. As a seller, however, I have seen it all. Quick example is when I tried to list a 1988 Ford Ranger XLT super cab 4x4 for $600. The truck was a two owner, had some typical rust over the rear wheel wells, but ran and drove extremely well...$600. Long story short, I got trade offers that I could hardly believe. One local guy...get this...offered me three chickens and a porta potti for this vehicle. I politely declined and told him that I really enjoy the chicken that Kroger and Costco sell, and that I live in KY and we received indoor plumbing and shoes like two months ago. Sigh...this world is something else.
-
3 pointsSteve, I'm with you and Bob on this one, I'm not very good at body work and hate sanding plus I'm just not set up to paint and that makes it a real hassle to get anything done.
-
2 pointsGreat weather just a tick windy. My friend Butch was here today with his 1067. Couldn't get a good pic of the site because once again my nemesis, the local IH club, parked a truck and trailer right in front of my canopy. Had a handicap sticker in the window and an old guy drove it in. didn't have the heart to ask him to move it so we used the trailer for a bench! Lot's of pics Pic of the site. Couldn't get Butch's tractor in it because of the trailer Shot with Butch's tractor HIGH NOON!
-
2 pointsThe fuel cap has a vent that allows air in as the fuel is used up, if the vent is plugged it will cause the a vacuum in the tank and prevent the fuel pump from working.
-
2 pointsThe camera setting accidently got bumped to the "WONKY" position. They do make good pies.
-
2 pointsJoe...Welcome to Red Square you are in good hands.
-
2 pointsI'd rather have my hands and face covered in grease and oil then paint and dust. i do like painting tho. bodywork not so much
-
2 pointsI have done a lot of Bondo and Fiberglass through the years, and sometimes it looks pretty good...thank God for spot putty (easy to sand). My problem with that stuff, is trying to get the right amount of hardener...you want some time to work with it, but you want it to set up and be sand-able in a couple of hours. I've had the stuff set up in a couple of minutes...all the way to 3 days later (still tacky). You want to take a couple of Viagra and grind them up and mix them into the paste. You sprinkle that stuff on the potatoes in your pantry and they will stay hard for 2 years. No...give me the wrenches and a can of Sea Foam.
-
2 pointsAll of my horses have assigned tasks. Some are not used very often but other than the snowblower/plow machines they get dirty working. Can't see much point in glistening paint covered with dust/grass. Besides I do not have the patience for body work, there is always more sanding needed, runs to be fixed, or bugs landing in the wet paint...
-
2 pointsJoe if you can't get it. PM me I am in Trevose.
-
2 pointsI agree with you Steve. I can't leave well enough alone, and end up messing body work up trying to be too perfect. When a bolt is tight, I put the wrench down...easy enough.
-
2 pointsSounds like this world needs more body people! Now, if only I could find one...
-
2 pointsWell I have a 607 6 = HP on the engine and a crack at the manufacturer 0 = manual start (5 = it's electric, bogey oogey oogey oogey - for those of you that get that joke) 7 = year of manufacture That said there's a lot of clues you don't know you have yet - If I may speak as a new guy around here. Oh - Welcome to RS! So much info here it hurts the brain at times but these guys are most excellent when it comes to info. I used to have a TJ too - miss that machine...greatly Start taking pictures of the dashboard, the engine, the attachments and so on. Are there areas that are painted over that look like a decal was there? Could be a clue - and so on.
-
2 pointsI enjoy bodywork. It's the painting I struggle with. I don't know enough about motors nor do I have all the special tools needed to do a rebuild but it's the most enjoyable part for me because that means I'm spending quality time with my son and grandkids usually for a weekend.
-
2 pointsLove building a smooth running kohler!
-
2 pointsI like both! (but I'm not an expert at either) like to make everything work and fit just right! Then I equally like to blast sand & paint, I just wish I knew more to move from the Rustoleum to the automotive paints After a hectic day at work i can sit and sand furniture or tractor parts all evening long!
-
2 pointsI'm lazy. I leave the dents in. Adds character. Just got home from the steam show and all the Farmalls have dents. I got turned off to body work in college. Saw a guy sit on a running body grinder! When ever I buy paint, the dude mixing it always adds the runs to the paint to make sure I have enough. At least with mechanical work, if you have problems you can blame it on the metric system. And if your working on a MG, you can curse George Lucas
-
2 pointsI have to agree with you Steve. When you tighten a bolt, you know it's tight. I don't know how many times I've left a finger print in uncured paint, or sanded a little too much on an edge. Although most of the time my end results look like I know what I'm doing, I am just too impatient to be a good body and paint man.
-
2 pointsThe Tecumseh and Kohler engines both have a mechanical compression release built into them to make them easy to crank over, the down side is that this also results in lower vacuum on the intake stroke. Since our carburetors require a great deal of air flow through the venturi to draw fuel from the float bowl into the compression chamber the reduced air flow requires a little human intervention, we need to pull the choke. I you are running a little on the rich side you may not need to.
-
2 pointsIf you are planning to use it I would go with a 63 or 64 model, they have better steering than the other ones which you will want for mowing. But the 702 I have is a very nice work tractor too, i use it for plowing but I like the steering my 854 has much better. I'd look for a 753 or 854
-
2 pointsClip Round hoods are fun, I have 2 702's (one of which has been in my wife's family since 1965), a 502, and my 854. Any will cut grass and plow snow - within limitations. There are 2 styles of gear driven rear discharge cutting decks that fit, either 32" or 36" - nothing bigger. The plow is 42" wide and even the 8HP 854 can only handle that, nothing wider. The 702's have the one piece fuel tank with removable dash plate, the 502 and the 854 have the leak prone 2 piece bolted and gasketed tank with fixed dash panel. My favorite is the 854, as it has the K181 motor, cambered front axle, and the adjustable down stop on the implement lift - great for skimming the plow over grass at the end of the driveway. I swapped the tired 4 speed in it for a good 8 speed from a C 81 - that gives the rear a wider stance for better stability on hills. Funny thing finding round hoods, they seem to find you when you are not really looking ....... Bill
-
1 pointI have posted some stuff of what I've been up to in the Euro section, but I think most people only look here so I'm starting another here. Ok so this is what has happened so far.. Some of you may know I bought another C series 161 8 spd. It is a bit rough but I only really wanted the motor as I felt the 10hp struggled a bit with the 42" deck. Pictured are both pre refresh, the 161 is't getting done, it will be sold later with or with out the 10hp motor.
-
1 pointAttention all of you Horse-aholics! 6th Annual North Central Indiana Meet & Greet is October 3rd!!! I look forward to hosting this event every year. I greatly appreciate the support that many of you have shown in the past. All of you make this a very special event and I can't wait to see all of you again in a couple of months! Remember that we hold one of the best raffles around with 100% of the proceeds sent to St. Baldrick's Foundation in memory of the late Max Nunn! P.s. His tractor will be on display again this year! Thanks to Paul and Sharon Iossi. I need your help once again.......prizes are needed for the raffle. You all have been soooo supportive in the past and I hope you would be willing to chip in again. With the wet summer, I don't know if the beans will be off the field for us to plow. I am keeping my fingers crossed as always so we can turn some soil. I will definitely keep you posted. Food will be available for purchase again from our friends, the Millers. If you have been here before you know the pie is amazing! I will be working on new t-shirt designs in the near future. Please hold your orders until I am all squared away with this. I will set up a seperate post once I have my ducks in a row. I am hoping that will be the first year that we break in to the 200+ tractor mark. I hope you are ready to bring a nice load to show. We will once again have a swap meet area. Again we will start a separate thread on what people are bringing and/or looking for. I do have a few costs I incur from putting on a show of this size. I will have a donation box out for those that feel compelled to chip in a few bucks. All of the help we receive is greatly appreciated! So this is just a kickoff.....mark October 3rd on your calendars. The show wouldn't be the same without you!
-
1 pointAbout time I came across a good deal. Got this Brinly disc set for $50.00! at a yard sale.
-
1 pointThanks to my friends here at Red Square you helped me come to the reasonable conclusion that my wheel horse is a member of the 6 series. I will never be 100% certain. I have been browsing the forum looking for stories and other bits and pieces of info, but I have not seen much. They almost seem like the middle child between the older RJs and the later d and c series. I should have the old girl running soon, and look forward to putting it to work. And any info on what attachments and mower decks that work with them is greatly appriciated. Thanks again!
-
1 pointAnother nice day. More people wanted to know more about the Generac Jenny than anything. Gave out a bunch of RS cards! Searched high and low for a 12v whizzer siren. A friend of mine has one but he won't sell it to me. I got half of the flea market left to find one. Lots of big trucks came today. Also the pet pig population grows. On with the pics! Day started out great! A ford truck had to get towed. Made my day. Typical scene ; Bought a Husk of a tractor from my friend Terry. Mainly for the tires. Knobby fronts and almost new AG's . With the paint scheme it looks like Marvin's son. Here we are towing it to the trailer Son of Marvin. Where do I find out what model it is by the serial no.??? Big Mack came rolling in and almost backed over my display Another pig! picked up a Monkey for my wife. She loves these things Nice loader on a cub Bassett going for a ride! Twin Airstreams got clothes? cool fountain Old White Big Rig One way to carry your camper! Another pic of the neat ford grader 1054 with sickle And the rest HIGH NOON !
-
1 pointWe have a member who makes a nice replacement. See @GlenPettit in the Vendor section.
-
1 pointWilly Wonky?
-
1 pointI knew someone was gonna catch that in the pic:-)
-
1 pointIs that wonky... a filter on the camera?
-
1 pointAny time that an engine quits, and then starts again after sitting for a little while, I always suspect a clogged gas cap vent first.
-
1 pointYou got a hang nail on that left big toe there ... LOL
-
1 pointTrevose and Feasterville. I lived in Neshaminy for years, right by the mall.
-
1 pointBe careful clicking on that website. My computer got an attack from some kind of virus or malware. It was blocked by Norton antivirus. Make sure your anti-virus software is working. Jim
-
1 pointThe roll pin groundhog47alludesd to usually protrudes further on one side than the other. Using a ROLL PIN PUNCH, drive the pin from the shallow side (recessed side). The ebonite knob breaks easily but, if yours is already broken, who cares....in that case, break off the knob any way you can...you'll be left with the brass insert of the knob. Now you can more easily drive out that roll pin. When attaching the new knob, first align it with a loose fitting small nail from one side. File the end of the nail FLAT and slide it all the way thru. Then, from the other side, start to drive in the new roll pin which will simultaneously drive the flat nail out. It helps to file a point on to the new roll pin...lets it easily find its thru path. Leave the nail in place until the roll pin drives it out. DON'T hammer directly onto the roll pin....hold a separate (square) drift pin against it, then hammer onto that drift to drive the pin into place..
-
1 pointif you are only going to have one make it a 854 Brian
-
1 pointWheel-N-It you beat me to the invite and I gotta say thank you for promoting this event Tuneup we would like if you'd join us glad to hear its noted. Oh btw that black hood has great potential, looking forward to seeing your progress.
-
1 pointSuppose I can give that a try.. don't have one small enough though but suppose it is worth getting some smaller ones to try it.. First I am going to try to take a small punch and try to knock it loose.. That is if I can find it.. my son has been rebuilding his transmission and transfer case in his first gen Dodge Cummins.. so not only has he taken up my garage space.. he also has my tools scattered throughout the whole shop.. LOL
-
1 pointWelcome to Thursday and an update from inside the workshop.... The bench WN was on ended up looking like this!! After the struggle of lifting her off the bench last time we decided the easiest thing to do this time was to slide drag the bench to the doorway and roll her down some ramps,,, To be fair on the bench it has put up with a lot of punishment for the past er... many years including the weight of the 6x6 being built on it.. The bench will be rebuilt a lot stronger and on castor wheels I'm very happy to report that all the changes that have happened on WN have been worth it.. Thanks to the new higher fuel outlet on the tank she starts up straight away with no hassles or queasy-start.. A little choke, no throttle push the starter button and she roars into life.. I also realized that I was no longer thinking about the brakes when using then, I guess the relocated front master cylinder is doing it's job now And now the big one.. Steering.. Gone is the twitchyness that was there under hard throttle while turning.. There is even a fair amount of self centering going on.. Oh, and the steering is so much lighter than what it was The only downside was the amount of wheel turning needed to steer.. It was about 1/2 a turn lock to lock, the A35 steering box made that 2.2 turns lock to lock!! This was sorted by drilling and extra hole in the drop link a bit closer to the wheel and giving the connecting rod a bend so it didn't hit the exhaust or anywhere else.. The lock is now 1.5 turns lock to lock which feels right.. In fact it now has so much lock that the front brake calipers hit the front axle on full lock, so I need to make a couple of simple stoppers to stop that happening.. The fender pan is as done as it's going to get before the shows, it still needs loads more work but that can wait until I get her ready for final paint. I have also installed a plug under the dash.. Nope, it's not for plugging in headphones It is in fact wired into the bikes stop/run circuit. The plan is to grind out some of the plastic bit that separates the positive and negative and weld both bits together. The idea being when it's plugged in to the stop/run circuit will be in run mode.. So if the plug is attached to the driver and the driver get thrown off for some reason, the plug get pulled and the engine stops Have some photo's of WN out in the wild. And for your Viewing pleasure, here's Part 17 and 18 of the build videos. Sorry you have to click on the links to see the vid's, if I post them up the normal way for some strange reason it changes the video links in my other posts! Why Not Build Part 17 Why Not Build Part 18
-
1 pointYeah, good luck with that one! Here's what you can expect: http://www.wheelhorseforum.com/topic/37762-is-your-kohler-happy/#comment-337126
-
1 pointI use a slot hitch on later model wheel horses (312's ,C-145), and its the same hitch that fits on my 633. The Later models use a seperate rear lift arm that fits up under the fuel tank. The cable runs fron the mid lift arm to the rear lift arm and a chain runs from the rear lift arm to the slot hitch. On the older horses the cable ran stright to the slot hitch. The picture shows the rear lift arm assembly. They can be found but are a bit pricey. Hope this helps. Attached Image


This leaderboard is set to New York/GMT-04:00