
Leaderboard


Popular Content
Showing content with the highest reputation on 07/30/2015 in all areas
-
7 pointsI think you are right...how can you not look good with these little guys? They already called "dibs" on the back seat riding to the beach with grandpa and grandma next month.
-
4 pointsSometimes there is nothing more soothing than the putter of a Wheel Horse. Some people just don't understand.... IMG_5387.MOV
-
2 pointsGetting to be that time of year again. Who's thinking about going to Pioneer Power this year? @joebob @prondzy @Shynon @wheelhorseman1000 @stevasaurus @ol550 @rydogg @Terry M @dclarke @Martin @Operator Show dates this year are August 28-30, at the usual Le Sueur Pioneer Power showgrounds. If there are any new comers this year, I've got some picture maps that have helped some other newbies find our little Wheel Horse gathering at this incredibly large show. I'm planning to be there all three days. Anyone interested in coming is welcome, they don't charge exhibitors at the gate. As I understand it there will again be an opportunity to drop a plow in the ground if you're so inclined. Also keep in mind there is a consignment auction on the grounds first thing Friday morning as well, so if you like auctions (and who doesn't ) make sure you're there plenty early to scope it out! If you have any questions about this show, please post them up. This will be our 8th year showing horses here at Le Sueur. Primitive camping is available on site, there is a charge for campers / camping trailers. Any questions about attending, please ask.
-
2 pointsI noticed that my horses don't run properly unless the correct liquid is in the beverage holder.
-
2 pointsAny shop that would say the BS your shop is telling you I would avoid.What do they think other engines are speced with,a measuring tape?If you can get the necessary tools and have any experiance with machines you could do a satifactory rebuild on what you have.Used engines and alternate replacements can be had for less than a rebuild.You pay your money and takes your choice.Luck,JAinVA
-
2 pointsYou might want to consider filling these ags for added traction. I prefer turfs and chains for pushing.
-
2 pointsThe 6 inch wheels were on there for the 37" deck. That deck would hit a tire if used with the 8" wheels, so they shrunk the wheels. I think they presumed not many people would want such a small deck on the higher horsepower machines, so they kept those equipped with 8" wheels.
-
2 pointsWould you care to share your serial number info? I have some odds and ends like this quote:"Have seen 953 serials from 62-137 to 62-928 and 32508 to 42159 1054 serials from 42105 to 49725 1054A serials from 49065 to 101637"but I have no sheet listing serials or how they apply Years ago I started to record any serial numbers I came across in a Yahoo manuals Group. Each one went into a searchable Database Table about 8 different ways so the info could be sorted every way possible. It worked great but their new format allows a maximum of 1000 lines and this one was up to 5000 so it takes forever to retrieve the info if it comes up at all. I did keep the info in pdf files as a backup but they are about 500 pages long. After 2 years of this I finally found a way to get the serials for individual models and have been working at copying them to the Red Square files. If you do a search of our files using - 1964 serial numbers any that are completed will show up with a SN in the file name. If you see a sn it is just my way of recording that I have checked that model and have no serials for it yet. I have copied the serials just as I entered them in the Groups. Many serials now have 0's before the number so they have the correct number of digits for that particular year. Left them that way in case the info can be used again to take them to a new level. Of course these 0's were not on the tractor so searching for a serial as decaled won't likely come up on a search. One column in the Groups has all the serials recorded as a 9-digit serial. This was very useful as one could quickly scroll down the list to see what years a particular serial was used. Some years the serials continued into the new model year and others they started over. In 1962 they introduced the 62-xxxx serials for the tractors and A-xxxx for the attachments. The 62-xxxx's were used on the following model years until the decal supply was exhausted. Near the end even the A-xxxx's ended up being used on the tractors. The 1971-74 model numbers on the product used 6 digits. These serial number lists is where I realized the significance of the 6th digit. Subtract 5 from that 6th digit and you get the model year. Very seldom does the 6th digit show up but on the Attachment list the GT-14 tractor for 1973 is model xxxx-8. These were 1972 left over models and surprising how many have shown up. It is not a carved in stone record. Some serials are hard to read off the tractor or attachment and others may be a typo. We all make mistakes but have copy and pasted the info to keep them to a minimum. Garry
-
2 pointsThe problem is, skeptichorse, once you've been bitten by the Wheel Horse bug... You just want more of them! I started out with a really nice 520-H. It's the Cadillac of the classic 300/400/500 series. There's not much it can't do with its powerful 20HP opposed twin cylinder Onan (some cringe at the mention of that name, but mine is solid) and hydro drive. Then, I was lucky enough to have a 310-8 given to me. I thought that it probably couldn't hang with the 520-H, but surprisingly--that little 10HP Kohler Magnum paired with 8 gears can really hold its own. Especially when pulling. And recently I came across a 522xi and snatched it up. 22HP with power steering and even heavier construction than the 520-H was very enticing. I bought it just because I wanted to see what it could do. It is the epitome of WOW! The bottom line is that it doesn't matter which Wheel Horse you end up with. The one you're sitting on is better than just about anything else you could have bought brand new (especially for the price). They are amazing machines, and from smallest to largest they just get it done. And with THIS FORUM, you will never be at a loss for knowledge and advice. What brand new machine comes with hundreds of experienced owners that can help you with anything related to your tractor? My wife was really upset when I bought a 23-year-old 520-H instead of something new with a warranty. She has seen what I can do with it and now she gets it. The neighbors can't do half of what I can with their brand new big box tractors. One of them even brought their brand new Craftsman over for a friendly pulling contest (I'm sure our kids had something to do with it). He was shocked and embarrassed when his was permanently stuck in reverse no matter what he tried. Since that day, every time I fire up the mighty Onan, at least one of the neighbors is suddenly out on their newer machine, as if to show me up or something. Too funny. I wonder what they are thinking now with the 522xi. But interestingly enough, Since I first bought my 520-H over two years ago, several horses have appeared in the neighborhood--mostly the same 300/400/500 series, but my next door neighbor just got a 1970s B or C series (don't know which one yet) that he got after selling his eXmark. Apparently he has more work to do than just mow. Hopefully I can convert them all and have my own neighborhood WH club !
-
2 points
-
2 pointsOkay, here's the update. I purchased a 2014 Tacoma today. Here she is.
-
2 pointsPlow some big snow with little power. http:// Hang with the big boys. http:// Impress the judges. http:// Win some awards. http:// Spark creativity. http:// Bring good folks together. http:// Meet famous people. (Don't forget about Bob Hope...if you did your reading) http:// Keep a family well rooted together. http:// Edit----darn it!! spent a little extra time posting this, and the links don't work. Apparently Wheel Horses won't help you be computer literate!!
-
2 pointsGreat suggestions all about what a wheel horse can do, but nobody has yet mentioned the most important thing of all: Bring a bunch of folks from all over the world together and form lasting friendships. Good luck with your lumber jacking! steve
-
2 pointsAnother thing a wheel horse can do, that very few (if any), other tractors can do, is set there in the basement (or garage), all shined up, and silently, just look damned good.
-
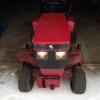
2 pointsJust joined the forum today, and may be kicked out, after this. Here goes. Until a couple weeks ago, I would have never even looked, at a Wheel Horse garden tractor. I was looking to replace my JD 212 with a JD 317 or 318. In the process of looking, for the right deal, the right deal found me. I stumbled upon a Toro Wheel Horse 518xi. Hours had just turned 160. Came with a soft cab that has a real glass front window, wiper, and beacon light. 48" mower deck, 42" single stage snow blower, weights and chains. I picked the entire package up for $1,650.00.. The price was definitely right, the attachments we exactly what I was looking for, and the soft cab was a bonus. So, this was more of a stumbling block I fell over and am glad I did. Photo is of the 518xi.
-
1 pointHeres the process of tearing down a hydro pump from a D. I will do my best to describe everything in detail so that anyone can handle it. I must say with Paul Frederis help we tore it down, cleaned and rebuilt it in 4 hours including tearing it down a second time because of MAJOR rust issues causing binding of the pistons. I will do this in chronological order as best as I can Step #1 Here is the pump before tear down. You need to remove the four 12 point bolts using a 3/8 12 point socket wrench in order to seperate the aluminum housing from the cast steel valve body STEP # 2 shows the bolts out and the pump housings seperated. Be ready to struggle slightly if your pump was never opened. It was necessary for us to put the aluminum part in a vice and hit the steel end with a dead blow hammer and brass punch to get it to sperate from the gasket/adhesive. You must rest the pump on its side or you will lose slippers and other items if you do it in the upright position. Upon opening it a large quantity of rust was found inside formed on the steel end suggesting water infiltration. Step #3 In this photo you can see the rusty liquid on the slippers and the general shape of them. They were scratched but the corners were square and not rounded over, which is very important Step #4In this pic Paul is trying to clean the rust off of the oil pump housing. As you can tell it was pretty rough. The 4 bolts here are 12 point also, you need to use a 5/16 12 point socket socket to remove these. this is another pic of the pump housing and the rust and bolts. Also pay attention to the orientation of the small pin location on the oil pump housing. Its on the botton of the pic and must be that way for reassembly. It is very important for reassembly that this faces the same way. Step #5 Here is the oil pump gear in the housing. You must mark this on the housing and impeller before you take it apart. Every lobe only fits its mating surface 1 way. If you screw it up the pump will bind and not pump oil to feed the cylinder, slippers and swash plate. The o-rings are the same set up as the manifold with a square backer ring and a regular o-ring on top to seal. Step #6 In this step you need to remove the charge valves. They are 5/8 standard socket. It is an O.R.B.( O Ring Boss). These were pretty tight but did come loose. Here are some close ups of the charge valve. We made a legal notebook map so we could be sure it all went back together well. one side has a spring and a ball, the other side has a small tapered shaft and spring. Later models of this pump had balls and springs in both sides. One thing to note is that occasionally you will find shims between the spring and ORB fitting. These were installed when the pumps didnt make enough pressure during testing. The shim increased tension on the spring and therefore raises the oil pressure just like it would in an oil pump for an engine. Step #7Next pics are a close up of the housing showing the accelerator valve removed. There are 2 of these. 1 on each side. They are the large straight head screwdriver tip recessed into the block. They are ORB also but damn were they tight. We needed to use an impact driver to break them loose. All thats inside is a ball and spring. Step #7Next pic is of the push valve. Remove it and check to be sure there are no gouges in the tapered area. If there are, oil will leak by and cause speed to slow and pump to overheat eventually during use. Step #8This is the inside of the aluminum housing. It shows the direction control where the swash plate sits. The can be removed if needed by removing the spring clip on the shaft where it comes through the outside of the housing on the flush side, not the long side that the direction linkage attaches. You then pull the shaft out and the swash plate resting surface will clunk into the bottom of the housing for you to pull out. The only reason to do this would be to replace a bad bearing. Step #9 Here is a close up of the swash plate during polishing. I started with 800 grit, moved to 1200 and then to the crocus cloth as the final step. DO NOT use water to lubricate the crocus cloth. it causes the adhesive to melt and the cloth to become junk. Use oil only for lube. This is a before of the swash plate showing severe rusting from the water that was inside this pump. this is after the three step polishing sequence. As you can see its a mirror now Step #10Here is the brass direction control valve plate showing scratches and oxidation. This also goes throught the 3 step process of polishing. This is the same peice after polishing Step #11 is the polishing of the slippers themselves. We made a diagram so that we could install them back in the bores they came from. After all that work we ended up with my original cylinder too rusty to be used. The slippers bound up and we had to take the pump all apart again and use a different cylinder after we got it all back together and it wouldnt budge. Step #12 is the installation of the slippers back into the cylinder. Be sure to install the slipper retainer BEFORE you install the slippers. They wont fit if you dont. Step #13 is the installation of the swash plate back into the direction control section. This pic shows it cleaned This pic is right before installation of the cylinder and slippers. Use lots of oil on both sides of the swash plate so theres no galling on start up. It will suck to do all this work and wipe it out with a dry start. Step #13 Assemble with the unit on its side. If you dont, you will lose slippers from the cylinder bore as you slide it down over the shaft and then have to start over. Once the cylinder is installed on the shaft, then flip the housing to the vertical position. Step #14 is to reinstall the charge valves, accelerator valves, springs and shims where they came from. A little grease on the springs wont hurt. It will stop them from moving and going caddywhompus when you install them in the bore above the ball at the bottom Step #15 Shows the proper orientation of the oil pump impeller in the housing. Take notice to our marks to be sure we had it right. You then reinstall the pump assembly onto the housing using the four 5/16 12 point cap screws you removed at disassembly. Again be sure the pin is at the bottom when assembling. Step #16 shows the new gasket prior to assembling both halves . I made this one the same way as the motor housing in my original resto post. Using a hammer to cut the material. Step #17 its all back together and ready to go back in my 18 Auto.
-
1 pointIts been three years since I rescued and restored an A-800 with the intention of bringing it home to mow the grass in my garden rather than keep it with the other horses out at the fields and barn. So this...... became this....... A slight custom job in terms of the different fender pan, seat arrangement, and steering wheel. However, two years on and it was still at the barn as I never got round to restoring a deck for it. The one that it came with being basically beyond repair. Almost half of the top of the shell was gone and had been replaced by a plate welded underneath. Probably gave it a few years extra life but by now the sides of the shell were rotting through as well. It would have been a whole lot of work to fab a new shell, particularly if it was to resemble an original. Trouble is that these little decks don't come up that often over here in the UK and when they do they're often not much better than this. I managed to find one that had been fiber-glassed top and bottom and although it was a gamble in terms of what was beneath it, it looked as though most of the strengthening ribs were still in existence - essential if it stood any chance of passing for anything like original after restoration. The fiberglass was difficult to remove and having struggled to get a small patch off, the rest had to be done in small sections along cut lines made with a small cutting disk in an little air powered tool. The fiberglass had held on pretty well despite the rust it had been applied over so it was a lengthy task to remove it all and then de-rust and treat the metal underneath. I left the fiberglass on the top of the shell intact as it was pretty much all that was holding the it in shape at this stage. The good news though was that the ribs that I wanted to save were pretty much intact. The above photo shows I think why welding in new sections was out of the question as most of the metal would have needed cutting away. The next step was to check the alignment of the two pulleys, one of which was out of line where the shell had already given in to belt tension before the last repair had been made. Fortunately there was enough give in what was left now to beat the shell till the pulley alignment was as good as it was going to get. To stabilize the structure, fiberglass paste (resin and chopped glass) was applied with a plastic spreader including filling the reinforcement ribs. With the underside strengthened just enough for now it was time to see what the top of the deck shell was actually like. Not bad really, certainly it could have been far worse. Fiberglass paste was applied over the repair areas then sanded back flush before surface filler is used later. The extent of the rotted away metal can be seen in the next photo - an effect I happened to notice while moving the deck. The underside of the shell will be getting three thicknesses of standard fiberglass matting to provide the necessary strength but not till the weekend as there's other bits to get underway first. I thought it a good idea to take the original deck apart so that the best bits from both could be selected to go to the shop for refurb. Although it looked unlikely that there'd be anything better on this one - there was! The pillar pulley assembly ran much more smoothly as did the idler pulley. Not surprising really as all of the pulleys had been replaced at some point (I seem to recall now the PO of the A-800 mentioning that but I'd forgotten about it.) The belts had obviously been replaced as well and are both OK to use so the original deck did have some useful parts on it after all. More photos to follow soon. The aim is to fiberglass the shell at the weekend so for the moment all the bits and bobs are in the shop being sorted and some now repainted and hanging up to dry. Andy
-
1 pointOn vacation this week in Maine. Did a bit of fishing this morning and hooked this (purple rubber worm). About 15-16" long. I'm gonna hate going back to work! Mike......
-
1 pointThe C-121 has a battery ignition. Before you start jumping through hoops, hook the battery up and all the other connections including safety switches if you didn't do so already. Make sure the connectors are clean and not corroded. And your battery needs to be fully charged to make sure that isn't the issue.
-
1 pointHave a two part question. 1) What is this spring (please see first pic) It was in a box of parts of a 1977 B100 that was overhauled and the owner passed away before putting the engine back on the tractor. I had to reassemble the pto but I have all the parts for it. 2) Where can I get some speed clips? These are used for attaching wiring to the tractor. (please see second pic) Thanks, Todd, New Guy
-
1 pointI use ag tires and tri ribs on the front of my b-80. The ags are loaded and i still dont tear up the lawn.
-
1 pointPoints will become oxidized. ..the nature of bare metal. CLEAN them with a points file or fine sandpaper.
-
1 pointTry cleaning and resetting you points gap.
-
1 pointI don't see any photos, guys.
-
1 pointDifferent part number also. I recall many switches listed in an Onan parts list depending on what you wanted it to do. Did you order the NN10824? Garry
-
1 pointIf the threads are good, just a little pipe joint compound will do. I use the yellow stuff in a tube that is safe for gas and oil. I don't want to use anything that is going to make that plug harder to get out next time I try.
-
1 pointI use a little white liquid teflon on mine for good sealing and the ability to get it out again. If it in less than perfect condition I would recommend replacing it as a stripped out plug that cannot be easily removed is a real pain. Cleat
-
1 pointLooks like you went to the limit to save that one, NICE JOB!
-
1 pointThat 953 has had a tough life and needs more love than most of us would want to give it.. The Ross steering gear, hood, headlight buckets and hydraulic pump seem to be the only real valuable items. The trans axle, engine and front axle would have some value if you wanted to bring them to the "Big Show" in June. What is the serial number on the plate above the shift pattern sticker? The only difference between the 1054 and 1054A is the year of manufacture. The numbering system that was used at the time would have had it be a 1055 in 1965 but that was the number being used for the newly introduced short frame square hood model.
-
1 pointMight be a possibilty??? I know the chrome horse is up to it...
-
1 pointThanks Hunter, They do seem to be rather simple and after having a done a few Kohlers this should be a breeze. I was more worried about where to find parts if needed but it seems they are out there yet ...even oversize pistons/rings, amazing that parts are around for a 55+ year old engine! I did find all the specs as well, wonderful thing this information age we live in.... Keep an eye on my thread in mods... will be sure to take plenty of pics....
-
1 pointI'll be there.
-
1 pointi recently bought a moldboard plow and today was the first test
-
1 pointWife had to put a fence around her garden as well. My lab kept stealing zucchini and beets and my beagle keeps raiding the tomatoes.
-
1 pointNice work Andy!
-
1 pointThat's a pristine looking 520-H. Congrats. Great haul! I had to put on my sunglasses when I looked at those hubcaps.
-
1 pointWell my production efforts drop off the cliff when the temperature needle hits 90 or above. I also had to deal with sale of the tiller today and you just have to take opportunity to show and tell and talk tractors....that's a lot of what the hobby is really about so between selling off redundant implement to make more space, general housekeeping and shoptalk, I was able to organize a bit. I almost spent time and effort sandblasting a body part that was unnecessary. Risk of having parts tractor, limited space and pace that I am going at. it was good to inventory as part of housekeeping. wish I had one of those shop AC units. But then I would need to insulate the garage. Yet another project to add to list:-) The obligatory pic .....
-
1 pointBasically When I got it the 8hp Briggs was extremely neglected, mower deck was pretty well rusted! I knew I didn't want to get rid of the machine just because of it. So with that in mind I pulled the tired 8 horse, removed the deck, and built it from what I pictured in my mind! The motor I put on it in place of the tired 8hp, was a flat head Briggs 12hp, I got bored with that lol. One day I came across lawn Mower racing that's when I decided I was going to build a racer out of it! I started doing research on good motors for racing one of the engines on the list was a model. 28 14.5 Ohv Briggs! On day my friend calls me up and says I've got another motor for the horse! When he got home from work that evening I went I looked at this engine! It was indeed a 14.5 horse Ohv! He said (my friend) I have no use for it, 40.00 and it's yours! Bam, I bought it, it had clean oil, the engine was super clean for a 1990 model, months later I built the engine! I'll I'm getting tired of typing now lol so I'll upload pics of the engine build! I build the tractor to have fun and simply recycle a cool piece of machinery!
-
1 pointSome incredible work there... saving that deck.
-
1 pointYou should be fine with a 42 as long as you have traction. Mike......
-
1 pointNICE, looks beautiful there! Water is CLEAR Just spent 4 weeks up there but working in Bethel around the White Mountains area. What's the deal with that place? Rent the house with a boat or... I see you didn't ruin your soft Palmolive hands
-
1 pointI put firestone tri-ribs on the front of the 520 that I use for the snowblower. Love them. Much better steering control in the snow, and not too harsh to use on the grass, unless it is REALLY wet. The Carslile Turf Masters on one of my other tractors are gentlest on the lawn, especially when wet, but the difference is small. The difference in snow and ice is a huge positive for the tri-ribs. On the back, the ags are best in loose dirt and not-too-sloppy mud, but are a little hard on grass, and do big damage if you spin them. On snow, ice, and hard pack, turf tires with 2-link v-bar chains work best for me. Ags do poorly on these surfaces. On normal or wet grass, I still like the Carlisle turf masters, inflated to 10-12 lbs. My most useful setup is turf masters in the rear, with aggressive chains and extra weights in the winter, and tri-ribs on the front.
-
1 pointAwesome! Glad to hear it won you over! These horses ain't your grandmas lawn mower . You are getting bit by the bug! It starts with this incurable grin on your face and the red tractors and attachments just end up multiplying! My neighbor who just finished replacing 4 gears in his old deere transmission (all it does it cut grass) is always impressed with the piles of snow I have in front of the 48" plow each winter. I remember he was out last year after a good 8" or so of wet heavy snow with a freeze on top. I offered to plow his drive, he told me it was too heavy my "lawn mower" would never make it. (Of course that just lights the fire) I fired her up, got a running start, and that 14 horse kohler ran hard into the governer all 100 feet of that driveway and I left a nice pile of snow right in front of his little walk behind snow blower. I had a big grin! (I of course cleared the rest of his drive, which he in turned paid me with a bag of salt. Love good neighbors!)
-
1 pointOK not gonna lie that was kind of fun I took it into the woods and looked for the logs that my wheeler hated.... Two were 9 ft long and 1 FT in diameter. 1 cherry and 1 maple... so not light pine logs... the 4th log I dragged was 31 FEET long and 8 inches in diameter... not as heavy but impressive because of the length. Funniest moment was when I got almost all the way out and it wouldnt go anymore, I backed up and took off again and nothing... after the third time I noticed that the drag cable had taken down a sappling and got stuck on the base... and it was pulling the sappling out by the roots while still dragging the log. I have no doubt that it would of if it could have gotten more traction. I would like to say that it was a nice level straight run but who am I kidding it was more fun with uneven terrain and turns to make while dragging...some where almost 180 degrees. The main differences that I noticed between dragging with the horse vs the wheeler: I never once felt like I would tip over backwards... where on the wheeler I did more than once. It did scare me a few times when it felt like it was going to go over sideways due to uneven ground. But some quick booty shaking and it got some bite and took off again. Once it was moving I had to look back to know the logs where there... I was comfortable on the machine.. where on the wheeler you rode with with your face over the handle bars and your chest on the tank... Vs just sitting and riding like on the wheel horse. There was less calculating my route... I just turned when I had to and it went... on the wheeler you went in one direction until it stopped then went in another to change the angle of the log then start again ... It may sound crazy but I think the machine was more determined to get the job done than I was... and the more I worked it the more it seemed to wake up... I do have to remember to take the parking brake off.... after the second log, I unhooked it and took off and it felt like it was bogging.... thats when I noticed the parking brake was still on... ooops. Wonder what it would have done with good tires... I am still using the old ones that came on it that are hard as rocks even with no air in them. So to say it did what my cub never would have dreamed of doing is a true statement... was it safer and more comfortable and efficient than the wheeler hell yes.. Now what else can I do with it lol
-
1 point" Any Crapsman can do that" But for how long? 40 years? I doubt it.
-
1 pointOK Dennis...I am by no means an expert on Wheel Horse tractors, but I feel your pain. If there is one thing that this site lacks, it is the ability to pull up good pictures of horses with an explanation of what is different between the years. Case in point...on the main page we have "Picture Gallery" and the sub-category, "Wheel Horse Picture Horse Gallery" For the most part you can go in there and identify a horse...the problem...I think through the up-grades and from the old "Forum-er Site" a ton of pictures have been lost. Another thing that never happened...the folks that posted these horses only posted maybe one shot (usually the left side) when it would be helpful to show at least 4 pictures showing all sides of the horse. This could be my next project...delete the worthless posts that have no pictures and set it up to have pictures, of every horse that is correct...and if it is not correct...why not. We could go to the members that did have posts in there and see if they want to offer up those pics again. What do ya think?? On a serious side...if you do this...a new member can go into this section...identify his horse and never post anything. In other words, if you have all the information available...you lose the back and forth that so many of us love here on Red Square...that includes the banter. Personally, I think it would do us all a favor to clean up the Wheel Horse Picture Gallery...I think that Brrly1 even started a thread concerning this. Understand that this could become a huge undertaking with a bunch of knowledgeable members weighing in on what is correct and not. If I had the admins blessing on this, I already have some ideas on how to go about this...you have brought up something that , I know, a few of us have been thinking about. I was looking for something to do.
-
1 pointRed Neck Cruise control one at fast idle one at mowing speed....
-
1 pointI don't remember his name but I talked with him a bit at the Le Sueur Minnesota show, he has a very nice collection and I remember the trailer which was filled with signage on the walls. All of his tractors were in very good or restored condition here are a couple pictures from last years show. I am sure Jason (casual observer) has some pictures and more information about him.
-
1 pointGuess I'll weigh in here. How are we determining "toughness"...pulling power?, brute strength?, long term survivability? Over the years I've done a lot of swapping, selling...general Horse trading & have had all the above models in my stable at one time or another. Here's my thoughts on some of them. D's...the hydro D's are built like tanks. I mean literally they are big, square, & take a lot of room to maneuver. There known for sloppy steering, weak hydro's (more related to wear & tear than design), complicated DCL linkages. early D's had problems with the bull gears spitting out the bolts & breaking the transaxle cases open. For a hydro they have plenty of yanking ability, but a hydro will never be as efficient as a gear drive. They are a tough Horse...but not the toughest. D250...nice machines (I like mine a lot!), probably Wheel Horse's only true entry to the "CUT" market. Like any Horse they have there share of issues, parts availability, weak steering & transaxle problems. Built with a Renault engine, Italian steering gearbox, German transaxle, cuts grass with a John Deere deck, assembled by Gutbrod in Germany, imported to the states with Wheel Horse stickers...is it really a Horse or a stepchild at best? Plenty of power & a lot of neat features, but again I don't think it's the toughest Horse. GT14's...I've had a few & they are "tough", but no more so than any other big block hydro Horse. 520's...I'm not a 520 fan. I had one great one with a 48" deck that would mow grass or plow snow like crazy. Then I've had three others that were less than great, weak frames (I suspect from heavy use carrying a 60" deck causing them to crack at the mid point), blOnan issues, wiring problems, finicky carbs & thirsty, thirsty, thirsty! I think the 20HP Onan & 60" deck were to much for the Wheel Horse chassis... They are a sweet sounding machine & have a lot going for them...I don't think very "tuff" though. 953/1054's....round hoods on steroids. Pretty tough, early models had some issues with the spider gears going "bang". Not all that "tough" either. IMOP...a C series with a big block Kohler, 8 speed, 8 pinion trans is the toughest tractor ever built by Wheel Horse. They are simple to work on, plenty of pulling power, survive & keep going. I know of a C120 a barn collapsed on & sat under that mess for years, when it was dug out eventually it took very little to get it running again. (that's tough!) They may not out pull a D, GT14, 520...or even a 953/1054, but when is the last time you seen one of those in front of a sled? Opinions are free & vary, those are just my thoughts on what Wheel Horse's "toughest" model could be. To much caffeine tonight.
-
1 pointC-160 8 speed in mint condition. I like the simplicity of the B and C series. They have plenty of power for my use!


This leaderboard is set to New York/GMT-04:00