
Leaderboard


Popular Content
Showing content with the highest reputation on 07/05/2015 in all areas
-
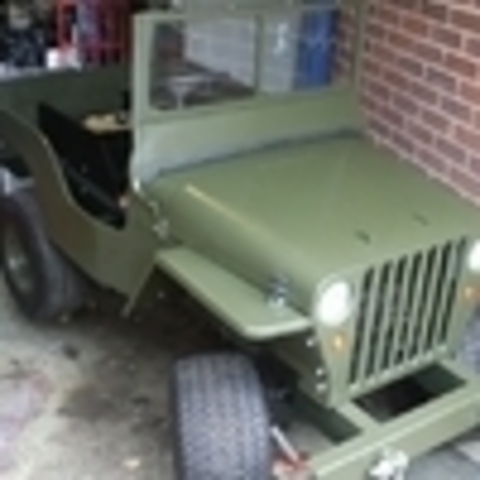
9 points1st, this is proof that the Flamingo did follow me home from the Big Show. 2nd, I wanted to take a picture of the Afghan that Squonk won and gave to my wife Chris. Karen (kthack657) made and donated this to the raffle at the Big Show...which makes it that much more special. Thanks Karen and Mike. 3rd, the 876 that I picked up from SmokinJoe. It is sporting it's new choke cable, lift lever adjustment and flywheel / generator guard.
-
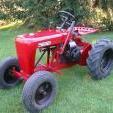
9 pointsFinally got one....on the 4th of July!! My 11 yr old boy was rather excited!! Thad
-
7 pointsGetting ready to load for Portage WI thought I would snap a few pics of the herd (not all were able to make it). Enjoy Thanks for looking Tom
-
5 pointsJust wanted to share a couple pics from a beautiful Western NY 4th of July weekend with the boys - n - girls of Red Square . Slipped the brush-cutter head on the old trimmer & hacked about 15 feet off the shoulder to park for next weeks ride . Foxglove is in full bloom ( way late this year ). Stopped for a break along one of the oil roads . Smile Rene'
-
4 pointsHey guys picked up these two little awesome tractors for my dad and I at the wheel horse show this year! What do you all think? And if you went to the wheel horse show this year what did everyone think about it?
-
4 pointsI agree with Ken on this. It is too bad for you that you couldn't score a good project, but the love of this herd is what keeps him going. I would hope he has a friend or two who will act on behalf of his estate to find new homes for them. We lost a member of our antique tractor club this spring and several of us have helped his widow sell them off slowly.
-
4 pointsIf the tractors keep the old timer happy that is what matters. I think the sad thing is the poor old guy needs to drag around an oxygen tank...I'd be willing to bet that when the times comes he has some good old buddies that will want his tractors...
-
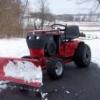
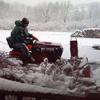
4 pointsFinally got the Bronco 14 running....the boys entered the 4th of July parade at MiTeJo Campground Milton,NH.
-
4 pointsHappy 4th of July, everyone!
-
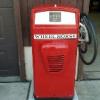
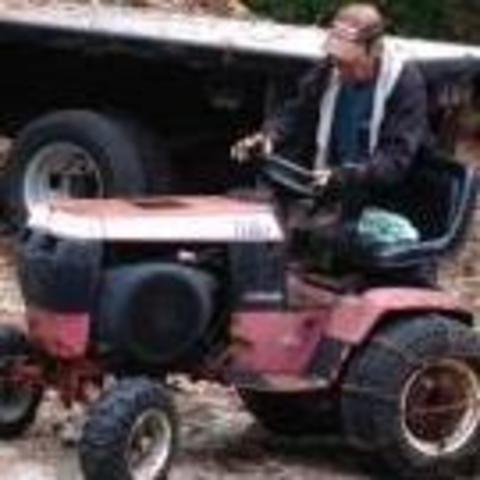
3 pointsWhile on our road trip Friday, we stopped at several yard sales and flea markets. While at a yard sale on ILL 1 near Oliver, Ill, I noticed some Wheel Horse tractors at the neighbors. I asked the yard sale people and they said the guy wouldn't sell them for anything. I went over and asked about the horses and the elderly gentleman (dragging his oxygen tank) said he "just collects them" and nothing was for sale. I got a few photos of the ones I saw outside, and was told the "better shape" ones were in the garage. It is sad the way these poor tractors will have a slow painful death! There were 2 more that I didn't get a picture of...1 was a "nut roaster"!
-
3 pointsLooks like you were camping on the hill this year. Very nice round hoods you found BTW. I was there...the show was fantastic, even with the Saturday rain.
-
2 pointsI just completed a hub conversion on my 312-8 with 520 front end. Being unable to find 520 front wheels, I decided to go with trailer hubs. I could not find a good write up on the swap, so I am posting this for anyone who wants to do this swap. All parts (minus tires) came to about $100, so the conversion is around the same price as a set of clean 520 rims. Parts List -Trailer Hub Kit, I bought this off Ebay From Elgin Trailer Parts, This includes 2X 1000lb 4 bolt trailer hubs, bearings, 1" x 1.25" seals, and dust caps. (Fits BT8 1" spindle) Cost- 57$ shipped -Wheels, I ordered 5-3/8 x 8 rims (standard for 400 series). A big benefit to trailer hubs is that they accommodate a wide variety of rims/tire sizes. These hubs use a 4 x 4" bolt circle. Cost- 32$ shipped -Spindle Washers, 1" x 1.5" flat washer, 14ga or 18ga. I bought these from lowes but These can be sourced anywhere. Qty 2 needed. -Hub End Washers, .75" x 1.25" flat washer, 14ga or 18ga. I bought these from lowes but These can be sourced anywhere. Qty 2 needed. -Bronze Sleeve Bearing, 1" ID x 1.25" OD x .5" Long, I bought these from Mcmaster-Carr P/N 6391K281 Qty 2 needed. -3/4-16 Slotted Lock Nut, Mine were missing. I bought these from Mcmaster-Carr P/N 95030A270, Qty 2 needed, Sold in 10 pack. Installation is straight forward. The pictures pretty much sum up the steps. The bearing need to be hand packed with grease before assembly. Install the inner bearing before inserting the seal. The hub nuts are not intended to be torques very hard. Just snug them up and install the correct size cotter pin. The hubs are very smooth and solid. I am very happy with the results. Thanks, -Justin
-
2 pointsStevasaurus's tricycle during the annual Boy Scout parade circa 1957, It was with a heavy heart that Steve sold his prized possession for his first Wheel Horse.
-
2 pointshaha yes I did camp on the hill this year. And thanks! These were the only 854's I seen there in good running shape. And yes the show was fantastic even with the rain! Going next year is a must! You must have missed my sons 854 at the show, it runs Primo... Nice Horse's...
-
2 pointsPost 'em up here... any picts to share of your 's flying the ol' RWB glory today.
-
2 pointsclub and 608 i would like to ask all of you with an onan twin cylinder to join the yahoo onan club. ( google it ) just say you want to join to learn how to work on your onan engine. the site has the P series parts and service manuals, as well as most of the other twin cylinder engines. then you can learn how to do it correctly. ( set valves, and torque ) thank you. boomer ( the used onan engine parts guy,also NOS and new )
-
2 pointsOne for the Dino(Steveasaurus)here...
-
2 pointsIt sure does not take a whole lot to get the clown car out and going.
-
2 pointshaha yes I did camp on the hill this year. And thanks! These were the only 854's I seen there in good running shape. And yes the show was fantastic even with the rain! Going next year is a must!
-
2 pointsHey Tom, which one holds the golf bag? I happen to have another horse on my trailer for you, and an engine...don't forget the license plat please. Nice herd Tom.
-
2 pointsHell no...
-
2 pointsSweet pictures guys show those American flags and be proud!!
-
2 pointsEnough already... quit hogging the computer. Hard for me to get a post in these days.
-
2 pointsI can now say it's completed! Even cut the grass with it today.
-
2 pointsPrecisely why I got it Mike.... for, you know...that off brand guy next door.
-
2 pointsHere you go Mikey... enjoy your holiday bro.
-
1 pointIt was great to finally meet so many of the great Red Square members at my first Big Show! Everyone was so friendly and there were so many great tractors and things to see and do-it was really a fun day! I actually got so caught up in the excitement of the show that I bought my first tractor from JayinNC- a WH A-81 mower - within 10 minutes of getting there! Thank you very much for your hospitality! Sincerely, Mrs. Rules (Linda)
-
1 point"..................Kelsey sneaks down and uses the leaf blower on the C-100's Kohler one more time for good measure."
-
1 pointTrying to get Mrs Rules back up there this fall...
-
1 pointLooks like the herd will enjoy a nice outing. While you are on the show grounds remember
-
1 point14-16 ft-lbs for the graphite based gaskets. There probably is a preferred pattern for tightening, but I just criss-cross. Tighten snug, then half tight, then to 14-16 ft-lb. I usually double check to make sure.
-
1 pointSteve, you cleaned up. Should have took a pic of the flamingo on the tractor. Earnin its keep. Glenn
-
1 pointIts starting to come together my 1054. Welded a New batterystand fiksed the tranny . Make a New spring for my hydro pump, sandblastering every pies and paint it With 2k akryl .paint from spies hecker.
-
1 pointThe seat has a split right along the top edge, the first time I sat on it I got a soggy back so I took the seat apart and set the squab out in the sun for a few days until the foam had dried. I treated the rust on the pan then set too on a quick fix of the split, I know up front it will not last forever but it will do for now. Pictures: 1) Wet split seat, yuck 2) In bits 3) Mastic tape for the inside of the split 4) Mastic tape cut to shape Once I had got the tape stuck in place I used a spray glue to reattach the foam to the seat skin. 5) Super glue used to stitch the outside of the split 6) Black gaffer tape over the top this extends right to the edge of the seat skin, under where the trim will hold it in place when I have repainted the pan. 7) A quick rub over with boot polish
-
1 pointyou are not getting enough fuel i would start by cleaning the carb
-
1 pointI was only able to be there on Friday this year, But it was a great day. I am amazed how well the WHCC is able to organize this and make it successful under all condition. They really deserve our support.....If you are not a member already, please join. And those Church Ladies really make a good Beef Pot Pie.... The best part for me was to renew friendships with those I had met before and to finally meet those I had only conversed with on line. See Ya all next year.
-
1 pointNow..that's a nice string of horses. And a cool hauler.
-
1 pointWow !! That looks like a beautiful place to ride an ATV.
-
1 pointThe mystery steering box from Chris turned up.early last week Thanks mate The mystery part turned out to be Austin A30/35, thanks for that Max if your reading this Getting the Pitman arm off the steering box is a whole story in it's self.. Involving a hub puller, zip ties and a huge amount of heat! Once the arm was off the splines the next challenge was getting a large nut off the shaft, this didn't quite go according to plan when the end of the threaded bit on the shaft sheered off right where the split pin holes are/were. As the shaft needs extending a little bit this wasn't a problem. So will it fit? with the aid of a pair of scissors this were looking good.. New and old steering box.. The box bit of the new one is certainly a bit smaller.. Trial fit time. The box is at the right height it just needs to go back a bit or there wouldn't be any room for the new Pitman arm to swing. To get the column up though the top of the dash I needed to make a hole a bit bigger, so I quickly spun up this bung on the lathe. It fit's like so.. The small hole is for the "drill bit" bit of the cutter to slot into. Letting the dash cool down halfway through the cut. The amount of swarf that came out was amazing! A big hole.. With a bit of the body mount sliced out.. And the bottom of the dash surround notched a bit.. The steering box ended up right where I wanted it.. The steering box mount taking shape. That should work well The mount has now had two captive bolts and one captive nut added.. Both ends have been boxed in and the welds cleaned up, I just forgot to take any photos of it.. Likewise I have made a start on shortening the steering column but also forgot to take any photos.. I'd best remember tomorrow
-
1 pointOven cleaner works good to clean heads.I have used Super Clean purple with good results as well.Not sure about the piston tops other than light scraping. Luck.JAinVA
-
1 pointto the I don't know if it was just coincidence, but It seemed much easier to find Craig this year. Oh, for transporting my dinner tray back to the kitchen on your new ride.
-
1 pointIs there really... any other forum?
-
1 pointBingo...we got a winner.
-
1 pointThat brings back some memories.
-
1 pointLooks like the bad weather is heading your way Craig!
-
1 pointI really gotta find a book to start studying these tractors.. Whats this one? Value to it? I'm guessing somewhat due to it being older, but not sure if there are certain models that are not etc. Thanks!
-
1 pointNo opinion either way here due to the fact I'm a MMO guy. Two or two and a half ounces added to five gallons of non-ethanol gasoline is the way to go for me!
-
1 point
-
1 pointAnother creative build well done!
-
1 pointAs restoration quality and New Old-Stock (NOS) Wheel Horse Dash Panels are harder to come by, it becomes necessary to restore what you have rather than replace the part entirely. This page is dedicated specifically to the restoration of an otherwise "good condition" dash panel that has been time-weathered, and return it to its original luster. The following process can be used (with little variation) on any parts made of vinyl, plastic, PVC, cloth, leather, or rubber. This includes items such as; shift handles, height adjusters and belt tension knobs, steering wheels, wheel caps, seats, plastic handles, hood latches, etc. The VHT line of products is extensively used in the automotive/aircraft restoration worlds for returning anything made of these materials back to near original appearance. See more details concerning VHT Vinyl Dye products at this website: http://www.vhtpaint.com TOOLS REQUIRED: 1. Small bristle brush and Dawn Dish Detergent 2. 1/8" Metal punch and heating source (if making repairs) 3. 800 grit Wet/Dry Sand Paper 4. 0000 (fine) Steel Wool 5. Brake Fluid 6. Paper Towels 7. VHT Vinyl Dye, Gloss Jet Black (p/n: SP941) 8. Elmer's "Painter's" Opaque Paint Marker (fine and wide tip, WHITE) 9. Exact-O Knife, Dental Picks and Toothpicks PAINTING TECHNIQUE: The white borders, letters, and symbols on the dash panels were originally manufactured using a screen printing technique. Since reproducing this technique is far more difficult for the "home restorer", this relatively easy method is presented to mimic the original process. The technique I use is pretty straight forward and quite simple to do. The most important thing to keep in mind is that you are NOT trying to completely cover the black dye color (underneath the white paint) in a single pass. What you ARE trying to do is build-up multiple, very thin layers of paint (usually two or three), until the white completely masks the black underneath and you are left with sharp, crisp edges and an overall opaque paint coverage of these raised dash panel details. The second most important aspect is to insure your panel is well supported (i.e. will not move during the painting process) while the heel of you painting hand is firmly planted on the work surface as you apply paint. This will insure the steadiest hand, and you will therefore have better control of the paint marker tip and where it touches while you apply the paint. Of third importance, as in any paint application process, starting off with a well prepared surface ALWAYS results in a higher quality final appearance. Complete and thorough cleaning, drying, repairs, and re-cleaning are all painstaking and necessary steps, before applying any dye or paint to the surface. The instructions below go into greater detail where necessary, and if followed closely will result in a "better than new" looking part for your tractor restoration. When painting with the white paint markers, insure the tip is about as wet as when using an artists "dry-brush" technique before touching it to the part. Apply the paint so it thinly "flows" over the surface, and use a paper towel to keep the tip "almost dry" of wet, runny paint between individual characters on the plate. Apply the paint with a very light touch in single passes only. Don't cover any more than a single pass at a time, building layer thickness with each additional coat. As always, follow the package directions for all of the products used in this process. Step 1: Thoroughly Clean the Dash Panel The entire dash panel should be thoroughly cleaned of all dirt, grease, oil, and old marking paint on all sides. Brake Fluid is a good paint and marking ink softener, but care must be taken to insure the brake fluid does not "melt" the plastic. I normally test the Brake Fluid method on the back of part, or on an surface which will not be seen when the part is installed, to insure the brake fluid will not attack the plastic. Use the brake fluid sparingly to "loosen" any foreign materials (paint, ink, or hard stains) from the surfaces. Then with a combination of 0000 steel wool (try not to scratch the plastic), gentry scraping using the edge of an exact-o knife, and/or dental picks and tooth picks, you can easily remove the unwanted debris. Once all of the foreign matter is removed, the plate should be thoroughly scrubbed with a small plastic bristle brush and Dawn Dish detergent. This will remove any remaining oil and dirt from the plate, the corners, and the edges. Rinse with warm water and allow the piece to thoroughly dry before continuing. Once it is completely cleaned it should look like the image below. Step 2: Repair Surface Blemishes This is the tricky part. If any face blemishes exist you need to make a choice whether to make the repair or leaving it as-is. Obviously, starting with a high quality, unblemished panel is more desirable, you may not have a choice. Repairing any surface issue may only result in a far worse appearance than leaving it alone. Choose wisely based on your abilities. Only one surface blemish was corrected on this example, the second blemish ("wiggle" in Electric Clutch "OFF" arrow-bracket) was left alone as it was too dangerous to attempt repair without further damage. The right side of the "N" was smashed down and the right "leg" of the "N" was partially split in two. A small round punch was used to "re-form" the letters edge by heating the punch tip to just below the melt point of the plastic, and "pushing" the letter back into shape. The split essentially closed up and re-bonded to the adjacent part. Care must be taken to not overheat the punch as you do not want to melt the plastic, only make it soft so it will "move". Once repairs are completed, re-clean the part as you did in Step 1. Step 3: Restore Plastic Color and Shine Many products exist to restore vinyl and plastic to their original luster. VHT produces a vinyl dye in several colors and the product is NOT A PAINT! It truly is a dye designed for vinyl. The product comes in Gloss and Flat finishes, but I prefer the look of the gloss, as it appears more like a new part than does the flat finished dye. VHT Vinyl Dye Gloss Jet Black (p/n: SP941) in the 11 oz. aerosol was used to treat this Dash Panel. The panel should only require a single, light coat to restore it to original appearance. NOTE: Allow the dye to absorb and surface-dry at least 4 hours before proceeding to painting white. Step 4: Apply First Coat of White Paint Applying the white paint is rather easy, but does require a little technique and a steady hand. For this step I have used Elmer's "Painter's" Opaque Paint Markers. They come in several tip-sizes (fine point and wide used here) and is composed of an opaque acrylic paint. The acrylic paint bonds very well to the dyed plastic, and holds up to temperature and the elements quite well too. LARGE PANEL DETAILS: Using the wide tip, very lightly cover the large borders with a single pass, DO NOT go over them a second time as doing so will leave "brush marks" in the paint. The result should be an almost see-through appearance in the white paint. Several coats will be necessary, so if the black shows through, leave it alone. Also, "paint" any large details on the face area; such as the choke symbol, large letters, rabbit and turtle; using the wide tip paint marker. SMALL PANEL DETAILS: As before, you are applying a very thin coat, so make sure the marker tip is almost dry (as in dry brushing) and apply only a very thin coat on the first pass. Using the fine tip marker for lettering and small details; use a patting (tapping) technique to apply paint to the tops of the letters. Begin at one end of the letter and overlap your taps, moving toward the other end of the letter. Don't wipe the paint on, PAT it on! Especially at the ends of the letters. This keeps the paint from "rolling over" the edges of the raised detail, and it should almost pool on the top of the surface on subsequent passes. NOTE: Notice the black showing through the white in the image below. Keep the first coat of paint VERY, VERY light. Step 5: Apply Additional Coats of White Paint ALLOW AT LEAST 4 HOURS BETWEEN COATS The application of paint continues as described in step 4 until all of the painted areas are completely opaque and covered well. This is normally accomplished in two to three coats. If you have blotchy or spotty coverage you can use 800 grit wet-dry sand paper to lightly sand the white faces to even the paint coverage, then apply a final top coat after cleaning the part. Make sure you allow the paint to dry thoroughly before sanding, and re-clean the part before applying the next coat of paint. Make sure all surfaces are evenly covered without brush strokes. The image below shows good coverage with very little over-painting. Some letters and small details will need to be scraped and cleaned up prior to applying the last coat of white paint. Step 6: Finishing Up The final step in the process is to clean up any mistakes or over-painting. This step is normally done BEFORE the last coat of white paint is applied, so that any scrape marks or edges can be covered on the final pass. I normally use dental picks, tooth picks and/or the tip of an exact-o knife to clean any edges which were over-painted or where paint has been errantly deposited between letter lines. Any over-paint on the panels surface can be covered up by spraying some of the VHT dye into a small cup and using a fine tipped artists brush to "dry-brush" the paint drip into oblivion. When the entire piece has dried for a full 24 hours you can then buff the entire surface with a wadded-up piece of regular kitchen paper towel. The paper towel is course enough to remove any dust which may have settled on the details, polish the faces, and burnish the letter and detail edges; resulting in a truly polished and natural look to the piece. The completed piece will now be "show-ready" and look like the images below. Thanks goes out to RMaynard for the use of his B-80 dash panel in the creation of this diatribe. Bob mentioned somewhere on this board that he was looking for an NOS panel for his B-80 restoration, that he had an old usable one in-hand, but did not like its appearance for his restoration. I offered to restore his old panel for this tutorial, and perhaps he will use it on his B-80 should he not find another. Hope you enjoy the tutorial, and Bob, Thank You for allowing me to use your panel for this example.


.JPG.ef4f4e37c6517f95bd36dbf5a1dfe0f6.thumb.JPG.2f2f4facf8a15b67d67829dcbaa787c9.JPG)


This leaderboard is set to New York/GMT-04:00