
Leaderboard


Popular Content
Showing content with the highest reputation on 06/28/2015 in all areas
-
14 pointsI had a great time and even enjoyed walking around in wet socks for a change! Rain did not dampen any spirit at this year's show! The variety of tractors and attachments were great ! Glad to reconnect with old friends and make some new ones Too!
-
13 pointsBeing all caught up in the WH mania, I forgot and left my camera in the truck... so these are the picts my Mrs Rules captured. Here's the prodigy himself, Jake Kuhn...and his meticulously restored RJ and 401 Mrs Buckrancher(Jo) and Jay Holt(JayinNC) just before the start of Friday's WH parade. The Squonk(Mike), JayinNC(Jay), and myself(AMC RULES) checking my Mrs Rules new A-81 mower purchase. The reason why everyone calls me Bob at the show...Me and Trouty56(Bob)hamming it up. The RJ-35 guru himself VinsRJ(Vin)diggin' my new "Where's Craig" shirt. Steveasaurus, Jusgettingby, Racinbob, Trouty56, and myself all just chewin' the fat here. Me with the stainless steel master himself...Buckrancher(Brian) Mrs&Mr Woodchuckfarmer(Wayne)enjoying a cruise with one of their adorable granddaughters. Me and that Clintonut(Charlie)caught doing a little catch up. End of the day...Me& the Zeek after successfully loading up the Cheese Grater. ...and finally, a new RedSquare member here...Mrs Rules waving bye, as she rides off into the sunset on her new A-81 mower. I just wanted to say thanks again to all of my wonderful RedSquare family who gather every year at the big WHCC and help to make it such a glorious event.
-
11 pointshere some pic's the wife took Mike ,Steve and me Steve ,Mike ,Karl , Steve and Doc me and Vince guess who sneaked in this shot My wife Jo on the 854 Brian
-
9 pointsWell, here are the pics that I took this year. I had a wonderful time this year! I'm so glad that the weather cooperated on Saturday. It was great to meet a bunch of you and to see some absolutely awesome tractors! I almost forgot to take any pictures because I kept pretty busy, but I decided to set aside a bit of time to take some pics before I took none!! Enjoy guys!
-
7 pointsPretty busy at the show with the great unexpected weather on Friday. didn't get a lot of people pics as most were off wandering the show as well. Thursday night I realized I never took the phone out once. Tried to make up for it Friday. I hope someone got a pic of me trying to "Hitch Hike" during the cruise: Mirror shot when I left home. Where's The Dino? Here he is out at dinner! Got Racinbob's wife Nancy in a candid shot! Great people by the way, awesome meeting you! I took a pic of my tractors in case no one else did! RS First Dog Pepper! Karl at the controls! Tractors lined up Comin at Ya Steve campaigning again. I think with R Wilson A Wallfish inspired Hot Rod Zeeks Masterpiece. My favorite tractor at the show! Well done neighbor! Steve's Heavy Hauling! That blower and tractor fit like a glove on the vintage trailer! Looks like Lane snagged someone's skivvies during the parade! YIKES! Bringing up the rear of the parade. Pics from my Hitch Hiker seat at the cruise Lights are on but nobody's home!!!!
-
7 pointsHere's the group photo scroll down a few posts for video Brian
-
7 pointsHere's a few of mine. A little wet today, but yesterday was beautiful and made it worth it. A pretty fair amount of people stuck around today. Awesome time and great seeing everyone again This is the camping area (some of it) with buckranchers rig and hotel Maynard Hotel Zeek Squonk and Steve. Since everyone always asks Squonk where Craig is, he decided to just get a shirt. Craig has his own custom that says "Here's Craig" Me . . . I missed the official Red Square picture because I was 10 deep in the lunch line when it was taken Mrs. Buckrancher and Mrs. Zeek Mrs. Zeek and Rocuski's mom Nylyon (Karl) videoing the safety class BPJunk doing the safety class Rocuski's dad hard at work . . . My Raider project . . . .
-
6 pointsFinally the paint work is all done and decals are all installed. Seems at home with two of his brothers. Cleat
-
5 pointsIn case you missed the announcement, the feature tractor for the 2016 WHCC show is "Customs" . The only stipulation is that it is based on a Wheelhorse or Toro/Wheelhorse tractor. Over the years we have seen thousands of them, and look forward to gathering them all in one place! As always there will be no judging or trophies, but it promises to be an epic show. The raffle tractor for 2016 is also going to be a custom tractor. Many thanks to the club members who have already donated parts and offered ideas. On a personal note, anyone that knows me, knows that I am beyond thrilled that this has finally become a reality. What started as an idea several years ago quickly gained support from many of you, and that's what made this possible. I'm looking forward to what all of the creative minds and hands can come up with.
-
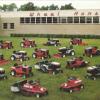
5 pointsSo, here are mine. Not many human interest pictures like Stevasaurus posts, but this is mainly to give those not able to attend a feel for the "sea of red" at the show. I'm not sure what happened Saturday, but my pictures were taken after we set up on Thursday, and Friday morning. The first couple are of our campsite. The "Maynard Hotel", with Zeek's hauler/camper in the background, and Brian & Jo's Wheel Horse hauler/camper. The "uptown" campers Karl walking his dog. Stevasuarus talking to Racinbob and his wife, with Steve's wife Kris talking to Terry (vinylguy) in the background Don Varos in red discusses pie. Vinylguy's setup before they moved him to the barn. Bob Maynard's Wheel Horse Stuff. Yup, that's my display. rwilson. wallfish. woodchuckfarmer, and Jake And then the rains came. Off came the shoes and it was swim time. These next pictures are Friday's. This year they had a safety seminar for tractor drivers 15 and under. Wild Bill had a course set up for the kids to drive. If they passed, they got a red wristband to say they were safe drivers. I think every one passed. No thanks Steve, I'm trying to quit. He worked at the teeter-totter all day and finally SUCCESS. And here is everyone that showed up for the group picture...
-
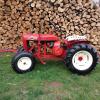
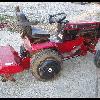
5 pointsI couldn't pass up the opportunity to pick up this 1949 Pond Walk Behind with two attatchments.
-
5 pointsHere's proof, the big show... was no bust.
-
4 pointsJust picked up my lift cable for my 953 from Wheelhorseman1000. He can make custom lengths and these things are strong! He really did his research on these and made a couple improvements like a plastic lined cable tube. Just wanted to share these and say thanks Lowell!
-
4 pointsWell since retiring MJ has had me pretty busy so we elected not to go to this years show. One because of the time, and the other is because we have been spending a lot of money on building materials for the projects we have been doing around the house. At Last years show I talked to Rich Wilson and he told me he had a tall chute blower for sale. After the show we talked on facebook and we agreed on a price and I paid him for the Blower. After a couple transports fell through I asked Stevasaurus If he could transport it to my place on the way home. My buddy came through for me as always! Thanks Steve. Him and Chris came by and we had a GREAT VISIT. MJ and I enjoyed that very much. It's always good to see our Pals. After unloading the spare back up blower. I showed him around the DUKE"O"MINIUM and of course he had to get in and fire up the Ole Snow Chucker and hear that Onan Purr. Here are some Pics. Oh by way.... one thing that I didn't like was this Looney Tune FLAMINGO he brought with him! Darn thing went over by our pond and tried to violate our Blue Heron Crane!! And if that wasn't enough that thing tried the same to our Peacock and my Horse's!
-
4 pointsA good friend of mine told me he misplaced his cell phone while he was at the WHCC show. Fortunately, the phone made it's way back to him but I wanted to share this with everyone. I am retired from the volunteer fire service, and we learned a long time ago to look at a persons cell phone contacts for ICE.....In Case of Emergency. You need to make ICE an emergency contact like your spouse, or nearest relative that can assist emergency personnel with information if you are injured. This ICE contact can also be contacted if your phone is found, therefore helping the finder know who's phone they found! I hope this all makes sense, as it looks like I was rambling! My wife I actually have ICE, ICE 2, and ICE 3 in our phones.
-
4 pointsNice pics Isn't it funny how there's always that one clown at the party with a lamp shade on his head
-
4 pointsThought I would post my new lift cable made by Wheelhorseman1000 for my 953 made to correct length with pressed on ball ends just like originals. Another fine product coming from Wheelhorseman's shop. We did a little test pull yesterday and tried to pull a 3/4 ton chev and a c160 all weighted down and dug holes and did not break. Thanks for looking Tom
-
3 pointsI am so fortunate to have been able to make it to the WHCC show. I spoke with a lot of you, both members and non-members of RS and one thing we all agreed on. The WHCC show is really a first class production. No one could think of another show which is as well run as this one is, from Bill and his famous white pants and red shirt to the church ladies serving us our food (and everything in between). So if you've ever attended I think you'll agree, this is THE event to attend. That said, this is really important.... The show is FREE for us to attend.... that's right FREE! BUT it is NOT free to put on. Where does the money come from? The sale of raffle tickets, shirts and of course WHCC membership. What's that, not a member? I'll make it easy for you.... download the attachment today and send in your $10 for a year of WHCC membership! Better yet, go to the 2016 show and show your support, the shirts are absolutely the best quality with a breast pocket. You MUST mail in your application with a check or money order as PayPal and Credit Cards are not accepted. Please support them, if you've ever attended the show, you know why, and if you haven't, supporting will help insure the show will still be there when you can attend! WHCC_MembershipApplicationForm-v2011.pdf
-
3 pointsCraig- Tell the misses that I appreciate the video and Brennan will too in the future I am sure. The funny thing is Brennan check the oil early that morning and said hey dad the oil is brownish/black and we should change it. He carefully drained the old oil and then re filled it. Later that day he just happened to have to change the drive belt and did it with the assistance of Vin. We got home and he decided it was time to make his rat rod 551 shiny like his buddies at the show. We are in the middle of this......
-
3 pointsHis and Hers? So I take it you'll be driving around the red bath tub?
-
3 pointsNice job! I agree with Karl, he needs to go on a diet.
-
3 pointsI can hardly wait to see all the cool stuff in one place! It figures this will be the feature next year. ALL of mine have been sold but I know a couple of them will still be there. Time to get to work on a new one!
-
3 pointsBe very careful Craig, or we'll be calling ya Caitlyn Rules...
-
3 pointsJust walked in the door. 14 hours in a torrential rain. Good to be home. Glad you are enjoying the popcorn. Great seeing you all at the show. See you all next year.
-
2 pointsIt was great to finally meet so many of the great Red Square members at my first Big Show! Everyone was so friendly and there were so many great tractors and things to see and do-it was really a fun day! I actually got so caught up in the excitement of the show that I bought my first tractor from JayinNC- a WH A-81 mower - within 10 minutes of getting there! Thank you very much for your hospitality! Sincerely, Mrs. Rules (Linda)
-
2 pointsHi all, new to the forum seen but not to wheel horses. I have a B80 with a 14hp kohler swapped from a no name 14 8speed and a C175 with a series 2 replacement engine. They are used almost nonstop on my farm for mowing grading pulling and so on. My son is a member here known as bert, some of yall may know him. He had asked me if we could use the farm for a red square southern meet n greet location and I thought it was a great idea and wanted to join the group and say hello.
-
2 pointsOur granddaughter Taylor came with us this year to help us out with our booth....she did a fantastic job helping everyone. Thank you Don Varos for letting her ride your tractor...she absolutely loved it!! Great Group of Guys........good seeing you all again! Thank you to everyone that helped Terry last year when I was unable to come with him......it meant the world to me knowing you all were there for him. trying to balance...... ir time to set up the booth
-
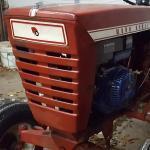
2 pointsI thought you guys might like to see pictures of more than just the hubs, so here is my $100.00 wheel horse. It came with the wheel weight and 33" rear discharge deck that needs a lot of love. Then doing some road cruising I found a 33in single stage snow blower for it for another $60.00 The plan is to sand it all down and paint it IH implement red.
-
2 pointsThat Steve is one great guy! (but never trust a flamingo!) Mike..........
-
2 pointsI was called Craig 3 times at the show.....I even spoke to Van about 1/2 hour before and then he introduced his grandson to me thinking it was Craig..... I got a friend of mine to ask Craig if he was Bob....lol...... I do see the resemblance now though!!!!
-
2 pointsBill, I commented to many how impressed I was (they were too) the time you spent with each kid. You didn't rush any of them and even though it was running on longer than you expected, you didn't rush anyone, very nice job. Steve, I can't imagine the pride to felt when your son picked up the tools and started working on the tractor. That's just awesome!
-
2 pointsGreat pics Tom! Cool shot at night with the abandoned Dino Trailer!
-
2 pointsI think you'll like it here just a heads up these folks are picture junkies so be ready to show off your herd
-
2 pointsgreat pic's Craig glad we finally found you Brian
-
2 pointsCraig: Smart I Phones but not people ! obviously I have not figured out how to turn these pictures around !
-
2 pointsLane. Were you and Wild Bill hanging from the rafters... or standing on your heads?
-
2 pointsLinder...
-
2 pointsOne of those rare instances when Wild Bill is out of uniform... where's them trademark white pants?
-
2 pointsOr... just give him the hard hat now ... ...Like they say if the shoe fits (or in this case hard hat ) wear it ...
-
2 pointsAfter some thought, I decided to pass Cheesegrater to another family member for fun for a while I'll be curious to see it's evolvement. Once I bought it from the original creator and mad scientist Charlie (clintonnut), I did a few things to it like tires, a little paint here and there, etc. Who knows what will happen as long as Craig survives it
-
2 pointsTrying to win that hard hat back, AINT YA!
-
2 pointsGreat pics Mike! The skivvies went over well with Bill -even he was red faced ! Good to see you again and the cultivator war will continue ! Looks like Lane snagged someone's skivvies during the parade! YIKES!
-
2 pointsYou can say that again!
-
2 pointsI got to say a BIG thank you to Terry for this cool prize......for those who picked up their popcorn Terry hosted a raffle for this cool item.... A 1956 Ford F-100 Pickup truck modified with some custom decals featuring a 1956 RJ......how neat is this???
-
2 pointsSince the weather forecast was looking ominous, I was all packed up and ready to go home after the campfire. Many others had already left, and still more were securing their stuff or moving into barns or under pavilions because of the forecast So here are a few pictures that I took just before I left last night. I don't know how many more showed up, but before I took off, the campfire was great.
-
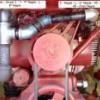
1 pointEverything electrical goes thru that ammeter. I have seen the connections the melted, burnt, corroded ect. Things get hot and break apart.
-
1 pointThanks, Lane.
-
1 pointNice pictures! Thanks. Nice to finally meet you at the show.
-
1 pointGood thing Zeek did not know that the featured tractor next year is customs back in the early spring when the deal was done or the price may have been a few bucks more... I know what Craig will be riding next year.
-
1 pointyep, the buyer did all the arranging. Trying to explain what I was trying to do to an employee was the problem.... I know what I need to do from now.


.JPG.9f2ecb26065c66527b0730084ab7fc7a.thumb.jpg.7dc8a04d9a53d44ee2b23f26ee94496f.jpg)


.JPG.ef4f4e37c6517f95bd36dbf5a1dfe0f6.thumb.JPG.2f2f4facf8a15b67d67829dcbaa787c9.JPG)


This leaderboard is set to New York/GMT-04:00