
Leaderboard


Popular Content
Showing content with the highest reputation on 06/14/2015 in all areas
-
6 pointsAlmost loaded..May try to fit the 48"SD and a few trannys on yet. I think I have everything on that was prepurchased, 953, Raider 14, 32" deck, 36" deck, 2 hoods, snow plow, blower....If I missed anyone, let me know. Oh,I didn't forget you John, your gen set is in the back seat.
-
5 pointsI was nearly packed and ready to go when I found out I couldn't make it.
-
4 pointsSince owning my 520 for about a year now with zero issues, I decided to pull the engine to clean it up, adjust the valves and change the oil. So I get the engine out and set it on a bucket. No problems so far. Pull the air cleaner housing and engine tins. Piece of cake. This thing is WAY OVERDUE for a good cleaning. The top of the engine and valve covers are just full of crud. On to the exhaust bolts, the front two come out with no problems. I move the crud from around the rear two bolts, but there is only one bolt. I think to myself, that's weird. On to the intake. Loosey 4 bolts, no problem. Then I pulled the intake manifold and took a look at the intake valve area on the rear and low and behold, a crusty and charred exhaust bolt! The sight of this immediately flashed back memories from 25 years ago.... FOD! For those of you that have never worked around aircraft, FOD stands for Foriegn Object Damage. I still cannot believe that bolt did not jam the intake valve. Feeling lucky.
-
4 pointsOh Heckfire, me and the whole family is comin'!
-
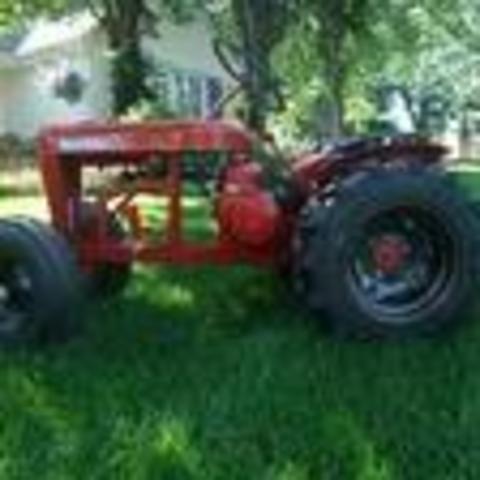
3 pointsI just bought this wheel horse today for $100. It looks to be in decent shape(not rusted through anywhere). I am not sure what model it is. The model tag has the numbers ripped off so I could not read it. It would be very helpful to know the model before the restoration. If you have any clues that would be great.
-
3 pointsMoms still in the hospital, pending bypass surgury .. at 83 thats not gonna be a picnic. Still gettin a few things done when I can...got the seats back from my upholstry babe . so here's a peek ... sure, "Florida style" had to include some cherry red gator skin!!! LOL This is the seat back for the front seat.
-
3 pointsHOLY POLOSI BATMAN...just maybe she is your new neighbor. WOW...see if she wants to come to the Big show. Quite honestly...I think she is hot!!
-
3 pointsWell, you said... you've been wanting to mow it for two years.
-
3 pointsYou said you were heading "down" the intercoastal but your compass shows "N"!
-
3 pointsChanging out tractors for this year show today Brian
-
3 pointsI got a chance to do some cleaning. Turns out that the tractor is in very good shape and was just caked with dirt. The onan doesn't smoke and the tranny is strong. Some elbow grease, citrus cleaner, murphys oil soap, wax and a tooth brush equals a clean worker tractor. I am super happy buying this tractor. I didn't pay a whole lot and got a nice looking worker with a good 48" deck. I guess that I lucked out with this one! To be honest, I wasn't planning on this tractor being a keeper. I was planning on cleaning and selling but after cleaning her up and cutting some grass and a few odd jobs, she is a keeper for sure. I am really getting to like the hydro on the column and the reduction steering makes a big difference. Maybe one of Matt's foot pedals may be in order in the future.
-
2 pointsI picked up a 94 520H. It runs well. The compression is good. 120psi front and 115psi rear cylinder. A few minor repairs and she'll be ready to roll!
-
2 pointsLooking good at this point. Here's the extended forecast from AccuWeather.
-
2 pointsThe property next door to me has been abandon for over two years. I offered to keep it mowed but the mortgage company declined my offer so it sat empty and unmowed for two years. Last night when I got home a young lady was attempting to mow with a push mower. I introduced myself and discovered she was the new owner. After thinking about this last evening, I decided the Raider should make a contribution to this young lady's project. Four gallons of gas and four hours later, we had the place mowed. We ran with the deck @ max height @ WOT in low 1st and 2nd. Seat time !!! I hope She is surprised and pleased when she returns.
-
2 pointsGo buy a lottery ticket!!!
-
2 pointsI had a FOD on time on a Case 210 with kohler K series 10hp. I could not get this thing to run right. Messed with carb, points etc long story short I pulled the head to find one of the carb air cover panhead screws inside and was holding one of the valves open. You never know...
-
2 pointsBig show, sham on you! Every one was being soooooo good and then you went and used the "H" word.
-
2 pointsGot some more done and was finally able to take it for a test drive today. Should be done before the big show but probably won't have time to get it painted. I'll be shopping for a new steering wheel and an 8 speed shifter for it.
-
2 pointsTake the belt off the pulleys 1st...then release the front attachamatic...then lower the deck and use the star wheel to get slack to the lift arm and pull the carter, or hair pin from the lift arm. Jack up the front of the horse and turn the steering wheel to the right...slide the deck out. Works every time. To re-install...do reverse order. The MANUAL for installing and taking off the deck is in the reference section. Nice pictures Slammer !!
-
2 pointsNice find. It looks lonely all the way back there!
-
2 pointsPicked up the 520-H today, got the deck on and into the backyard just as it started to rain hard
-
2 pointsTractor is now out of the garage and running
-
2 pointsIf you can lean back far enough, the drool when you fall asleep mowing will get on your shirt instead of your nice dashboard. At least that works for me!
-
2 pointsLooks like a different tractor! congratulations!! If you keep all your horses cleaned liked that it is no wonder they called you!!
-
2 pointsThanks for the nice words fellas. Regarding that seat...man when I lean back on it I feel like I am in a recliner. It has a broken right front seat screw so that corner isn't attached. That gives me even more room to lean back! The seat is the same type that is on my 522. I am not sure if that is original or not. I do have a 520 seat on my 416 that I may swap. Since I am not a fan of reclining while driving I will have to figure out something.
-
2 pointsThey will arrive at 8:00 am Thursday morning, but will be kept under lock and key until such time as I feel they are ready for distribution.
-
2 pointsThis guy is not coming with.
-
2 pointsAll cleaned up! Used Steve's plastic chain saw and no injuries have been reported!
-
2 pointsSnagged another one for CT! I even got to use it once I got it home!
-
2 points
-
1 pointCan't wait...bringin' Ellie Mae?
-
1 pointBetter hope Dino... your other girl Hillary doesn't find out.
-
1 pointGot the hood back on. Now to make it look respectable.
-
1 pointOne way is to use a voltmeter. Check voltage across battery posts. Now move the black negative lead to the tachometer ground post and you should have the same reading. If it is a lower reading that is what is called voltage drop and is created by resistance (corrosion and/or loose connections) between that point and the battery negative post. Garry.
-
1 pointHi Cod, Attaching a graphic posted earlier showing lift bar configurations for different attachments. Not sure if iut is model specific but helps me with a 520 and 310 attachment installs. p3x
-
1 pointI have Power Tools!
-
1 pointThats OK Ed, You did the right and neighborly thing. We recgonize that even if she does not. And then again, maybe something happend to her or a family member since then. Stranger things have happened
-
1 pointThe signal to the TACH is off the AC terminal NOT CONNECTED INTERNALLY TO THE B+ TERMINAL. The orientation of the wiring is correct as seen in the image above. The TACH signal does not ride on the B+ lead as the battery acts as a "super capacitor" and will filter out any ripple (signal) on the B+ lead. The TACH signal from the stator is an AC signal which is referenced to ground within the gauge, therefore the gauge must be grounded. In the OFF state, the indicator pointer on the gauge could end up at any RPM and will not return to zero all by itself. This condition does not warrant the gauge being called defective. The TACH gauge is an "air core" gauge which is not driven by magnets or returned to 0 RPM by any spring mechanism. Air core gauges are used in aircraft applications where a large swing of the indicator is needed and indeed this style of gauge can swing around an entire 360 degree sweep.
-
1 pointWell, you're both correct. I made that too easy I really mentioned Palm Coast again to make sure everybody knew where I picked up the 701. Of course Palm Coast is about 30 miles north of me. It was obvious that I was coming back home so I should have been going south. Yup, the compass busted me. Also, if I was going south the ocean would have been on my left. I preferred a shot with the ocean background so when I found a good spot I did a u-turn before I pulled over. Then another u-turn to continue on home. But not before I got out and enjoyed the scenery.
-
1 pointThat cleaned up to darn near like new. Beautiful tractor.
-
1 pointNapa 5L820W I have run that belt on my 76 for 5 years with no issues
-
1 point1975 C-160 Auto takes belt # 7478 at 84" . The 8-speed manual takes belt # 7473 at 82". Thats per the Toro website. I have several of the GOOD USED belts in my shop. They aren't stretched or slashed, cut or chunks out of them.. For more details if you want to buy one of mine, send me a direct emails....clik here: daveoman@windstream.net
-
1 pointGotta like the high back seat
-
1 pointMaybe the red doo hingus thing may be for a bagger?
-
1 pointEven ore impressive than the job the Raider did is your kindness and caring to welcome your new neighbor. I hope she realizes how blessed she is to have you as a neighbor.
-
1 pointI found If I only took a 2/3 cut, using the left and center blades to cut and the right one to chop the hay, it would not clog up. When I took a full cut, the right blade was trying to push out 2' long grass and it would get caught on the back side of the chute opening and keep building up and closing the opening. Plenty of ticks here also BOO. But they don't bite me as I have had Lyme Disease for 35 years , so ticks, vampires and rabid dogs are afraid to taste my blood. I am hoping for a good neighbor also. She didn't show up today. I hope she isn't out looking for a person to mow, or worse shopping at HD or Lowes for a green tractor.
-
1 pointGreat thread Duane! Now Ya'll don't laugh! 06 Tundra 168.000 mi. Just spent a grand on new sneakers and some super whoopy Bilsteins. Trailer is a Lowes Special Sno Bear Strong Box trailer that has been modded to fit 2 Horses Nice and light. I'll be cruisin to XM Deep Tracks and Outlaw Country!
-
1 pointI finally get to do this! Leaving the previous owner: Heading down the intercoastal:
-
1 pointNow I am not a Ford guy but that is a pretty truck! Congrats Duane. If you break down for some reason on the way down, give me a call I will bring my tow chain and pull you the rest of the way there with my Silverado Duramax... lol
-
1 pointI like the term, " Firewall" !


.JPG.9f2ecb26065c66527b0730084ab7fc7a.thumb.jpg.7dc8a04d9a53d44ee2b23f26ee94496f.jpg)


This leaderboard is set to New York/GMT-04:00