
Leaderboard


Popular Content
Showing content with the highest reputation on 05/19/2015 in all areas
-
5 points
-
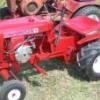
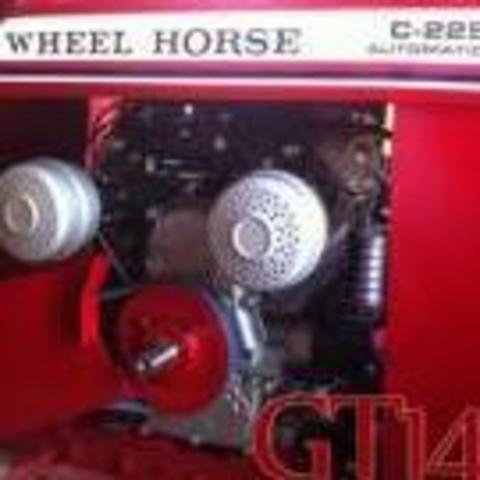
3 pointsI took out all of the 57 series today and to get ready for the show this weekend. This 1257 is about 95% original. With the weather it should be packed show. I did a few things to the 1257 hear are a couple picks. Excuse the pink tones it is the camera it is getting old. thanks for looking Gary B.....
-
3 pointsWired it up... then, put some fire in the hole here today. Was still too bright outside... so I had to drag it back in the basement to get the full effect.
-
3 pointsWell, since I had to tow you in TWICE over the past yr. I figured you owed me one.. This is one of those laugh now cry later type of deals for you, I can almost GUARANTEE it that you will be at the end of my line sometime real soon. KARMA. I might even pretend not to see you waving me over just to make you suffer a little.. I'll make sure to always have my camera handy for that special Kodak moment.. Now, the motor that konked out is a 1926 Johnson 2hp. I completely went thru this motor over the winter and then I shined it up. It hadn't been run in decades... She started easy and ran very well but when I shut it off to make some adjustments I couldn't get it refired.. It happens, I always expect to have to do additional work after taking out a motor for the first time in so long but for a motor that is 90 yrs. old I was very pleased, matter of fact I will be taking it back out in a few days...
-
3 pointsa little - yes. insert the innermost shift rod drop in a detent ball, the shift stop spring and the shift pin move the shift rod until the ball, spring and pin are all shifted into a detent in the 1st shift rod. position the trans case so the shift spring is pointing upward and drop the 2nd detent ball onto the spring now the challenging part - and very few get this right the first time insert a long allen wrench thru the outer access hole in the trans case, and compress the detent / spring / pin combo while pushing down on the 2nd detent ball with the allen wrench, slide the 2nd shifter linkage into the trans case so the leading edge of the shift linkage slides over part of the 2nd detent ball - capturing the detent ball under the shift rod once the detent is "captured" under the shift linkage, remove the allen wrench and slide the 2nd shift linkage completely into the case until the 2nd detent ball clicks into the detent on the 2nd shift rod. if you are successful - great. If not there will be weeping and gnashing of teeth. If the insertion of the 2nd shift rod does not properly capture the 2nd detent ball, the stiff spring pressure may cause the spring and ball to fly across the room. It may be helpful to keep a rag on top of the case as you remove the allen wrench. This will help prevent the spring and ball from jumping out of the case and rolling underneath your workbench - never to bee seen again.
-
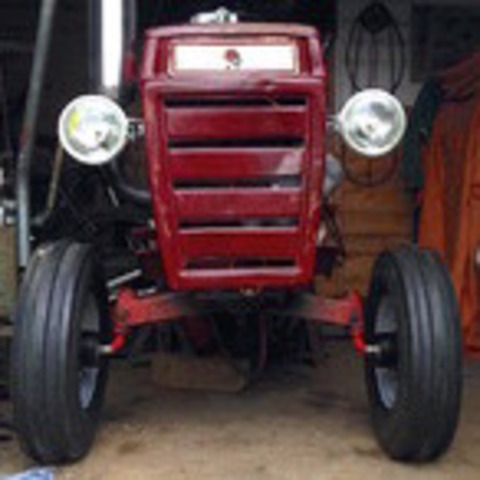
2 pointsHi all, it suddenly occurred to me that i haven't actually posted anything in this section of the forum, so I though i would share my horse with you as i have only done so on the restorations modifications and customisations board. The is my first horse and its a 1972 A-800 ranger, I am currently in the process of customisation called 'project agri-800', what I'm doing here is turning a lawn tractor into a garden tractor. lights, stack, Uni-drive, front spindle to 4 lug hub and agri style rear tyres are some of the modifications I have either done or doing to get there. the main modification is obviously getting rid of the peerless tranny and fitting a Uni-drive i and in the process of doing that now. once i have finished this project I will have a one-of-a-kind heavy duty garden tractor that I will make various implements for such as a harrow, reel mower and various other bits. anyway, here are some videos from my youtube channel, i was only driving around the small garden here but the tractor will be used at the allotment. https://www.youtube.com/watch?v=j2mjMdbKd3U&spfreload=10 haha, opening line in this video "bet you didn't know i had one of these", it was one of my first videos of a wheel horse on my previously stationary engine and workshop related channel, I would hope being a red square member would suggest i own a WH!! https://www.youtube.com/watch?v=fpqluu0pfY0&spfreload=10 and some pictures for you all: thanks for looking, I hope I might have let some of you see the A series in a different light, callum
-
2 pointsWhat happens to an inexpensive (or free) multimeter when you hook it up to measure higher voltages and you have the meter on the wrong measurement function? Fast forward to 5:11 on the video and find out. Also note the same test is being performed on a Fluke multimeter as the speaker is holding it in his hand. https://www.youtube.com/watch?v=OEoazQ1zuUM
-
2 pointsKEN, HE WAS NOT TOWIHG YOU, YOU WERE PUSHING HIM WITH A STIF ROPE.
-
2 pointsWell we had a really good day...... at least I did ... Me towing Ken B in with my 1929 Johnson 3hp (that I bought from Ken at the meet last year). Th eguy who took these photos was kind enough to post on the antique outboard site... thought I would share too
-
2 pointsIn a previous thread, several folks asked me how I painted my rims with tires already mounted. I recently did another set, so I illustrated the process as I did it. Typically, I like to paint the rims after they are mounted anyways, because inevitably when you have tires mounted on painted rims you’ll always scratch or nick them somewhere. I like to get the rims all cleaned up, blasted and primed, then mount my tires. Here’s my process: 1) Rims were sandblasted and primed with self-etching primer. Tires and tubes were mounted. Everything was wiped down with a pre-kleeno wax and grease remover prior to taping. 2) Using blue 3M tape, I go all the way around the rim slipping the tape between the rubber and rim occasionally tucking it tight with a very small standard screwdriver. 3) Then I create a wider tape ring a few inches out from the rim lip. 4) Slide the whole thing into a kitchen garbage bag. 5) Cut a hole in the bag revealing your tape ring below. 6) Tape the bag to your tape ring previously created on the tire. 7) For silver rims, I like Eastwood Silver Argent rally wheel paint and I use a Rust-Oleum Crystal Clear. http://www.eastwood.com/silver-argent-rally-wheel-paint-set.html 8) I wipe the rims down a few more times with a pre-kleeno wax and grease remover, blow them off with the gun, then shoot two coats of color and two coats of clear. I find that the Rust-Oleum clear holds a much better shine if you don’t let it set long between coats. As soon as it flashes, hit it with round 2. I do all four coats in about 20 minutes.
-
2 pointsmy first horse was a 657 (that I kinda stole from the hubbie) but the first one I bought for myself was an early 68 charger 12. after that there are alot more...love them horses!!!
-
1 pointHere are some Pic's I took at the little guy's show Winner of the plowing competition Garrett Brown on his 856 our camp Thursday night Brian
-
1 point...thought I'd sneak up on the clean up with a little test patch first, to see if my idea would work. Started on the lip that slides into the frame, progressed to a corner... then I did the logo in the center, and finally the whole lens. I'm thinking I hit a home run with the first product I tried(pictured)... first shot shows the before and after.
-
1 pointPicked this little gem up today my very first rj58. Runs good trans feels good. Couple of questions, how do you check the trans oil? Also are the wheel horse decals oe? And is the clinton the right motor or should it be a k91 kohler?
-
1 pointWhen you pass thru St. Louis feel free to drop off that classic gt and pick up a load of projects from me. Travel safe. steve
-
1 pointBud Andrews has some awesome homemade mufflers that look & sound great too. He was thinking about making some extra and bringing them to the show. If he has them I'm buying one. You can find him on FB
-
1 pointWould make a good head board. Night lite!
-
1 pointHave been watching them feeding themselves recently too.
-
1 point
-
1 pointThat's OK, Steve... I'll go first.
-
1 pointthat makes perfect sense. I'm sure i'll feel some sort of "hitch" or "click" in the gear sets through the input pulley?
-
1 pointJust put gas in her today and she fired right up. It's been a labor of love, when I first got her everything was shot.Thanks to everyone on the forum for all the help. Looking forward to the next round hood project.
-
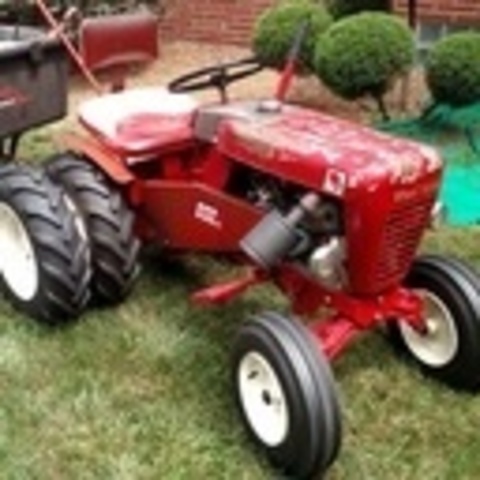
1 pointI do like that set up... are both those cultivators WH pieces Lane?
-
1 pointThe holes are 11/2 inches in diameter....the bolt slots are 1/2 inch wide....10 inches between them....
-
1 pointMike, I put an International Cub muffler on my WH 953 many years ago and I just love the sound I'm sure they can be found on E-bay. Enjoy I,m bringing it to the big show in June. See ya, Bye, Ted
-
1 pointThe balls are 1/4" I bought a hundred from McMaster. I refuse to spend my life trying to find them when they fly out and roll away
-
1 pointWell....I hope this helps you a bit.....the lip is 1 inch high.....guess they weigh about 60 lbs....maybe more/less..... 2 inches deep at the access holes and bolt holes...bolt holes are wide enough to secure a carriage bolt 12 inches across and fit inside the tire circle.......
-
1 pointMore pics of the 1961 Wheel Horse 701 with the two piece cultivator set before she went to work!
-
1 pointMy next project Craig! That is where my "free" time will go! A 704 I bought last year. Just going to put a 7 HP recoil start Kohler and go with it!
-
1 pointI plan to be there around 6;30 am. see you all there.
-
1 pointI would say for use in a low voltage / low power scenario, the cheapies are no problem. Will they be damaged if used on the wrong function (measuring voltage on the ohms scale)? Yes. They will not explode and catch fire if you are just measuring 12 volt or 24 volt battery circuits. I would not measure any "mains" i.e AC wall socket 120 or 220 VAC circuits with them.
-
1 pointAnybody who uses a multimeter should learn what the cat rating means before use. There would be less injuries due to incorrect use. Good video.
-
1 pointIf you check the download section you can download the RJ58 manual. great find , enjoy
-
1 pointI may have been the cause of Mike's featured tractor snafu. We were talking on the phone the other day and I mentioned that the '73 was the feature tractor. Must have been a brain cramp, old age, drugs, or a combination of all three. Sorry Mike. Now you can relax and take your time. No deadline looming anymore.
-
1 pointThe weeding is gonna be too easy... what will you be doing with all your free time now Lane?
-
1 pointYupper! My cradled KT17 in the C-175 decided to ground through the PTO lever/rod. I smelled something hot and it wasn't running right and I touched that rod and felt like I held a lit cigarette. Cleaned the ground wire up and it was fine! They will do crazy things!
-
1 pointCouldn't help noticing where you are from.I lived in Wooster until moving south in 1999.Spent many hours at Pleasant Hill Dam and dirt tracked raced at Lakeville Speedway and Buckeye(Wayne County) Speedway.Still have family in Lodi and West Salem.Wish you had some d-250 parts I could come up and get.
-
1 pointHi Bob, It was good to see you again too, Jim figured it out tonight, it actually turned out to be the condensor, he had it running and finally got to take it for a ride, I was happy for him, he should be bringing it out to the big show Karen
-
1 pointFor front tires, grab a 2 or 3 square foot section of rubber pond liner. Cut out a round hole in the center of the rubber mat. Size the hole about 60 - 70% of the rim diameter. Detach the tire from the rim bead, stretch the rubber over the rim and it will both self seal to the inside of the rim and drape over the tire and protect it from overspray. Rear tires require a larger section of pond liner. Once the paint is dry to touch, stretch the liner to remove it. The stretched liner will flake off the overspray and the liner can be reused over and over.
-
1 pointMike the 73 tractors were last year. This year are the Bronco tractors.
-
1 pointAll mechanical work is done, I am repairiing the plastic fender now. Have the key installed in dash and used original choke and throttle cables. New Headlights installed. Broken fender will be repaired with a piece of 1/8 ABS, sheet metal and JB Weld.
-
1 point I just bought a 1969 Wheelhorse Model 7245 Electro 12 about two weeks ago. It has a rototiller,runs good but needs lot's of repair and paint. I just bought it to rototill our home garden garden. Then I stumbled on to this website and after reading many of the articles on this site I am hooked on the wheel horse and very interested and hope to restore my tractor. It's my first one. I'm 68 years old. I'm excited about starting this project. Good luck with your wheel horse!
-
1 pointWell, considering this one was the worst one of the two sides Don... even with fighting the unexpected hassle with the hazing...over all, I'd say my brake fluid experiment did a pretty good job.
-
1 pointThis followed me home to day Brian
-
1 pointI had planned to be there but my work trip was extended to 3 weeks and I don't get home till late this Friday.....have fun guys! Mike.....
-
1 pointIt's a 2,990 lbs. rated trailer, with regular 3,500 lbs axle. Trailer itself weighs a little under 1,200 and will comfortably carry 4 tractors with attachments mounted. Deck is built the same as their longer dual axle trailer so weight won't be issue. Keeping it rated under 3k lbs allows it to have a lifetime license here in MN... no annual registration or license plates either!
-
1 pointI PLAN TO GO ON SATURDAY WITH MY 1054 DIESEL WHEEL HORSE. RUSS
-
1 pointPlan to be there Saturday. Not sure if I'm displaying anything this time. The wife like this show since it has all the flea market stuff on the other side but she probably doesn't want to spend the whole day.
-
1 pointYou forgot step # 9 .... stepping back and grinning ear to ear ......
-
1 pointBrought Two horses home from their winter pasture. Changed oil in the raider and put him to work mowing the ranch.


.JPG.9f2ecb26065c66527b0730084ab7fc7a.thumb.jpg.7dc8a04d9a53d44ee2b23f26ee94496f.jpg)


This leaderboard is set to New York/GMT-04:00