
Leaderboard

.JPG.9f2ecb26065c66527b0730084ab7fc7a.thumb.jpg.7dc8a04d9a53d44ee2b23f26ee94496f.jpg)
Popular Content
Showing content with the highest reputation on 05/12/2015 in all areas
-
10 pointsLet's get this party started
-
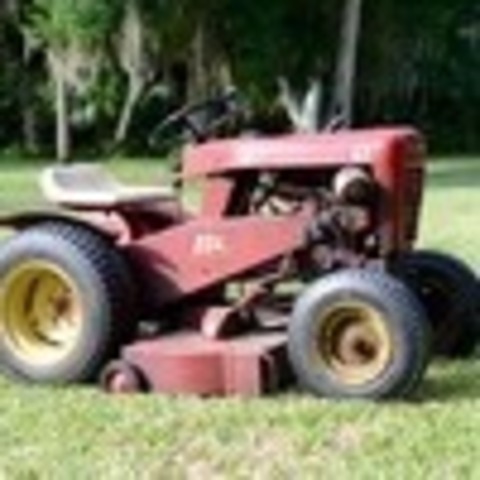
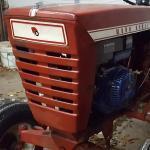
8 pointshere's a 1956 Brian
-
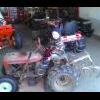
7 pointsHere we go... The intent of this thread will be for members to post pictures of they're 1955 to 1957 RJ 35 model tractors. There will not be any voting, winners or losers just a thread for everyone to see pictures of this model. Please post your pics.
-
7 points
-
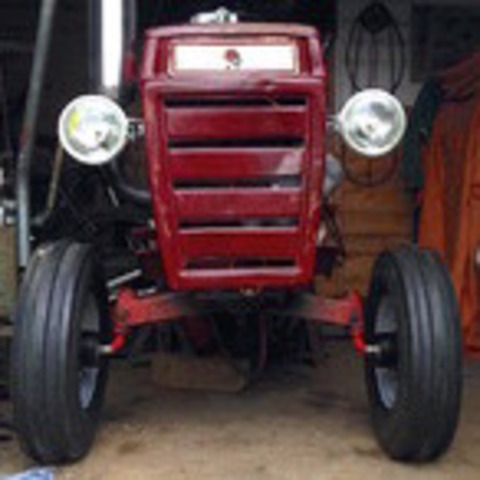
6 pointsHere's mine it's a 1955.
-
4 pointsThis is a 1957 RJ-35 project which is patiently waiting in the haymow, lots of rust, but lots of potential too.
-
3 pointsNo offense meant Dad, just a humorous picture. You do realize that as a Browns fan I have to have a sense of humor just to watch em. lol
-
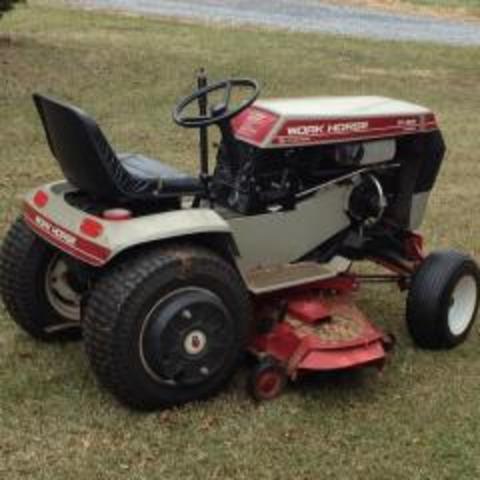
3 pointsI figured since the rest of the Work Horse got new tires the mower deck deserved some new gage wheels. I'm guessing the old ones were original from the looks. Couldn't bring myself to pay $23 each for the wheels from Toro so I hunted around and found some at the local True Value. These were Arnold 6x1.5 steel wheels with an offset hub and a diamond tread (http://www.arnoldparts.com/equipment/arnoldparts/490-320-0001). I could have picked up a ribbed tread but it had a centered hub. Beggars can't be choosers. Also got some 1/2 shoulder bolts in a 1 3/8 length, nylock nuts, and four 1/2 washers to shim in case. Got the old wheels off and measured them at 5.5" OD. The old shoulder bolts were wrecked too. These wheels had almost 3/4 inch of play at the outer edge. New wheels mounted with the new bolts, needed two washers each on the inside since the shoulder was about 5/32 longer and the thread was the same amount shorter. I ended up using the old 3/8 nuts on the new bolts with a drop of red loctite since the threads just barely protruded from the nut. Looks good, no more wobble. Total was around $19.
-
3 pointsBetter watch were you park the lawn chair!! :laughing-rofl:
-
3 pointsThanks dude. Thanks Mr Ranger. Thanks Callum. By the end of today I hope to have WN stripped down to the bare chassis for final welding. So yes, pavement pounding is not that far away now Morning chaps, yesterday's progress for you.. The expansion bottle is now fitted in the only place it could go.. It's a bit tight in there! The bottom of the bottle may look rather close to the prop shaft but the is a good inch gap between the two. The carb tube air filter thingy now has a couple of tabs to bolt it to the hood stand.. The carbs now have extra support which they never did on the SilverWing but did on earlier models! The battery box is now mounted although I need to add a little extra bracing.. The battery comes out through the top. And playing around with hood hinges..
-
3 pointsI'm happy everyone is ok and the damage wasn't too bad. The last time it was the ice age that took out the Dinos. Now it looks like traffic and women drivers are out to get you.
-
2 pointsDid I hear Florida!?!? Brandon is right, there's not a lot of us down here. Doug, we're a bit apart with you being in the Miami area and me just north of Orlando. I don't know what you'd like to discuss that can't be posted here but I'll send you a quick email so you'll have mine as well. Just know that all the folks here are great and not only love Wheel Horses but love to help others. You found the best forum there is for our beloved little red tractors.
-
2 pointsstd tubes for RJ's have tr15 stems miller tire sells a round spacer to take the difference Brian
-
2 pointsHave tried unsuccessfully now to upload videos 3 times of the difference between the Gates 6686 BR 1/2 x 141 3/8 and Gates 6652 BR 1/2 x 139 5/8 on my tractor. The short answer is that 6686 work for me - had play in both the idler arm and plenty of slack in the belt itself. Worked like it was designed to. Obviously couldn't have done this without the Wheel Horse Community. You may regret it, because now, I have to get to getting the rj35 up and running. Cheers, John
-
2 pointsI've got some covers but they are just a stainless sleeve for looks. You might try tubes with a TR-4 or Tr-6 stem. They are the type with nuts and I used them on mine.
-
2 pointsJust heard weather alert. No snow for the next two season's because off, Lack of Interest! We can only hope
-
2 pointsImagine being on Skype and have this red truck come roaring in behind you! Of course you'd keep talking and just think Chris was running the vac or something!
-
2 pointsLikewise, and if you don't like the way she drives, stay off the sidewalk!
-
2 pointsIn my wonderful days of youth, I wanted a Muscle Car. Nothing else would do. So at the age of 16, my dad signed for a loan, on a 1971 true numbers matching, SS Nova. Color, hood exactly like what is in the photo. 1 owner car, with all the documented up-keep. True 10 bolt posi, 350/275hp. Bench seats, auto. That was right around summer time when I got the car..... Fast forward 3.5 months. Now fall is setting in. I am not liking the fall weather and dad is starting to snicker a little about the Nova.... I believe his comment was something like "well, if you get up early enough in the morning, there is this big yellow thing that will pick you up for school". I certainly did not want to drive the Nova in the fall, winter months, and I was not about to ride the bus..... SOOOOOO, I devised a plan. Once day after school on a Friday, I went and picked out a 1978 Chevy 3/4 ton Scottsdale 4x4. Photo attached also. The story behind me getting the truck is to looooong to type, but the shortened version is this. I went to the dealership, let them know I wanted the truck, salesman said you are to young to purchase without a parent signing. Gave them the number and name of person at the bank I banked at and walked out with the truck. Salesman was dumbfounded and was still trying to pick his chin up off the floor when I drove away with the truck.... And they say farm boys are slow and ain't got a clue... I worked 3 jobs and still had a full schedule at school. However, I had enough credits my junior and senior year that I did not have to stay for the last 2 periods of school. So that got me some extra hours at 1 of my jobs to help pay for (2) vehicle payments, insurance, gas, maintenance, and storage for the Nova for the bad months......... Rob
-
2 pointsWhat... no curb feelers?
-
2 pointsGlad your alright and there is not a lot of damage on the house which is good too.
-
2 pointsStill running great, can't wait for my V-treads to get here.
-
2 pointsLooks like she was zeroed in on the DINO. Ya sure it wasn't an upset EX.
-
1 pointI can not count how many times I've been asked about will this engine fit, or will this oil pan fit?? most times the first question I ask is what style block do you have ?? large or small base ?? BUT there is one exception to that rule I will cover that later. I'm writing this post to help clear up that question, first this only applies to 10, 12, 14 and 16 HP Kohlers, they used two style blocks commonly referred to as large or small base blocks. We will start with the large base or eared block used on most WH tractors from 1967 to the last Magnum about 1987, these blocks use the bigger oil pan, and the pan bolts on from the top side through ears on the block, this style oil pan is the one that bolts directly to the frame, the two bolts on the right side that hold it to the frame go from under the frame into blind bolt holes in the bottom of the pan, the pan will hang over the frame some on that side, with the mounting ears on the pan NOT being used. This is a large base block and pan, note how long the pan is and where it bolts to the block Here you can see where the pan hangs over the frame, at this point under the frame is where the bolts go from the bottom in to the blind holes in the pan. The holes outlined in red are the blind holes used to bolt the pan to the frame from the bottom, the holes in green are the ones that hang over the frame. Here you can see the bolts that hold the pan on, going through the ears in the block. That pretty much covers the large base blocks. Next is the small base block used on the shaker plate engines, and some of the mid 60's 10hp engines in WH tractors, this style block is also common in Cub tractors, and others but we are talking WH here. The small base block the oil pan bolts on from the bottom of the engine, it does not have ears on the block, the pan is closer to a square in shape than the large base block, here is a pic of a small base block and oil pan. There are many many styles of oil pans to fit the small base block, other brands of tractors use pans in all shapes, and depths so when swapping this style pan you have to watch how long the oil dipper is on the bottom of the connecting rod, it can be cut to fit a shallower pan, WH used two basic pans on this engine a very shallow pan on the early 10 hp and a mid depth on the shaker plate engines. This pan is a shaker style pan used in the late 70's early 80's on the shaker engines This pan is the flat bottom style used on the 1045, 1055, 1075 and 1046 also used on many Cub engines and other brands, the dipper on the connecting rod is very short on the engines that use this pan. This is a deep pan on a Cub engine, I do beleive it uses the same dipper as the large base blocks with the big oil pan. Here is a shot of both styles together, to give you a idea of how the blocks look side by side, note on the large base block the cut outs at each end, I will be talking about them and the 4 holes you see where a small base oil pan could fit with a few mods. Here are the pan gaskets side by side and over top of each other. Ok now we will talk about how a small base oil pan can be used on a large base block, note the red circles they point out the cut outs in the block where the small oil pan will not seal, this area can be filled up with JB weld or other compound that will stick to metal and take the heat, then note the green circles they show the holes that will need to be tapped to bolt the pan to, so far all blocks I have seen have the holes but are not tapped, with these mods a small pan can be used on this block, also if needed you could cut most of the ears off the block. Now some blocks (very few) are set up from the factory to except both style oil pans, most common found on JD tractors as they use a shaker mount set up that uses the ears on the block to mount it but still uses a small oil pan, here is a duel pan style block note is does not have the cut outs in the block like a normal large base block does. Just remember to check the dipper on the rod, to long and it will hit the pan, to short and it may not splash lube properly. I hope this helps clear up a few questions about block styles and how they differ
-
1 pointBefore I post, would like to know if this forum can be used to possibly sell old Wheel Horse Tractors? Our family has 4 of them with many parts too. If not, can someone direct me to the proper forum/website. Thank you, Doug.
-
1 pointYou can see more of it, and a bunch of other absolutely awesome custom tractors here:
-
1 pointThat is a tractor built by one of our members kj4kicks.
-
1 point​You would be surprised how much help you can find on The Square. If you have a question and ask one member via private message you may get one answer, post it on the forum and you will get several (some may contradict each other ). Also, use the search function and you may find the answer without having to ask. Shouldn't be a problem selling in Florida, when I lived there I always had to travel to find one. Good luck and remember;
-
1 pointEasy there!
-
1 pointThe .6 volt drop was more than likely an average drop seen by your voltmeter. I can guarantee the drop during the compression cycle in the engine was 2 or 3 times the average drop.
-
1 pointWell done. You isolated an issue with logical troubleshooting instead of guessing and waiving your wallet over the problem. You can also use that exact same voltage drop technique to check the quality of the battery cables. You may find additional 0.5 volt drop(s) across both battery cables or the battery ground cable bolted to the chassis.
-
1 pointActually Deere made the L-series, plus the Sabre, the later Scotts, the LA series and now the D-series in Greenville, Tennessee. The higher end John Deere L&G lines are made in Horicon, Wisconsin.
-
1 pointSoo glad you are all ok Steve , I must have been quite a scary moment for you and Christine . It could have easily been a different story. Be safe mate xx
-
1 pointYou are correct Paul. The cable did want to bend when pushing the wire out to lower the deflector. I reduced all friction on the deflector by loosening the lock nuts. If you look closely you'll see I actually turned them around putting the locking side on first so they would lock. It works fine now ,but with the force of the snow discharge pushing the deflector to the open up position, I may not be able to push it closed or down with the cable. In hindsite, I should make a new longer operating lever with the pivot in the center and pull with the cable to lower the deflector.
-
1 pointGot the dash mocked up and tacked today. It will house a volt meter, oil pressure guage, ignition and light switches.(and maybe a tach if I can find one). The two upright posts will be cut off and capped after the dash is all welded together.
-
1 pointI'm trying to imagine just what a "gas explosion" in your "man cave" actually sounds like? Really glad to hear everyone survived it Dino.
-
1 pointWe better have to wait a few months!
-
1 pointLeave it up to the folks here to have me cracking up. Thankfully it turned out that the laughter could happen. It looks like the tailgate of that Nissan is as bad as the front end. Thank God the driver and you two are fine.
-
1 pointUncle Jim on a roll, must be feeling good! She split the uprights with the bushes. We've had 2 close calls in 27 years. First a tractor-trailer lost a wheel about 200 yards from my house. It got off the shoulder onto my neighbor's side walk. Hit a bump and got airborne. It made it between a tree and hydrant and hit my front porch square on a double floor joist. A foot to the right and it would have gone thru a beveled glass door and probably thru the whole house. A few years later, some drunk jabrone stole a car, drove thru my bushes and sawed off that hydrant
-
1 pointWeeeeeeew, That could've been much worse. Glad to see the damage is minor! Probably talking on the phone and putting her makeup on. Rain shouldn't cause that unless she was going real fast, which doesn't seem to be the case.
-
1 pointGlad you are OK, but from now on keep your house out of traffic.
-
1 pointYou forgot cup holders.
-
1 pointGet some 12v lights in it and haul it in a trailer!
-
1 pointWas finally able to christen the new hauler today. Thanks again, and was nice to finally meet both the Mr. and Mrs. Baerpath today.
-
1 pointSugarcreek Ohio Pictures.
-
1 pointas said many a time, superb engineering there! can't be long now before we see you pounding around on it? callum
-
1 pointAs it turned out the remains of the Reliant prop shaft was too short, but I did have these Reliant axle off cuts which could be welded together to get enough length. A template for cutting out notches. A nice tight fit.. Lot's of cutting, grinding and welding later.. I need to "port" the inside a bit more to help air flow. Fitted to the carbs. But will the hood stand still fit?? I had to trim a little off the hood stand, but yes it fits The left side was an even tighter fit with the fuel tap present, but fit it does.. All I need to do now is by a pair of correct size air filters and trim the tubes to length.. Speaking of air filters, I thought it would be a laugh to put on the way over sized filters I had bought a few weeks ago And to finish off this update, here's the last two parts I need to fit before I pull the whole thing apart for final welding.... Test drive time is getting closer by the day
-
1 pointSorry I haven't been on for awhile folks. Here is an update for ya'll. Surgery went well(6 weeks ago). Started physical therapy yesterday. Just stretching for now. It's funny how the muscles in my arm seem to have disappeared. 1 month of just stretching and then maybe, starting to rebuild the strength in the muscles in my arm. I may be available for light duty work of some kind in a couple of weeks. But, unfortunately still no use of my right arm for at least 6 weeks yet(not even writing). Getting very old. I must say though, I have been pretty humbled by the amount of help people have given me. From the owner of the company that I work for driving all the way out to bring me a few books he thought I may enjoy reading during my recovery to a friend of mine coming out with his new JD tractor and tilling my gardens for me. All without me asking nor charging anything. And, all of the well wishes from everyone have been very nice as well. Thanks everyone. And, I had the ultimate therapy yesterday afternoon. I mowed with my 520. Surprisingly easy to operate with one arm. Could probably have used Matt's foot control conversion. But,it worked very well. One handed seat time, YAY!!! Take care all. Pat
-
1 pointor in the case where you choose a one color harness to save big $$ on buying 8 separate spools of different color wire, laser print some labels and use clear heat-shrink to label the wire ends by function I can't say for sure how these held up - I sold that tractor a few years back.
-
1 point


This leaderboard is set to New York/GMT-04:00