
Leaderboard


Popular Content
Showing content with the highest reputation on 02/26/2015 in all areas
-
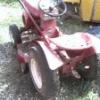
5 pointsPTO all hooked up. Rear lift assembly installed. Muffler and heat shields installed. Welch plug for camshaft replaced. Proper dash installed. New battery tray installed then installed battery. Cleat
-
5 pointsWe had about six inches over night in Franklin N.C. Got a little seat time in this morning. It probably will have melted away by tomorrow, but with a steep driveway like ours you can't count on that; could be a sheet of ice!
-
4 pointsIt snowed again last night. We got 5 1/2 inches. Here are some pics from today. Oh the fun you can have with your family and a Wheel Horse!
-
3 pointsI ended up getting it for 450 dollars!
-
3 pointsthanks steve, i'll ask him if he still has the blue prints and if i can throw them on here
-
2 pointsJust ordered a blast cabinet from Harbor Freight.....Now I have to get a BIGGER air compressor. Used my wife's debit card!! It's for my birthday.......shhhh
-
2 pointsso i shot a couple pictures of my horse there ya go
-
2 pointsHello,I picked this up with 19richie66.It is a future restoration. It has a stamped frame which I believe is a 56.
-
2 pointsGetting a little closer, engine is now complete other than oil drain and air cleaner, still have to paint the air cleaner, and pick up some screws for the carb elbow. I'm going to run the oil drain off to the side of the frame, its probably not original, but don't want to make a big mess on the frame when changing the oil. Also got the rear lift, and steering together and working good. exaust was painted with rustoleum high temp paint, have had good luck with this on several tractors.
-
2 pointsWhat a Pud! Just rub some dirt in it, that's what a U.S. guy would do!
-
2 pointsMike, I have attached a page from the 5xi transmission service manual. Following the first paragraph there is a Note concerning noise from the lift valve on non-power steering units. I have 522xi which has power steering, and the lift is not very noisy. It looks like you are in a cold climate, which may also cause the hydro to be noisy. I always run Mobil 1 10W-30 in the hydro. Do you know what is in your hydro and when was the last time the hydro filter was changed. Have you checked the oil level in the hydro? At 400 hours, you shouldn't really be having valve problems, or hydro for that matter. Also note that the last paragraph on the page makes reference to running at full throttle. Are you at WOT when you get the noise. I'm sure some of the other 520 and 518xi owners will chime in and make reference to how noisy their lift valves are. Rick Trans.pdf
-
2 pointsScotty,,,,,,dont you feel like a thief stealing that beauty? I wouldnt..........lol. best of luck. Glenn
-
2 pointsI think you forgot tot mention you LOVE the shed
-
2 pointshere's some pics of the green machine and a round hood and now some of the round hood, this one wouldn't start today so we pulled it with the horse till it started
-
2 pointsVery nice RJ35... its a double edge sword on the resto vs leave it alone IMO... restored RJ35s are nice but forget using it... all it does is spit grease and oil everywhere... at least in original condition the paint is already worn so a little more grease or oil doesn't matter.
-
2 pointsOn the up side, you type really well with just one thumb!
-
2 pointsNice pics! Looks like a fun day for all. I used my C-101 to clear my drive yesterday (and my neighbors) in Chesterfield, VA. We had about 8"-9".
-
1 pointI used a 48" side discharge mower deck on my 520H all last winter and it didn't miss a beat. I do have a 60" deck but the ground I cut is a bit rough - grass as opposed to lawn, and the 48 is a bit easier on the tractor. I am currently cutting around five acres which takes roughly four hours and two tanks of fuel. The mower didn't miss a beat but I was expecting the belt to break towards the end as it had lots of chunks out of the rubber. I managed to wrap up some fence wire a couple of times, mowing areas I hadn't been before but no major issues. The RH deck spindle has developed about half an inch of vertical play, but no wobble. I realised that I would need to do some work before next season, which is suddenly nearly here. The grass here greens up in autumn and grows strongly over the winter period before dying off in late spring. It normally doesn't require mowing from November until May, unless we get summer rains. This is the deck I used last year; I had four of the 48" SDD's and dismantled three of them for rebuilding. I picked up another 520 last week and so now have five 48 decks, in addition to the 60 and a 42" RDD as well as a new 42" SDD. I want to refurbish one of each for my WH collection as well as setting up two for use. That way if I have problems during mowing season I can just swap decks and keep on going. As another home project I want to make up some raised garden beds for growing vegetables in the back yard. I came up with a design and made some corner brackets to bolt sleepers together. When the brackets were done I decided to galvanise them so they will outlast me. This was just after Christmas and I was thinking I needed to get on with the mower deck. When I built my trailer a few years ago I had the rims, tailgate hinges and catches, and a bar inside the tailgate for the loading ramps to hook into all galvanised. They are not showing any wear after more than ten years. So far with my tractor rebuilds (416H and 520H in progress) I have had everything powder coated. I want durability rather than originality with the working mowers and thought why not get the parts for the decks hot dipped at the same time as my other garden brackets. They turned out great! I hadn't done anything with the deck shell and wasn't sure of the best way to treat it. I want something durable but low maintenance, so was leaning towards sandblasting followed by a couple of coats of POR15. However, when I got the galvanised brackets back I started thinking, I wonder if the shell could also be galvanised? Initially I was hesitant for fear of warping the shell, but when I was scraping the worst of the crud out from underneath the steel was thicker than I expected. I decided to take it to the sandblaster and call in to the galvanisers on the way and ask them if they thought it would handle the tank okay. The chap I spoke to assured me it would be fine so I decided to give it a try. The reason I was hesitant is that I made up some sump covers at work many years ago and when they came back from being galvanised they were all bent up like bananas. At the time I was told it was due to stresses locked up in the steel from welding. Anyhow, I thought it would be worth trying. I also took in the rear height adjuster bar, and a pair of 12" rims. The back rims on the mowing tractor seem to cop a lot of the grunge. Picked it all up yesterday and 100% success! You beauty. This one is going to outlast me. Bearing in mind that these decks are all over twenty years old, with a bit of care they will last for many more years. and the rims;
-
1 pointSorry it took so long. Had other things going on. I really enjoyed the Flywheeler event. Richie, his wife, and Mike are a really great bunch. I have been planning on going to this for a few years, but now that I'm retired I actually have time to do it. It was well worth my 975 mile round trip. I picked up a nice 702 that I have been wanting for a while. After checking it out there is a lot of fresh red paint on everything which is usually not a good sign. However, I found everything to be in good shape and it runs and rides well. The throttle cable to the governor is not right, I think (see bottom pictures). If anyone has pictures of the right way it goes I would like some see them. Chris From Florida
-
1 pointAs Mike (sorekiwi) said if you do the swap make sure you get the axles in the right side of the 10 pinion differential as they are different length's...you can see the offset in the 10-pinios differential end caps...and make sure you use the corresponding axle gears as the axle gears a different between the 2 differentials also...Easy swap just make sure you have everything in the right spots before final assembly...hate to see a short axle in the wrong side...3" sticking out one side and 1" on the other...Been there done it...
-
1 pointI went the other way on one of my tractors, from a 10 pinion to an 8 pinion. I need to think a bit about it, but I am thinking that I had to swap an axle too, I am thinking the 10 pinion used different lengths?? The problem with the 10 pinion diffs now ( 50 years after they were produced!!) is that the spring clip thingy in the middle wears out, and it is NLA from Toro. That severely reduces the locking ability of the diff. The one in my 1267 still locks up, but the other two that I have owned have lost their traction ability. My belief is the best traction is the spider gear diff, but it is also the weakest of the Wheel Horse differentials, and I have blown up all the ones I have had.
-
1 pointYup. I was one of the callers. I was really curious on how well the cab fit as I'm looking for one for a C-160
-
1 pointi see you added some wheel weights to your c, looks like you all had fun
-
1 pointPersonally, I would not worry about the limited slip. It is probably just that the spring is weak and they do not make them any more...and they are expensive if you can even find one. The worst that happens...your differential acts like the one everyone else has. As long as that spring is in tact, your differential is OK. I would imagine that you can find a new spring, but it was not really a good design...they only used this trans for a few years. You could fix your problem with chains on the rear tires, wheel weights, maybe governor adjustments...that kind of thing. What do you think??? In other words, I do not think it ever worked as well as they were thinking it might. Just my 2 cents.
-
1 pointI just saw this on ebay. I know nothing else about it. E-bay link deleted per forum rules Cleat
-
1 pointFrom $300 to$1000 maybe if super clean, and a nice job done on it, not a crappy rattle can paint job, so many things can influence value.
-
1 pointGerry. What a great panel set up Looks like room for 6 or 8 red ones under there Maybe more ! ! ! ! I got to get over there and see this whole gizmo For myself soon as weather permits.
-
1 pointso glad others are getting some snow too
-
1 pointI like it.Especially for the price.Gotta put some duct tape or spray paint over those New Holland insignia.Have fun with your new toy. 12 horse Kohler,I presume??
-
1 pointJust called the ATF to try and confirm the Milford CT carb cleaning methods! That's a good idea!
-
1 pointNice Find! Not sure if I would restore that one, would look very nice with a good clean up and the wheels repainted, but totally up to you. Looks like a very nice tractor!
-
1 pointGot some parts back today, can finally start putting it together a little more.
-
1 pointWhat is strange is, back in my Okie days, work nor school ever stopped...business as usual. When in school in Colorado it snowed in May, everyone but us limb clean up crew loved it. Yeah Steve, that is a good one. Yes Mike, a "dustin", can you image the shock of a blizzard (over 2" for 3 days), I almost got in deep trouble for not returning off vacation (year the Red Hiver froze over. It may have been 3 inches for 4 days though. Anyway...local PANIC. We usually get more depth of leftover/broken/discarded Mardis Gras beads than this weird white stuff today.
-
1 pointI hope you heal fast with little pain. We all make mistakes in judgement from time to time. Don't beat yourself up. Be glad it's still there and climb back in the saddle with renewed respect and focus.
-
1 pointI use a can of Berryman Chem Dip. Its specifically made for carburetors and even comes with a tray to put it all in and dunk it. It doesnt hurt anything and Ive never had a carb it couldnt clean to brand new. Why would you use something that wasn't meant to clean correctly for what you have? Thats like saying its good to use 60 grit sandpaper to clean bugs off your cars paint or windshield....sure it works but its not the proper method
-
1 pointI've had a solenoid click on me, but the contacts were burnt enough not to carry the load.
-
1 pointI use one of those min- tire changers from Harbor Freight.Plus I spray the tire beads with Pledge furniture polish or spray silicone.Still a tough job.Especially the 6 and 8 inch front tires.I'd rather change a big rear farm tractor tire instead of those little ones.
-
1 pointLooks like fun Bobby
-
1 pointNew sealed 9 pin connector installed. Engine then installed and connected. Waiting on the Welch plug for the cam to arrive and then exhaust and PTO can be assembled. New plugs and wires installed. Cleat
-
1 pointJake, looking at your work both on the forum and in person, i got to disagree with that statement you made on the details. I think you are right up there with the details on your work as much as anyone on the forum who goes the extra mile on these tractors. Don't ever think that any of us who like to go all out can't see the work and effort you put into your builds. You should be very proud of your accomplishments, especially since you are still of a young age. I put that last line in the quote as it just reinforces what I'm trying to get across, normally you wouldn't look at work like this that is the result of somebody still in school. You also floor me with your knowledge on the round hood tractors. I just thought i needed to mention all of the above as it is truly not the norm for somebody your age to be at the level you are. I think it is very refreshing these days to see such a passion for a hobby from somebody your age.
-
1 pointhttps://www.youtube.com/watch?v=klVkBFWvA3M
-
1 point
-
1 point
-
1 point
-
1 point
-
1 point
-
1 pointWe have a high end cub at work (They used to have a 520 with the 2 stage blower but now I have it ) and after 3 years it is now on it's second blower because the first one got so bent and twisted that we just replaced it. Blower is made of really light gage metal, seat pan and hinge assembly is plastic and has broken twice. Machine is shaft drive and where shaft connects to engine flywheel is a plastic coupler that has literally exploded. I can go on about how corners were cut on this machine. Unit was purchased from a Cub dealer for over $12,000.00 with blower, wheel weights, and chains. Plusses are hydro drive, shaft drive (supposedly), power steering, engine runs smoothly. I do not expect this machine to be around in 20 years. Cleat
-
1 pointThanks Martin I probably won't be catching up with the powder coater for some time yet, but will pass on his thoughts when I do. I think it would definitely help to weather the galv for some time, years even. I am not fussed about the look of this deck, it is for work. I have a really good one that will be powder coated and restored, but probably not used. I had some small parts zinc plated a few years back and was disappointed with how quickly they faded. It was also expensive. I am lucky with my current 520 rebuild that most of the original zinc plating is still in good condition. Bolts are all new zinc. I was hoping to fit the decal for the choke / throttle panel this weekend, but ran out of time. Terry made up the new decal and I got it last week. Will update the thread on that one when I get a bit more done.
-
1 pointThat shed is a damn portal to another Wheel Horse universe...Its like a clown car for tractors!!!!
-
1 pointI have recently rebuilt the hydro unit in one of my 520H tractors, but haven't tried it out yet as the tractor has some way to go before it is finished. The seal kit is available p.n. 563310 and priced at $40.11 from Jack's where I get all my parts. Input and output shaft bearings are commonly available from bearing suppliers. I pulled mine down and cleaned everything then reassembled with new seals and replaced input shaft bearing. The output bearing was fine as it is constantly flooded with oil being the return path for oil from the hydro to trans. The input bearing is sealed so I replaced that as a precaution. Things to look for are wear and scoring in the pump and rotor balls and races and these can be fairly terminal or expensive to replace. Other than that it is vital to keep the balls in their correct pockets and obviously cleanliness is essential. My hydro was in good condition without apparent issues so I reassembled everything. I took a heap of photos but not a step by step record. The manual is easy to follow. The main reason I pulled mine apart was I was worried about corrosion of the cooling fins so I got the housing blasted.


This leaderboard is set to New York/GMT-04:00