
Leaderboard


Popular Content
Showing content with the highest reputation on 02/08/2015 in all areas
-
8 pointsBrought home my first Wheel Horse tractor yesterday. After a lot of input from forum members I was able to find a good deal on a nice 520 not too far from home. This tractor came up on Craigslist a couple weeks ago but when I called the fellow said it had been sold. I left him my number in case that sale didn't work out. Yesterday morning he called me out of the blue saying the other buyer fell through. So I went down to get this. 700 hours, the engine sounds really good. It starts right up, no smoke, but it does have some cosmetic issues- seat, no rubber mats on the foot beds, one of the bezels for the front lights is broken. Came with snow plow, chains, and very solid 60" mowing deck. I could barely fit that mowing deck into the back of my truck! Although I don't intend to do a restoration on this tractor- I bought it for working, I will be looking to go over it throughly, tighten things up, clean up what I can and maybe replace a few things here and there. I'll also be on the lookout for a snow thrower. I appreciate all your input the last few weeks helping me find something. And I'm sure I'll be back to the forum often for inspiration, tips, and help. Feels great to be part of the herd. Only down side is I just got her home and now I've got family obligations the rest of the week. No the Wheel Horse isn't considered part of the family- yet. All the best, Peter
-
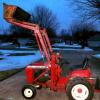
7 pointsOn the C195 with a helper pushing the snow banks back in anticipation of more snow!
-
6 pointsthe moble marion motel Brian
-
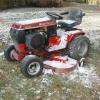
5 pointsEvery once in a while... make 'em earn their keep, right?
-
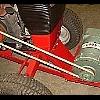
5 pointsWell after the engine swap to my spare and removing a lot of grass under the tower along the frame, tightening loose bolts, adjusting and tightening the transmission linkage, fixing corroded connections and ones that looked bad, I finally ran the tractor with the spare Onan. Runs real well so far. Just a little puff of smoke on start up and nothing after that. Smooth idle and great power especially compared to the original engine with the failing rear cylinder. I mentioned in my earlier post about throwing some Carlisle 26 x 12 x 12 rear meats on the tractor and eliminating the duel wheels I had on it. (You can snap axles with duel wheels and especially on a tractor your working). I appreciate other members warning me about duel wheels and axle issues! The 26 x 12 x 12's would give me enough of the stability I was looking for with the duels without the added stress on the axles. (Plus at 26" high, they are really cool but I'm 57 years old so that doesn't count). Problem is anything that high is not going to fit under a horse's fenders plus the side rails. I was asked to post what I did "if" I got them on the tractor so here are some pics...... Used a plasma cutter and trimmed the lip off both "upper" side rails then "rough cut" an area around the gas cap on the fender tub so I could reach in and remove the gas cap since it would be "under" the tub surface. (First 2 pics) Next measured a needed 2.25 inches of height on the fender tub to clear the tires on the top. Next I bent the upper foot-rails inward with the missing lip so it would move past both the side pieces on the flywheel side and the belt guard on the PTO side so the tire would clear......barely!!!!!! (The Next 2 Pics) Next.......I used half channel slotted strut, (inch and 5/8th's) which happened to be leftovers used by electricians at my place of employment and I cut pieces of heavy-duty polyethylene, (HDPE), I bought online to make my 2 and a quarter inch risers for under the fender tub. The HDPE is hard but bites on the metal and eliminates vibration. Kind of a cross between a gasket and a flange. Pics of the strut and the HDPE plus the much longer bolts I needed are shown beside the stock bolts used under the seat and a picture with them bolted together under the fender. (Next two pics). The gas cap is very easy to get to and take off and on and so is the tranny dipstick and the adjustment area for the transmission's linkage. Pros............These tires with their width will give me the stability using the loader I needed verses the stock lug tires. I had to eliminate using the duels which were pretty cumbersome in tight places. These new tires also barely stick out beyond the bucket which eliminated compressed snow with the dual tires on each side. This was a big PIA when clearing snow off a driveway and especially along the edges. Being a tad higher gives a feeling of being on a bigger tractor and I still have plenty of room between the steering wheel and my legs. I actually have more lower leg room now! I have a little better ground clearance in the rear though the front remains the same so it's not much of a Pro. The ride feels better. Can't explain that one but it feels that way. Easy modification! Not much to it! Cons...........You don't want to get your hands/fingers between the tires and the metal on top and on the side-rails. It will tear them up and quickly! With that upper lip gone on the side panels of the foot-rails, the tires will throw mud/water through the slight opening onto the foot-rails and possibly on the back of your boots or paint legs. The tires took more room on the sides which makes getting on and off the tractor with the loader a little hairy! With my size 12 boots, you don't have much room getting on and off it! You can really notice the cut-out I made for the gas cap. I plan to make a little plate with some magnetic adhesive/vinyl on the back painted red to cover this though. Pretty sure I can come up with something to stop the water or mud from splashing through the foot-rail too. It's hard to really see the size of these tires on a garden tractor unless your right there. PS....the tires were bought used and on some pretty interesting rims that a person welded together. Thanks to Redsquare member and neighbor David, (chev0545), for letting me wheel & deal on them for use on this little project!
-
4 pointsWith all of the Wheel Horse fans out there, I’m surprised that I’ve not seen any decorations as I just completed on my RJ-58. When I finished putting my WH back together my daughter-in-law suggested some blazing flames would be a nice added touch. I wasn’t too hot on the idea, but the more I thought about it, the more I thought this might be pretty cool. So, I made a paper cut out, set it on the hood, took a picture, and emailed it out to a few friends, including my daughter-in-law. I got back nothing but favorable comments, from a “big thumbs up†to “you'd be smokin'!†So, I drew and cut out a stencil, sprayed on some old yellow and orange paint I had and here’s the result. Is this cool or what? My wife even said “You should have some fun with this".
-
4 pointsHmmm....an open flame inches from the fuel cap....not a good idea! Mike............
-
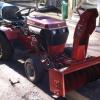
3 pointsit's been out of commission for awhile but it's back with a new motor and new rear meat, some maintenance on just about everything and after moving some snow piles back from the road and driveway, I shined it up in the garage since the temps were in the high 30's today with a little rain! Now I need to find another Onan or repair the original that was in it. Need to tear into that later this week or next weekend to find it's issues though I just know it is most likely a valve seal in the rear cyl.
-
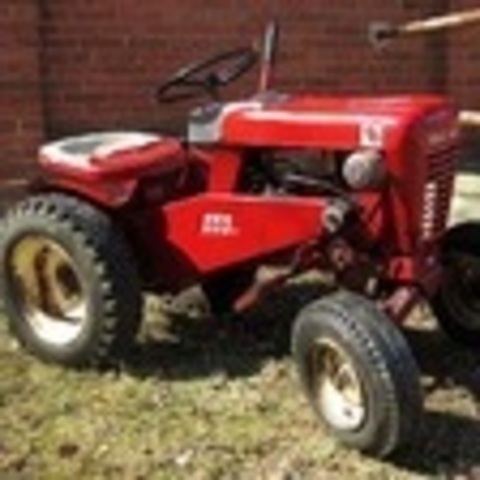
3 pointsAs some may know when I joined this forum I was the new owner of my first round hood, I'm the 2nd owner of this untouched original 653 that has sat for 20 years in a barn after its owner passed and the kids decided to sell to me. I was raised with a father that brings old tractors back to life by repainting and making them look better then factory show room! All this talk lately about patina oil finishing(what I always called rat rod finish) is starting to peak my interest. Today I wheeled her in the heated garage and steel wooled just the hood and am on the fence, don't know if she's in need of what my original plans of frame off resto or if she is a great candidate for this patina show finish? The only thing that makes me second guess is when I pull the original seat pan cover back and see that beautiful original finish underneath.... Wandering what you all would do and why? And would you replace the original decals when keeping the patina look or let the worn down ones on her?
-
3 pointsGot my room at the Red Carpet Inn (Right next to "The Crackerbarrel" ) in chambersburg. I'm ready to go but the tractor isn't. It may not make it this year as the wife and I will be there all week before the show to do some sightseeing. Hope to pack a lot in before the weekend and top it off with "The Big Show". We're heading home sunday morning.
-
3 pointsThey are only patina once after lets say...... 50 years ?? Do nothing but clean it up and running as you like.
-
3 pointsSince Bob has bumped this thread, (thanks Bob!) i thought id share a decal change that #1 is going through right now. #1 has been more than earning its keep lately with all the snow we've had. the tall chute blower/416 combo is just tearing up the snow around here. couldn't ask for more from this revived from the dead blower, the auger has a small balance problem which needs to be sorted, but for now its going to be used as is for the rest of the winter........ so since #1 has been working so hard its getting a reward with new decals, hood and seat pan decals are done and on the tractor, just waiting for the hood stand side decals to arrive in the mail and they will be on too..... Thanks Terry for putting up with me again!!!! #1 hasn't had much time in this thread of late so here are some pics..... this will be the hood stand side decal design, probably should have waited until i got these on too, but whatever, i feel like posting something right now...........
-
3 pointsWell, like the Chrysler Cordoba... there's always that rich Corinthian leather.
-
2 pointsIf your interested I can save you a lot of time and effort and sell you my mini dozer. It's a Lennon Kittytrack 600. Really rare. Needs a little work but it's all there and complete. I have the complete manual with parts break down. It's not cheap but would save you a ton of time and work.
-
2 pointsLooks good and will strand out in a crowd! I also use a chrome gas cap (sold online) and a chrome Harley Davidson softtail heatshield for added bling! Chromes gas cap not on in this photo: Chrome gas cap on in this photo with the snowplow:
-
2 pointsI like It Martin!! Very Nice!! Just curious, what do those Deere weights weigh?? I do know that its alot of "Dead" weight ....
-
2 pointsUsually pretty quiet at the Comfort Inn. Saturday night is usually the loud night.
-
2 pointsWhy would you even consider removing the gorgeous patina on that tractor? Hands down...I vote keep it.
-
2 pointsBooked our room at Comfort inn Chambersburg PA this morning.
-
2 pointsThis was always my favorite truck /blower mod.
-
2 pointsNow that is some heavy duty rubber. Nice job Boo. I also raised the fenders 2" on my 520 to get more clearance for the chains. I moved the foot rests forward about 1.5" to close the gap at the fender.
-
2 pointsWould have loved to see that sled ride! ON the tonneau cover: I have a Truxedo Lo Pro QT (low profile, cant really see it from the side) and it has no problems in any temperature. The fabric stays very flexible even when covered in snow. It does try to melt my hand off on a mid summer day though... I would HIGHLY recommend it, the whole thing has a lifetime guarantee.
-
2 pointsUnless you where doing their driveway!
-
2 pointslook at the angle lever where it is banging into the brake pedal. note that there is a square notch ( or should be) on the opposite side of the angle lever. disconnect and flip the angle lever around. you will need to flip the angle lever hardware too but if you download the owners manual, it has the instructions. that notch is for any of the models that had the brake on the right. with the hydro, it doesn't matter.
-
2 pointsGetting it later today! You guys are really no help at all. If this was a terminal condition you would just be pushing me to my death. Now I have to go into the engine shed and move a dozen or so engines so I can fit this behemoth on the shelf. I have to re-evaluate the people I associate with.
-
2 pointsI sell these bushings for $3.plus $1 shipping .I've never had any luck reusing them with out them leaking.There is a little secret to installing them.Coat the out side with a good lube spray or vasaline,start it in to the tank,about 1/4 the way.Than coat the fitting the same way start it into the bushing about the same 1/4 of the way.Than push the bushing in all the way than the fitting all the way.If you install the bushing all the way before starting the fitting you will never get the fitting in as the hole in the tank is a press fit.
-
1 pointBeautiful day in southeast Indiana. Had the herd out for a little run and exercise. From left to right - '95 520H, '93 416H, '82 C195, '83 C175.
-
1 pointCraig... are those 5-12 rims with 6-12 tires? They look very familiar
-
1 pointGreat pictures of a super looking Super C in action. Thanks.
-
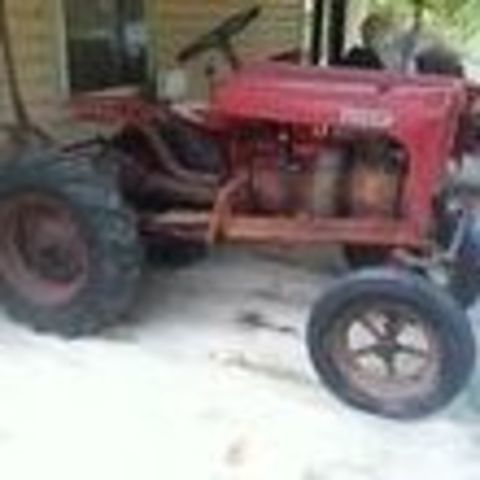
1 pointI removed the hood from my Senior today, I wrote down the serial number (2443669) found on the Wisconsin engine and looked it up to confirmed the date April 1 thru May 1 1955. I then went to the Senior registry and looked up serial numbers people have given with their information. I am Happy to report that my Senior has a big brother #2443662 living in New York !!
-
1 pointHi Rob, you have a PM
-
1 pointSharp! Nice tractor.
-
1 pointheres mine cedar springs mi .
-
1 pointI know when I took mine off, I had a heck of a time getting the roll pins out of the collars. The roll pin holding the steering wheel on is very easy to get off. I like not having the lever there anymore. It was always in the way. I jumped around the nuetral switch and always start the tractor when the park brake is applied. That way I know the tractor is in nuetral. Red
-
1 pointHopefully there won't be a biker rally at midnight like there was for me 2 years ago at Gettysburg Terry!
-
1 pointGood advice here, thanks to everybody who's contributed. Tommy and Bill, you might also consider replacing the fuel line at this point, as long as you have everything apart.
-
1 pointHey Mels, If you have any questions or get stuck on something on the RJ, feel free to PM me. I have restored and worked on numerous RJs. I live in Sherman and am generally around given my work schedule. Wouldn't mind getting my hands dirty working on another RJ. Jeff
-
1 pointStill not sure what I will do with the ugly holes in the grill. I'm leaning toward not completely redoing it as the original gelcoat finish is tired but looks interesting. I was thinking about '42-'47 Ford truck parking lights, but I don't know I need opinions on the look Most of the newer crappy bondo is gone, but I need to strip off the rest of the paint. maybe after its one color it will look better but right now it's got a retarded Frankenstein look I think
-
1 pointIt amazes me what an RJ can do with an experienced operator on it. Craig you herd up every flake of snow thats on your path, and push it to the very end of the row.
-
1 pointNice video Craig!
-
1 pointNice little MG you have there , great little British sports car .nice to see it still has the original Rostyle wheel rims.
-
1 pointHere's mine. Collecting parts still. Got just about everything except the small throttle cable bracket on the engine block. Pm if you have a spare According to Wisconsin s/n: 2667569. 1956 with a hood plus optional distributor timing
-
1 pointSimple. When you have nothing else to do there's chrome to polish! Anybody who's ever owned a bike knows that!
-
1 pointSo, what's so good about them apart from all the chrome bits?
-
1 pointMeh.... I beat the crap out of my 416-8 plowing snow these past 2 winters.... I'm not worried, haven't broke nothing yet, and 3 hi ramming speed to push the pile an extra foot back is fun!! Besides I'm an hour south of Kelly for parts and less an hour from Mike Biser for tranny parts, best of both worlds for me. Sent from my iPhone using Tapatalk
-
1 pointI grew up on a farm and remember using one of these to check out starters and generators over 50 years ago, thanks for putting a smile on my face. We also had a commutator cutting lathe, very cool. Each farm in the area had a few specialty tools and we would do one another's work without any money changing hands.
-
1 pointYOUR DRILL IS TO FAST. USE A SLOW SPEED DRILL.
-
1 pointHey Martin - you talk funny!! That hunting would drive you nuts. Have you tried just giving it a hair of choke to see if the slightly richer mixture helps it? I don't know which inlet manifold you are using, but it might be worth having a look for a vacuum leak. I've had good luck with a benzomatic mapp gas torch - don't light it (!!), just turn on the gas and wave it around the manifold with the engine running - if the engine changes note you have found a leak. With regard to the belt slapping around, do you have a guide underneath the lower run of the drive belt? The 520's don't come with one, and my 520 made that horrendous slapping until I installed one. They are standard issue on a 300 series tractor. I don't know if my 516 had one or not - it didn't have one when I installed the diesel, but I suspect that the one on my 520 came from the 516. You can just make it out in this shot, directly below the access hole in the dash tower. Didn't see a puff of smoke from that motor, looks like it will be a good one once the carb is sorted. When filling the trans (with the filter on) you can remove one of the 3/8 bolts that hold the rear lift cable conduit on, this will allow the trans to breathe as you are filling it.
-
1 pointMust have missed this topic the first time around
-
1 pointNice Horse! I had a few Horses carryin' on some probably from lack of use. Tried SeaFoam® in the carbs, smoke, WOW! After a while, clear 'n clean exhaust. My '85 416-8 (Kohler one cyl) and my '90 520-8 Onan (two cyl), are both purring now. Some needle adjust and SeaFoam® did the trick. Try some if you haven't already. Liked the results so much added some to my old pickup trucks fuel tanks. We'll see. Again, "Nice Horse!"


.JPG.9f2ecb26065c66527b0730084ab7fc7a.thumb.jpg.7dc8a04d9a53d44ee2b23f26ee94496f.jpg)


This leaderboard is set to New York/GMT-04:00