
Leaderboard


Popular Content
Showing content with the highest reputation on 12/16/2014 in all areas
-
10 pointsThere are a number of other threads on motorizing the chute deflector on the snowthrowers and snowblowers so I won't take any credit. But here is how I did mine with a 4" linear actuator that included the brackets. With the 4" of travel it won't deflect down completely but it should be sufficient. Relatively cheap and strictly bolt-on. I used stainless steel 1/4"-20 socket cap screws inside the chute and locking nuts.
-
6 points
-
5 pointsWell it was Awesome to get that box from Horsefixer .. but it is still more in the box that i cant open before Xmas..
-
5 pointsToday I was able to spend some time getting the gutter straps installed and one downspout along with the edge stiffener. Not sure if you can see it in the pic but the right side has it installed. It is basically a piece of angle at the bottom that gets pop riveted to the panel to stiffen it. I need to do the left side and install the downspout. Last thing I need to do is to install snow rail system once I get them....
-
4 pointsBeen watching this one on CL for awhile and couldn't stand it any longer. I've been trying hard, really I have. Gonna have to Winter it but I just don't see enough 60" decks out there so we went for it. This one was owned by a gentleman who owned a repair shop and had it 3 years. Mechanically it's all new, just needs paint, seat, mule drive pulley cover, matching front tires and decals. Decals are already ordered from Terry.
-
4 pointsI did some piddling last night, almost forgot about it.
-
4 pointsI don't disagree with having a small shop is a big PITA. I don't want anybody to get mislead that having a bigger shop is best. I have a two car garage and a 10x16 shed full. Now the kicker is 5 years ago I built a 30x60 barn with two lofts in it and preceded to fill that up. The moral of the story, the more room you have the more STUFF you will cram in there putting yourself right back in the same situation. Out of room and trying to explain to the wife why. Those wives have built in radar when it comes to this, so don't even try to ask for more room for more Red stuff.
-
4 pointsGeno's "Iron Horse Stables" We service the rest, but sell the best. Wheel Horse.
-
4 pointsThis is my favorite This is a great thread!!!
-
3 pointsLike most people living in neighborhoods where work space is limited, and half of a two car garage is about all the space you have. It's difficult when you have to move stuff around to get the wife's car undercover when it's about to storm (hail). I am having a 12ft by16ft work shop built behind my house, per our deed restrictions 200 sq. ft is as big as I can go. Going to have a Wheel Horse theme shop. At least I won't have move stuff around to bring in a car. Can't wait.
-
3 points
-
3 pointsThe 418a schematics DipTrace Schematic - 418a ind pcb test lights schematic.pdf 418A EDGE CONN PINOUT.pdf DipTrace Schematic - 418a ind PARK BRAKE SCHEMATIC.pdf DipTrace Schematic - 418a ind pcb CLUTCH Schematic.pdf DipTrace Schematic - 418a ind pcb PARKING BRAKE schematic.pdf DipTrace Schematic - 418a ind pcb PTO schematic.pdf DipTrace Schematic - 418a ind pcb SEAT SW schematic.pdf
-
3 pointsI secretly taped the first gang meeting!
-
3 pointsMy wife told me last week to be on the look out for something red showing up at the house in the next few days! Turned out it was the Fire Dept dropping off a real Christmas tree she bought!
-
3 pointsI want to Pledge! And trust me, I don't care how "dirty" I have to get! I might even have to get a 100% tatoo (henna of course).
-
3 pointsNeat....Kind of scary, but neat!!
-
3 pointsJust keep your eyes open for a post that says "Look at the awesome tractor that I bought" or keep looking in the classifieds for 1 for sale for $8500
-
3 pointsOne of my favorite rusty clunkers recently added to the herd.
-
3 pointsI feel your pain I've been building my wheel horses inside my mud room/laundry room my wife loves it when I push a tractor through the kitchen to get one in there
-
2 pointsWas sending some stuff to Lars a couple weeks ago, so I got a hold of Terry Dennis because he had some stuff to send Lars. After receiving Terrys stuff I sent to Lars. I had Steve, And Jim D along with Larz and MJ and we all watched him open a couple things I shipped.
-
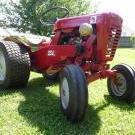
2 pointsAlright guys. I have no painting skills, no welding skills and no fabrication skills. I love seeing posts of guys who have brought a rusty hulk back to showroom shape but never have one to show myself so.... lets post up some pics of yer rusty, cobbled up, homemade, mis-matched but loved machines! Lets keep this for machines that are still in service. This is a chance for us rusty tractor owners to show off our junk and brag!! Here's mine. Its started out life back in 1966 as a 656. It ended up at my neighbors house and when I showed an interest in a short frame tractor he gave it to me. It was missing a motor, belt guard and a few other items. It sat outside uncovered for almost three years before it was moved to the garage for an inspection. I started out thinking I would restore it and did slap some paint on it but without those skills I mentioned in the beginning of this post it was gonna look crappy so.....it got a 5hp Honda yank start with a 3" drive pulley for just a bit more speed. The original tires/rims it came with were the skinny ones which were swapped out for 16x6.50x8's up front and 23x10.5x12's on the rear. The rears came off a GT-1800 so they are the nice deep rims and the rear thread is nice and flat. The aluminum light weight Honda doesn't help keep the front end down so 2 cast iron pipe flanges are bolted into each front rim. There's a trail in the woods behind my house that's about a mile long and I take the dog out on it almost everyday and probably 3 or those trips each week are done on this tractor. The Honda starts easy, sips fuel and if its idling I can hold a conversation on my cell phone. This winter she'll get rear weights and chains so I can still do the trail in the snow. Mike............
-
2 pointsHorse Of Ill Repute
-
2 pointsTerry created this one for our three point hitches we were building.
-
2 pointsDo we wear red leather vests with the logo on the back and call each other brother? How 'bout a do rag? I think Geno has the perfect place for club house meetings.
-
2 pointsI like it but I'm thinking a bit more subdued Geno. A more typical logo but with the horse having a menacing look. Maybe green eyes too, symbolizing chasing those green thingys out of the territory.
-
2 pointsI built a 28 by 16 shop about five yers ago. Simply put, it is just too small for my needs. I have been toying with the idea of making it larger and that is probably what I will do. If I add another 8 ft to it I am sure it will still be too small.
-
2 pointsNice! And I thought it might be the 420...
-
2 pointssome random thoughts ... why bother running the seat and parking brake signals thru logic ? why not just hardwire the lamps directly to the safety switch terminals and have done with it? the whole bill of material for the low oil light could be replaced with a single, self contained flashing LED wired directly to the oil pan switch. my schematics show a 1K ohm base current limit resistor in the schematics - this item is not present on the original pcb and causes some lamps to glow dimly even if the fault is not sensed by the indicator pcb - inserting the 1K resistors resolves the issue. notice the 470R resistor from the +12 volt supply to the VCC of the logic chip. This design actually (attempts) to use the voltage drop across the 470R resistor to supply voltage to the logic chip rated by the manufacturer at 4.7 to 5.1 volts DC. The actual voltage variance seen at the chip under normal circuit operation is 2.3 to 7.2 volts !!!! I removed a filter cap and inserted a 1 watt 5.1 volt zener across the power rails and recalculated the 470 shunt resistor to around 220 - 270R. This keeps the Vcc of the logic chip at 5.1 +/- .15 volts across the entire range of voltage supplied by the battery. The circuit works predictably across a range of 10 to 16 volts at the battery.
-
2 pointsIt was the penetrating oil. But I'll take the credit as well.
-
2 pointsRed square and penetrating oil, what a combo. Knob turns smooth and belt is tight. Thanks guys.
-
2 pointsPaul, I understand what you are saying, and I did have the opportinity to see Matt's foot pedal setup at the last Wheel Horse show. After seeing it, I drove a 520-H with the kit installed. It worked well, but it's not as nice as the factory setup on my John Deere X-300, but it is much better than the hand controls on the horses. I had a 1972 Charger 10 with a Sundstrand transmission. Even as ragged out as that tractor was, the transmission worked great. I sold it to a friend who cleaned it up for his 7 year old grandson. He drives it around like a pro. I can't believe that the Eaton 1100 can't be made to work as well. However, having said that, it is my intention to make this 416-H work like it is supposed to. Then and only then will I consider the foot pedal kit.
-
2 pointsJust when I thought I had hidden from them... Date on the camera is wrong, this is from about an hour ago..
-
2 pointsI agree with those who said not to use filler on rust hole's etc. You also need to eliminate the rust PERIOD or overtime your body work will lift. I do use the same filler Bob uses.. These type fillers sand very easy, careful you don't use too coarse of a paper or you will easily get fine sanding scratches you won't be able to see with the naked eye, you'll see them when you put the color coat down though and by then its a little late. Make sure to use a good filler primer. You don't need to buy the best products that money can buy to get excellent results, good products will do. Most of it is in the prep work, rush the prep work and I don't care what product you use, the results will always be the same. Take your time and make sure everything is perfect before you lay the color down...
-
2 points6 Grand is certainly a good hunk of change but who am I to judge. 6 grand wouldn't get you much in the way of a new John Deere or Cub Cadet garden tractor. I have certainly paid the price for things I thought I wouldn't be able to live without thru the yrs. Seniors aren't easy to come by, I think now that this NOS 420 is gone we won't be seeing too many more NOS 420's for sale either.. Another thing to remember is not everyone is into Senior's, maybe he collect's the later tractor's, might even be a member in good standing here.. Now, the real question is.... Will he run it???? And congrats to the new owner! Now clean the friggin dirt off of it!!
-
2 pointsHad a good time that evening.
-
2 pointsWish had known as have a couple decals I promised Lars. Know he enjoyed it!
-
2 pointsHere's the original Glenn.
-
2 pointsDone In Progress My plow tractor
-
2 pointsAWESOME!!!
-
2 pointsThanks for inviting me to the party...it was nice watching Lars open those.
-
2 pointsThat is awesome! The only alternative would be sell the wife to slave traders for full use of the garage A man can never have enough garage space!
-
2 pointsAs long as it involves world domination I'm in.
-
2 pointsRaider 10 as bought.. After... 312-8 not so much a clunker but it did arrive with faded to pint paint. And odd wheels on the front! As she looks now.... Just without the snow.. or the plow.. I'm not sure this counts.... C-125 tired and battered.. Now errr.... Looks like this
-
2 pointsTwo rusty 1964 1054's . Before and after shots. Before: After: This next one is the first one we ever atttempted to do a limited rehab on. Before: After:
-
2 pointsThe before...as it came off the truck Friday night, and the after... is that Sunday morning, after it's first cutting with the reel in over twenty five years. :text-woo:
-
2 pointswell heres the rustiest one ive had so far, my 1054. while i really liked the way the rebuild turned out, i was really hesitant to pull it apart, and sometimes i wish it was still that rusty patina. theres just something about that 'old' look.......... here it is in its new skin....
-
2 pointsRestored my dads tractor - just have too many good memories with it. (It pitched a rod when he was driving it - thank goodness - and during the rebuild I learned about the "Tecumseh H55 oil pump issue". Now it sports a slinger rod. Think the guys in Heaven read this?
-
2 pointsI've had a few, and still have a bunch of rusty ones, here is some I have redid in the past few years. Not real rusty but beat bad and drilled full of holes broken rod in engine, here it had a brush paint job over the rust, I paid $25 for it. And how it looks now Another we fixed up this one is very rusty, we changed the frame it was almost rusted in half, motor seized tight, another $25 buy and how it looks today this is a rattle can job, but everything was redone mechanically on it. and now The last was this one, it was a parts tractor, but my daughter liked it so we redid it. and now
-
1 point
-
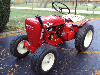
1 point312-8 not to rusty, but needed better paint and a few dents knocked out, fuel pump, valves adjusted, reinforcing the straightening and welding the footrests, weld the axle pivot tab, roller axle bearings and seals. It had good paint on the hood, but that's where the worst dents were. The hood stand still need welding on the back corner, a new switch, lights. Here is what it looks like now.

.JPG.9f2ecb26065c66527b0730084ab7fc7a.thumb.jpg.7dc8a04d9a53d44ee2b23f26ee94496f.jpg)


This leaderboard is set to New York/GMT-04:00